With ProgressAlly Interactions, you can create customized mark-as-done buttons and live-updated shortcode snippets for a more interactive user experience. You can also allow members to reset their own progress and quizzes, as well as include a downloadable certificate of completion.
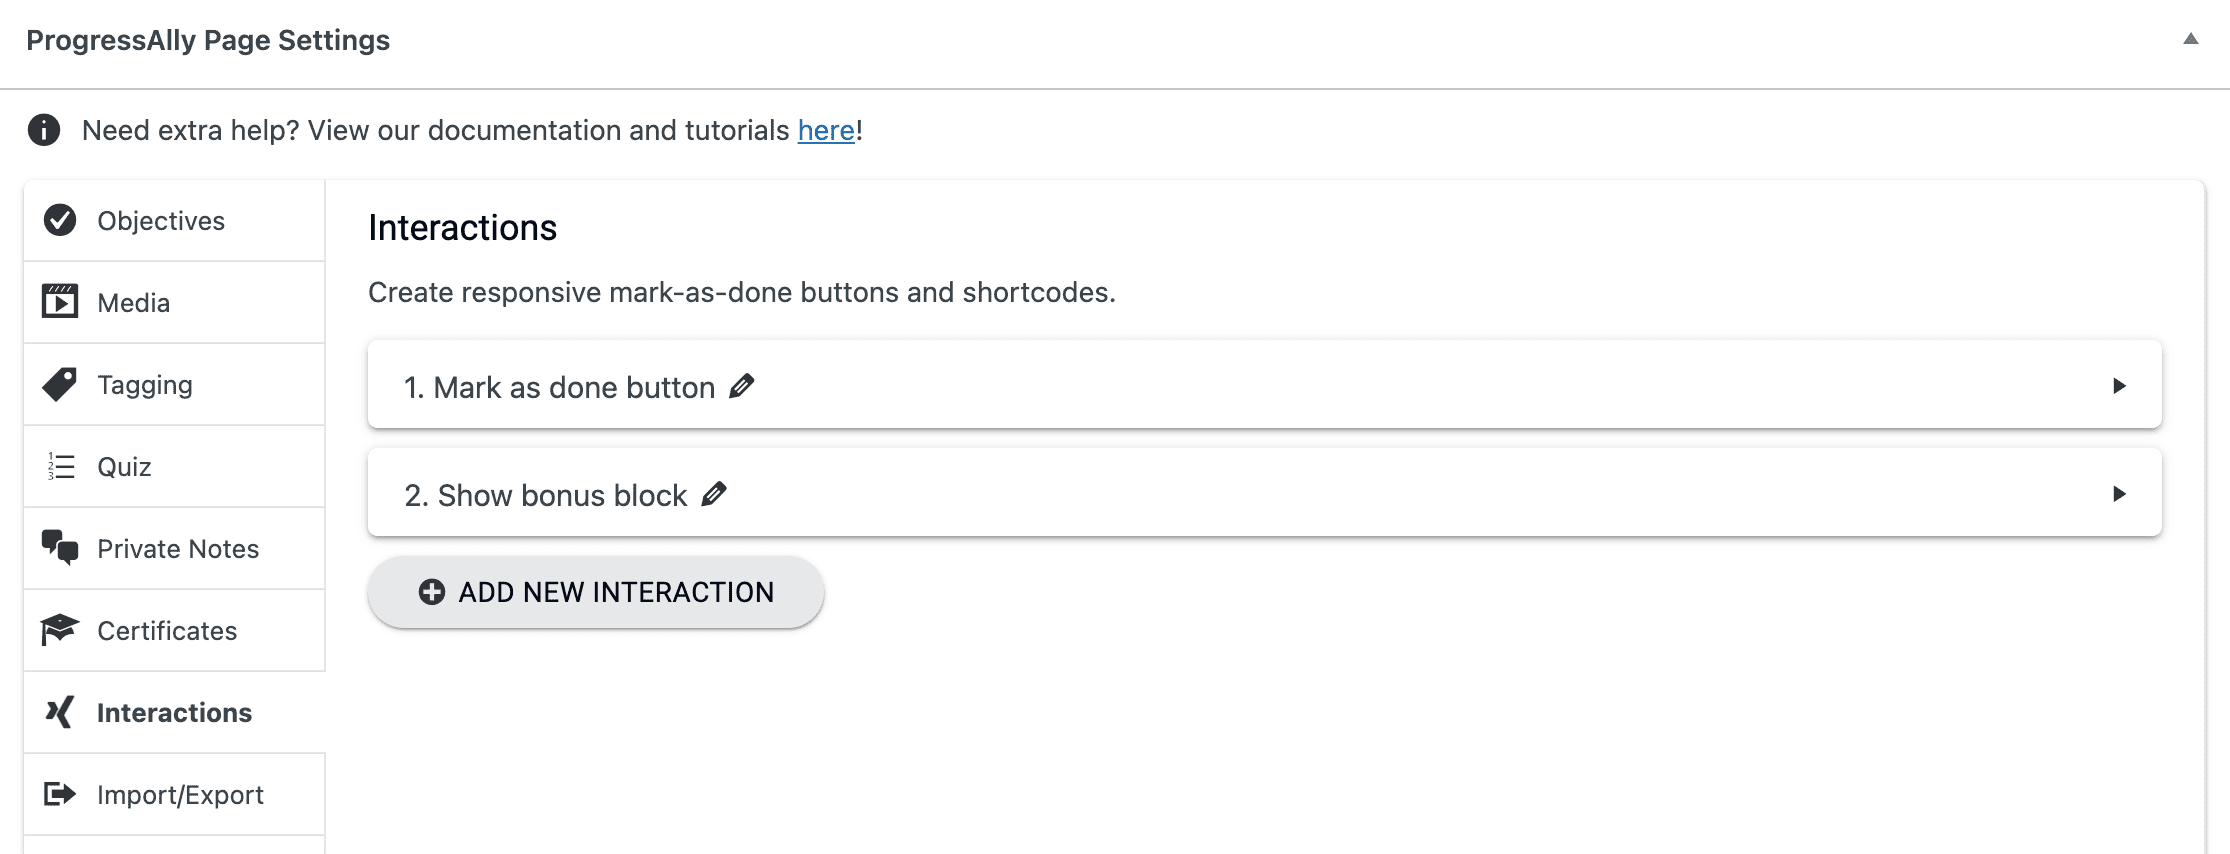
You will find the Interactions tab on any page or post in the ProgressAlly Page Settings section.
ARTICLE CONTENT:
See Examples of live interactions
How Interactions Work
ProgressAlly Interactions allow you to make content update seamlessly as users progress through your courses. The two main functionalities are to create customizable mark-as-done buttons and shortcodes to be updated on the go.
This brief guide will walk you through:
- Step 1. Creating an interaction (Mark-as-done button or Interactive shortcodes)
- Step 2. Insert interactions on your page through AccessAlly shortcode adder
- Step 3. Testing your final results
Mark-as-done Buttons
Mark-as-done buttons will check off ProgressAlly Objectives and perform some completion actions.
In addition to modifying its text and its associated objectives, you can choose to hide it, display a success message or redirect upon completion.
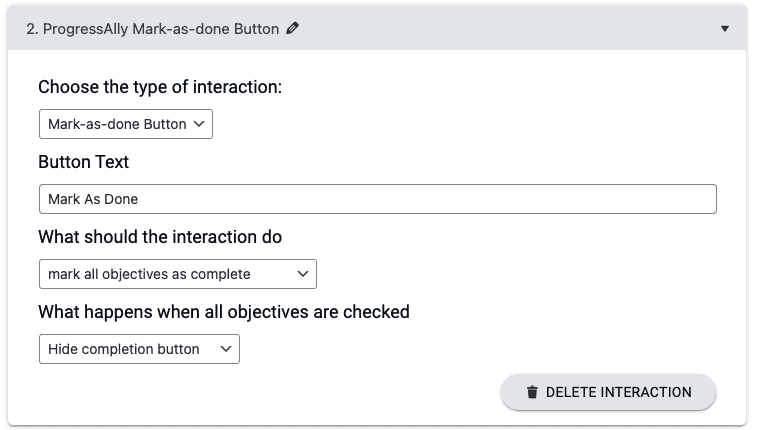
If you are using the original Mark-as-done button or shortcode, then you will want to replace your shortcodes with the new interaction type.
Your options include:
- Hiding the mark as done button when items are completed on the page or the button is clicked
- Showing a different different message when it is clicked
- Taking people to another page when the button is clicked
- Taking people to an external URL when the button is clicked
Add this interaction to your page to see it in action.
Interactive Shortcode
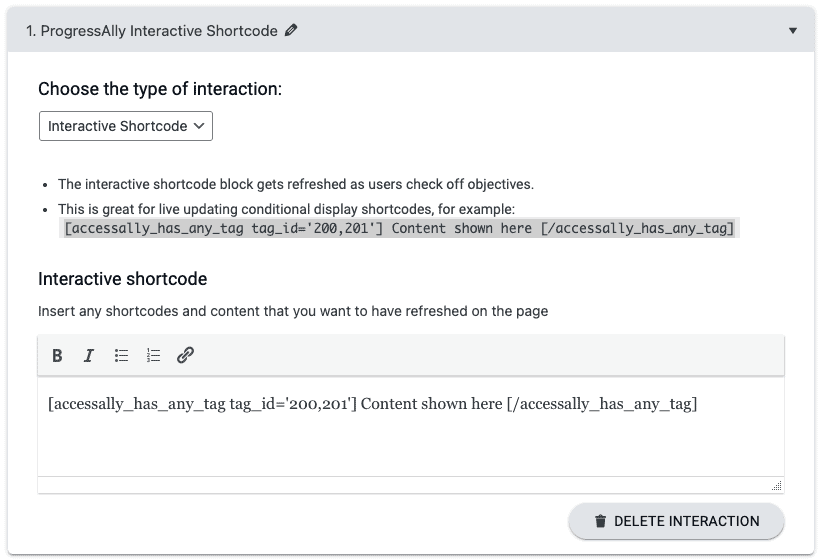
The interactive shortcode section refreshes on the go as users progress through an objective list. This is a perfect place for conditional display shortcodes. The conditional content will automatically show up without having to refresh the page.
This involves two simple steps to set up the desired tags and add interactive shortcodes to a page. First select the desired tags in ProgressAlly Page Settings > Tagging area. This way, the user will receive this tag upon completion.

Then go to ProgressAlly Page Settings > Interactions and create a new interaction to house the desired shortcode. You can generate the shortcode in the AccessAlly shortcode generator
Certificate Download
The certificate download interaction allows members to download a certificate only when all other objectives are completed. It will also check off any objective linked to this certificate.
This Certificate Download interaction button replaces the legacy “download certificate” shortcode, because it can now track when someone has downloaded their certificate when it’s added as an Objective.

Some additional settings include:
- Always show certificate download button regardless of progress
- Text on the download button
- Team leader downloading team member certificates
Reset Progress Button
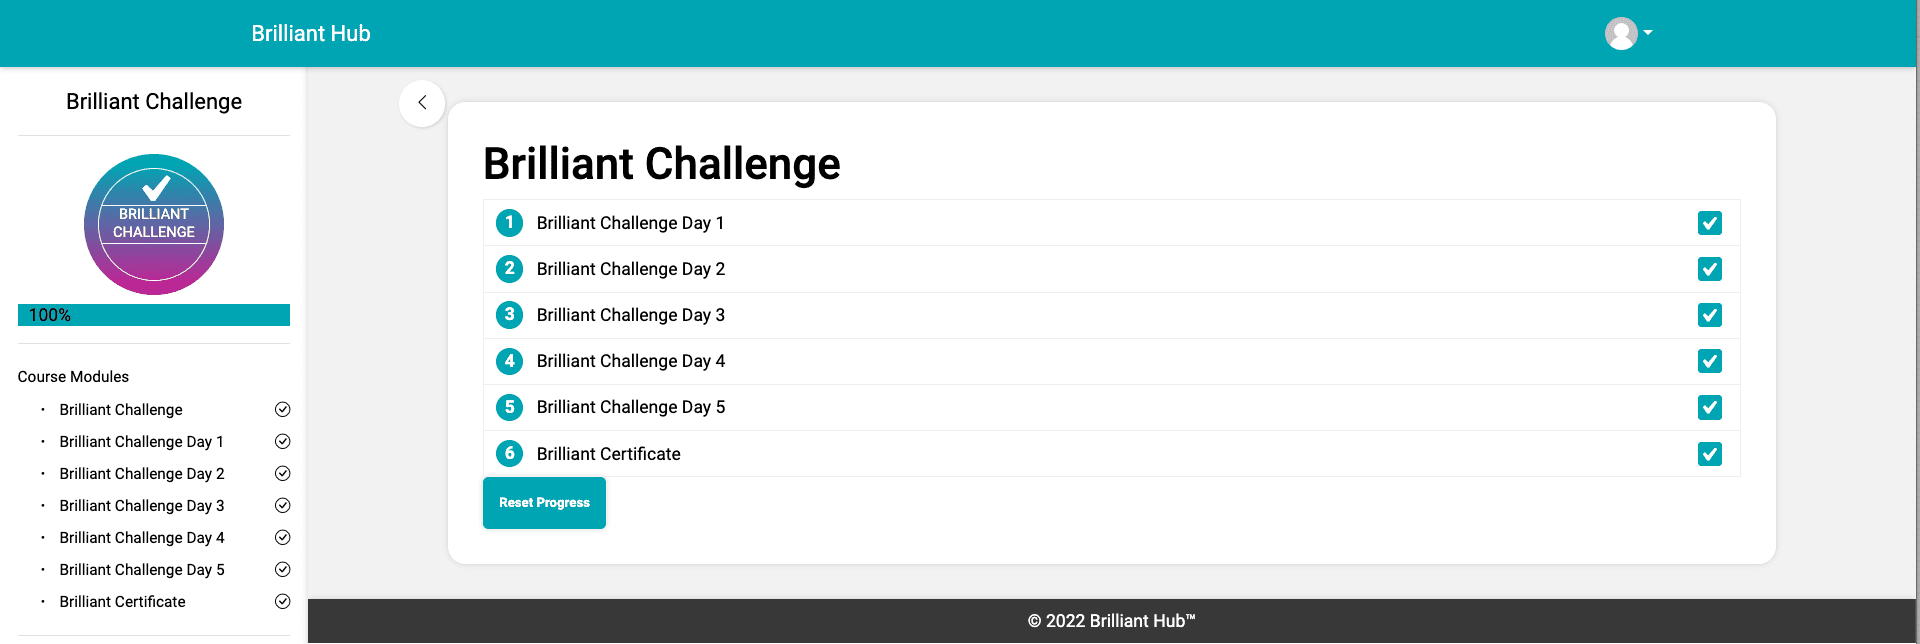
Allow for members, team leaders, and admins to reset progress for selected members quickly and easily.
In the example below the member clicks the Reset Progress button.
Additional Ways Progress can be Reset:
Adding Interactions to a Page
Just like any other ProgressAlly shortcodes, you add an Interaction to your page through the AccessAlly shortcode adder.
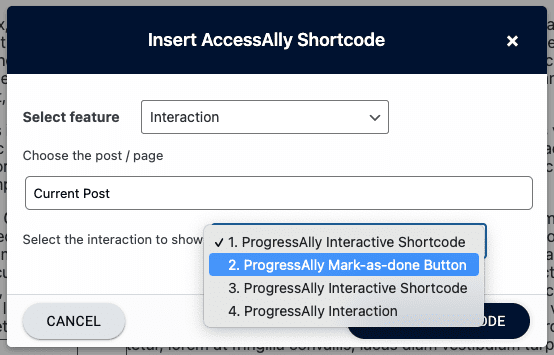
It will look like:
Shortcode example:
[progressally_interaction post_id='200' interaction_id='1']
Optional Arguments:
- post_id: post id of page/post where the interaction is defined (current page/post by default)
- interaction_id: the id of the interaction that is defined on this page in the ProgressAlly page settings
Testing Your Interaction in Action
Now you can view your interaction and confirm it is working correctly. Open up your page in a test account without the tag and complete all the objectives on that page. As you complete objectives, the interaction will refresh automatically.
