Track progress when an individual activity (media, quiz, private note, etc.) is complete.
The default ProgressAlly set up only moves progress tracking (progress bar, progress pie chart, etc.) when all the objectives on a page are completed.
However, it is possible to move the main progress tracker for EACH activity. This gives you a more responsive progress bar, where each item that is checked off moves the bar immediately.
This is done by creating all of your objectives for all of your sub-pages on your MAIN offering page.
Step 1: Edit your Offering’s Main Page
By using Main Page of your offering to create your main Objective List, all of the built-in progress tracking as defined in the AccessAlly theme will work out the box.
Alternatively, you could use a private “dummy page” to create your master list of objectives, but it adds unnecessary complexity to your site.
You don’t need to insert this massive list of objectives on the front end of your main offering page. You can keep it hidden behind the scenes, or only display a partial list of items.
Step 2: Add ALL Course Activities to your Main Page
Add objectives for course activities for ALL your modules and pages (media, private notes, quizzes, etc.) that you want to be displayed in the progress tracker.
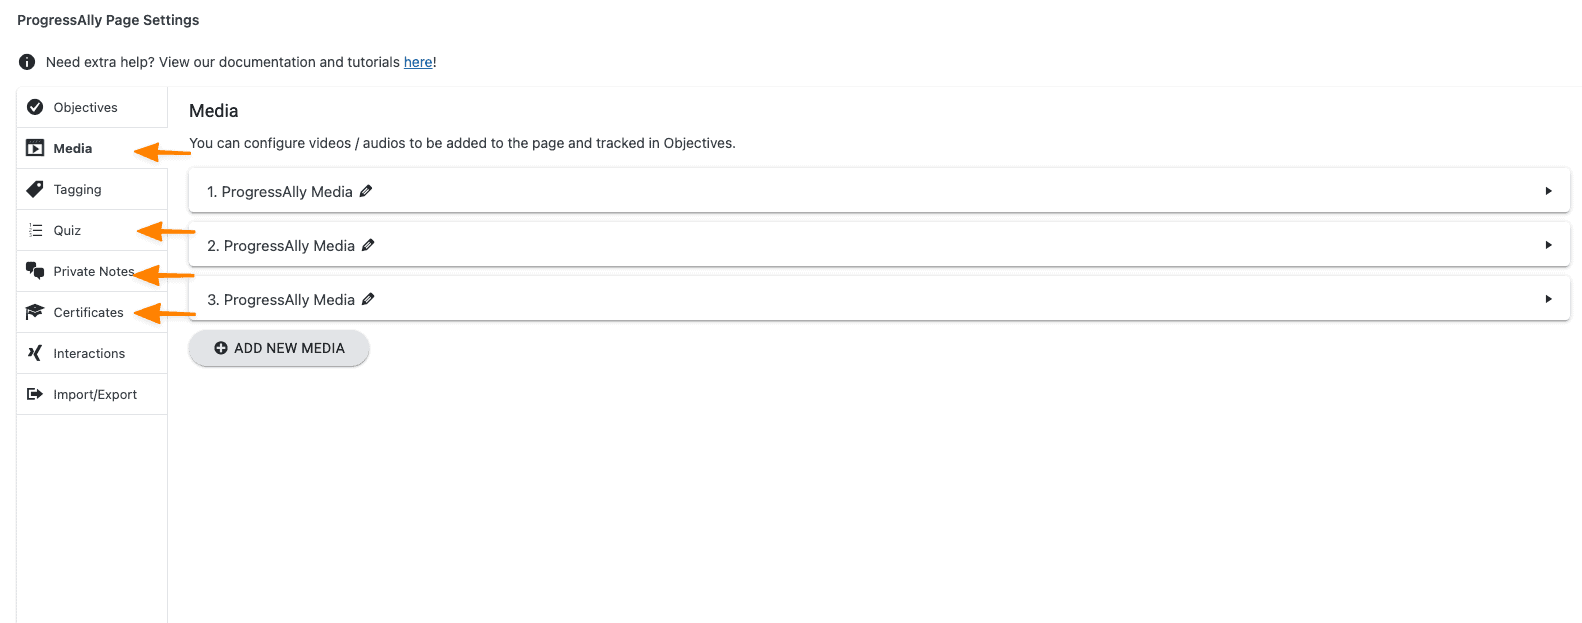 We will then display these items on your sub-pages later using the appropriate shortcode.
Step 3: Add Objectives to each of your Course Activities
Add an objective for ALL course activities that you want to be displayed in the progress tracker. This is the granular view, which shows all of the different checklist items that will move the progress bar.
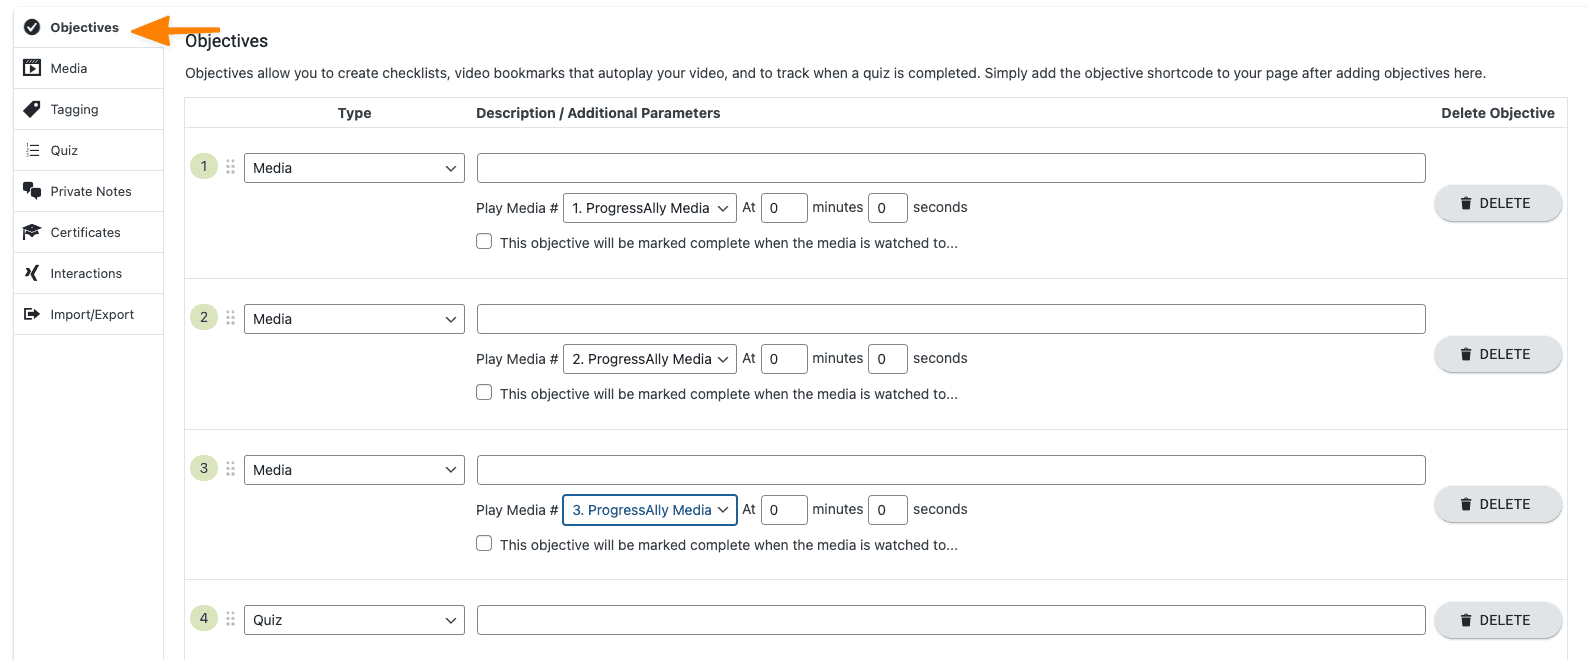
Ideally, you will place all of the objectives that go together in a row, so it’s easier to insert them on the actual pages.
Step 4: Add the Objective shortcode sections for each page
Now it’s time to insert the “sections” of the big Objective list that tie into each module and sub-page.
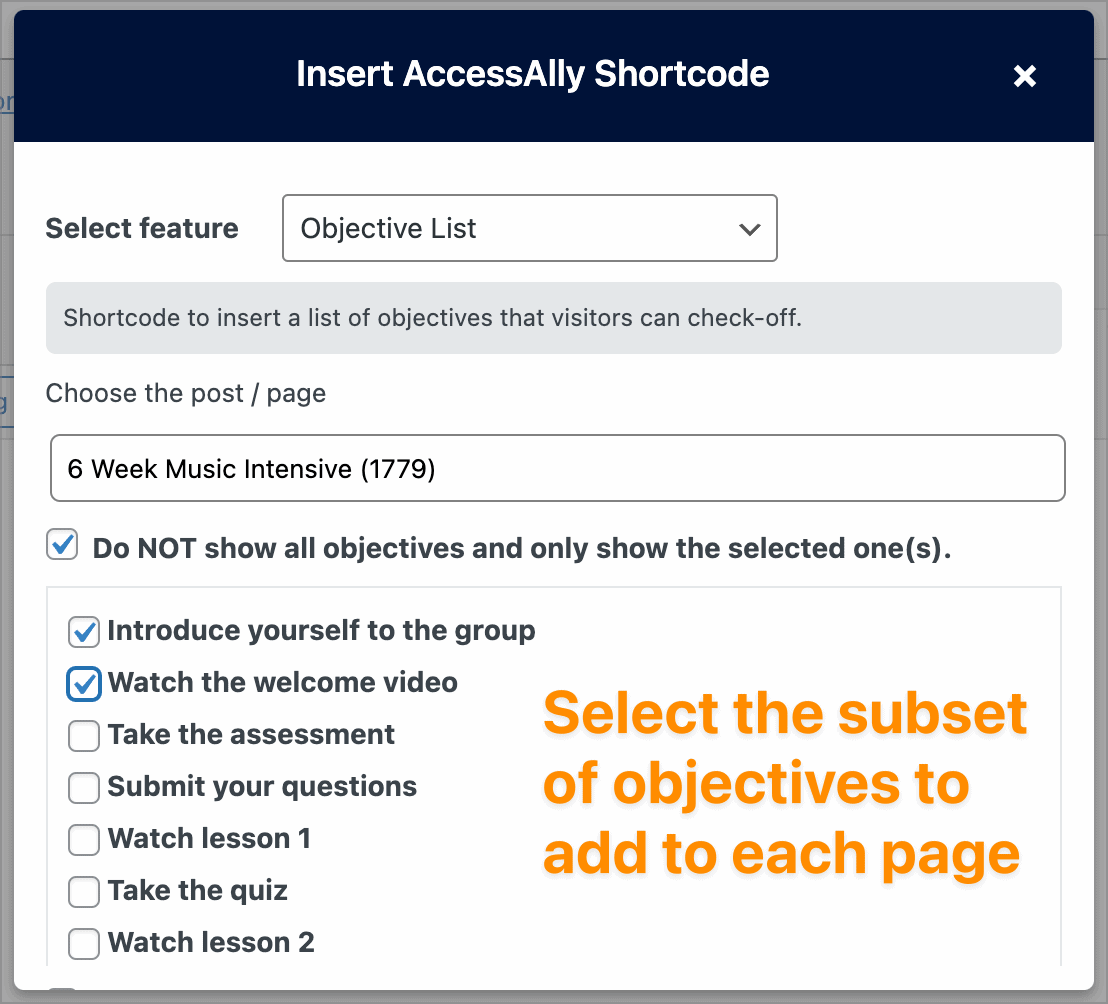
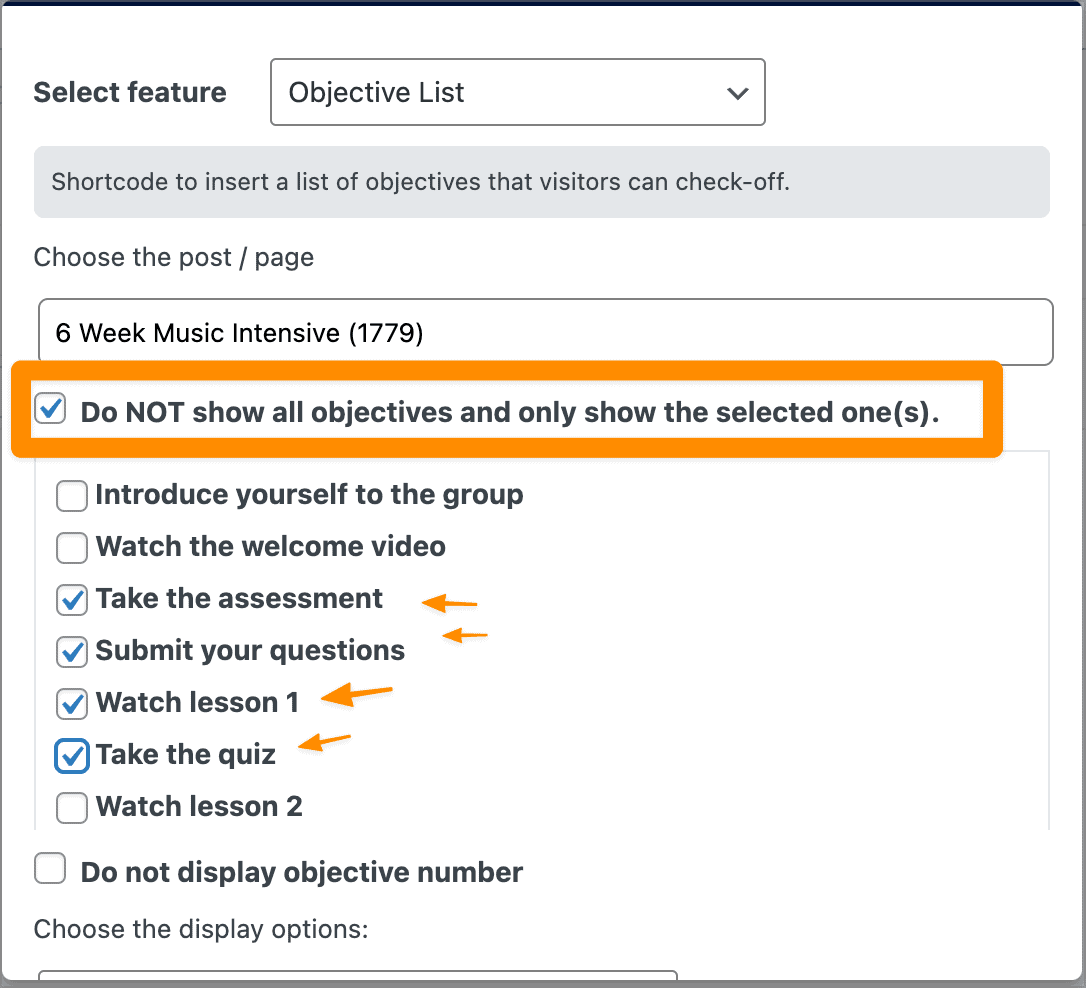
In the AccessAlly shortcode adder, which you can find in top bar in the WordPress admin area, select “Objective List” and then check off the subset of objectives that apply to each page.
Then insert each shortcode on the sub-pages. This way, your objectives are set at the top level but displayed on the page level.
Step 5: Add the Course Activity Shortcode to your applicable Module Page
Now you’ll insert any of the items that need to be displayed like a private note or a media player, to each sub-page.
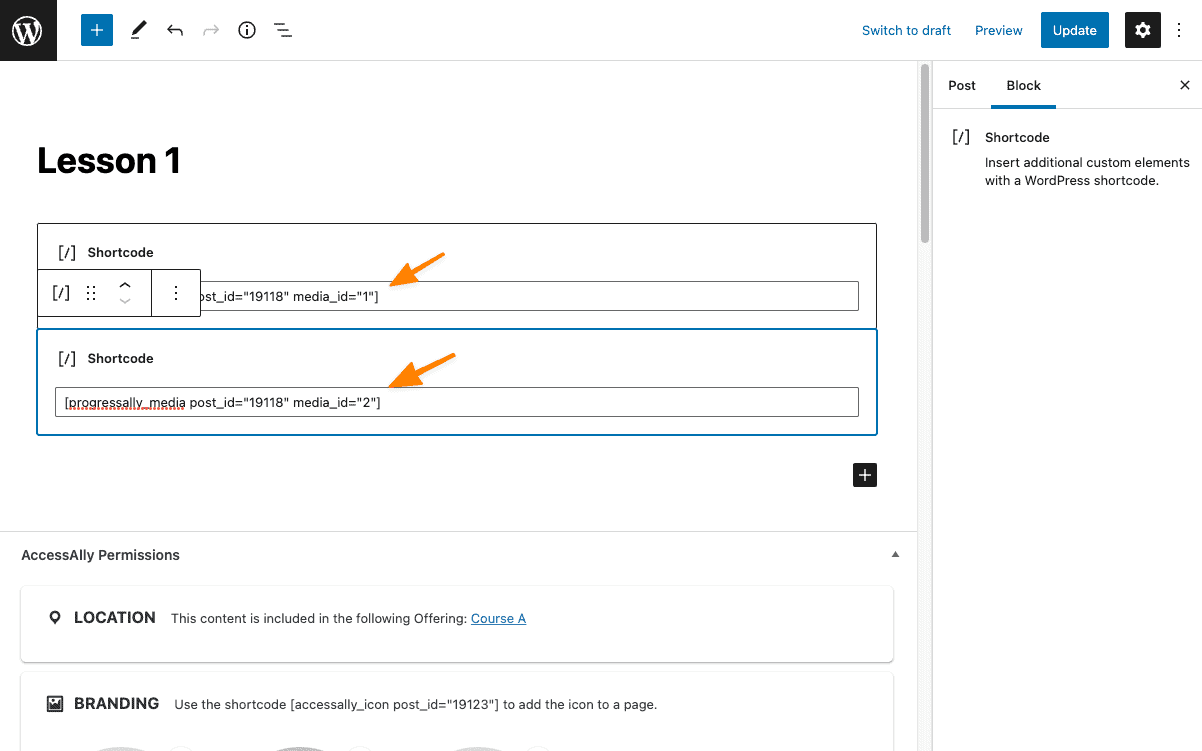
This is how to find the shortcode for the course activity that you want to display on your Module page:
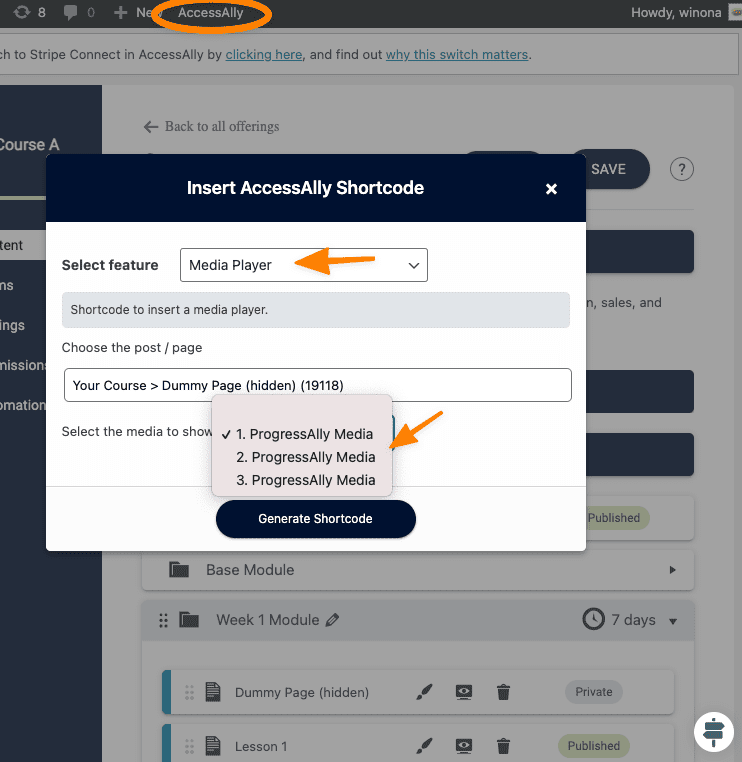
Choose the activity type (Media Player, Private Note, Quiz) > the main page that hosts all your course content > the activity you want to display in the module page.
Add the generated activity shortcode for each activity you want on your “real” pages.
Now, when an activity is completed on one of your “real pages,” it checks off as complete on the objective list that is on the main page.
Now, when a member completes any activity on a page (ex: watched video) the progress tracker (ex: progress bar) will move even though not all activities on the page are complete. This is because all activities are tracked by the main page.
When you are adding new course material, ensure that you are adding the course material to your offering’s Main Page first and inserting it to your “real” pages.
ARTICLE CONTENT:
