A membership site is a complex ecosystem. It takes time to implement the vision you have in your mind. This step-by-step guide will walk you through getting started.
Prefer video based training? Check out AccessAlly 101.
The first step is creating a WordPress site to hold your courses & memberships.
- Select a hosting provider
- Create a new WordPress.org install on a subdomain
- Add an SSL certificate to your site
- Choose a WordPress theme:
Create an outline to use as a roadmap of the first program you'd like to launch. This guide will be helpful when creating your first offering in AccessAlly.
- Create a map of your online course or membership content
- Prepare your content material
This might include written content, videos or video scripts, checklists, quiz questions, etc.
Now it's time to download and install the AccessAlly plugins (based on your plan) to your computer.
- Install AccessAlly plugins (install all plugins that come with your selected plan)
AccessAlly Essentials = AccessAlly plugin
AccessAlly Pro = AccessAlly & ProgressAlly plugins
Community = AccessAlly, ProgressAlly, and CommunityAlly plugins
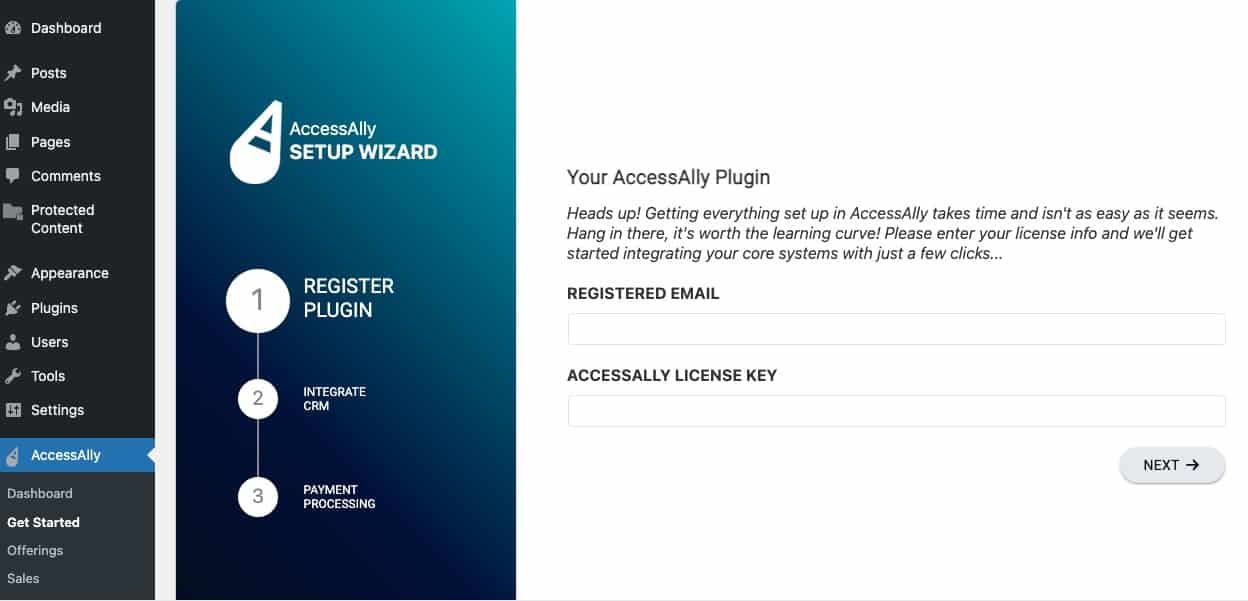
AccessAlly’s Setup Wizard provides an easy-to-follow, 3-step process that activates your plugin license, integrates with your CRM, and connects your site to Stripe and/or PayPal to process payments.
The Setup Wizard will also create key pages and make sure they’re set up properly.
After you have content mapped out and created, it's time to implement the design (look & feel) through your WordPress theme.
Start with the free AccessAlly theme to get up and running faster!
Design Resources:
- Use the free AccessAlly Theme or design your course template look and feel
- Guide to Membership Website Design
- Download AccessAlly Custom Badges or use AccessAlly's built-in gradient shaded icons
Not sure what theme to use? We recommend starting with the AccessAlly Theme. It's free to use and quick to get started with.
The Offering Templates take care of creating the pages, permission tags, opt-in forms, and order forms you need. You can use the templates to quickly create:
- Free online course (free daily dripped programs like challenges)
- Drip-released course (paid courses with dripped modules)
- Membership programs (instant access to everything as a subscriber)
- Affiliate center (create an affiliate program)
- Team center (bulk course enrollment ) with content for team leaders and team members
- Start from scratch (create your own offering)
In the previous stage, you created the structure of your offering. Now, it's time to add your content to the pages.
To see how to add content to your pages visit the Offerings module in AccessAlly 101 or this article.
- Upload offering videos to: Vimeo, YouTube, Wistia, or Amazon S3
- Add content to your pages
- Once done, publish the pages.
The Offering wizard automatically creates opt-in forms and order forms for you. Now it's time to customize these, and add any additional entry points into your content.
- Customize opt-in forms for free courses
- Customize order forms for paid programs
*There are many ways you can customize an order form to sell your content (promos, upsells, toggles, etc.) Click here to learn more about The AccessAlly Workflow.
*This step is optional based on your AccessAlly plan.
Using AccessAlly Pro or Community? Once your pages are published, it's time to add gamification features.
Now it's time to set up emails that go out to your new members. You can send emails using:
- AccessAlly Emails - our recommended option!
- CRM Automations - with ActiveCampaign, Kit, Drip, Keap, or Ontraport
You'll also want to add a plugin & email sending service to improve email deliverability. This ensures that any emails going out from your AccessAlly site, land in the inbox.
Don't invite people to your site until you're sure everything is working. Click here to test your setup before you go live.
As a final check, please make sure you've run through a thorough testing sequence so that you don't run into any issues as your site goes live. Make sure:
- There are no tech issues with the setup of your WordPress.org website on the subdomain (with a careful check for plugin conflicts)
- All order forms are working (and showing up in the AccessAlly Sales area)
- All free opt-ins are functioning properly
- New members are created promptly, with the correct permission tags
- Offerings can be accessed by the test users who have corresponding permissions
- All progress tracking and other “special” setup (like affiliate systems, point systems, etc.) function as intended
