Learn how to set up a WordPress site so that you can use AccessAlly for your courses and memberships.
As open-source software, WordPress has incredible flexibility and potential. If you’re new to WordPress, you might be tempted to get a free site at WordPress.com. But this won’t give you the full flexibility you’ll want to have as you grow and develop your online presence.
Please be aware that there are TWO different ways to access the “WordPress” platform:
- WordPress.ORG – RECOMMENDED. This is known as the “self-hosted” version. In other words, you pay for your own hosting and can install WordPress for free. This is the recommended route for AccessAlly clients.
- WordPress.COM – NOT RECOMMENDED. You can sign up at this website (run by the team at Automattic) to access the WordPress platform. Plugins can only be uploaded at paid levels, and you will have to pay for a second site if you wish to create a subdomain. For these reasons, we do not recommend using AccessAlly to build a membership site if you are on WordPress.com.
To set up a fully-customizable WordPress site, you’ll need:
- A hosting company (read our article on choosing the right LMS hosting service here)
- A unique domain name (we recommend a subdomain)
- A free WordPress install (usually linked through your hosting cpanel)
ARTICLE CONTENT:
Step 1: Choose Your Hosting Provider
For hosting providers, we recommend WPEngine, a hosting provider that can handle a ton of website traffic and is specifically intended for WordPress sites. Another great option is Kinsta, which is on the same quality level as WPEngine.
Both of these are affiliate links, but we don’t recommend them for that reason. They are solid and proven hosts that deliver a great experience for you as the site owner, and for your clients as your number of members grows and traffic increases to your site.
If you choose another hosting service, look for one that offers 1-click WordPress installs, for ease of setup.
Some hosting providers do not offer domain name purchases on their sites. In this case, a simple Google search will lead you to many different companies that offer domain names for you to purchase. You can purchase a domain name pretty much anywhere on the web – a good place to start is GoDaddy.
A domain name purchased separately must be linked to your hosting services via the DNS settings. Each registrar is different when it comes to the steps needed to properly configure your DNS. Whether you use WPEngine, BlueHost, or another hosting service, you should check their tutorials for further information on this step.
Step 2: Create a Subdomain (IMPORTANT!)
A sub-domain is a mini-website connected with your main website, and will have a slightly different URL. For example:
Main site: accessally.com
Subdomain: access.accessally.com
We strongly recommend that you build your AccessAlly website on a subdomain, rather than the main domain.
There are a few reasons for this recommendation:
- Ease of management – Your main website will require an entirely different set of plugins than your AccessAlly membership site. Building the membership site on a subdomain greatly decreases the possibility of a plugin conflict, which can render your entire site ineffective.
- A better user experience for your members – so that they don’t get lost in the regular site navigation.
- Simplified SEO – Unlike your main website, your membership site pages are password protected and do not need to be optimized/indexed for Google search results, but may still affect the visibility of your content negatively if it is built on the same domain.
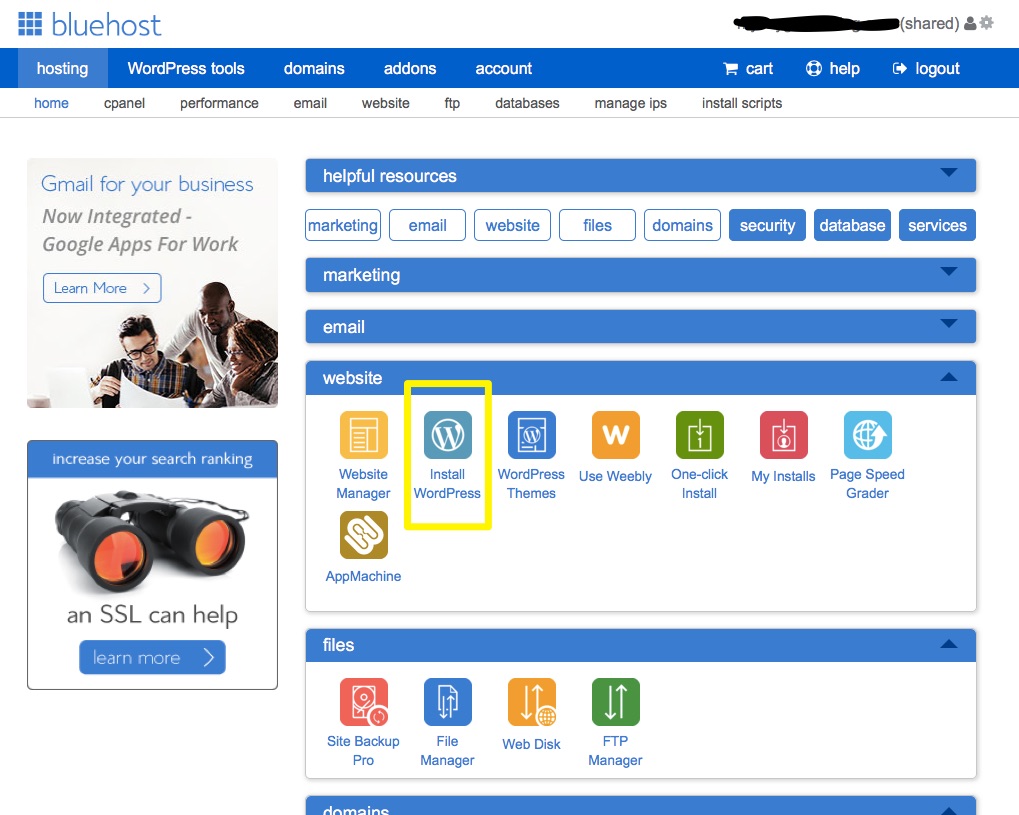
Step 3: Install WordPress on the Subdomain
This is where a 1-click install for WordPress is invaluable. In BlueHost, all you need to do is log into your account, then scroll down to Websites > WordPress install. Follow the step-by-step instructions to complete the install.
Once completed, you can access the backdoor of your website at: SUBDOMAIN.YOURWEBSITE.COM/wp-admin
Step 4: Install a WordPress Theme
WordPress is the framework upon which you’ll build your site – to customize its appearance, you’ll need to install a theme (easily accessed through the WP dashboard).
Go to Appearance > Themes to change the appearance of your website.
Each theme is different – not just in terms of colors and fonts, but in overall functionality. Because of this, we recommend using a fairly flexible theme that will allow you to continue to build and develop your website.
(Common themes that are flexible and easy to work with are Beaver Builder, Elementor, and Divi)
We do not provide support for designing and tweaking your theme. If you have difficulty in this area, please see your web designer for help.
Step 6: Install Your SSL Certificate
If you want to retrieve account and billing information on your new membership site, you will need to properly install SSL.
Please head over to this tutorial to learn more: Why You Need an SSL Certificate On Your Membership Site.
