With AccessAlly's Offerings, you can create all kinds of different order forms and pricing structures. In this tutorial you will learn how to create these order forms and start selling your goods!
Note: With AccessAlly, you can sell you content in multiple different ways (toggles, upsells, bundles, etc.). For a full breakdown, click here.
ARTICLE CONTENT:
Creating Order Forms for your Offerings
When setting up your Offerings you can choose from a variety of different pricing options. For example, you could have a one-time payment, recurring monthly subscriptions with a trial period, or installment payments.
Once you've set up your first Order Form, you can add additional ones by going to the Forms tab and clicking the Add button.
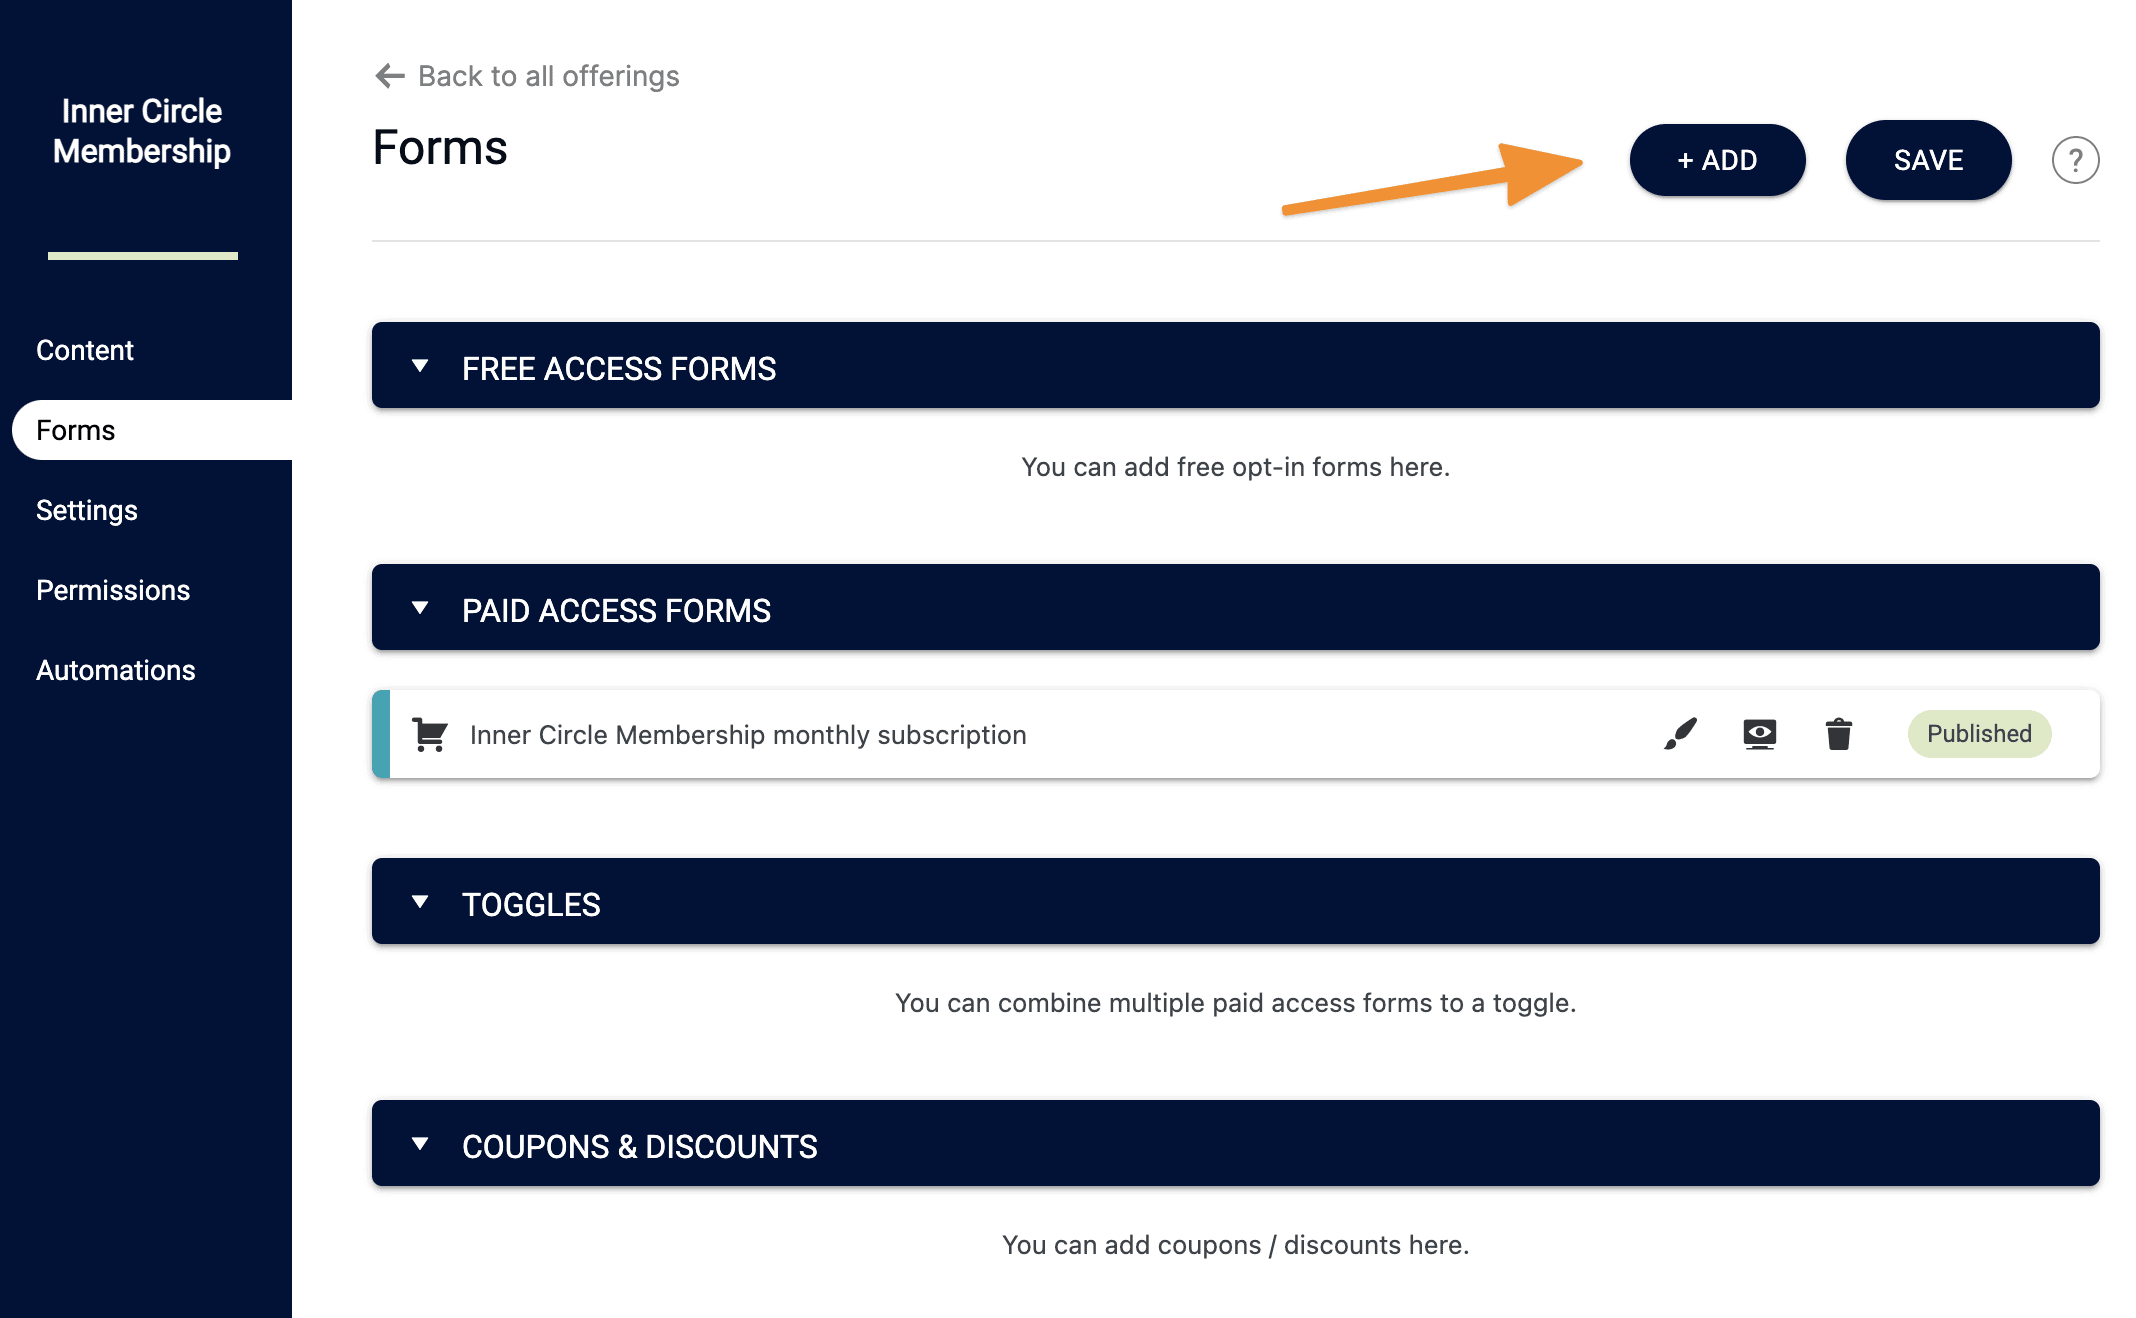
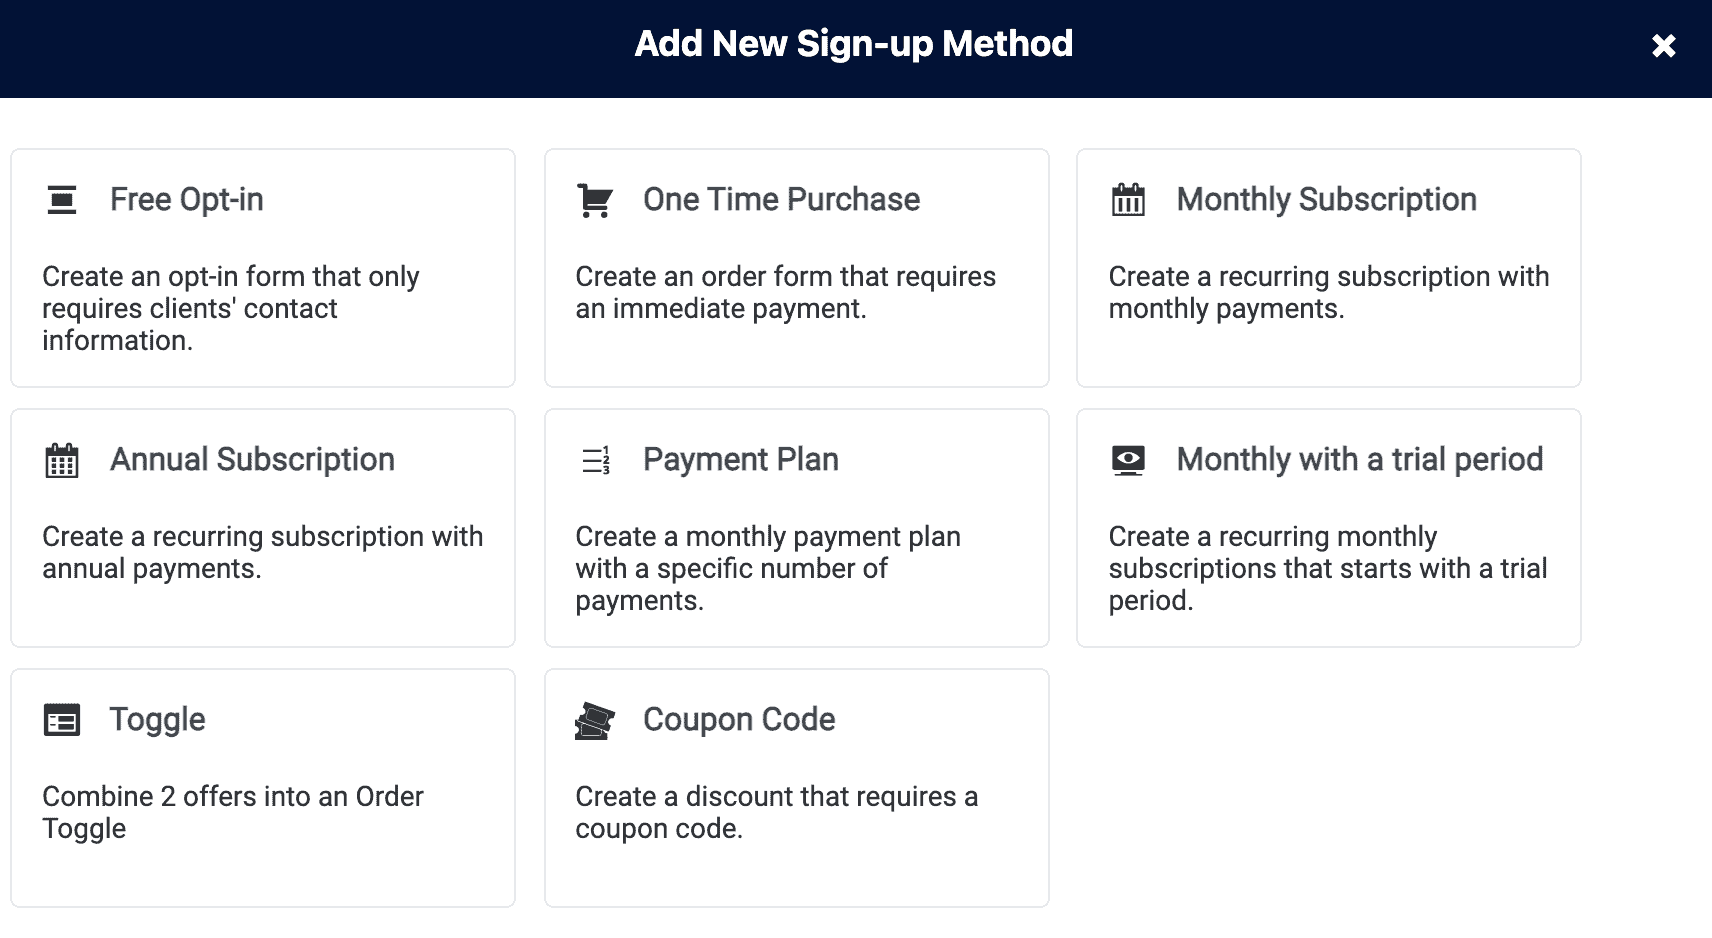
From there you can select what kind of Order Form (or free opt-in form) you want to add.
The most important thing to keep in mind is that your Order Form is "pending" until you hit the Save button inside your Offering.
After that, you can click the edit button next to your Order Form to go to the advanced settings to really customize it.

Advanced Settings under Sales section
When you click that edit button, you will be taken to the Sales -> Offer Setup section, where you will find advanced settings.
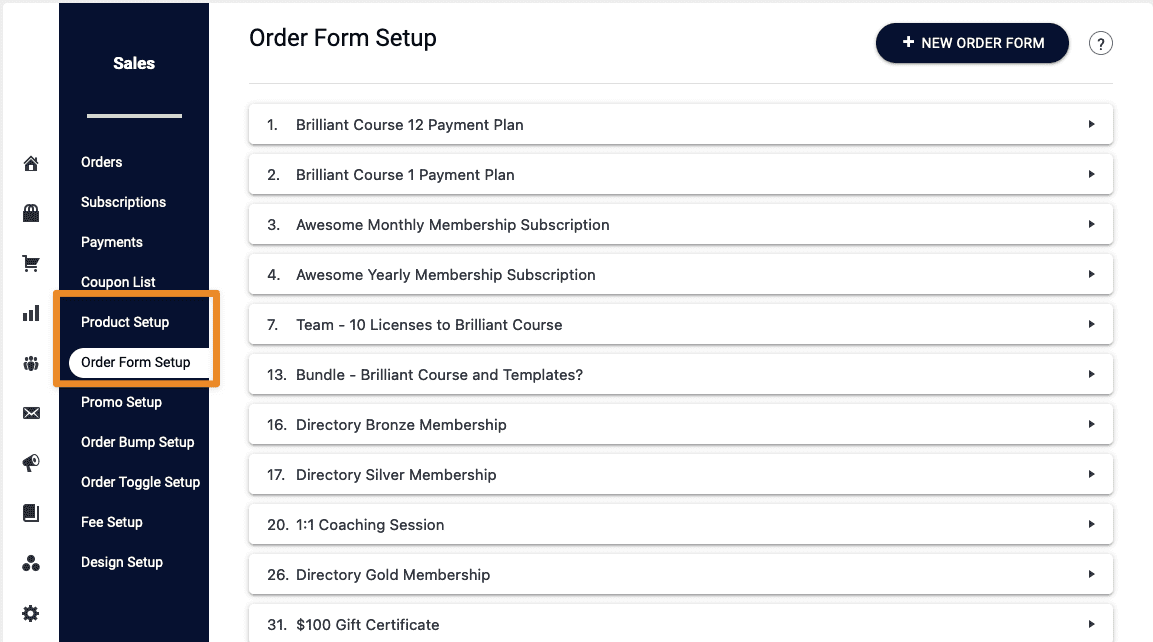
The first tab is the Product Setup one, which has settings for the price and payment options of your offering.
The second tab is the Order Form Setup one, and allows you to select multiple products to add to one order form, change the look and feel of a form, and set the thank you page and automation.
Under Product Setup: Editing Trial Details
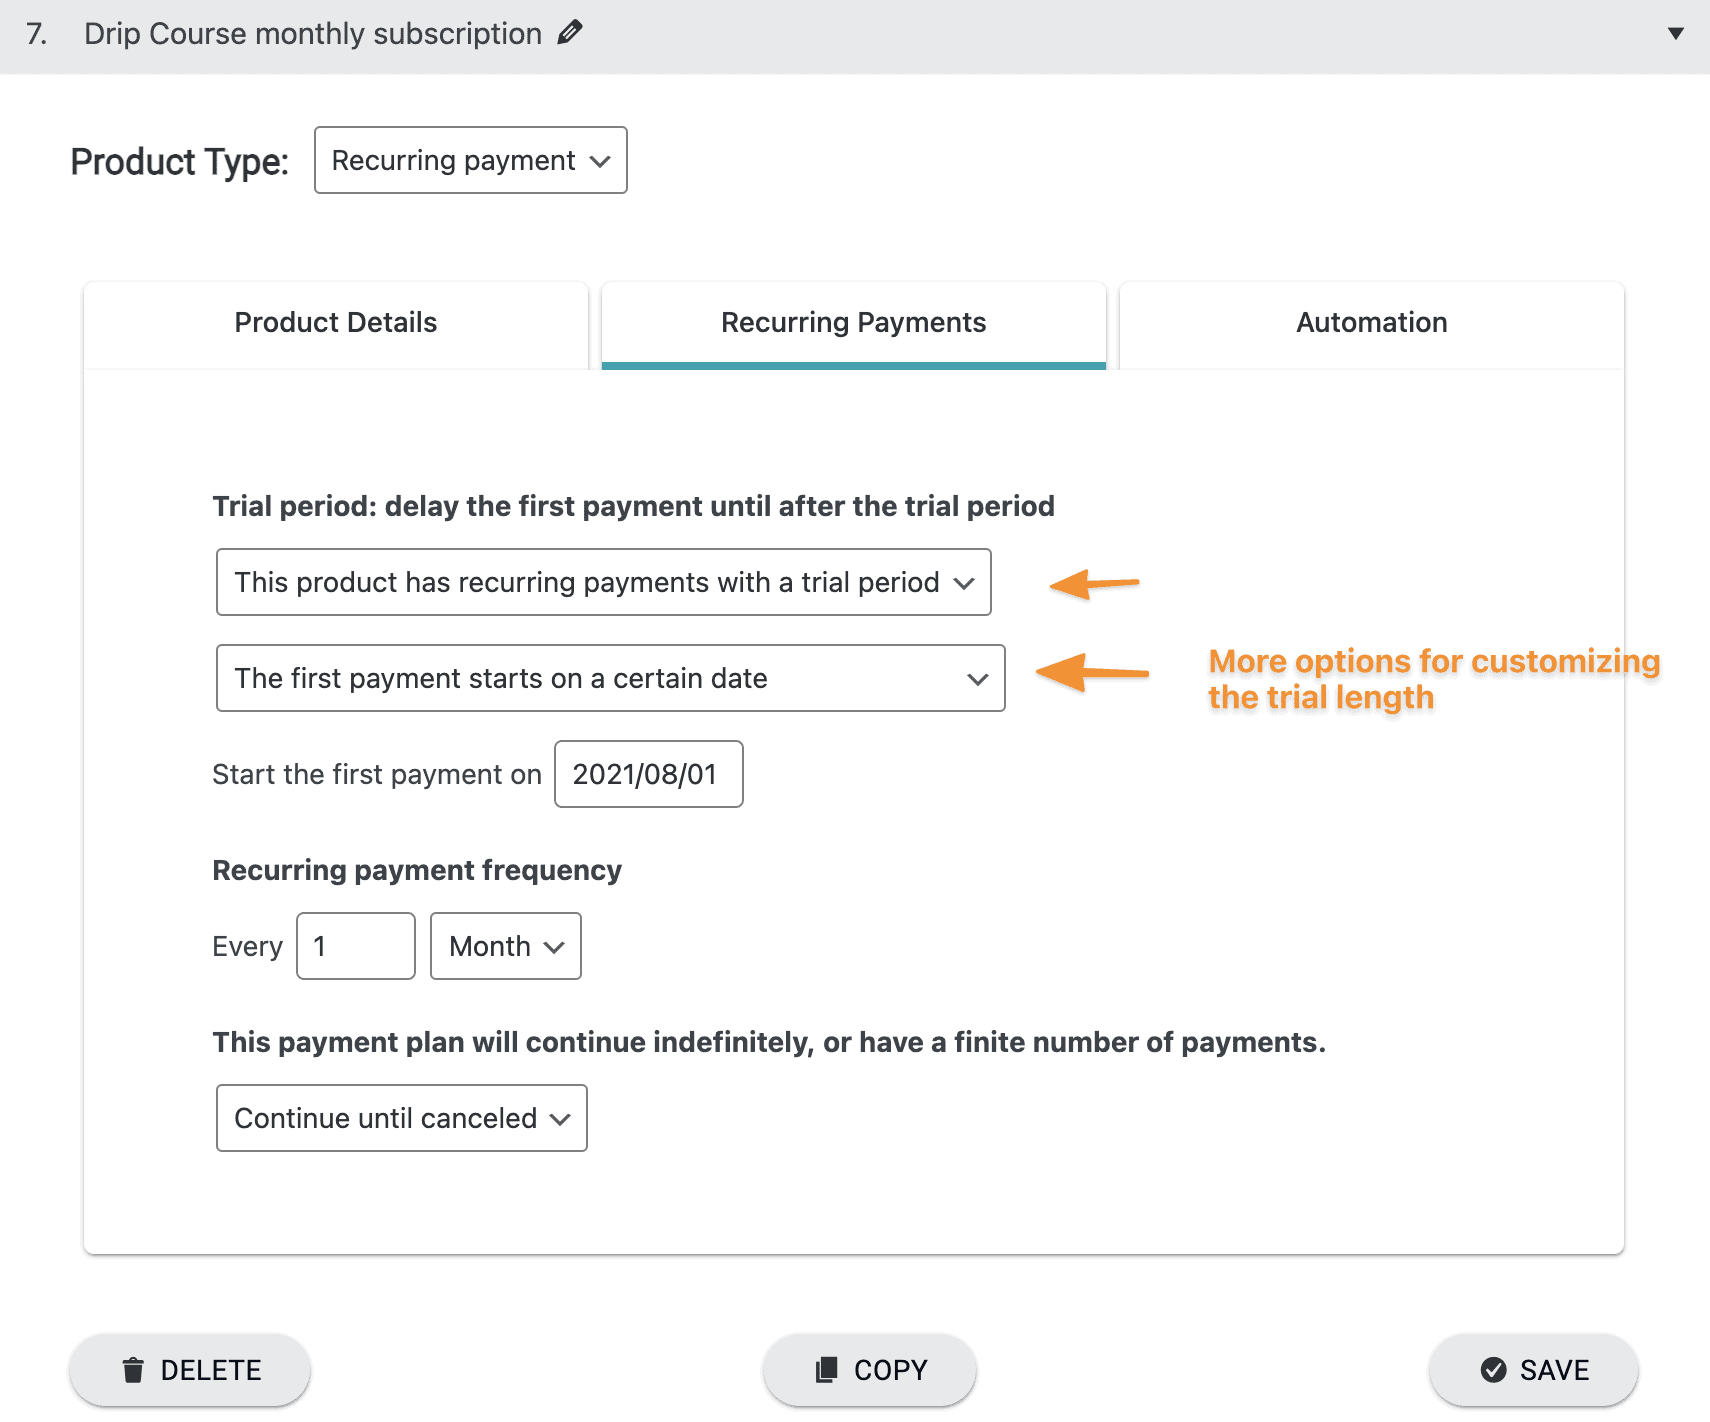
Under Product Setup, you will find the "Recurring Payment" type, with the options below to help you customize your product and how you want to charge your clients.
Choosing the trial period option will give you the ability to specify if the first payment will happen:
- On a specific date - which is useful if you're pre-selling a membership or course that starts at a given time
- On a specific day of the month - this is a good option if you have rolling enrollment and you want all payments to start of a specific day the following month
- After a set amount of time - this is great for doing a paid or free trial as an incentive to get people to sign up and experience your content before the full price or recurring membership begins
Under Order Form Setup: Early Contact Creation & Following up on Abandoned Carts
With AccessAlly's 3-step order forms, potential customers enter their name and email on the first step of the checkout process. At this point, you can assign an "early contact creation" tag that you can use inside of your CRM to follow-up with abandoned carts.
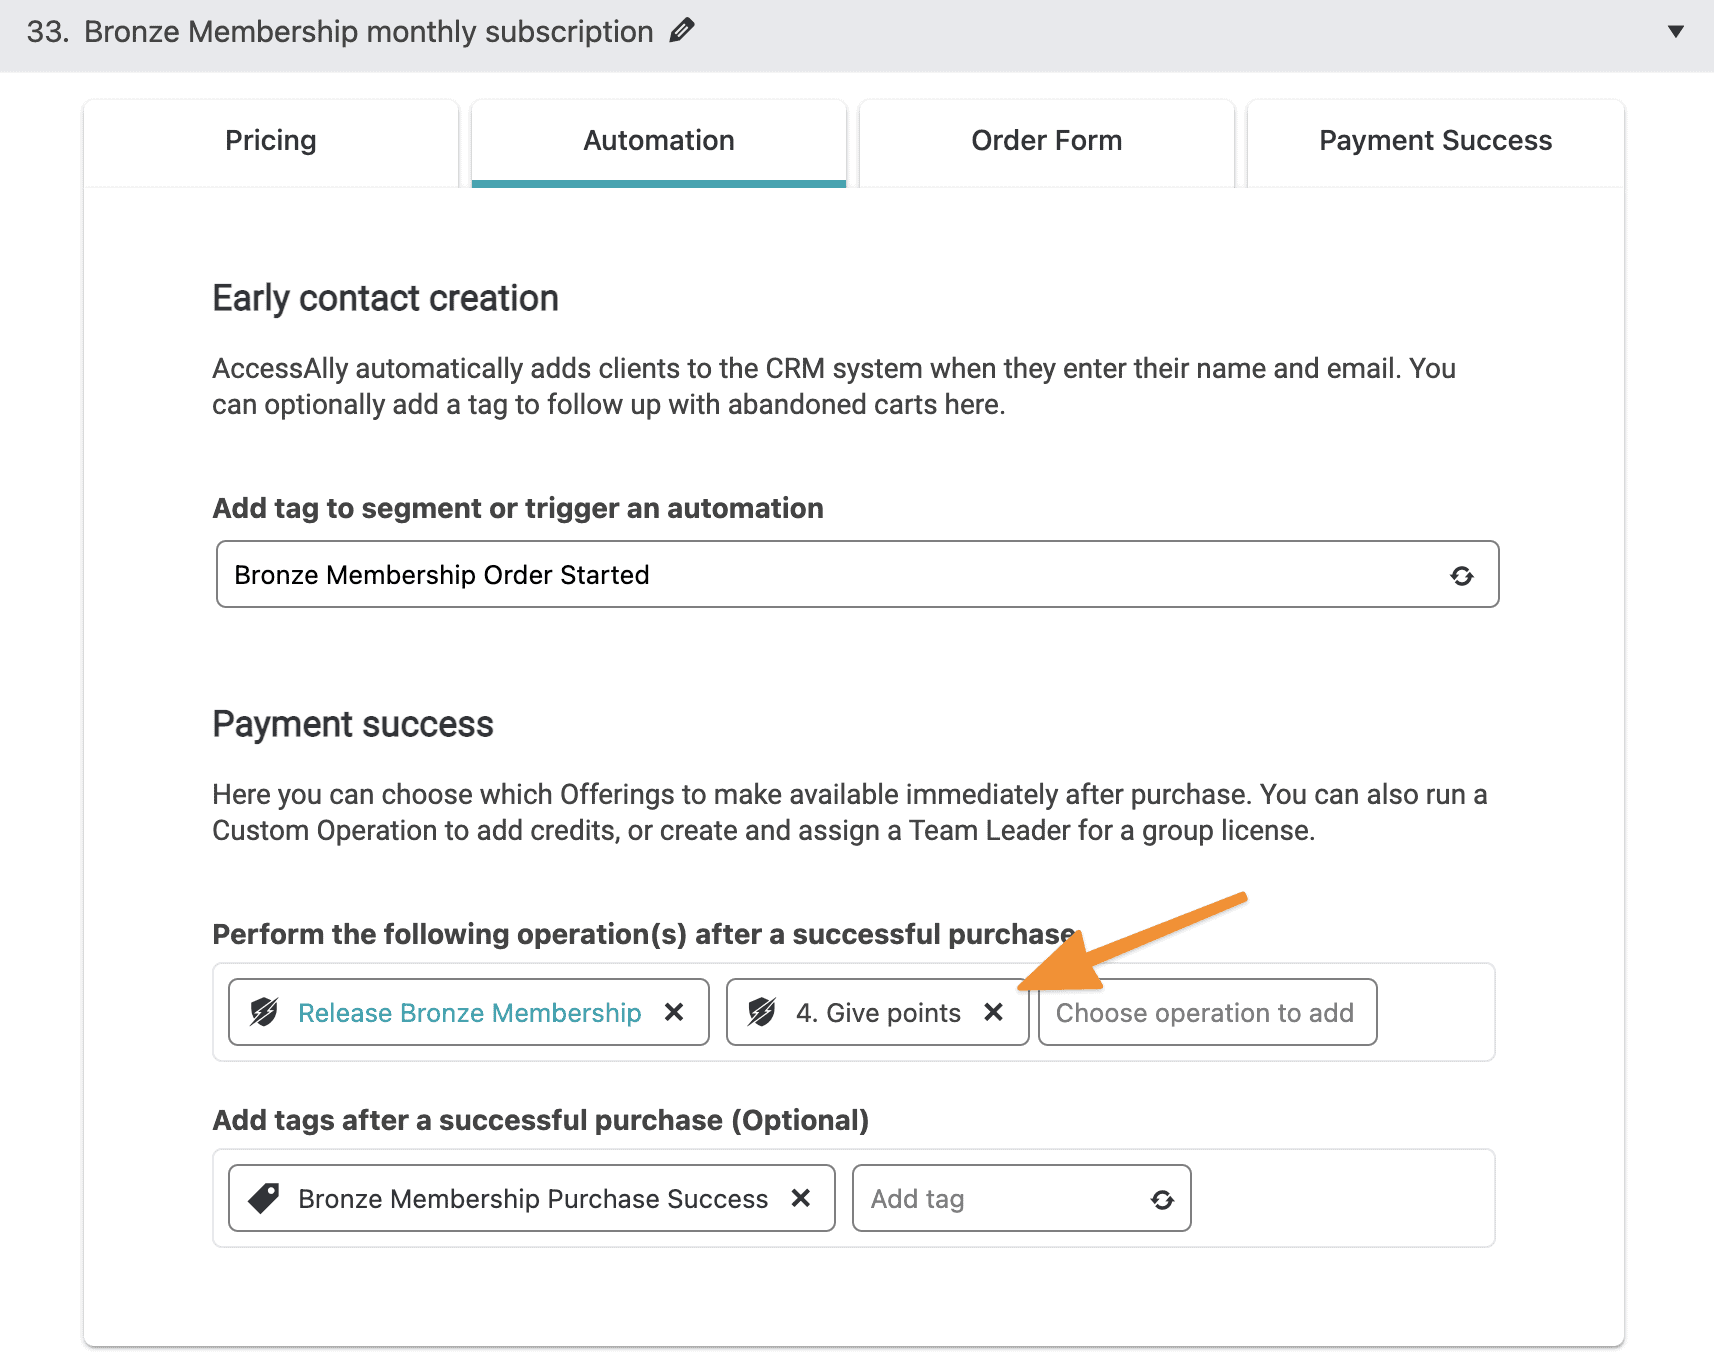
The Offering wizard will create an Early Contact Creation tag for you.
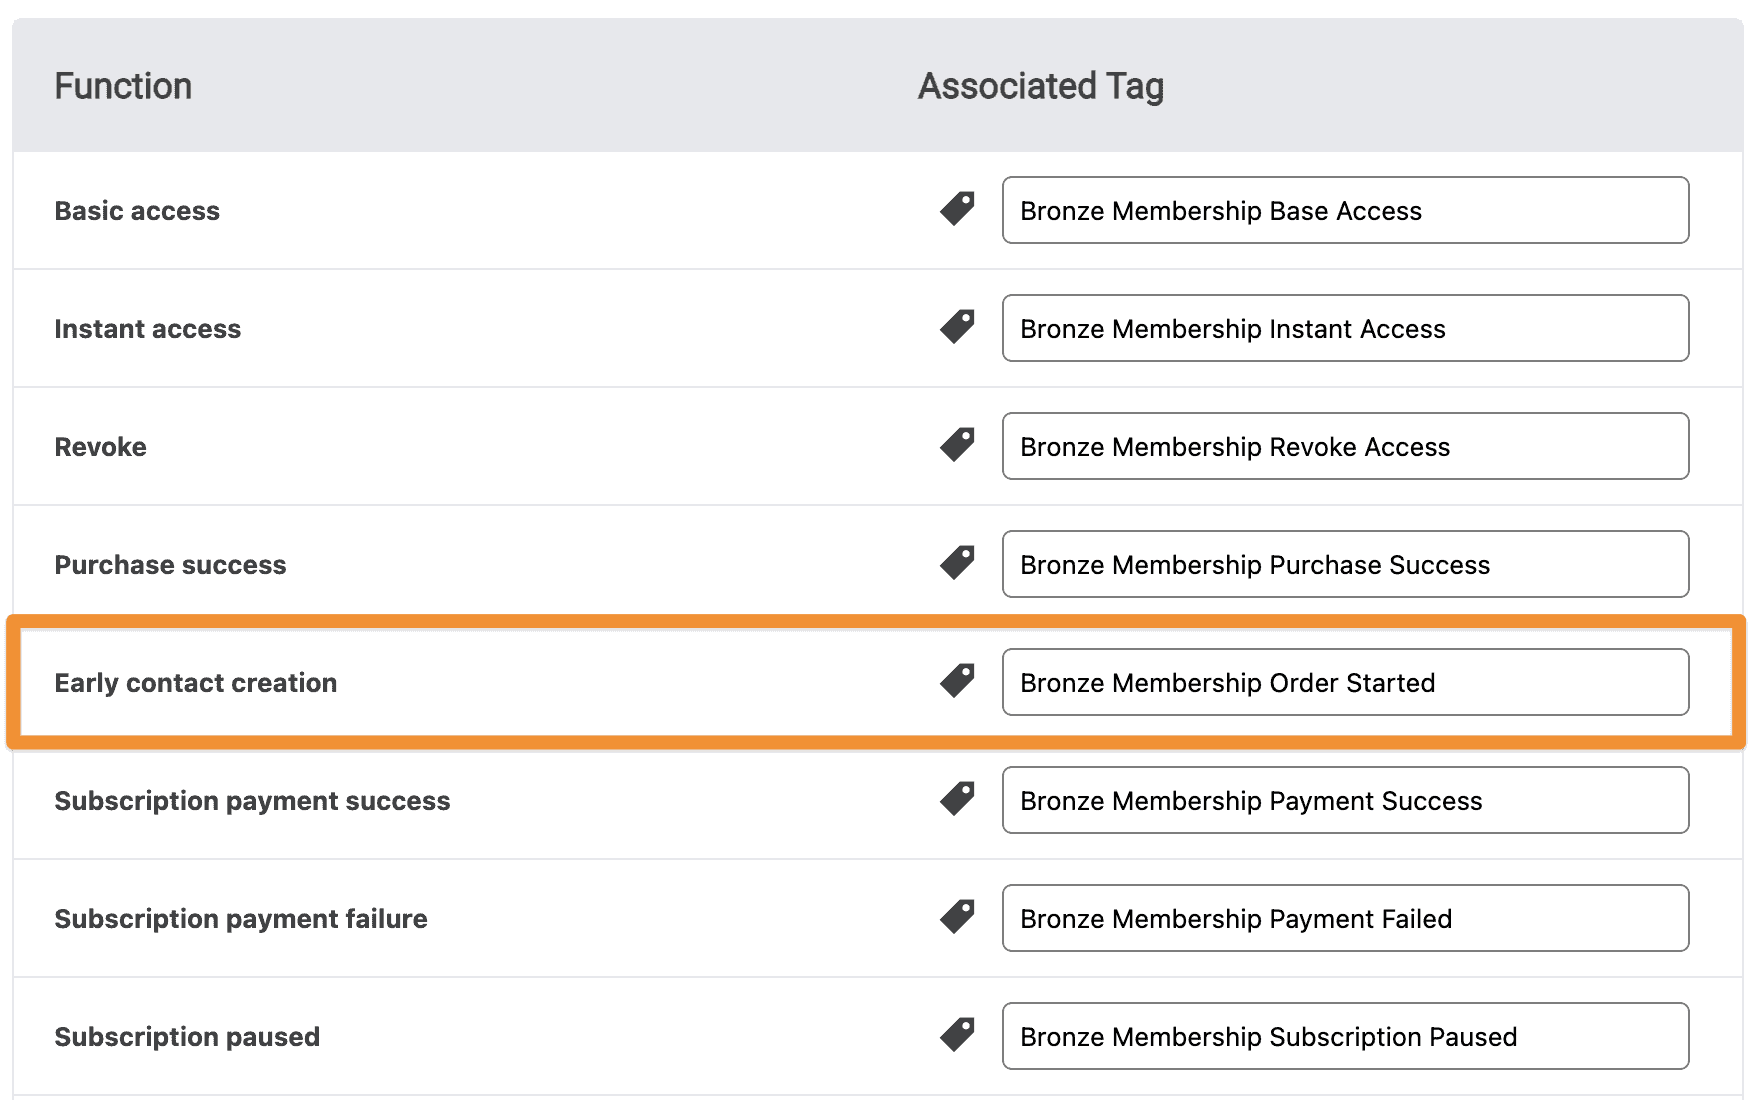
This will be a tag that looks like: Bronze Membership Order Started
From there, you'll want to follow this tutorial to set up a CRM campaign to follow up with people who start the checkout process but don't complete their purchase.
You'll know that someone has completed their purchase if they have a tag similar to Bronze Membership Purchase Success. If they do complete their order, you can immediately stop the abandoned cart follow-up campaign.
Under Order Form Setup: Running Custom Operations After Purchase
Is there a custom operation that you'd like to run automatically when a user places an order on your site? If so, go to: Sales > Offer Setup > Automations. Then, select the custom operation you would like to run from the dropdown.
You could use this for example, if you wanted to give new members some points in a credit system after they sign up.
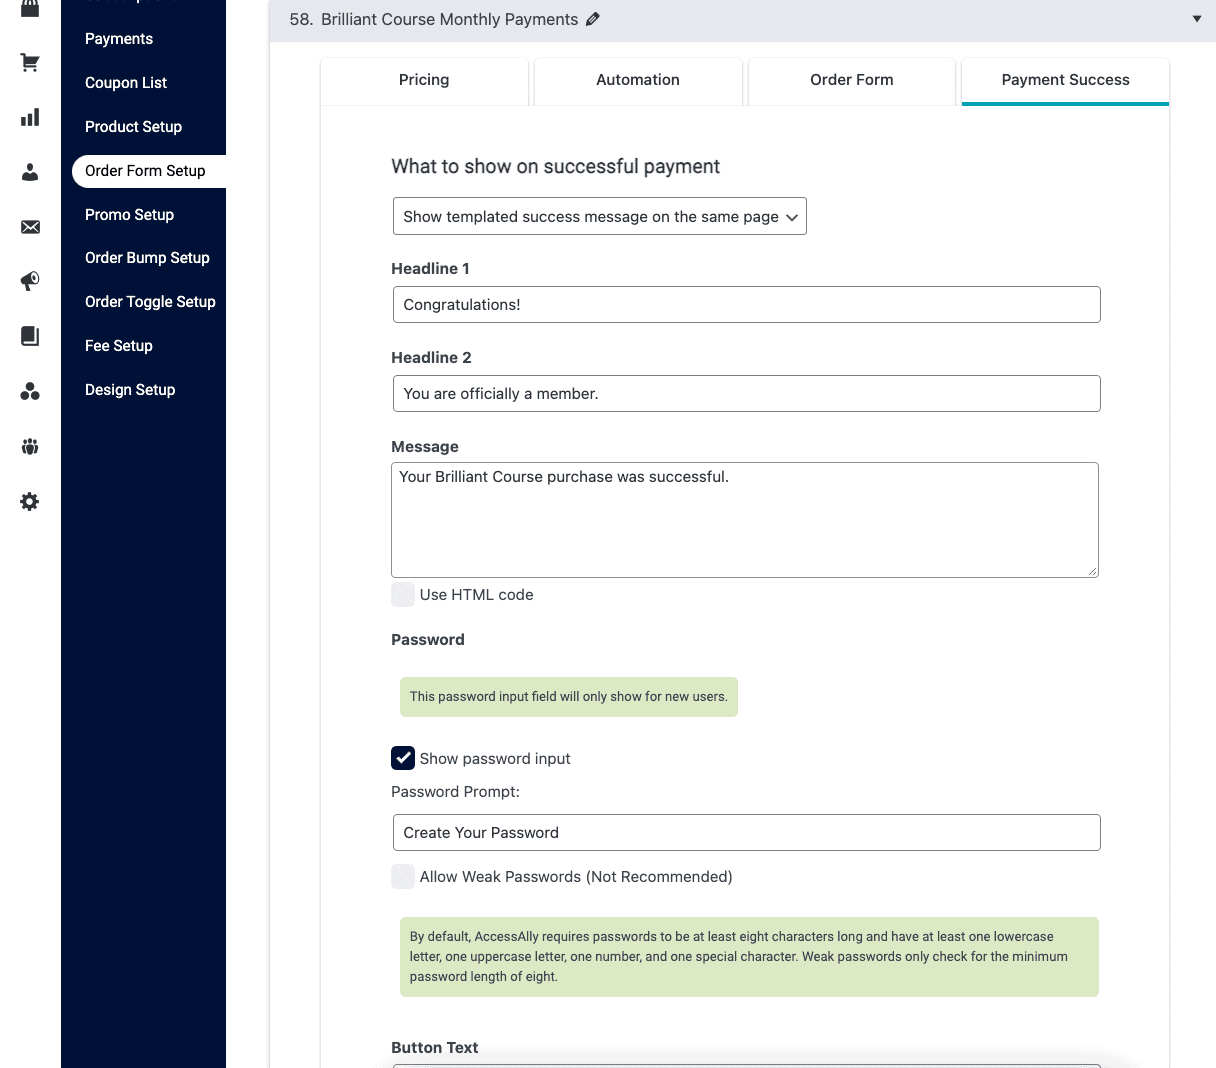
Under Order Form Setup: Payment Success Templated Success Message
This template design allows you to display a success message upon purchase along with a space to allow new members to create their own password.
Under Order Form Setup: Showing a Username & Password on the Thank You Page
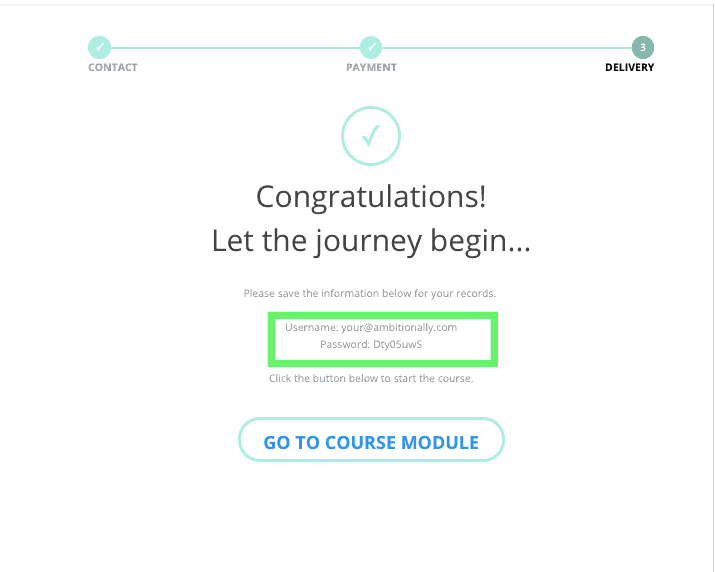
If you'd like to give people their username and password right after they purchase (for safe keeping), there's an easy way to do that on the thank you page.
You'll find the full tutorial including the steps to implement that here.
Here is the full list of placeholders that can be used in the Thank You message
- {[first-name]}: client's first name
- {[last-name]}: client's last name
- {[email]}: client's email
- {[total]}: total payment amount
- {[confirmation-num]}: credit card / PayPal payment confirmation #
- {[username]}: login username (always the email for new users)
- {[password]}: login password (only shown for new users)
Under Order Form Setup: Sending People to a Custom Thank You Page
If you want to send people to a custom thank you page (any URL you like - it can be on another domain as well) then simply select that option in the "Payment Success" tab.
If you enable the checkbox marked "Append order info at the end of the Thank You page URL", these are the parameters that will get appended at the end of the URL. You can use these in tracking scripts, for example.
- orderId: this can be used as a unique identifier, since each order will have a unique number
- offerId: this indicates what offer was sold and it corresponds to each offer in your AccessAlly settings
- price: the actual amount, after any promo or coupons were applied (this does not include any upcoming recurring payments, only today's immediate payment)
You can also add your own customized URL parameters manually, for example by adding it at the end of your Thank You Page URL like this:
https://URL.com/?product_name=AccessAlly+Pro+Annual
This could be used to track sales in Google Analytics.
Under Order Forms Setup: Choose a different order form design
By default all order forms will use the basic order form design. However, you can create new designs by going to Sales -> Design Setup.
Then you can assign these designs to each order form, by going to the Order Form Setup -> Order Form tab, and selecting it from the dropdown.
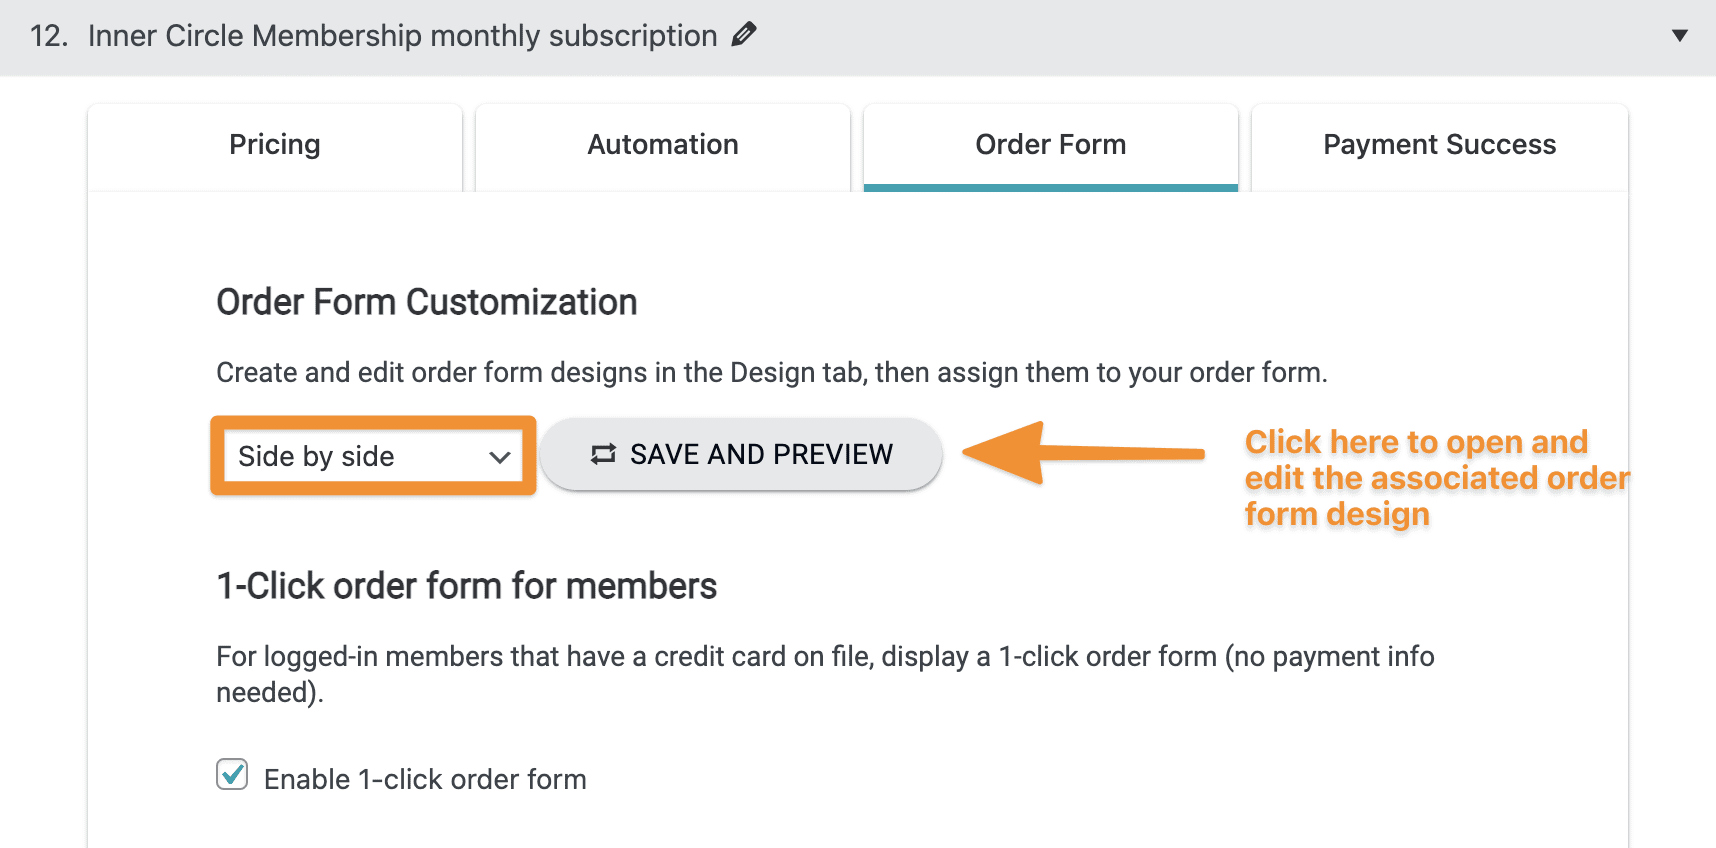
When you click on the Save and Preview button, you will be taken to the design editor to make any changes.
Remember that you might have multiple order forms using the same design, so any changes should be meant for all of your order forms. You can also clone designs and rename them, for more flexibility.
Under Design Setup: How to Set a Default Country On Your Order Forms
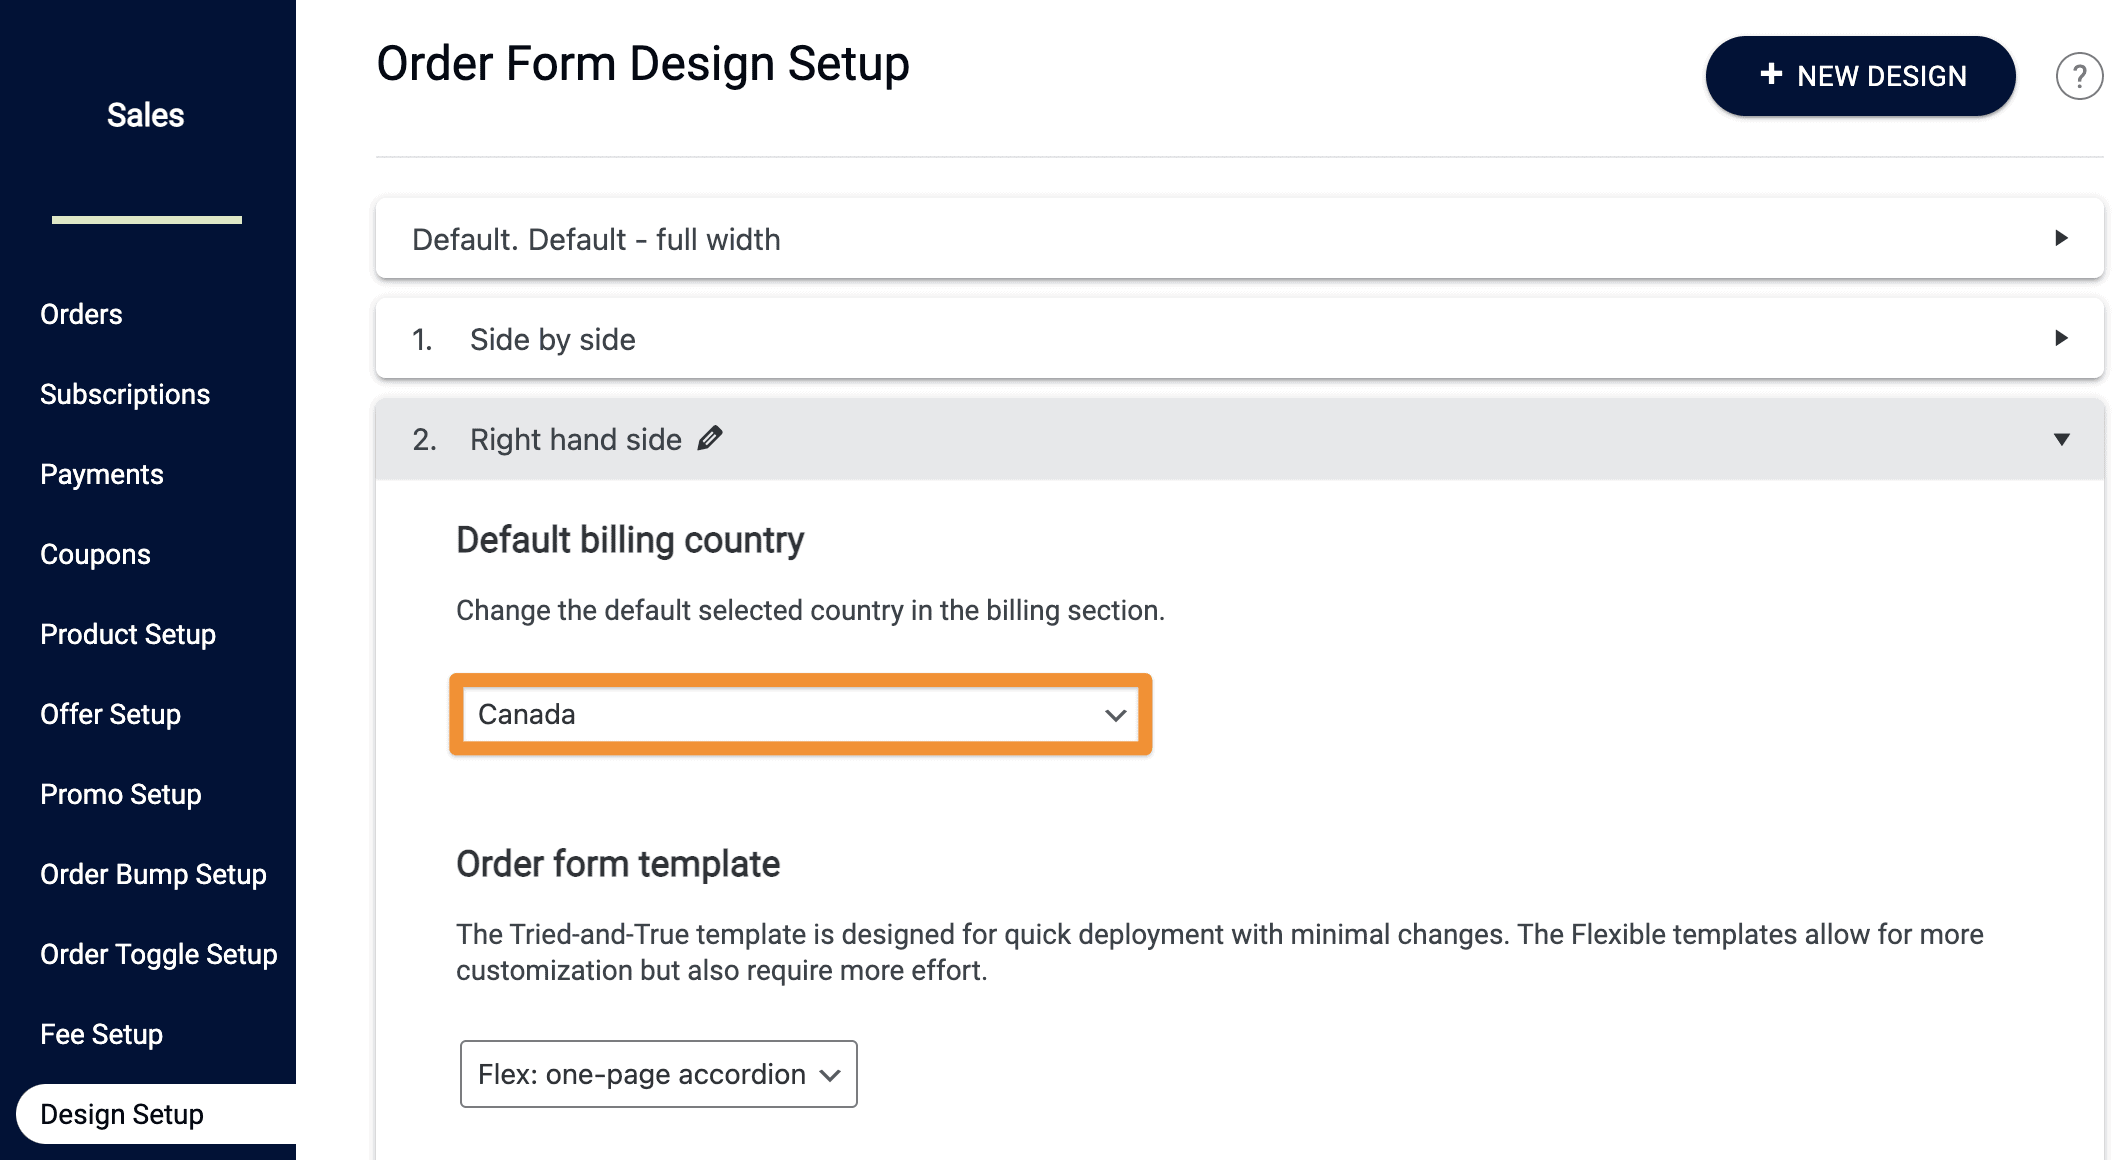
To change the default country on your order forms, go to:
AccessAlly > Sales > Design Setup
Scroll down to the bottom to the "Default billing country" section on your corresponding order form customization. Here, you can select the country you want to have as the default from the dropdown.
Make sure to save changes before exiting this page.
Under Design Setup: Linking Order Form Input Fields with Your CRM’s Custom Fields
There are a few different scenarios where you might wish to collect (and save) additional information when your client submits an order, beyond the basic name and email address.
For example, you might want to ask people where they find out about your business, or what size t-shirt they take and store that into a custom field in your CRM.
Each input item can correspond to a unique custom field. Note that AccessAlly only supports the text field type for this custom field display.
Please make sure your custom field is already created inside your CRM. (Tutorial here)
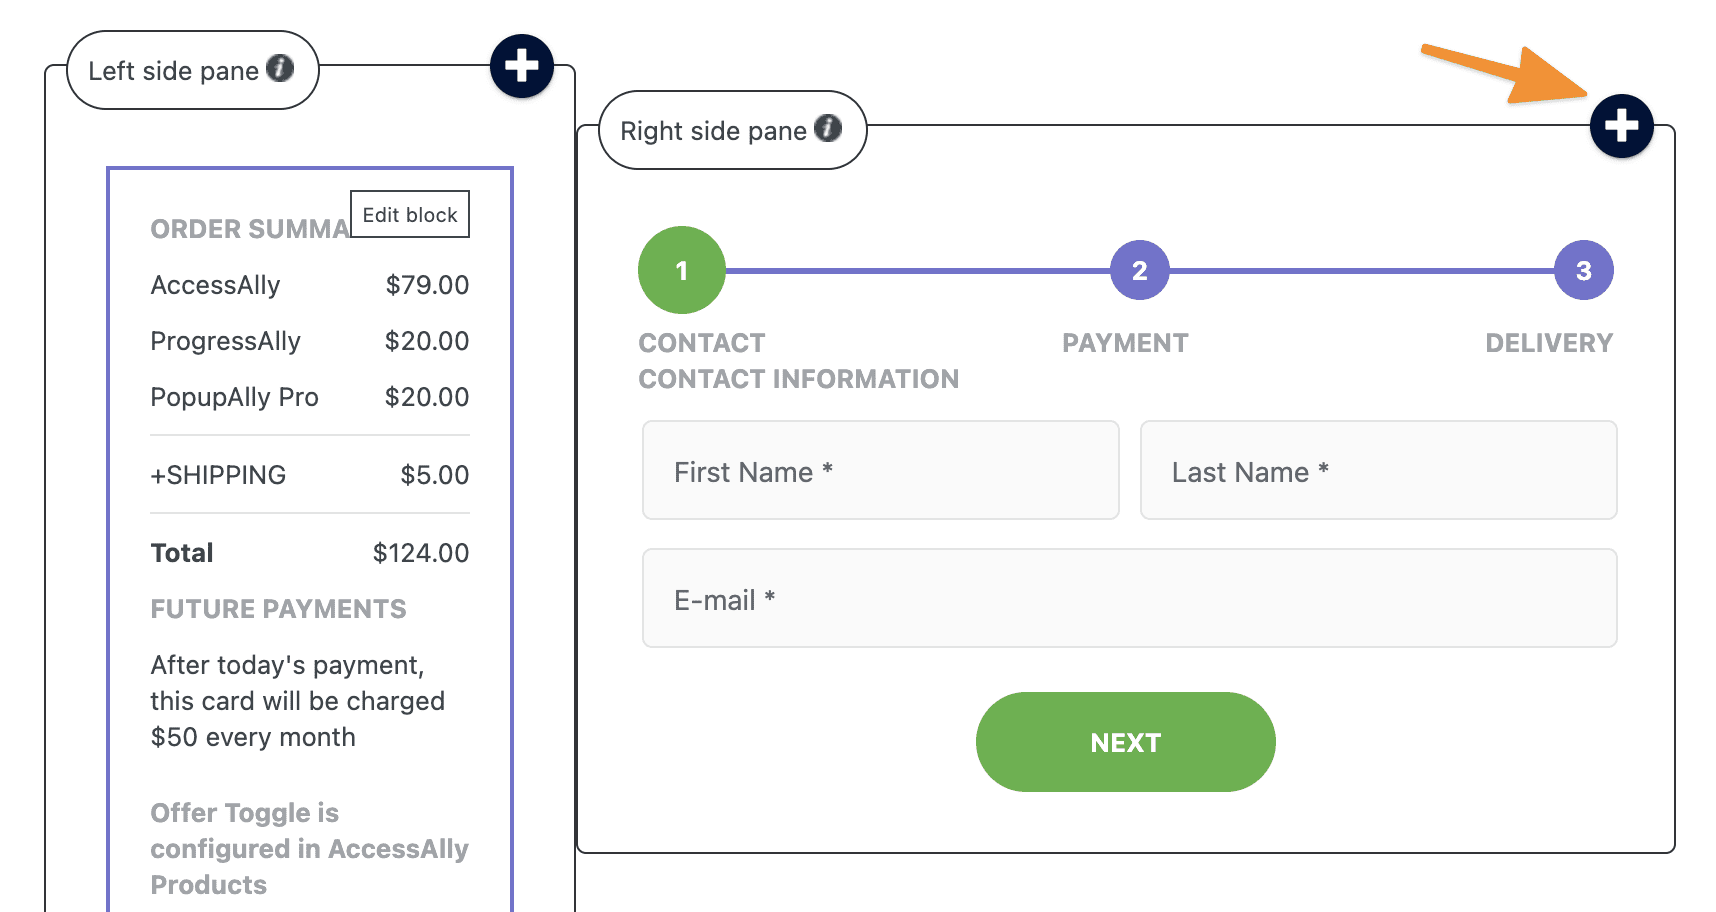
First, go to Sales -> Design Setup and choose the customized design you want to edit. Click the "plus button" where you would like to add your input field.
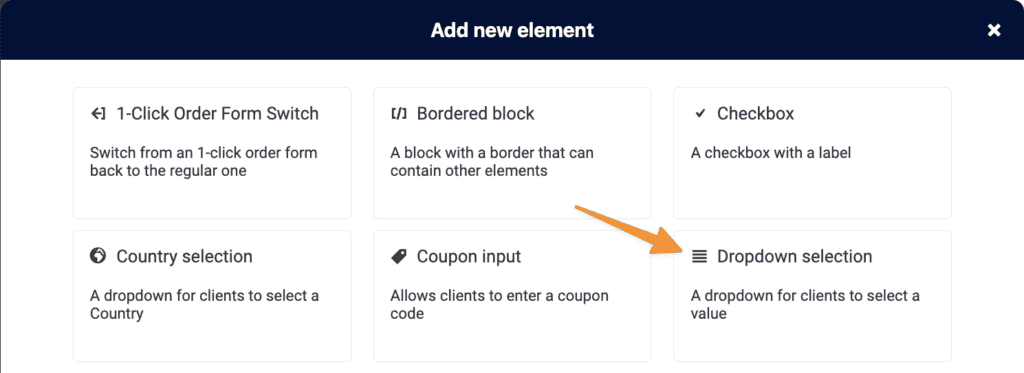
Choose between the available options as shown in the image below.
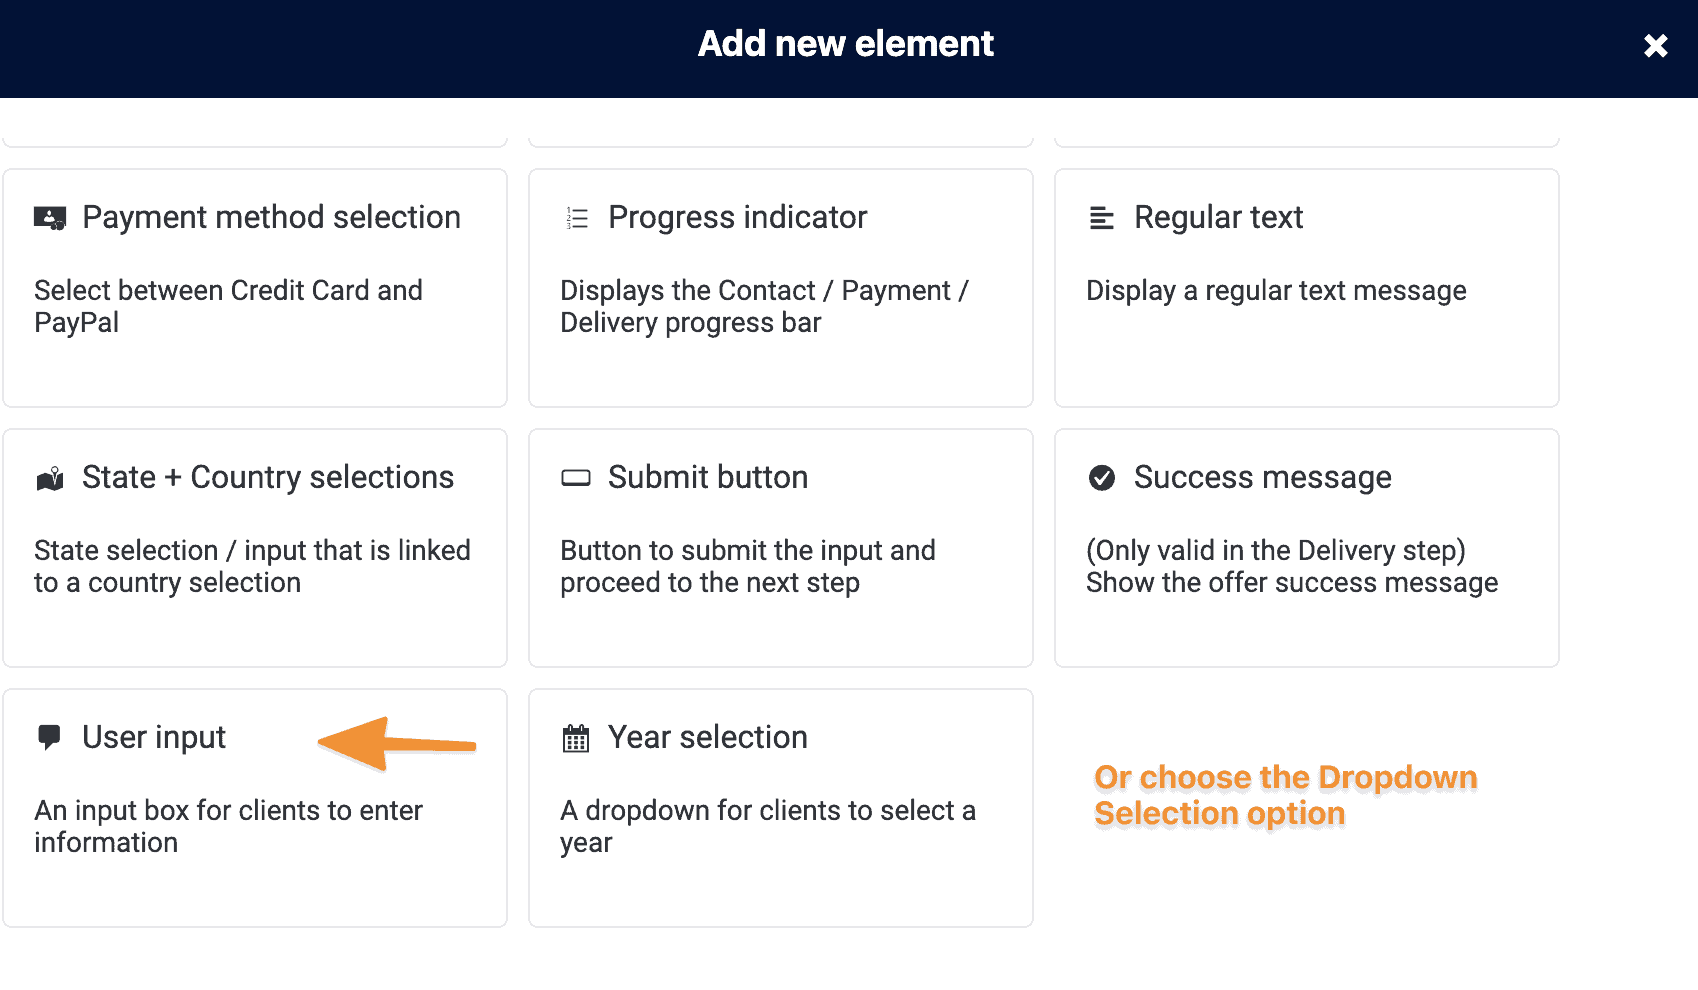
The Dropdown Selection option allows customers to select a pre-provided option.
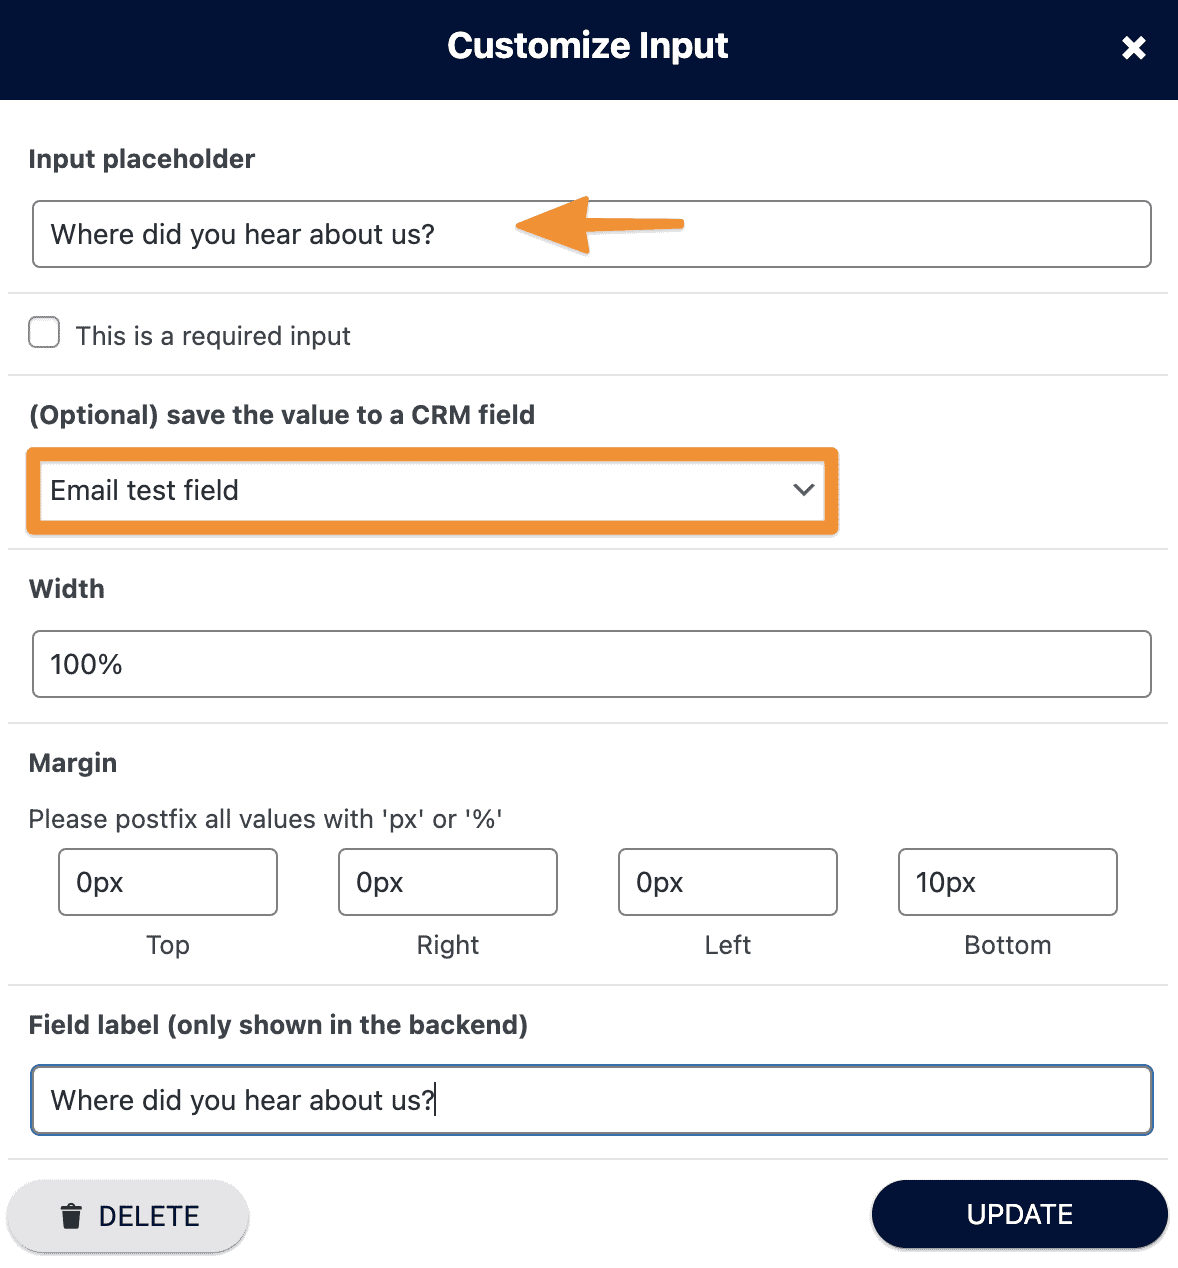
Then pick your CRM field and include the label you want for your field.
The data inside a custom field is saved to your CRM only when the order form is fully submitted. If using AccessAlly Managed Contacts this option is view only - see more here.
So if you add a custom field to the first step of an order form, and someone fills in their name and email and this custom field... but then abandons the cart: only the name and email and your abandoned cart tags will be saved in the CRM.
This is important to note, so if you want to collect client information they do need to complete the full order form for this field to be saved back into your CRM.
