In the past we have recommended several different WordPress themes and page builders. But, one thing was clear… none of these themes knows AccessAlly like we do. We tasked Naomi from our Customer Support team to build our most popular requests and wishes into our recommended WordPress theme…
ARTICLE CONTENT:
The AccessAlly Theme
1. Installing the AccessAlly Theme
Click here to download the AccessAlly Theme ZIP file.
You will also want to download the AccessAlly Child Theme ZIP file.
Go to Appearance > Themes > click Add New
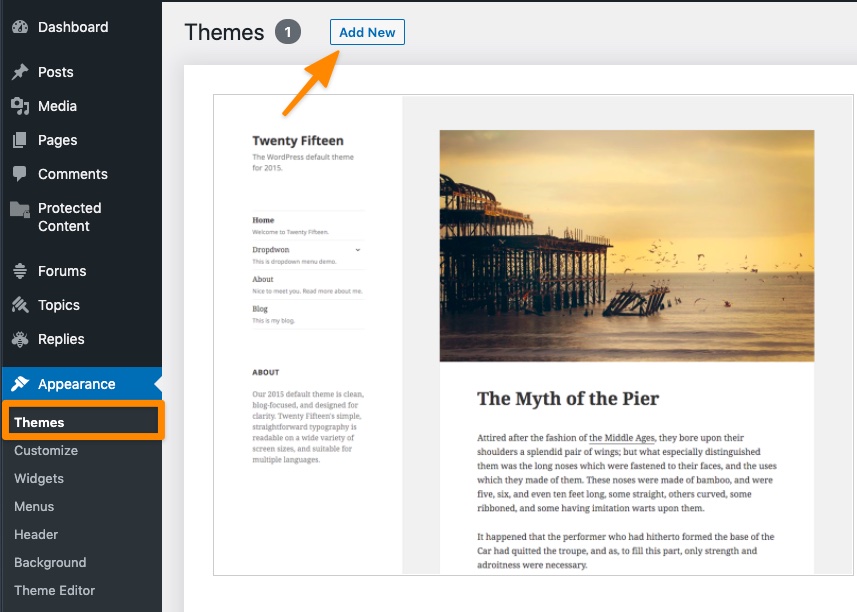
When prompted choose the AccessAlly Theme ZIP file from your computer.
Then go back to the Themes page, and choose “Add New” again, and this time upload the AccessAlly Child Theme ZIP file from your computer and click Install Now and Activate.
Why do you need both the AccessAlly Theme and the AccessAlly Child Theme? Because the AccessAlly theme may be updated from time to time, and when you update a theme it wipes out your settings (like colors, fonts, etc.) and reverts back to the defaults.
So what you’re doing here is installing the AccessAlly theme, but enabling and customizing the AccessAlly Child Theme. That way, when there’s an update to the AccessAlly Theme, your child theme will retain all of your settings.
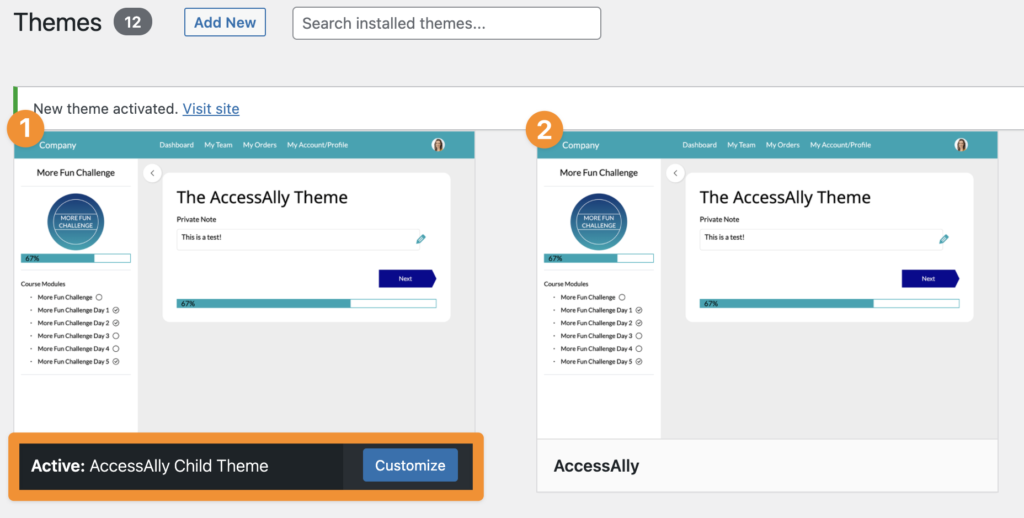
This is what your Theme settings page should look like: the child theme enabled, with the AccessAlly theme installed but not enabled.
Now you can customize the child theme!
2. Customizer Settings
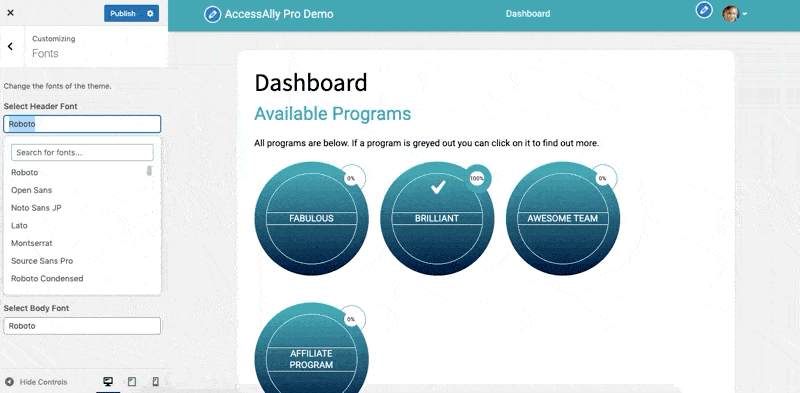
In the left WordPress sidebar, go to Appearance > Customize.
In the boxes provided add your Site Title and Custom Footer wording.

Choose your fonts.
There are two options for colors. You can use AccessAlly colors (matches the colors you set under AccessAlly > Settings > Styling or choose your own.

You can change the width of your pages, choose if you’d like to display titles, and center titles.

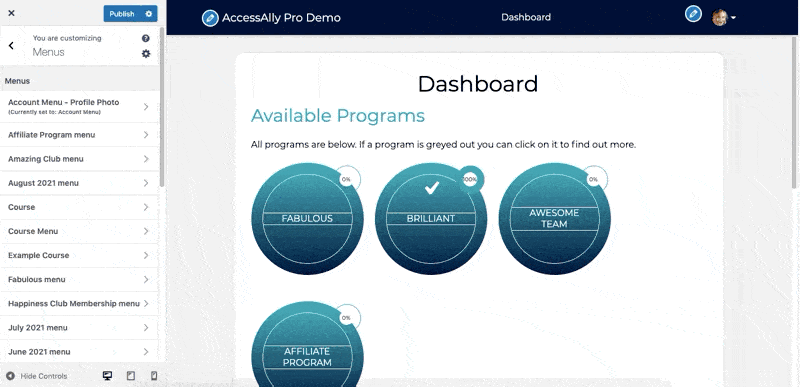
There are two default menus in the AccessAlly theme. The primary menu (center top) and the account menu (by the profile photo.) We’ll cover menus in more detail in step 3.
After you set your menu areas, you can scroll to the bottom, and collapse your submenu pages. This can be helpful if you have a large number of pages in a menu.
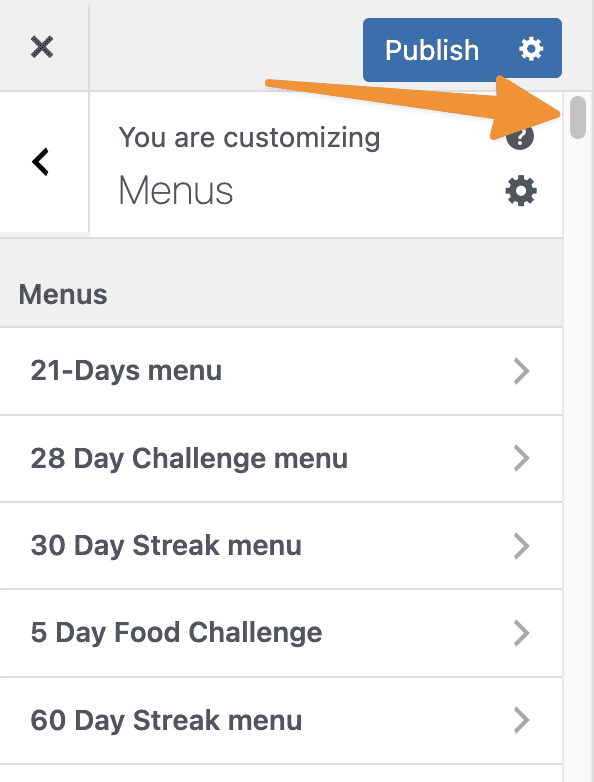
Select menu display options.
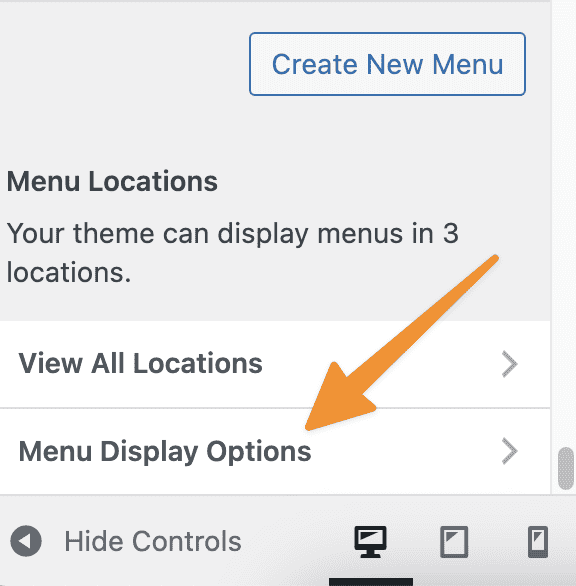
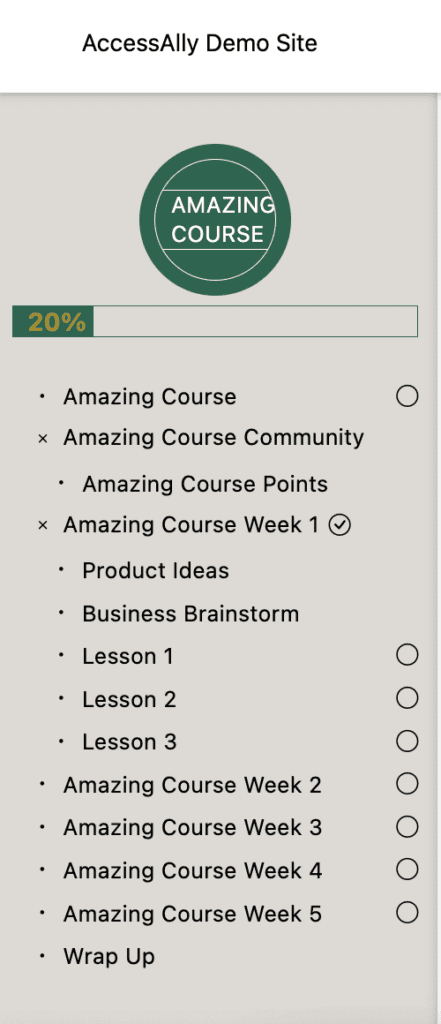
Mark the option to collapse child sidebar pages.
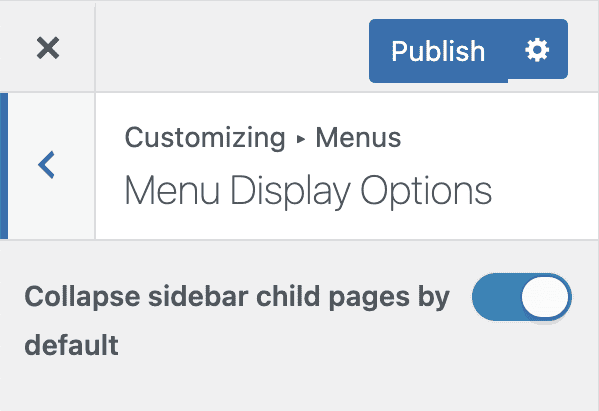
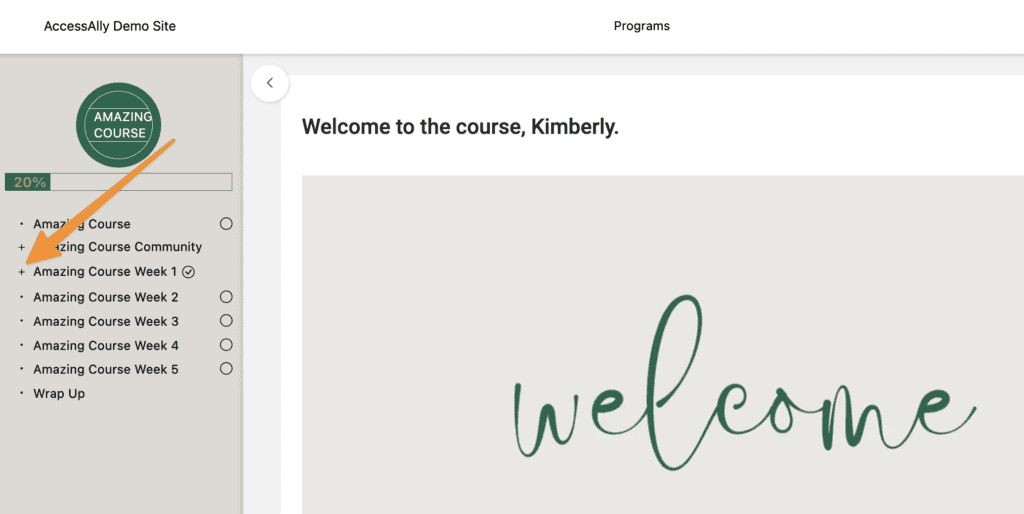
The result with child sidebar pages collapsed (click “+” to reveal submenu items.)
The result without collapsing child sidebar pages (all menu items are shown.)
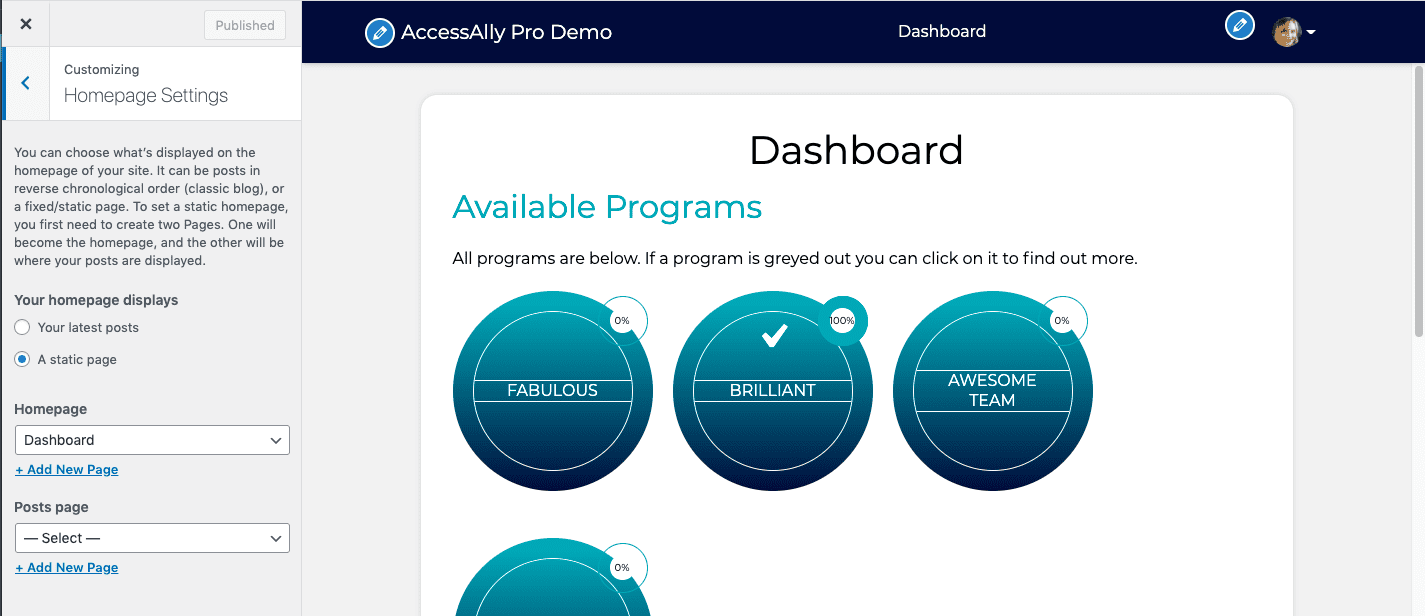
The Homepage Settings are set to the recommended settings to use with AccessAlly shown in the photo below.
If you’d like to make custom changes to the AccessAlly theme via CSS you can make your changes here.

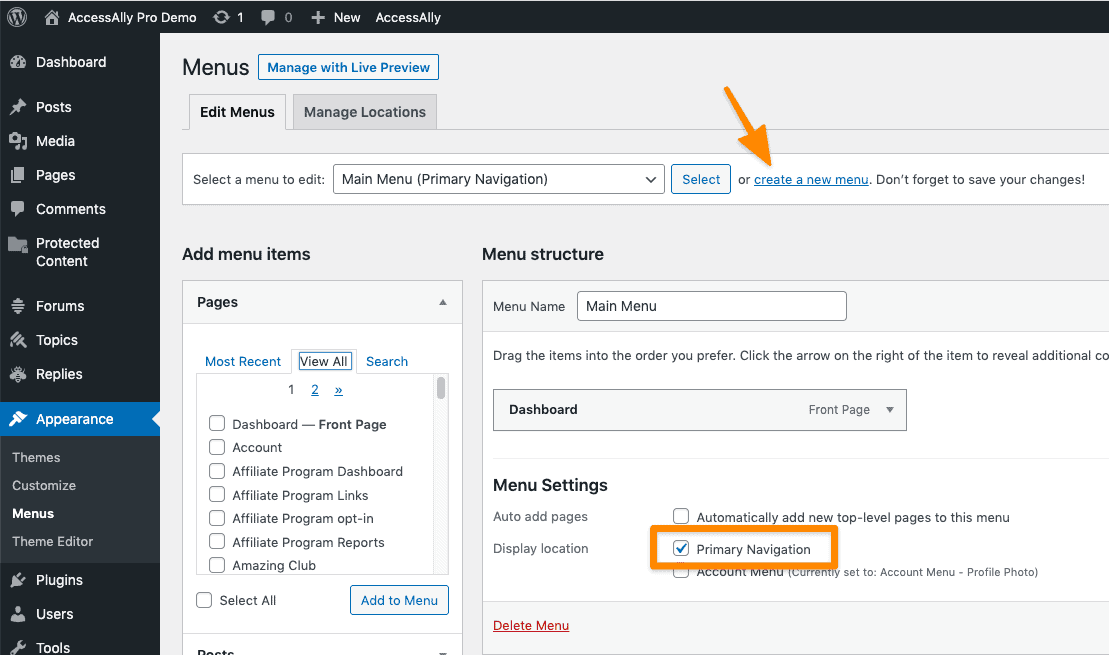
3. Menu Locations
There are three menu locations in the AccessAlly Theme and an option to set . You can find these under Appearance > Menus > Menu Settings. We’ll explore each below.
![]()
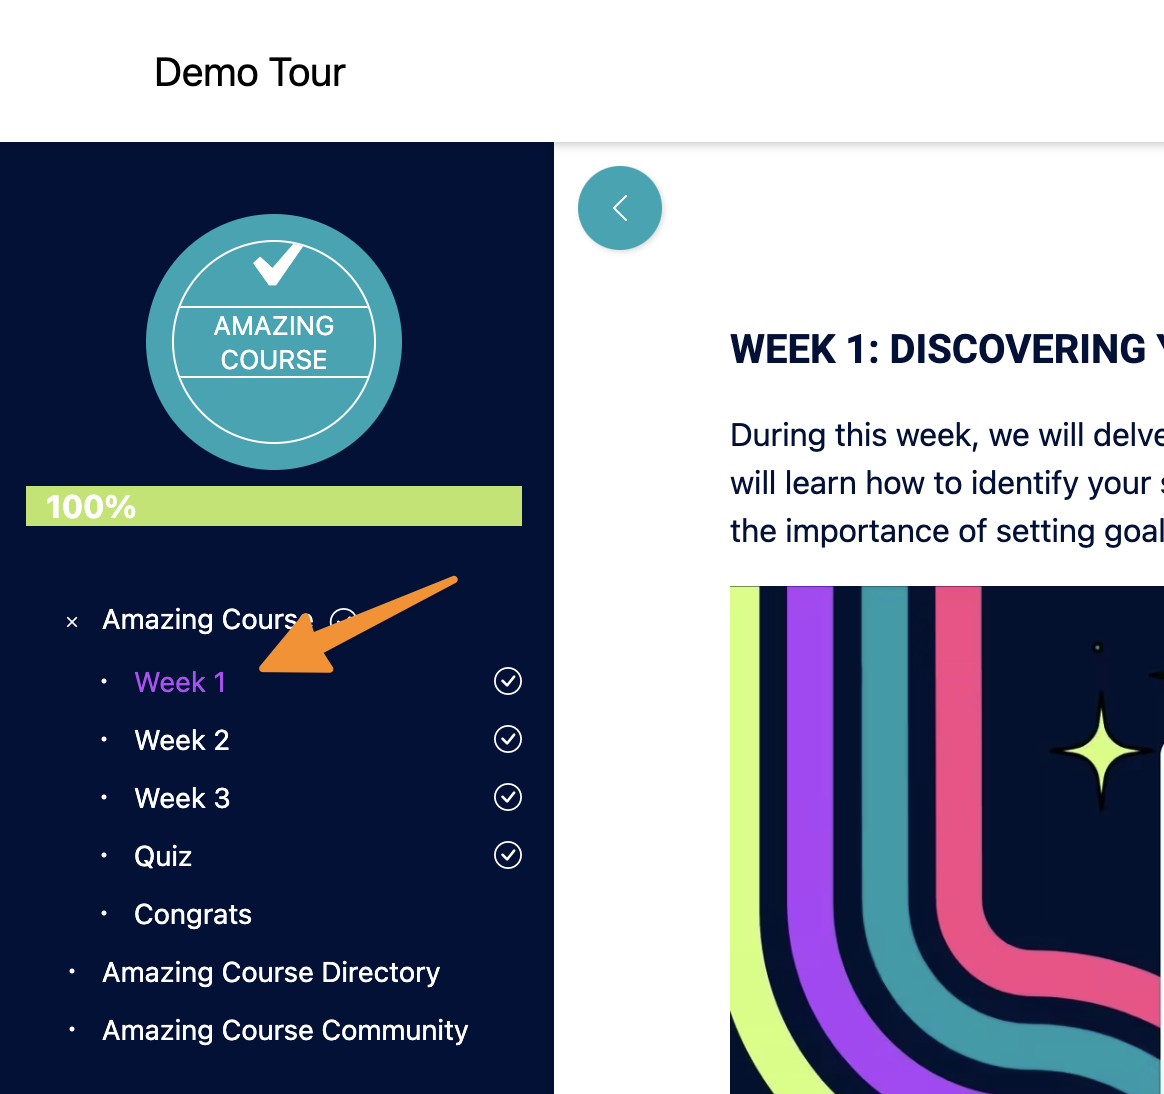
This menu is at the center top location in the theme. You can add any pages that you would like to this menu. We recommend keeping this menu to a single level (no submenu pages.)
Go to Appearance > Menus and create a new menu and mark the Primary Navigation location to be used with this menu.
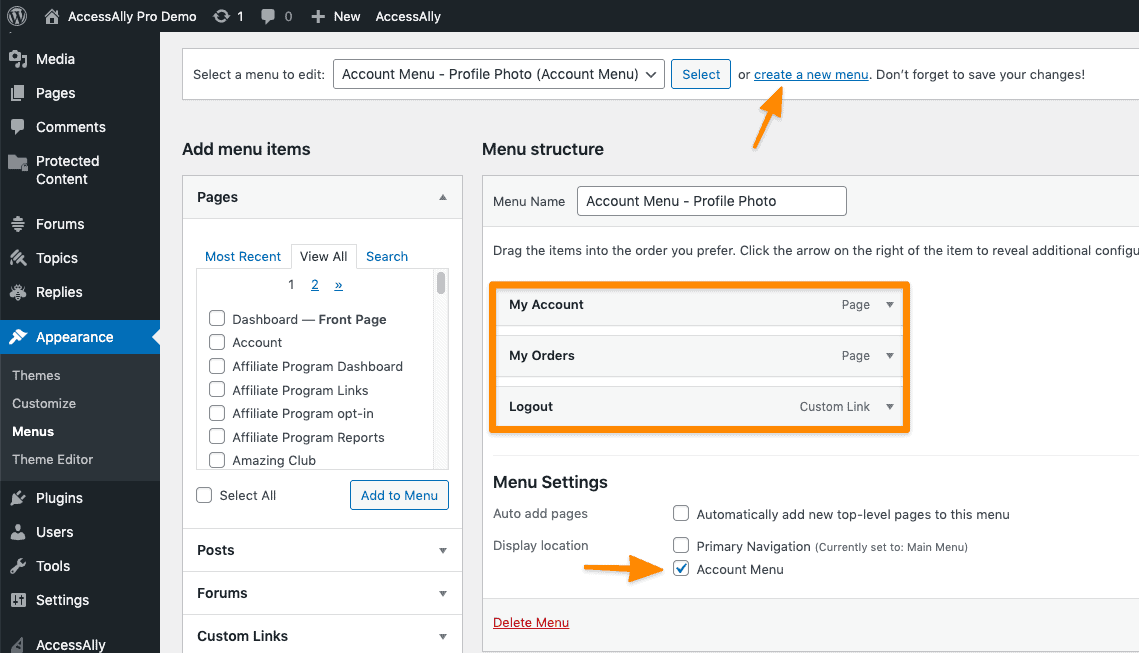
![]()
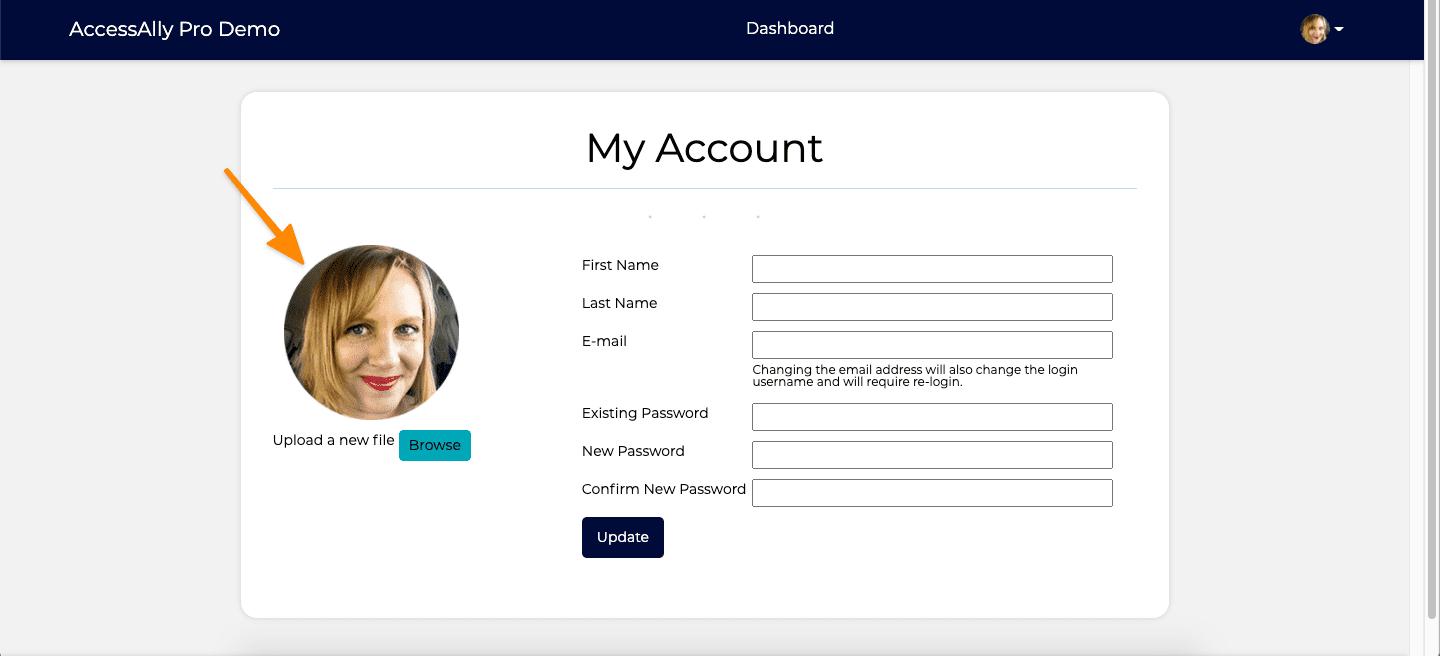
This menu is at the top right location in the theme. You can add any pages you would like to this menu – we recommend adding My Account/Profile, My Orders, and a Logout link to the menu. This menu should not have any submenu pages.
Go to Appearance > Menus and create a new menu and mark the Account Menu location to be used with this menu.
Go to your My Account/Profile page. Copy and paste the shortcode below and add it to this page if you would like members to add their profile image.
[accessally_profile_image readonly="no" label_text="Upload a new file" button_text="Browse" height="175px" width="175px" ]
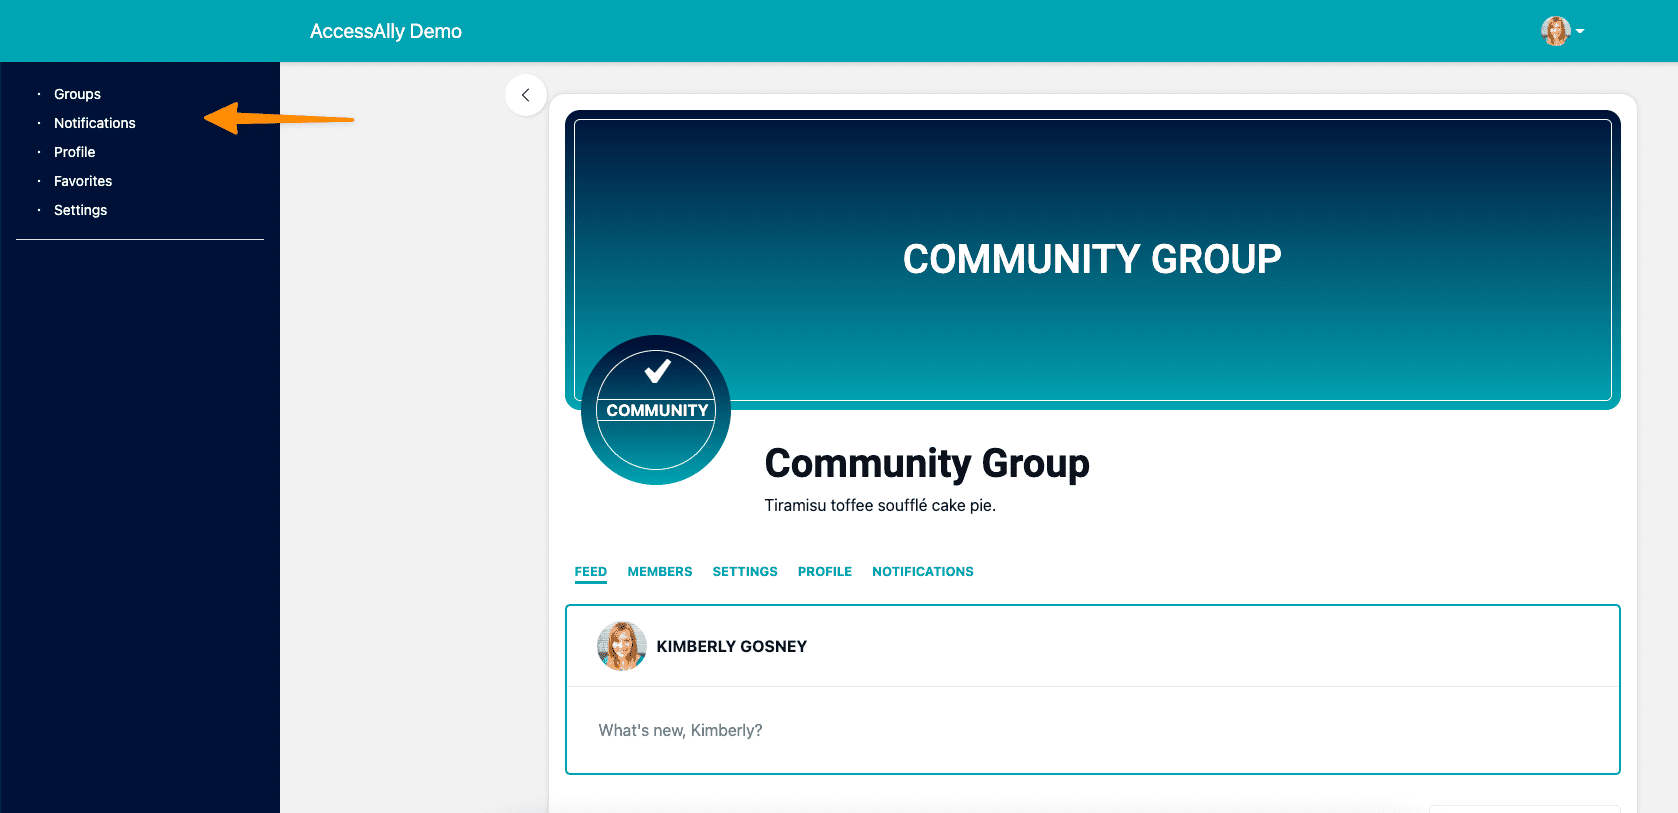
Visit the Dashboard page of your site and click the caret icon by the profile photo. This will open up your newly created Account menu.
![]()
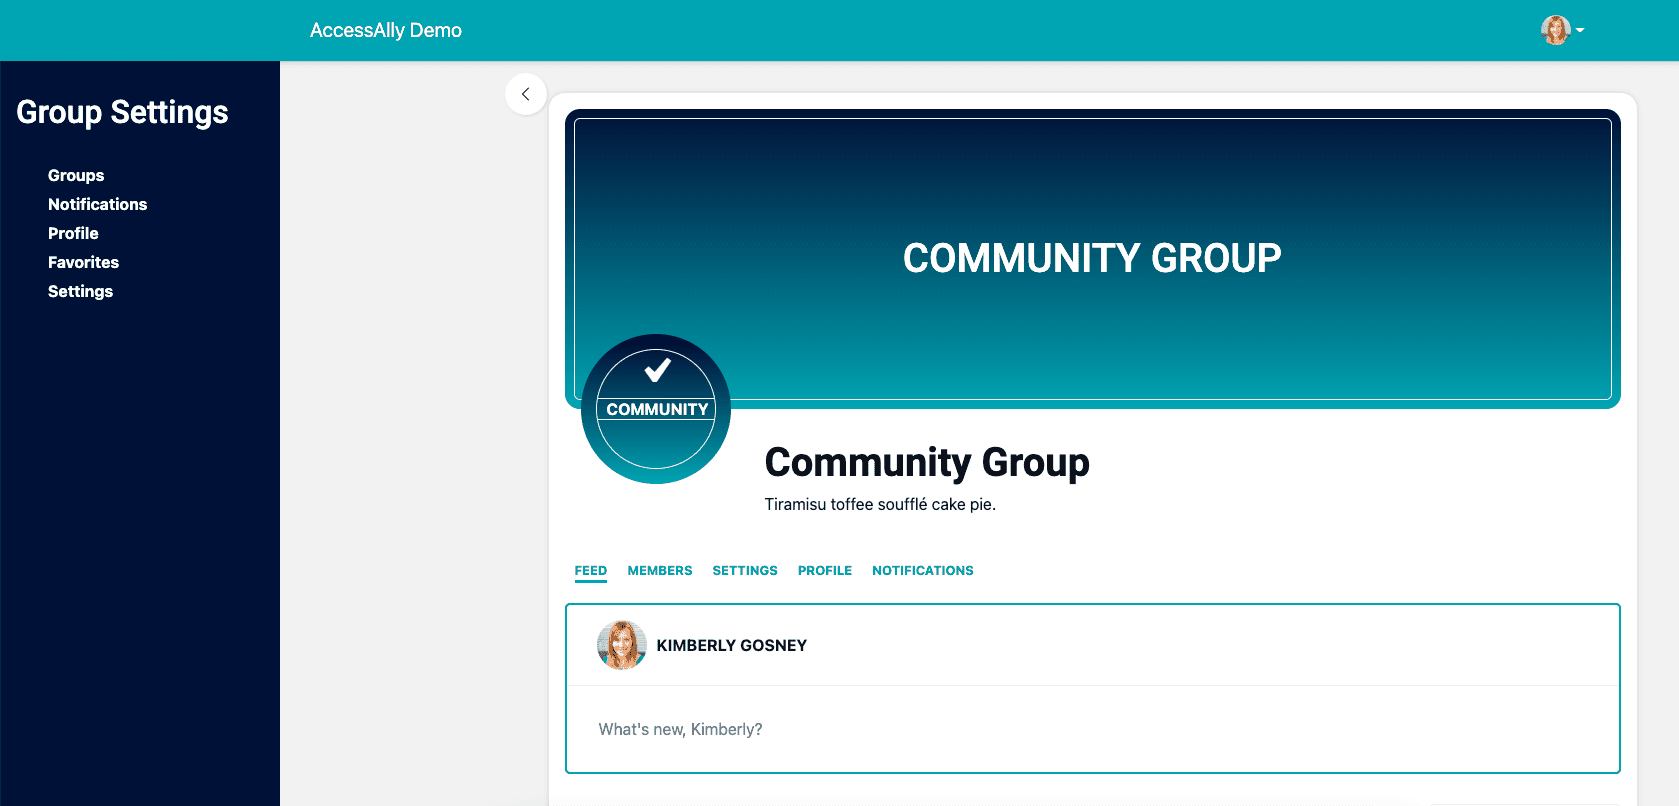
This menu location allows you to create a sidebar design that displays the same sidebar content on multiple pages of your site.
Here’s an example of the Static Sidebar Menu being used to display Group Settings for a site using CommunityAlly. This allows members to easily see these options.
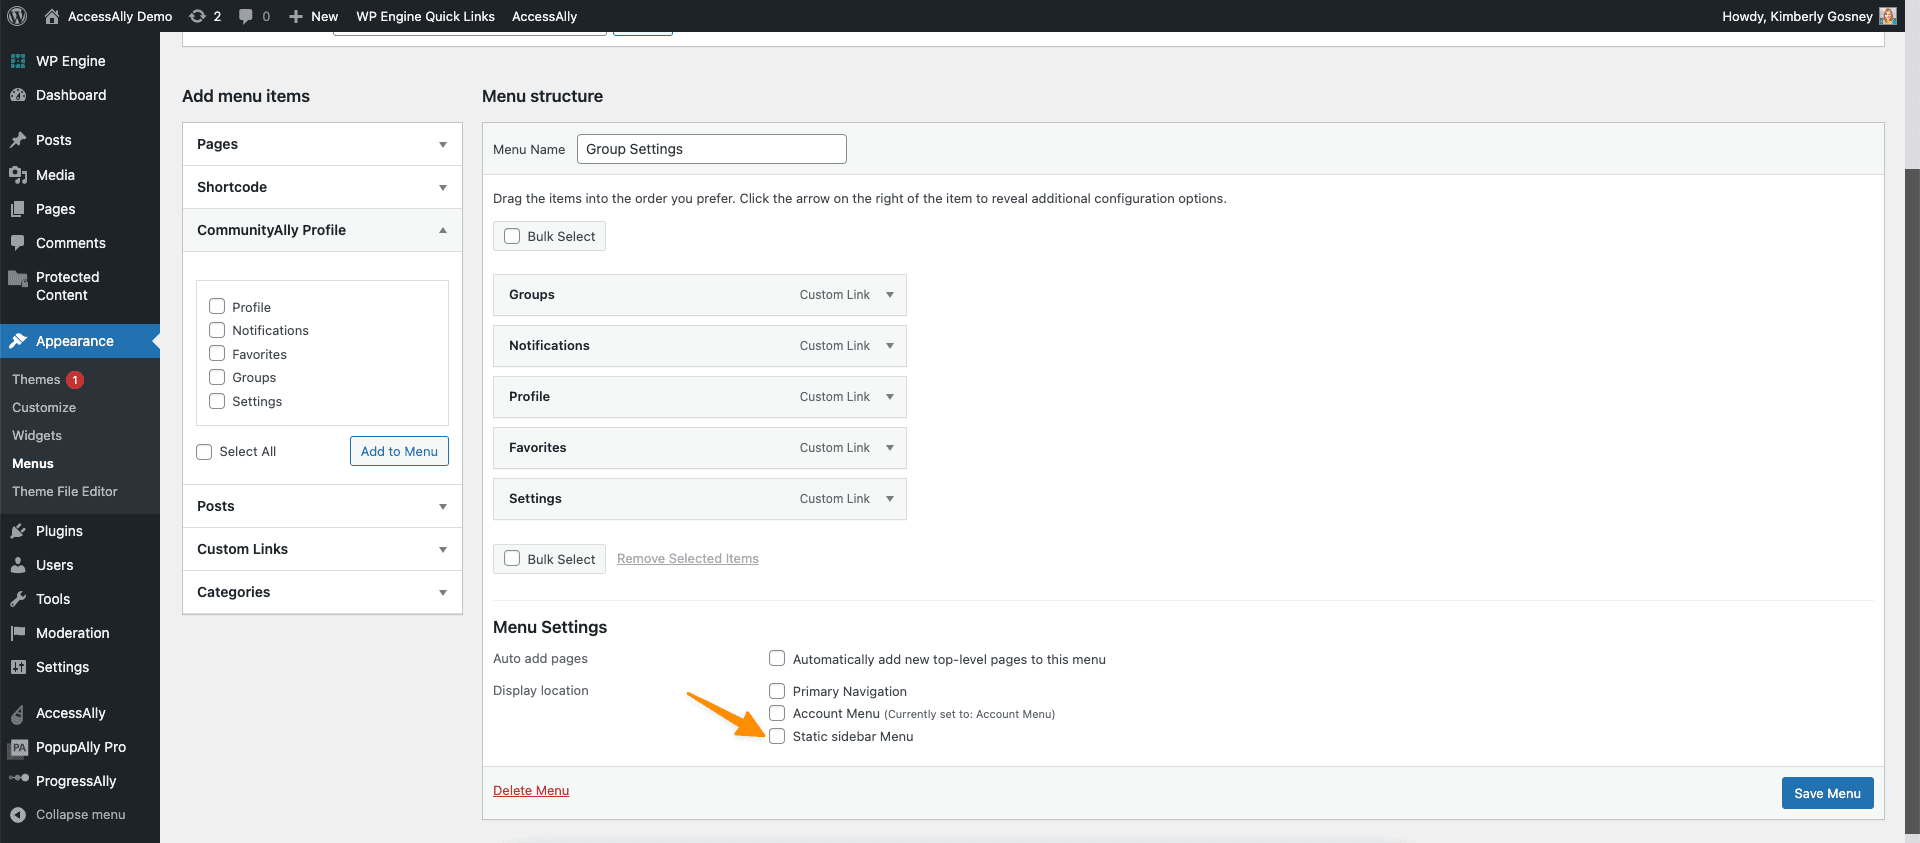
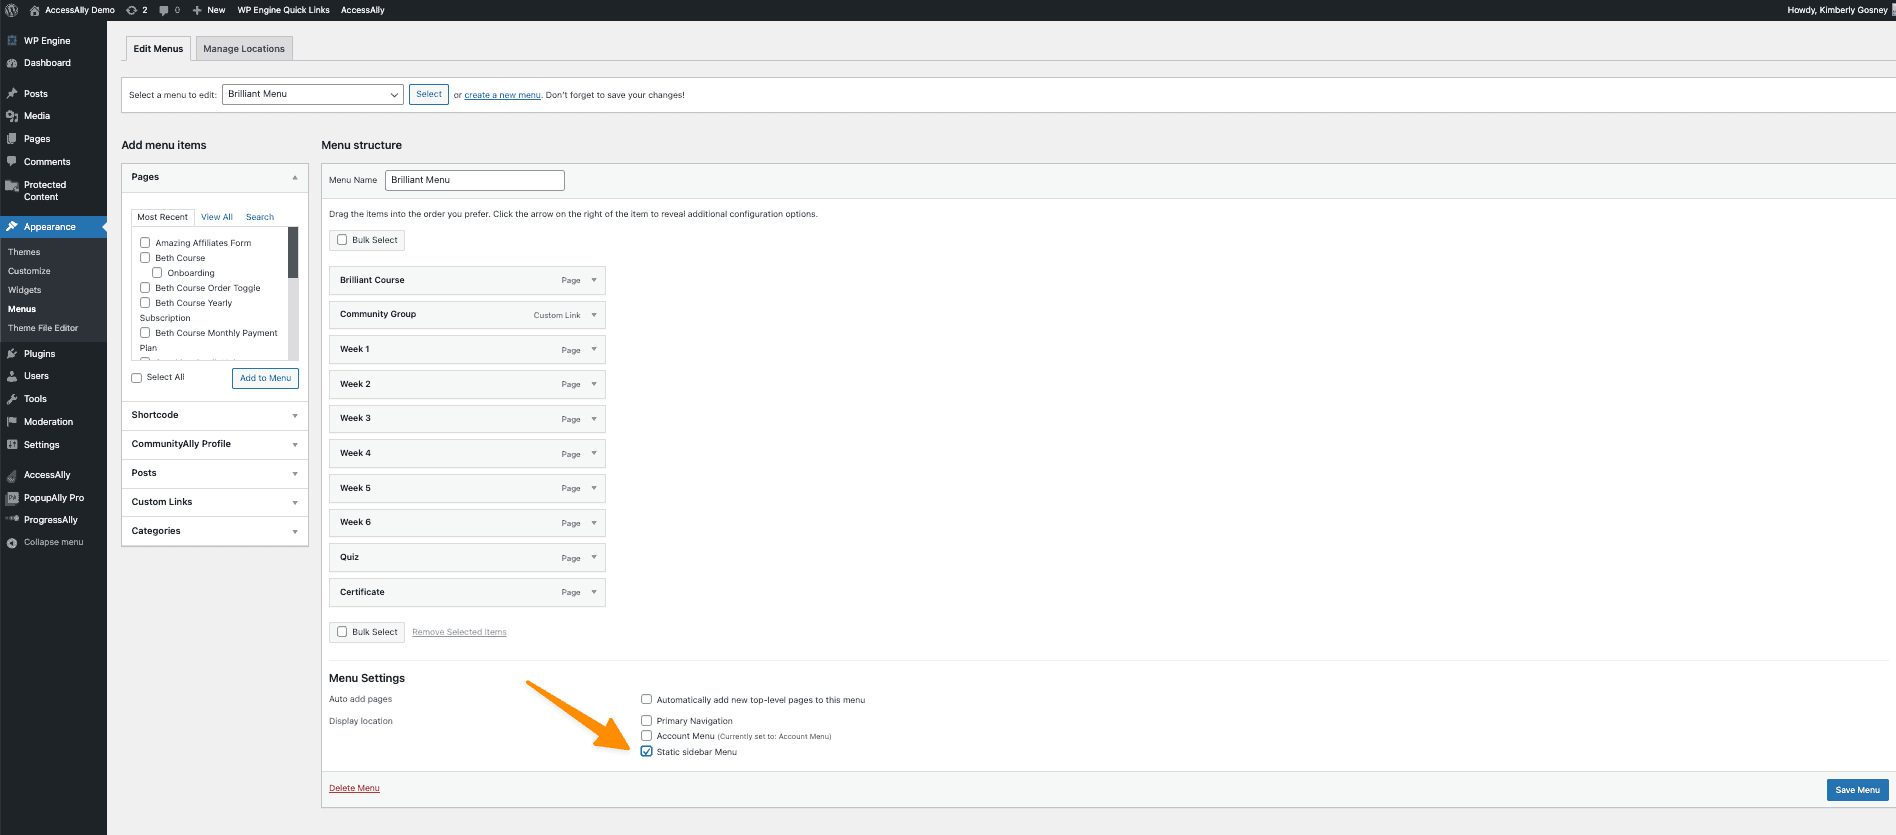
If you go to Appearance Menus you’ll be able to create a static sidebar menu using the image below.
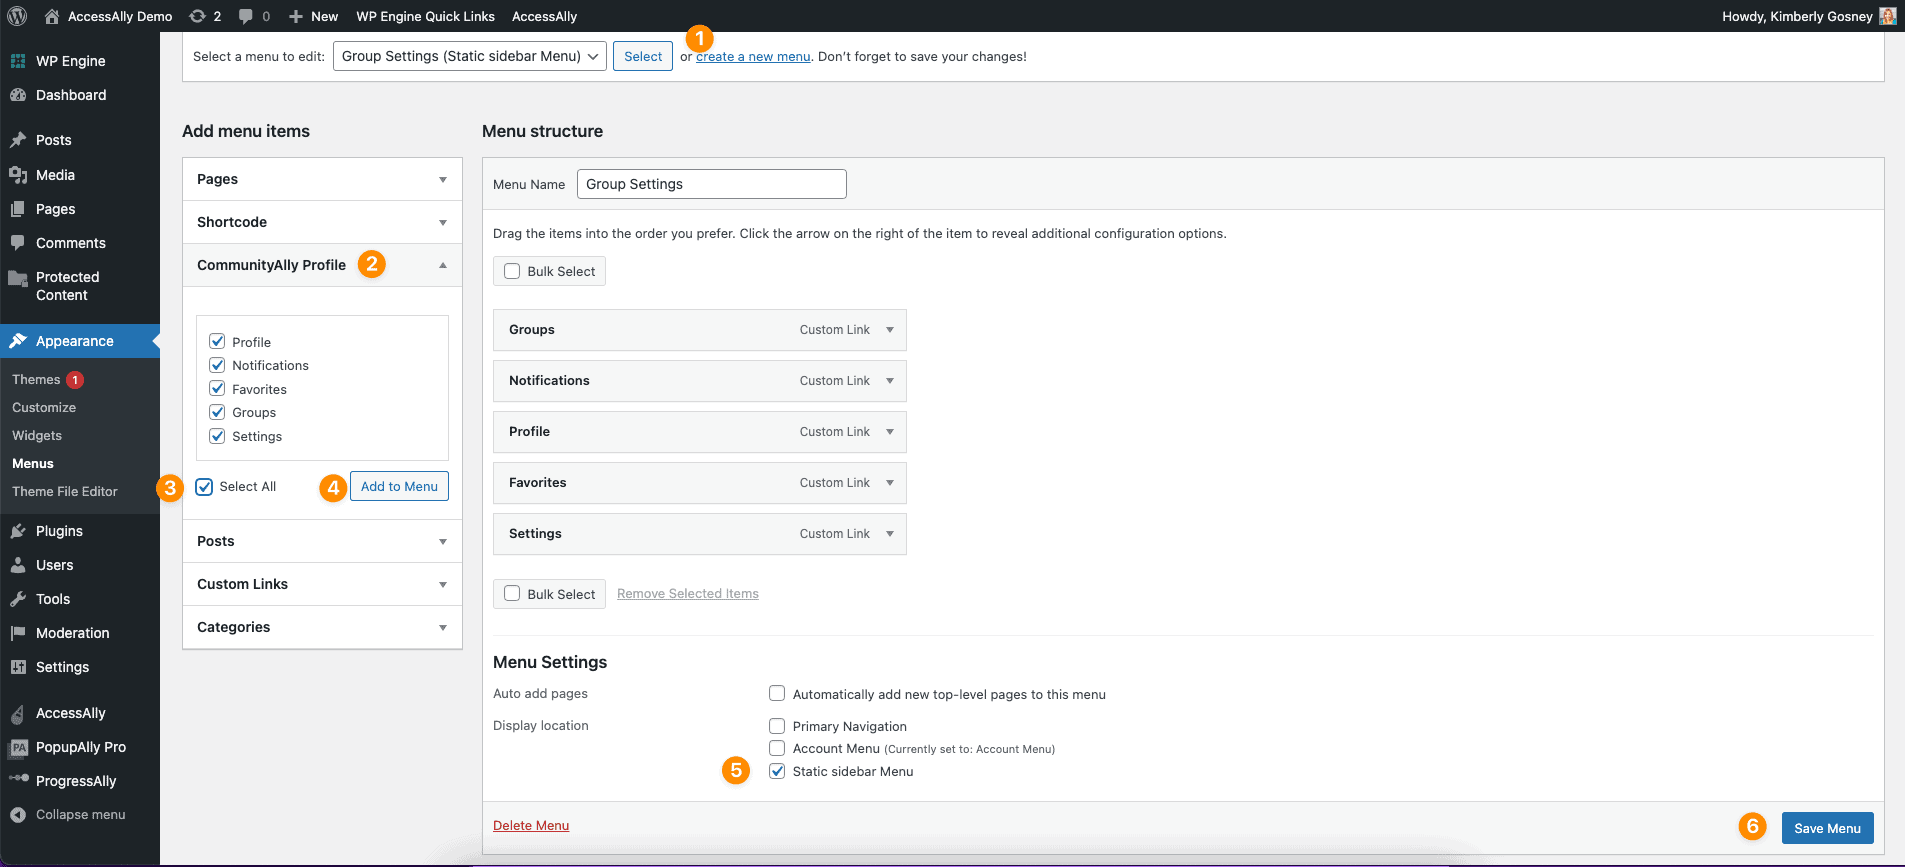
- Create a new menu
- Choose your menu items (example CommunityAlly Profile)
- Select desired pages
- Click the Add to Menu button
- Check the Static sidebar menu button
- Save Menu
4. Using AccessAlly Theme Templates
There are three templates included with the AccessAlly Theme.
- Default Template
- Page Without Sidebar
- Page With Static Sidebar
You can open any page of your AccessAlly site and use the Template section in WordPress to assign your desired template. Click the dropdown and you’ll see all three styles.

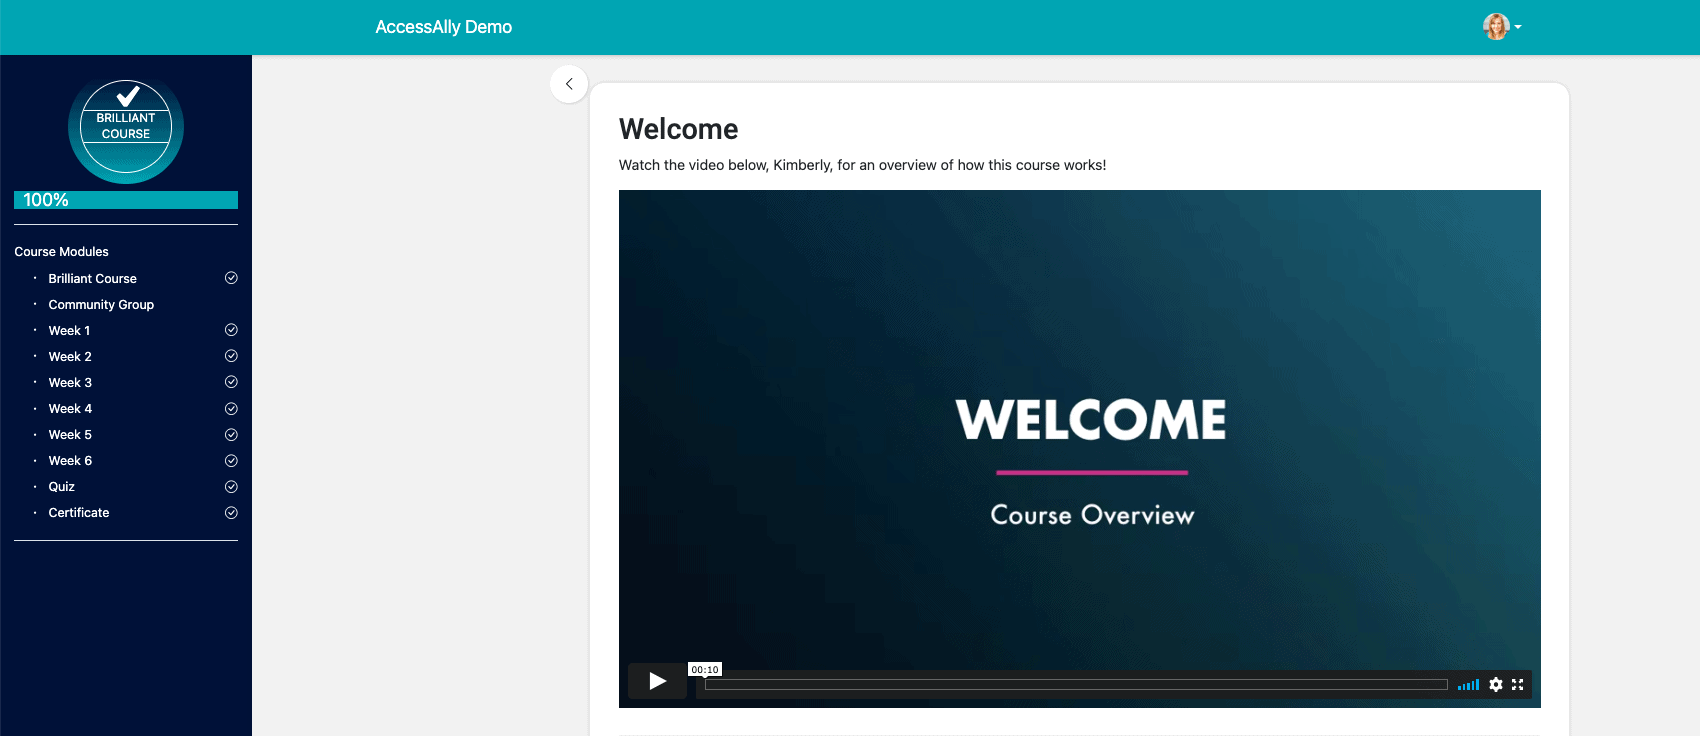
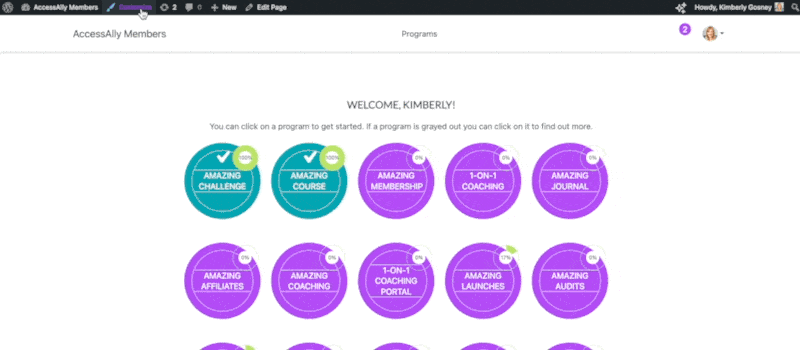
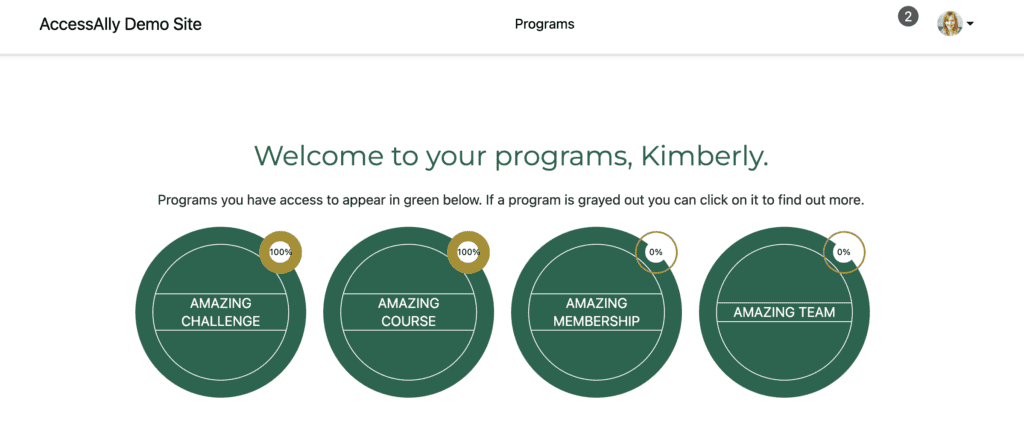
This is the template style that is automatically used on your site. This design shows key pages of your site without a sidebar while showing pages in your AccessAlly Offerings along with progress if you’re using AccessAlly Pro.
Example of a key page using the default template.
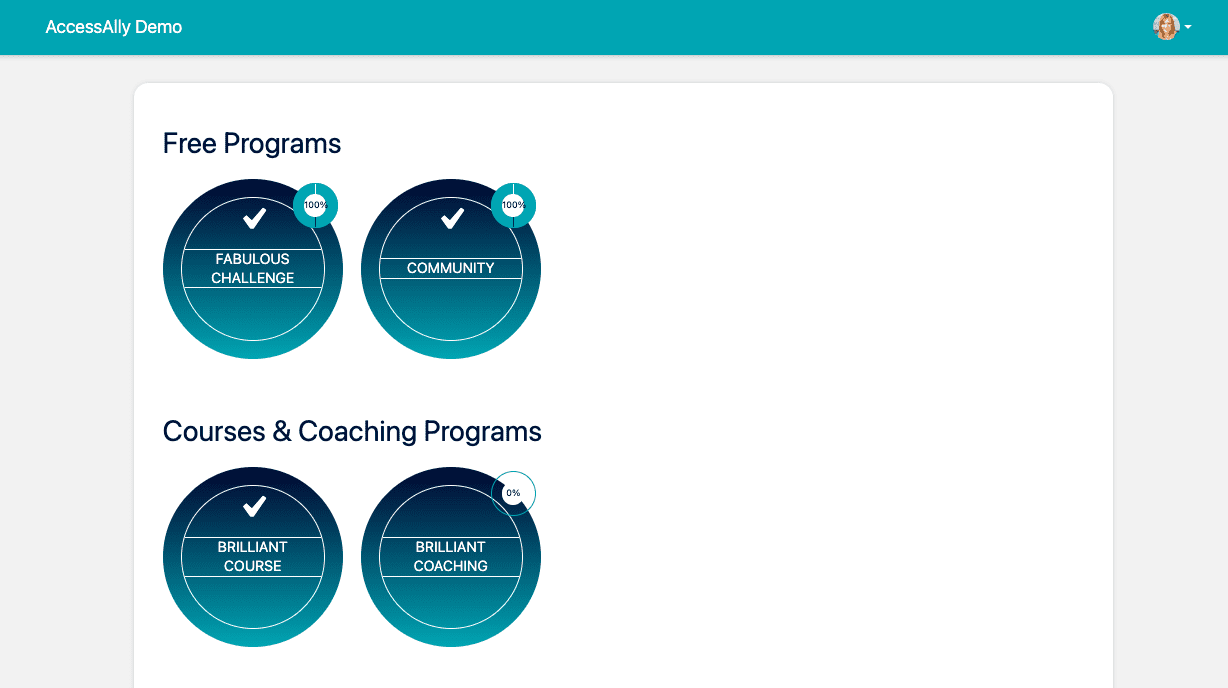
Example of an offering using the default template. This sidebar is automatically created with the icon and pages in your offering.
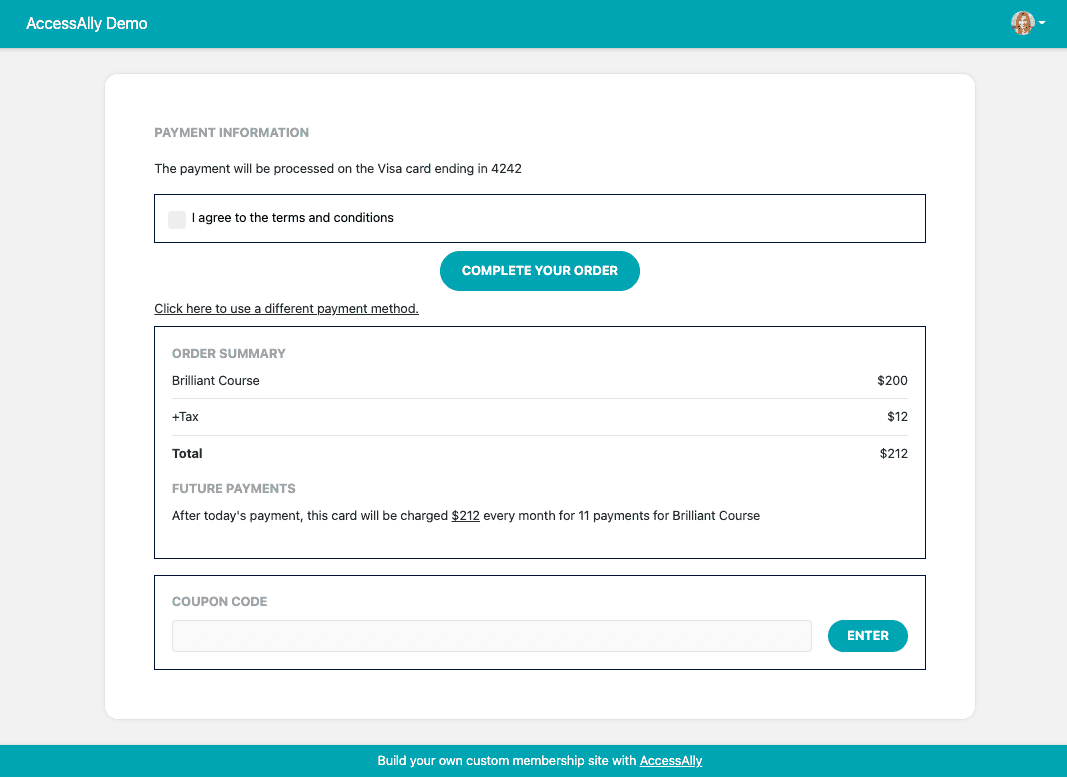
When you assign this template to pages on your site only the page content will display and there is no sidebar. This design template style is perfect for order forms, opt-in pages, and sales pages.
This template style will display the same items on all pages this template is assigned to. It is very different from the default template which creates a different sidebar for each offering.
Static Sidebar Template with a WordPress Menu
Here’s an example of the static sidebar template used with a WordPress menu.
For this style menu to appear you must have the WordPress menu settings checked for Static Sidebar Menu under Appearance > Menus.
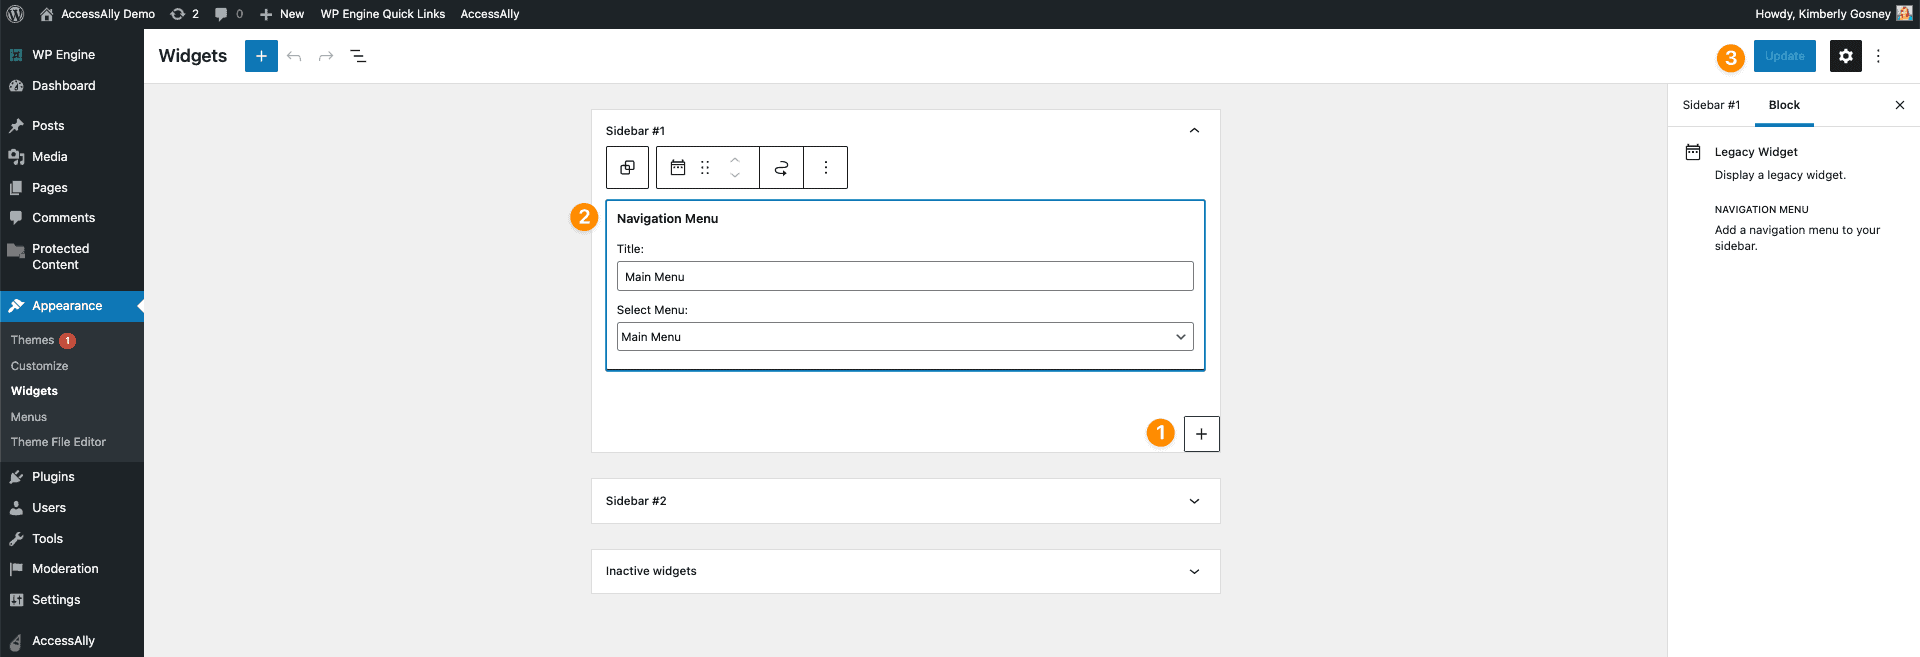
Static Sidebar Template with WordPress Widgets
Here’s an example of the static sidebar template used with WordPress widgets.
For this style menu to appear you must have the WordPress menu settings unchecked for Static Sidebar Menu under Appearance > Menus.
You will then be able to use WordPress widgets to create a custom sidebar.
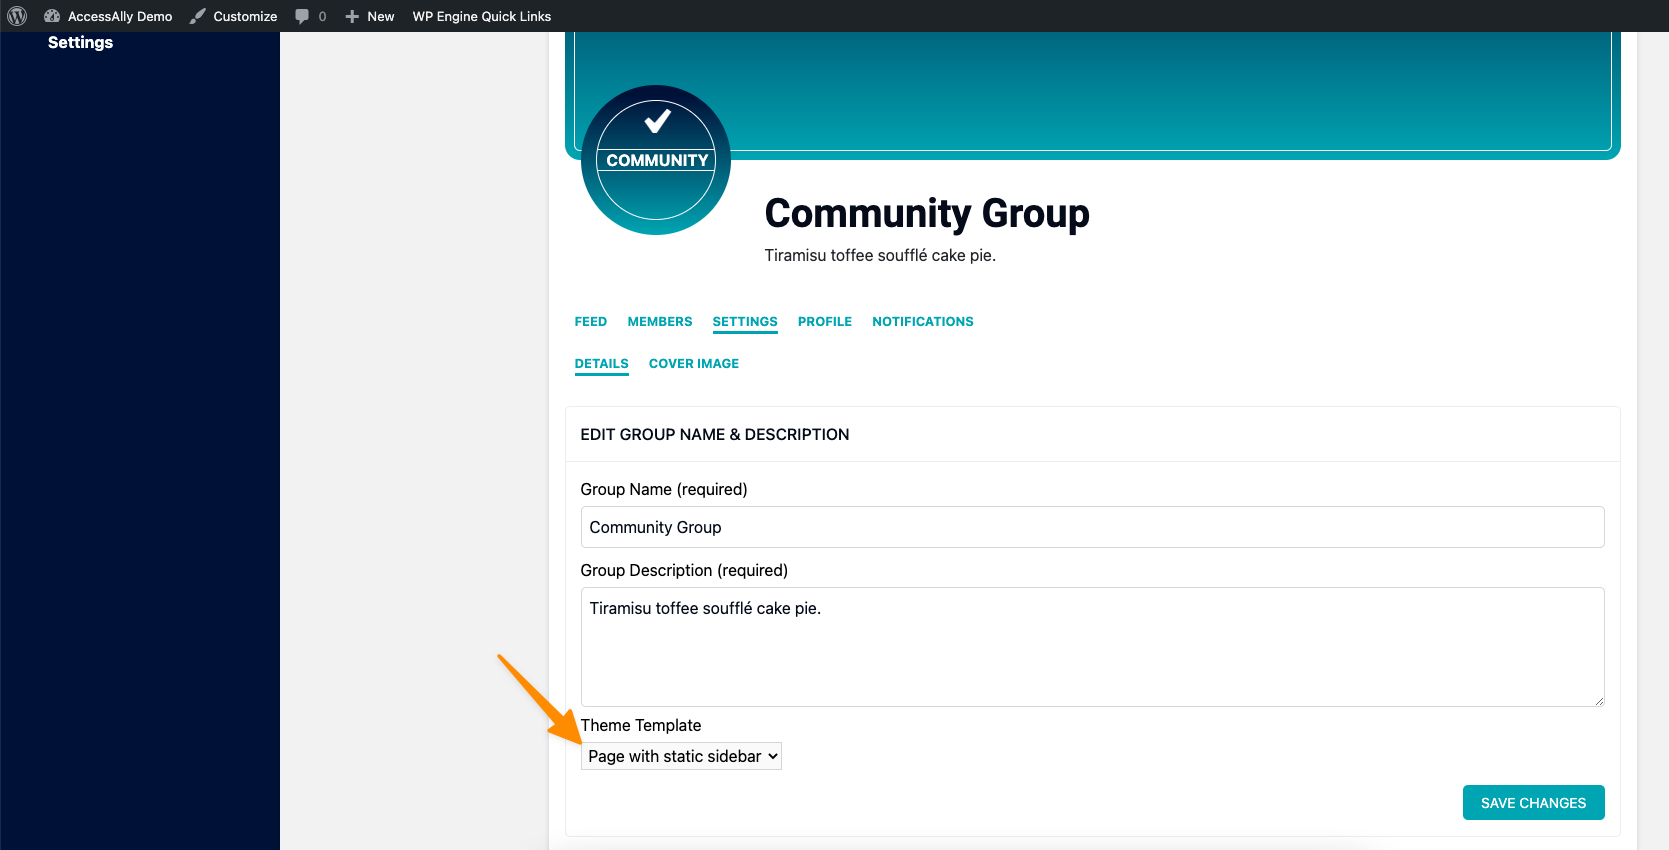
5. Using Templates with CommunityAlly Groups
If you would like to use the AccessAlly Theme templates for your CommunityAlly Groups visit the group(s) and click the Settings tab.

In the Theme Templates Section click the dropdown to select your desired template. We recommend trying the default template to start as the AccessAlly offering menu and progress will appear.
6. Customizing the AccessAlly Theme with CSS
If you are familiar with CSS here are some options you can try with the AccessAlly Theme. You can add CSS by clicking Customize > Additional CSS
Add the following CSS code in Customize > Additional CSS. You can change the 500px to any size (like 300px.) for example.
#sidebar {
max-width: 500px;
}
#sidebar.active {
margin-left: -500px;
}
.sidebar-inner {
width: 500px;
}
The image below shows an example of using CSS to change the active menu page color in the sidebar.
Add the following CSS code to highlight the active sidebar menu page.
#sidebar a[aria-current], .sidebar-primary a[aria-current] {
color: var(--theme-primary);
}
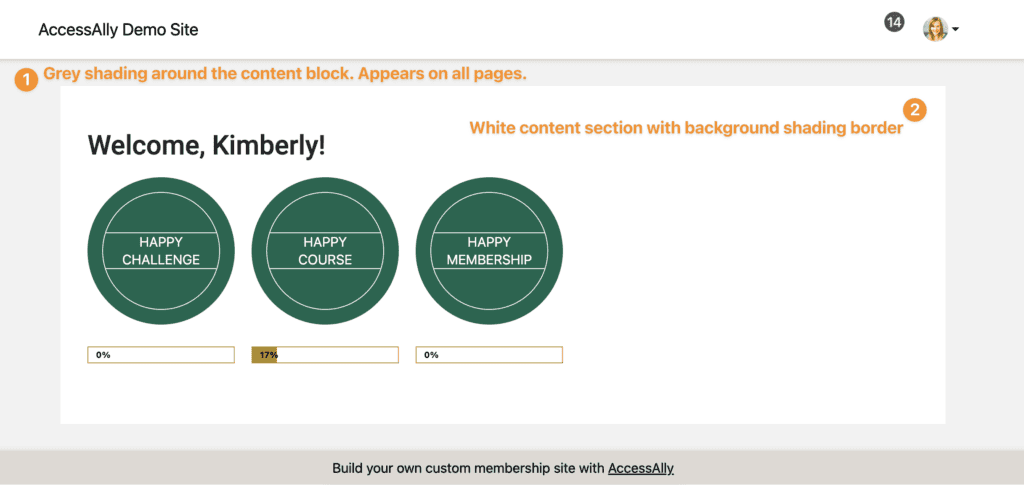
Default look with grey background and white content section with background shading border.
Look when CSS is used to make the background white.
CSS code used for white background.
.container, .container-fluid, .container-lg, .container-md, .container-sm, .container-xl, .container-xxl {

background-color: white;

}
CSS code used to remove border shadow around content.
main article {

box-shadow: none;

}
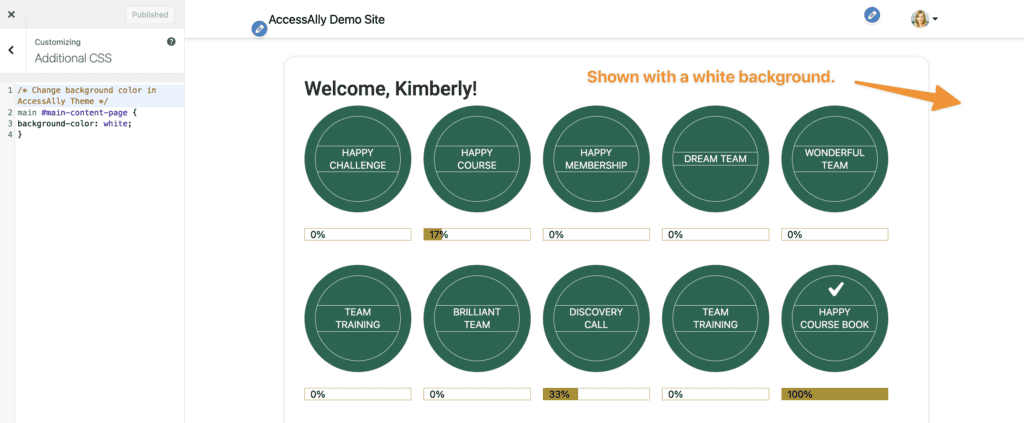
By default there is a gray background color on all pages in the AccessAlly Theme.
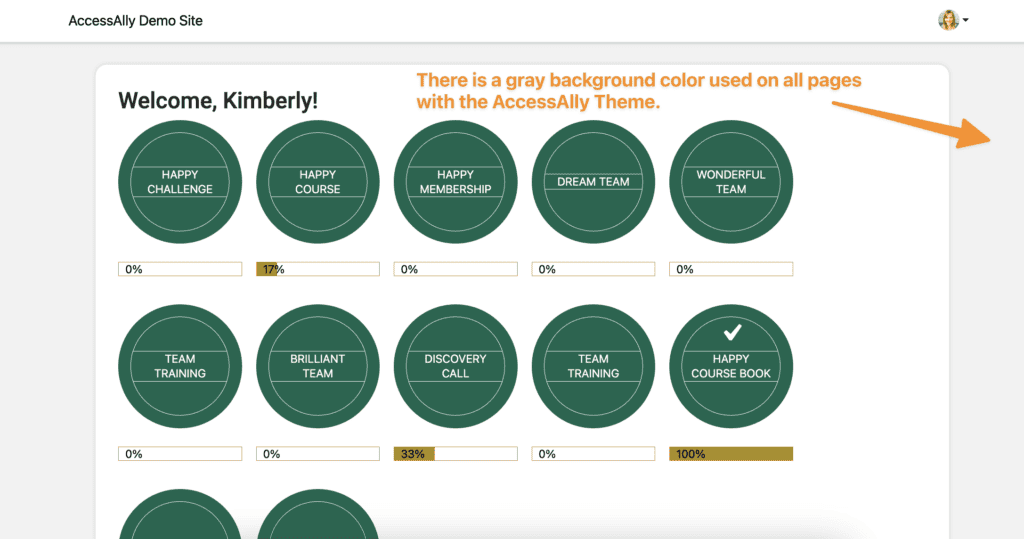
You can switch this to white (or any color you’d like) by adding the CSS code shown below.
main #main-content-page {

background-color: white;

}
7. Adding Offering Content & Page Design
When you’re ready to add content to your site, visit this guide on using the AccessAlly Theme with Gutenberg.
Need Help with the AccessAlly Theme?
If you have questions about using the AccessAlly Theme Contact Support.
FAQs
We do not recommend using the AccessAlly Theme on your main website if you already have a theme installed like the Hello Theme, Divi, or Beaver Builder Theme. The AccessAlly Theme works best on a subdomain. See why we recommend subdomains here.
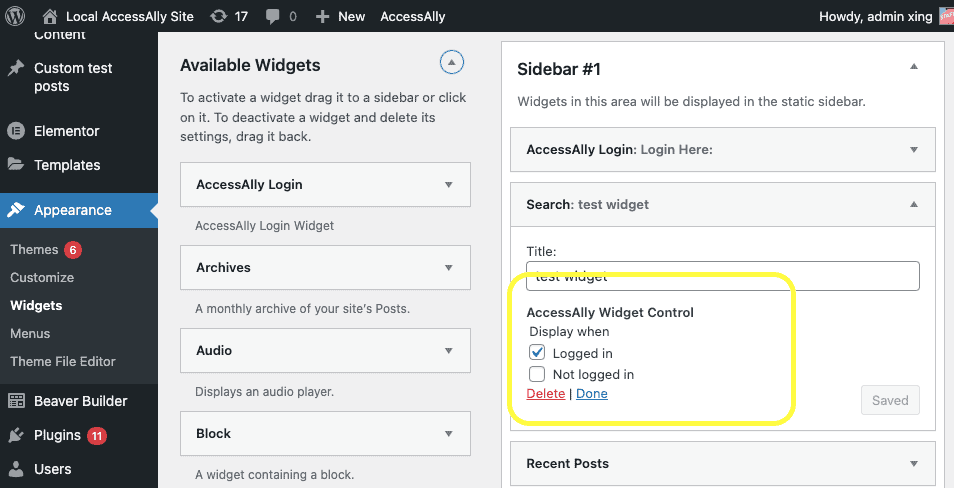
The AccessAlly Widget Control Tool is deprecated as of WP 6.2 (2023). It allows conditional display of classic widgets based on user login status. It only works with the classic widget editor on non-block themes with modifications. In case the Widget Control Tool is needed, add the following code to your WordPress Theme under Appearance > Theme File Editor > functions.php:
function accessally_base_theme_support() {

remove_theme_support( 'widgets-block-editor' );

}

add_action( 'after_setup_theme', 'accessally_base_theme_support' );
