Have you created a free offering, but now you’re wondering how your new participants get the content? In this article we’ll explore two ways.
- Using an AccessAlly opt-in form
- Using a CRM opt-in form (ActiveCampaign, Drip, Keap, Kit, or Ontraport)
Option 1: AccessAlly Opt- in Form
Using an AccessAlly opt-in form is the preferred way to give access to free offerings. This method will instantly tag and provide access to your offering at sign up.
Go to AccessAlly > Offerings > Choose Desired Offering > Forms Tab > Free Access Forms section.
If you have an existing free opt-in form in this section you can make tweaks or changes. You can also click “+ADD” to add a new Free Opt-in.
Save your offering to ensure a newly added free opt-in form is able to be edited.
Now you can make any tweaks or changes to the form using the drag and drop form editor. Click the brush icon by your opt-in form to make changes.
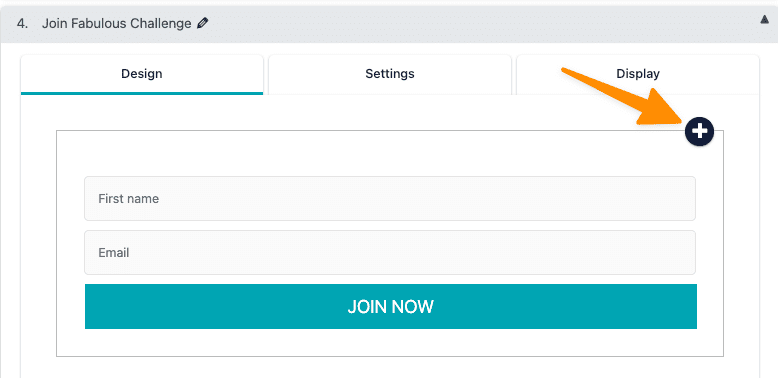
Design Tab
You can click the “+” button in the top right to add additional items to your form.
The example below shows a checkbox being added to the form. This option also allows the value to be saved to a custom field.
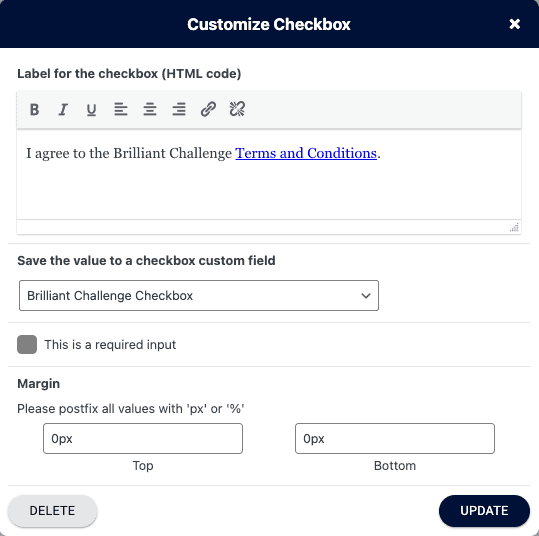
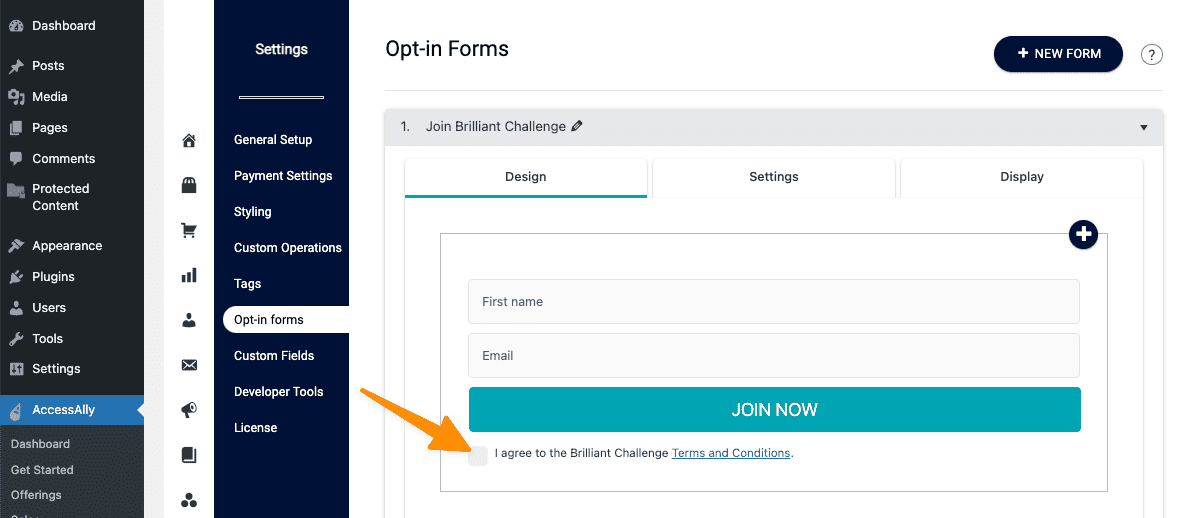
View of the checkbox as it will appear on the opt-in form.
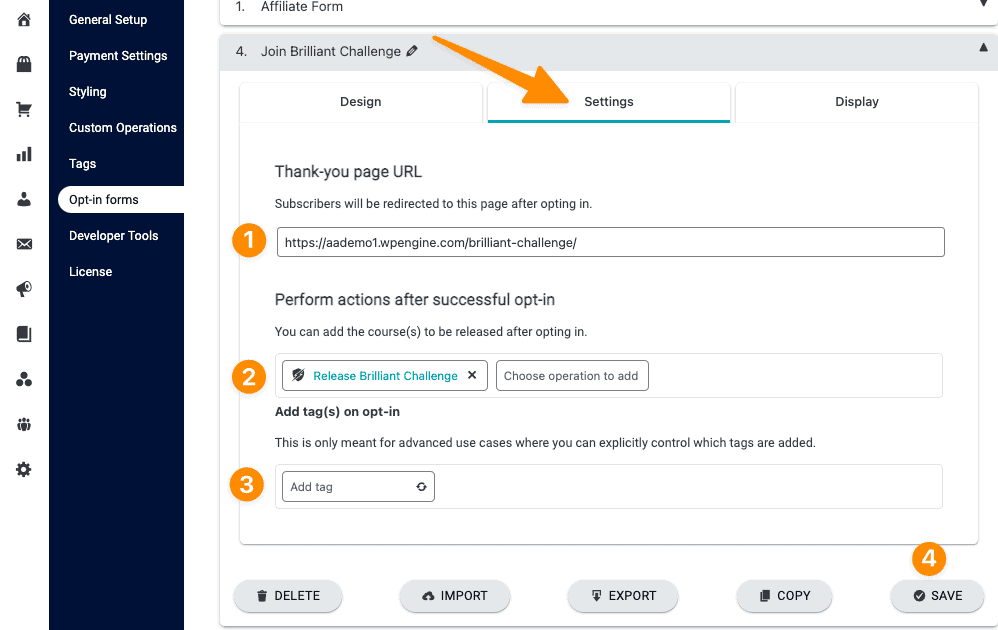
Settings Tab
Options here are designed to take a newly opted-in user where you want them to go.
- Thank-you page URL this is usually the first page of the offering they opted-in to receive.
- Perform actions after successful opt-in releases offering content
- Add tag(s) on opt-in is great for running CRM automations when someone signs up
- Save your changes
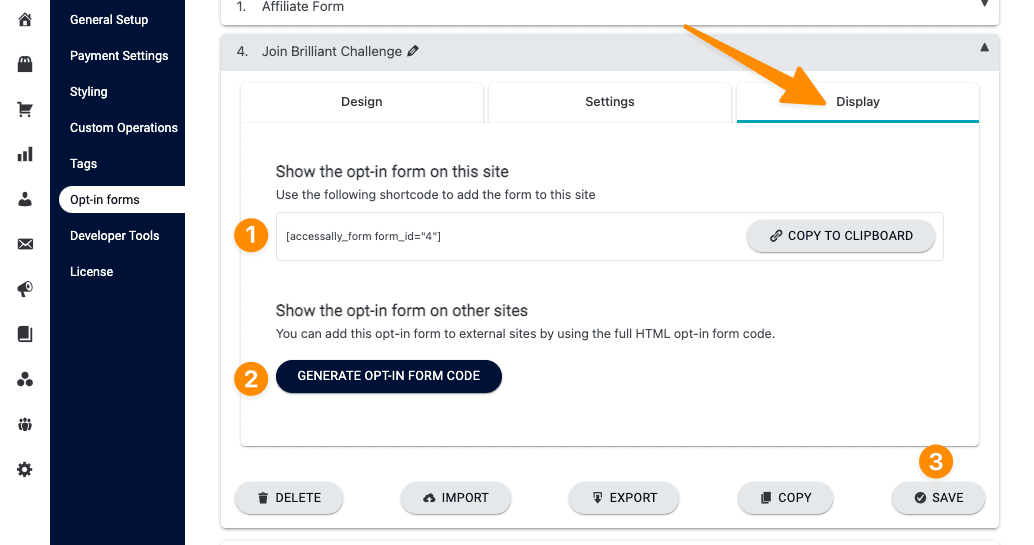
Display Tab
This section shows options for adding the form to your website.
- Show the opt-in form on this site is used if you need to add the form to a landing page on your AccessAlly site.
- Show the opt-in form on other sites is used to embed the form on a different website like your main site.
- Save – don’t forget to save your changes.
What happens when someone fills out this form?
When a new subscriber fills out the form they will automatically be created as a WordPress user, logged in to the site, and sent to the page you have designated in your setup.
Welcome Email (optional) is sent to the user’s inbox
Module Release Emails are sent if the offering has dripped content.
Option 2: Use an on-demand login link custom operation
This option gives you the flexibility to have a new subscriber fill out a CRM opt-in form. Skip the wait for your CRM automation to create a new WordPress user, run webhooks, and send an email with how to access your offering.
When a new contact fills out your opt-in form, they’ll be logged into your AccessAlly site, and taken to the first page of your offering – in seconds!
Part 1: Create a CRM opt-in form
- Kit Opt-in Form Set Up
- ActiveCampaign Opt-in Form Set Up
- Drip Opt-in Form Set Up
- Keap Opt-in Form Set Up
- Ontraport Opt-in Form Set Up
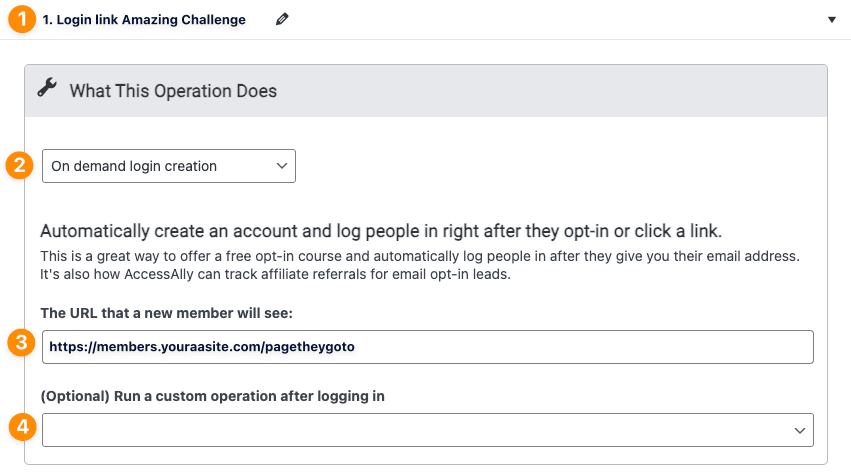
Part 2: Create an On-demand login link custom operation
Go to AccessAlly > Settings > Custom Operations > + New Operation
- Add a descriptive title
- Select On demand login creation
- Add the page link (where they go logged in after signup) most often the first base page of an offering
- If you would like to run additional custom operations in AccessAlly you can add those here.
- Save your changes
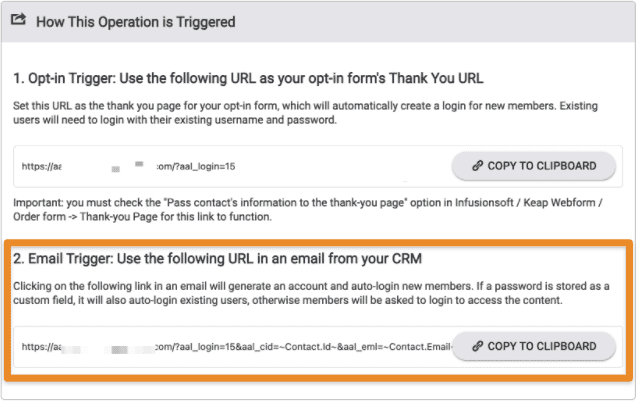
Step 3: Add opt-in trigger
Copy the opt-in trigger.
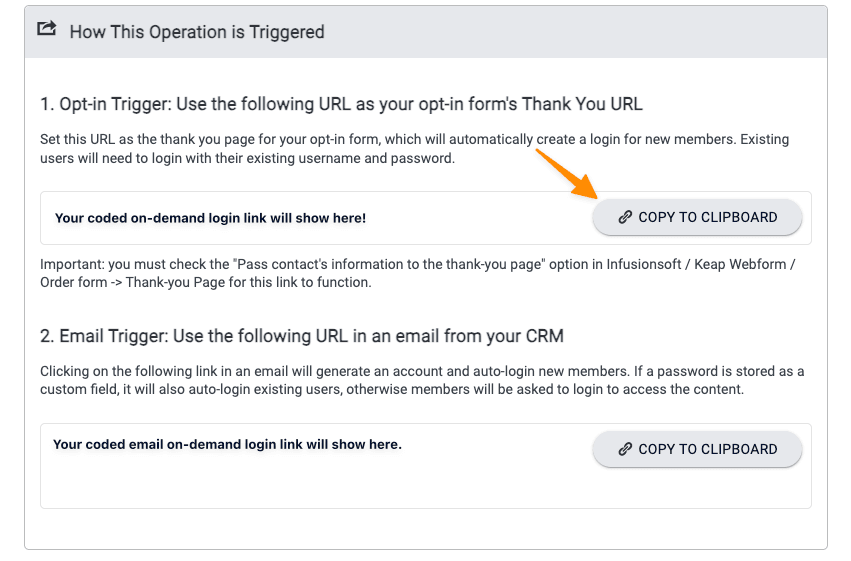
Paste the opt-in trigger to your CRM opt-in form as the thank you page URL.
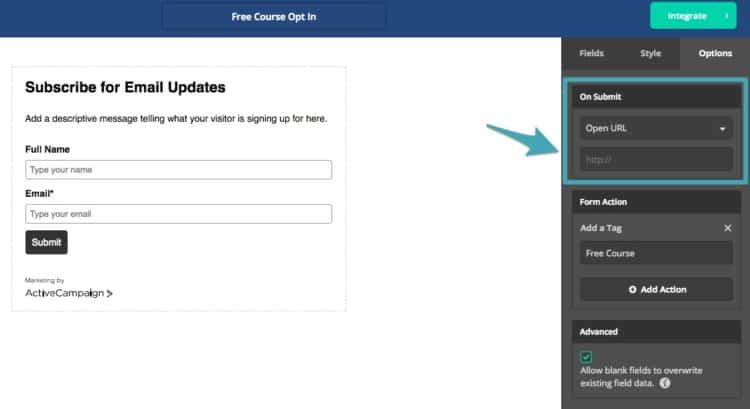
When editing your ActiveCampaign form, go to Options. In the “On Submit” section, make sure it’s set to Open URL. Paste the URL into the field and save.
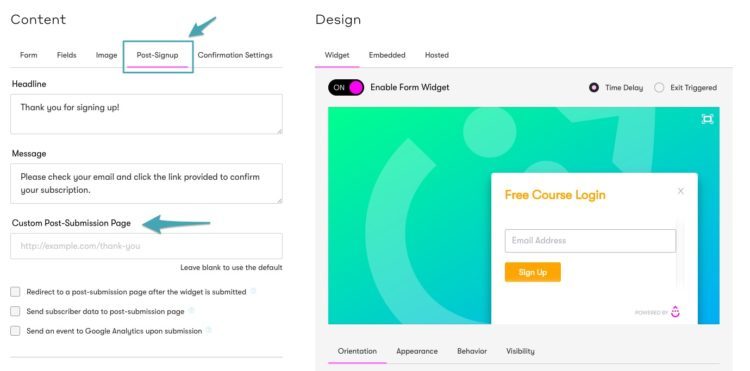
When editing your Drip form, go to Post-Signup. In the “Custom Post Submission Page” section, paste the URL into the field. Make sure to check the box directly below in order to activate this. Then, click save.
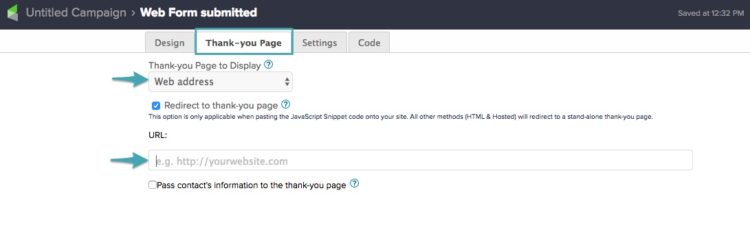
When editing your Keap form, go to Thank-You Page. Here, make sure the Thank You page is set to display a Web Address. Paste the URL into the field and save.
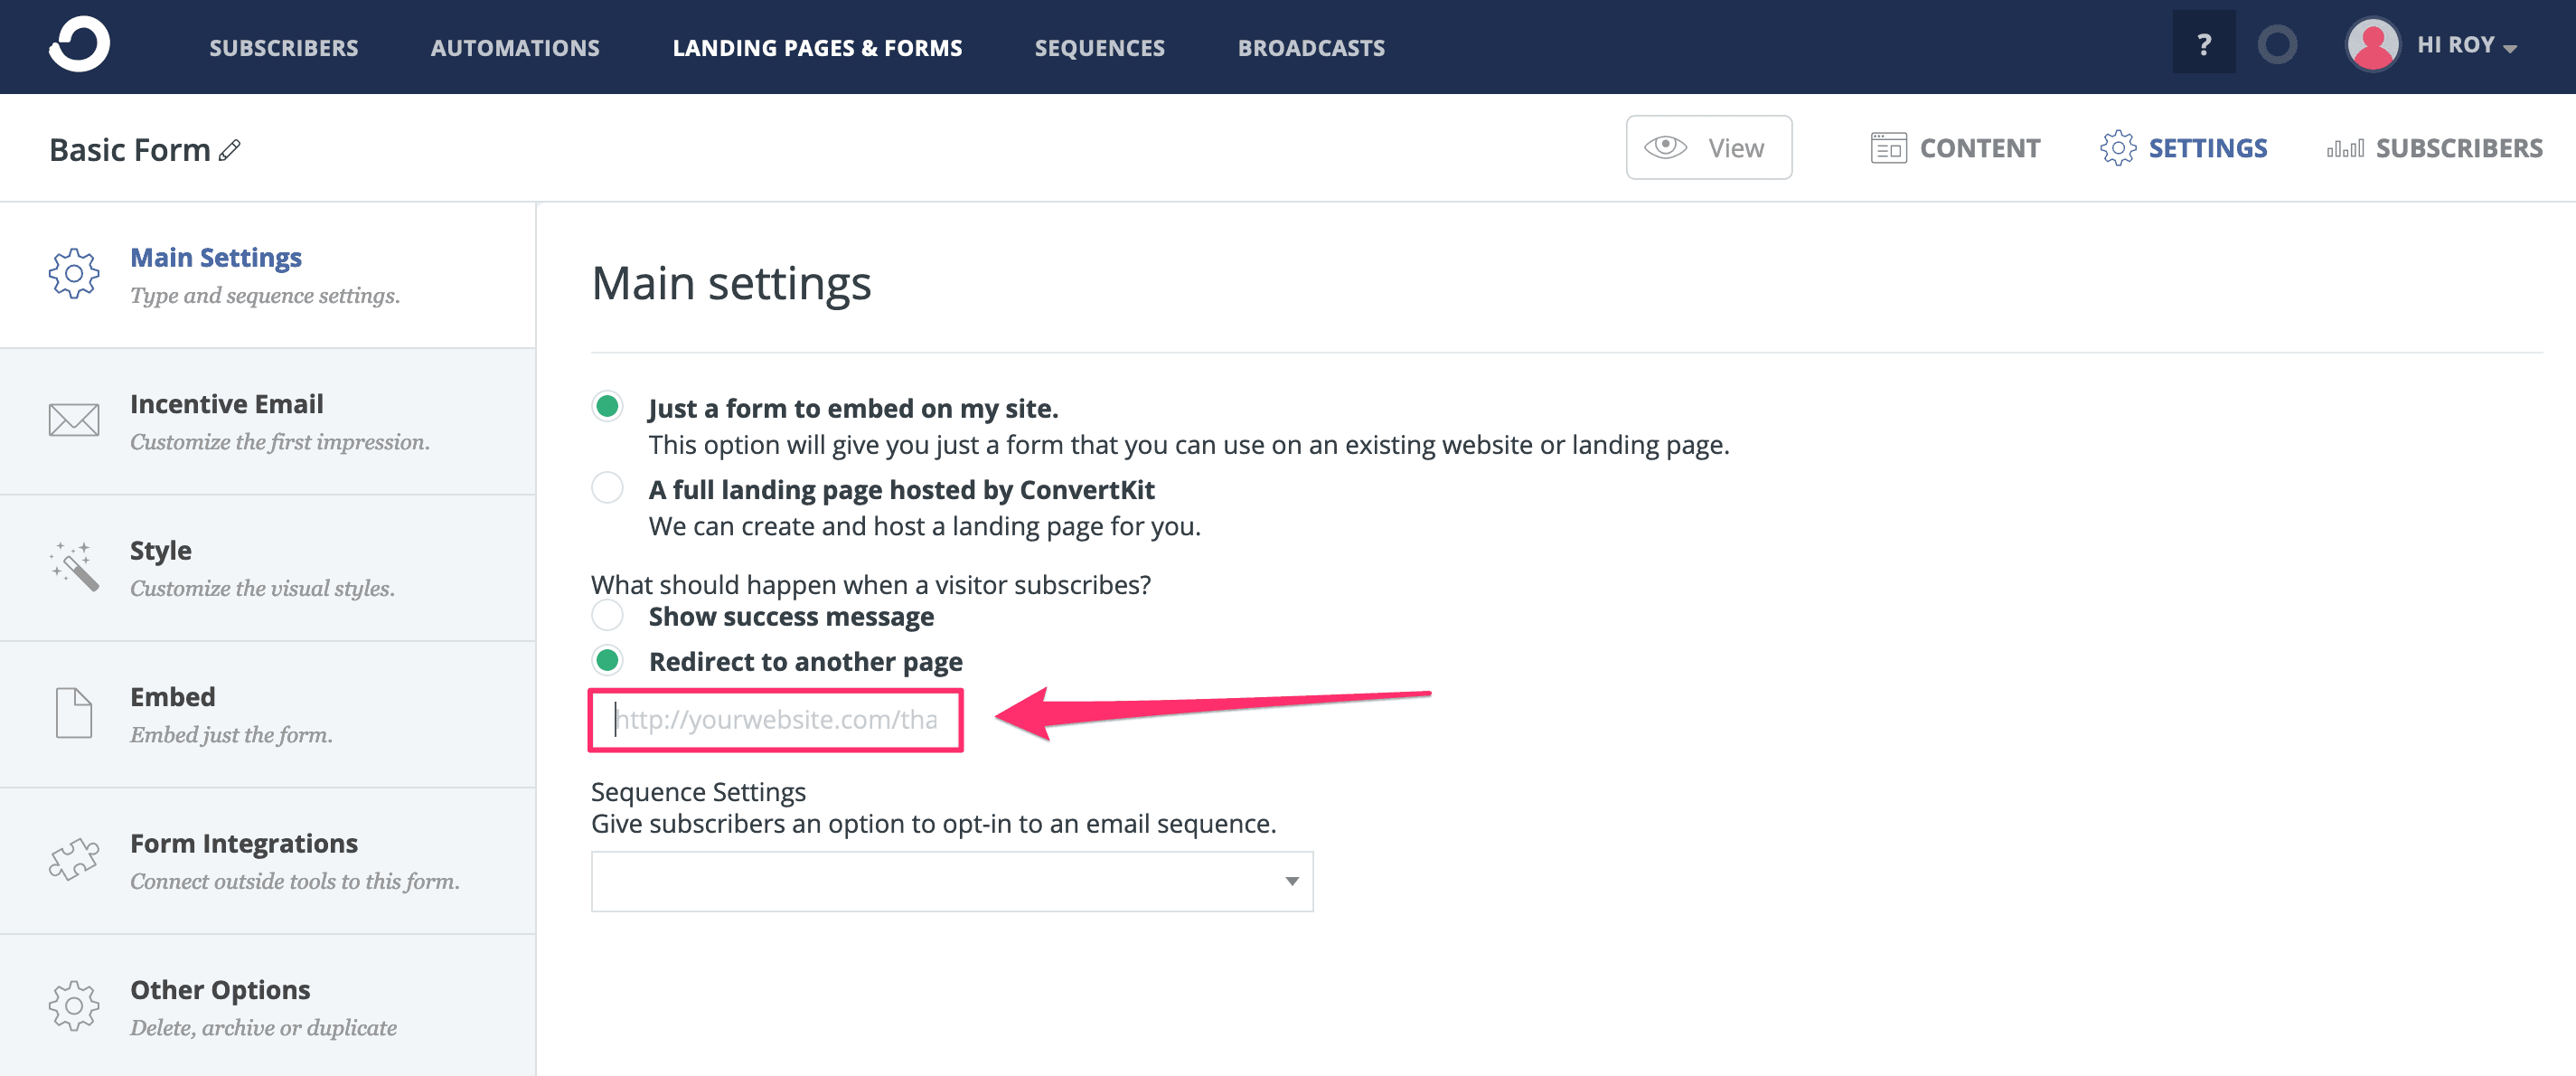
When setting up your opt-in form, go to SETTINGS and make sure the “Redirect to Another Page” is selected. Paste the URL into the field and save.
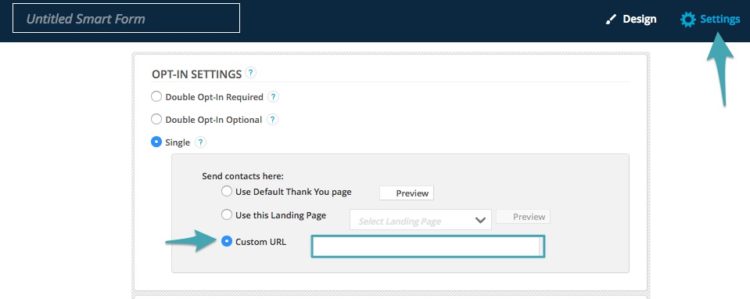
When setting up your opt-in form, go to SETTINGS and make sure the “Custom URL” is selected. Paste the URL into the field and save.
Step 4: Testing Your Opt-in Form
It’s important to note you do not have control over the browser settings a new subscriber uses on their computer. If a subscriber is using a browser with private sessions or incognito windows on-demand login links may not work.
Having a welcome email with details for logging in is an important consideration.
We recommend the following tests. This will show you how different WordPress users and CRM contacts experience this opt-in form.
Test 1: New contact (not a contact in your CRM and not a user on your AccessAlly site.)
Log out of your AccessAlly site.
Fill out your opt-in form using an email address that is not a contact in your CRM or in use on your AccessAlly site.
Test 2: Existing user on your AccessAlly site that is logged in and fills out your opt-in form.
With this test you can use the first testing email address. This user is still logged into your AccessAlly site.
Fill out the opt-in form again.
Test 3: Existing user is not logged into your AccessAlly site and fills out your opt-in form.
With this test, you can continue using the same email address. You’re currently logged into the AccessAlly site.
- Log out of the AccessAlly site
- Fill out the opt-in form with the same email address
Optional: Sending the On-Demand Login Link in an Email Instead
You have the option to send the on-demand link in an email instead of using the link on your form. Copy the Email Trigger link, and insert that into the email in your CRM.
UTM Parameters
Using either of these options you can add UTM parameters into the link. For example the link above is:
You can add UTM parameters to the end of this in your email. For example:
This also allows you to add any custom field from your CRM into the UTM parameters. You would just need to add the customization for that field in the correct place.
You might also want to learn more about the Snappy Login option for letting people easily log in via their email address.
