ARTICLE CONTENT:
About This Article
In this article we’ll cover setting up log in streaks that display badges based on how often participants visit your AccessAlly site. This article is based on AccessAlly user Clare Josa who created this setup. Click here to visit Clare!
Skill Level: Advanced
CRM Compatibility Warning! Clare uses ActiveCampaign. The website tracking functionality in ActiveCampaign is allowing for this workflow. This may not be possible with all AccessAlly supported CRM systems.
If you have questions about anything in this article see how we support you.
Clare’s Idea
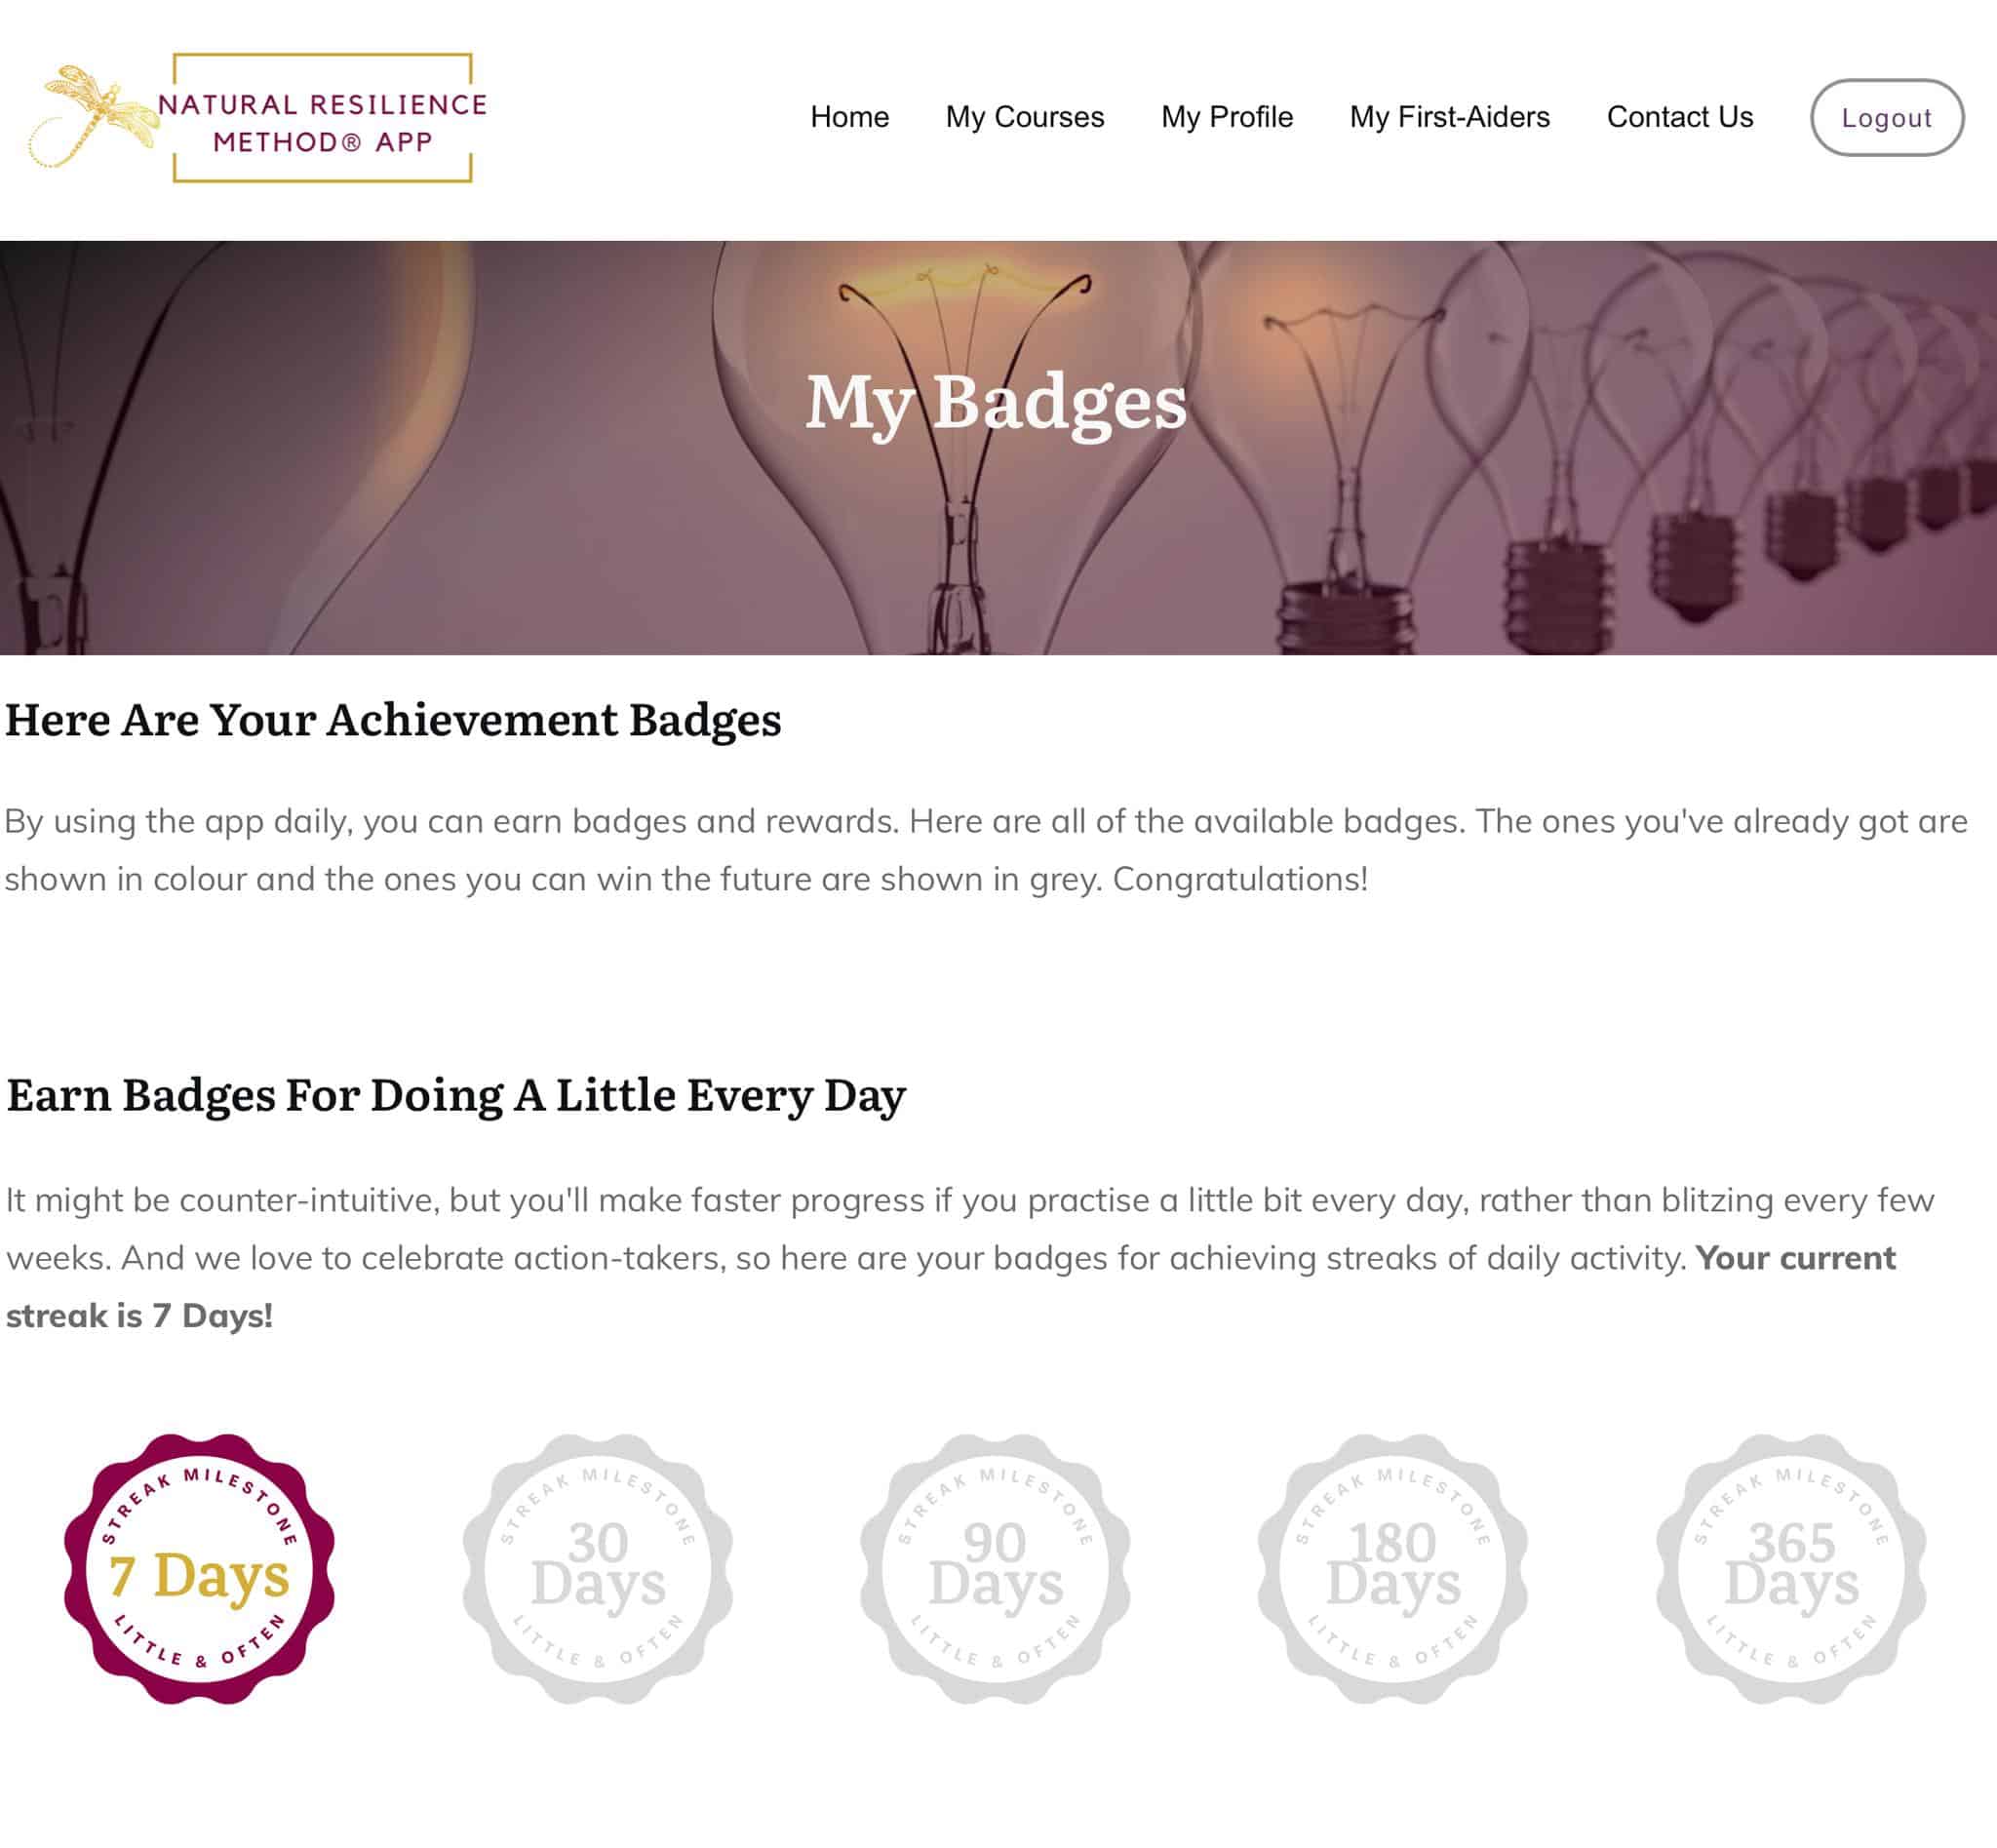
I love the idea of being able to post a badge with ”streak length” for daily usage of our site, but I can’t figure out how to track this.
Here’s a screenshot of what Clare created with a little help in the AccessAlly Product Community Facebook Group from Scott, Technical Support Engineer, at AccessAlly.
The ActiveCampaign Automations
Scott guided Clare to create three automations that tap into a custom field in ActiveCampaign that holds the number of streaks.
Quick Tip! If you need help creating advanced ActiveCampaign automations visit the #HireHelp thread in the AccessAlly Product Community Facebook Group.
- ActiveCampaign’s tracking ability setup on your member site. You can then trigger an automation when your site is visited. In this automation you would add a tag, “Visited Site.” Click here to see an example!
- The “Visited Site” tag starts a new automation in ActiveCampaign, it would end automation 3 (shown below) and it would then increase the field value of a custom field named “Streak” by 1. You can do this using the math function in ActiveCampaign. Then set a timer to wait until midnight and then remove the “Visited Site” tag. This automation also adds tags for the badges based on the number of days the contact has visited the site. Click here to see an example!
- A third automation that starts with the “Visited Site” tag being removed. When the tag is removed, add a wait timer of 24 hours, then set the “Streak” field to 0. This automation will need to be ended when they enter the 2nd automation as mentioned above. This automation also removes tags for all badges earned if the user does not visit the site that day. Click here to see an example!
Resource! Testing advanced automations can be tricky when the workflow has wait timers in place. Here’s a great video on skipping wait steps from the team at ActiveCampaign which was extremely helpful in creating this article.
The AccessAlly Setup
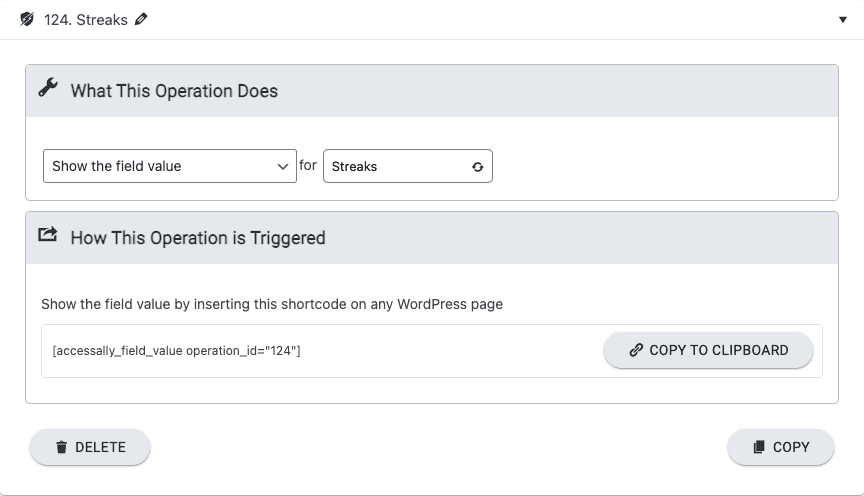
Create a Custom Operation
Go to AccessAlly > Settings > Custom Operations you’ll add a new custom operation. This will be used to display the current number of streaks on the My Badges page.
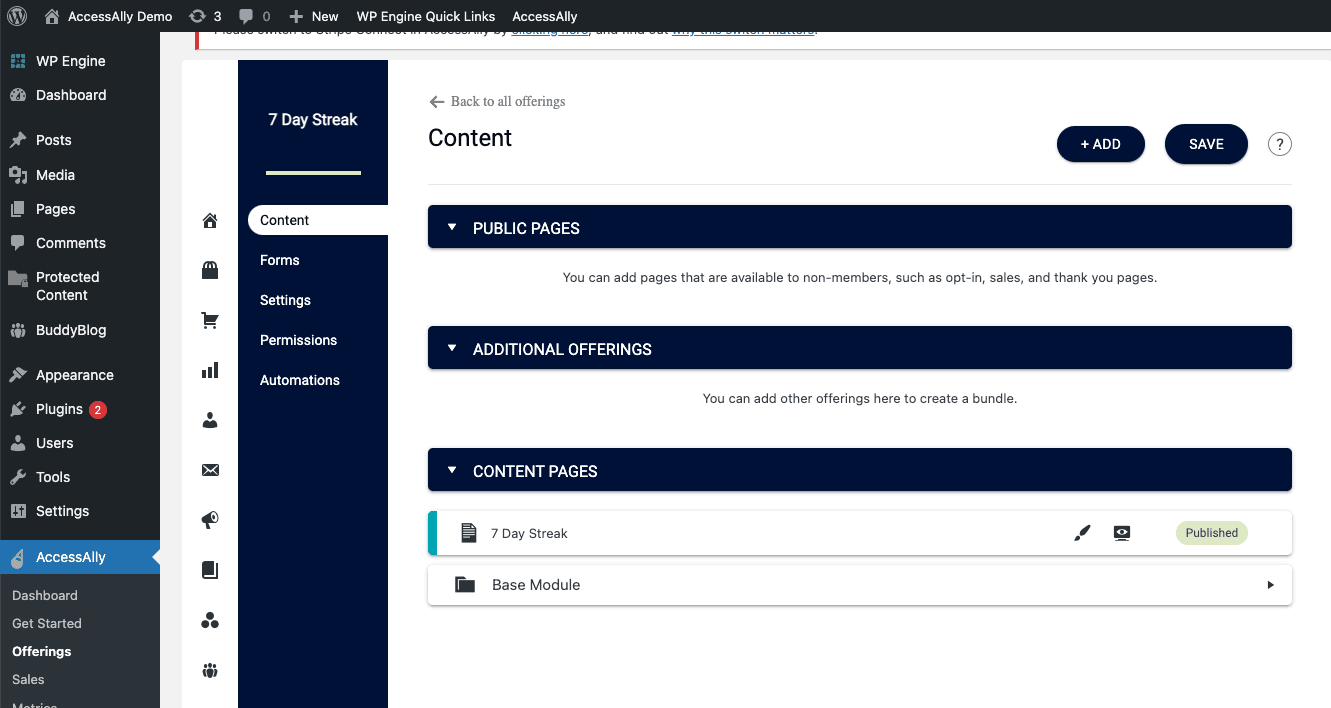
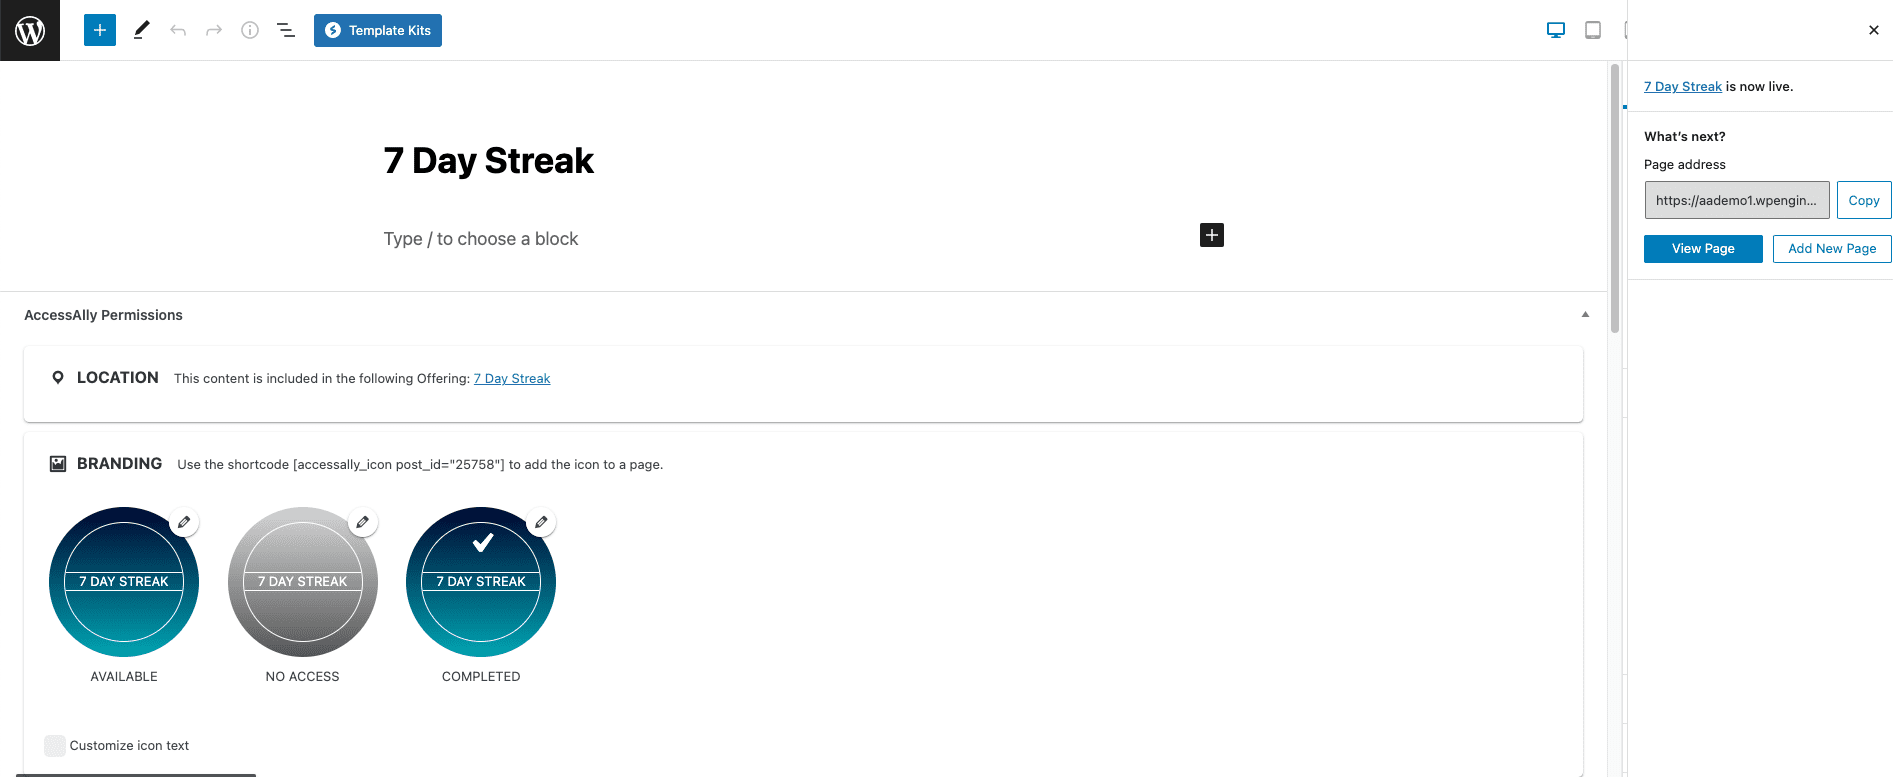
Create an Offering for Each Streak
Use the “Start From Scratch” Offering Template in AccessAlly to create a single page offering for each streak.
In the example below three separate “Start From Scratch” offerings were created a 7 Day, 30 Day, and 60 Day. This allows for a simple way to get three badges, a dedicated page for each badge, and the tags you need for ActiveCampaign Automation 2.
Here’s an example of the 7 Day Streak offering.
Use your WordPress theme and page builder to add content to the page. This would be a great place to add a video or message celebrating your users for making it to this streak.
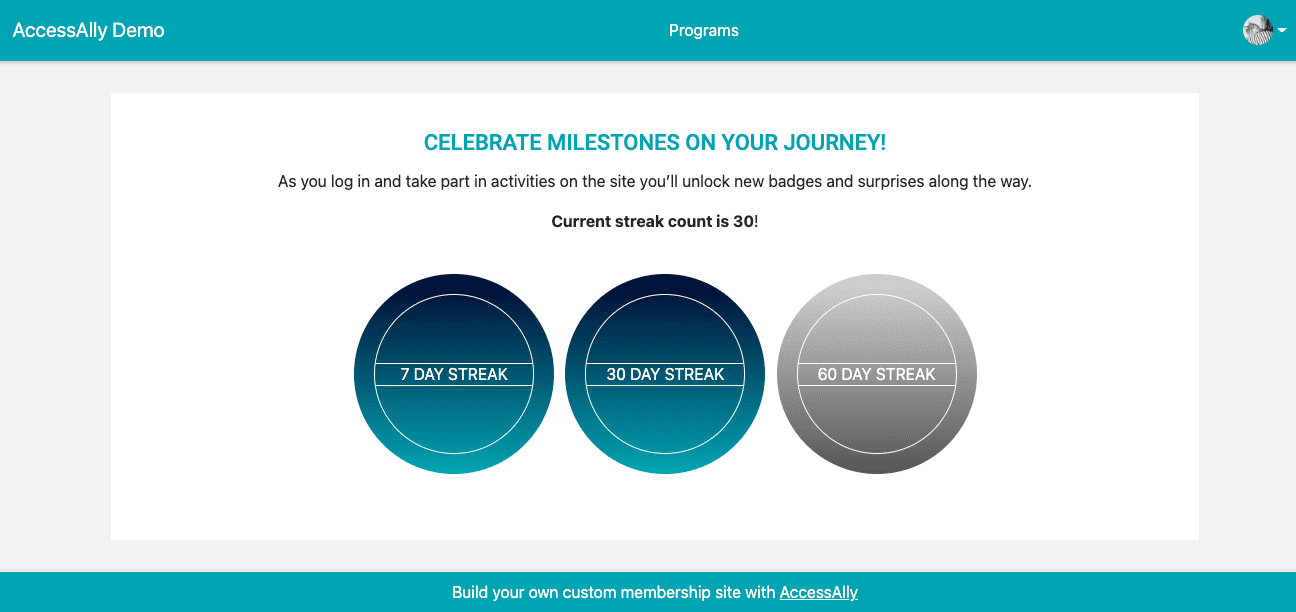
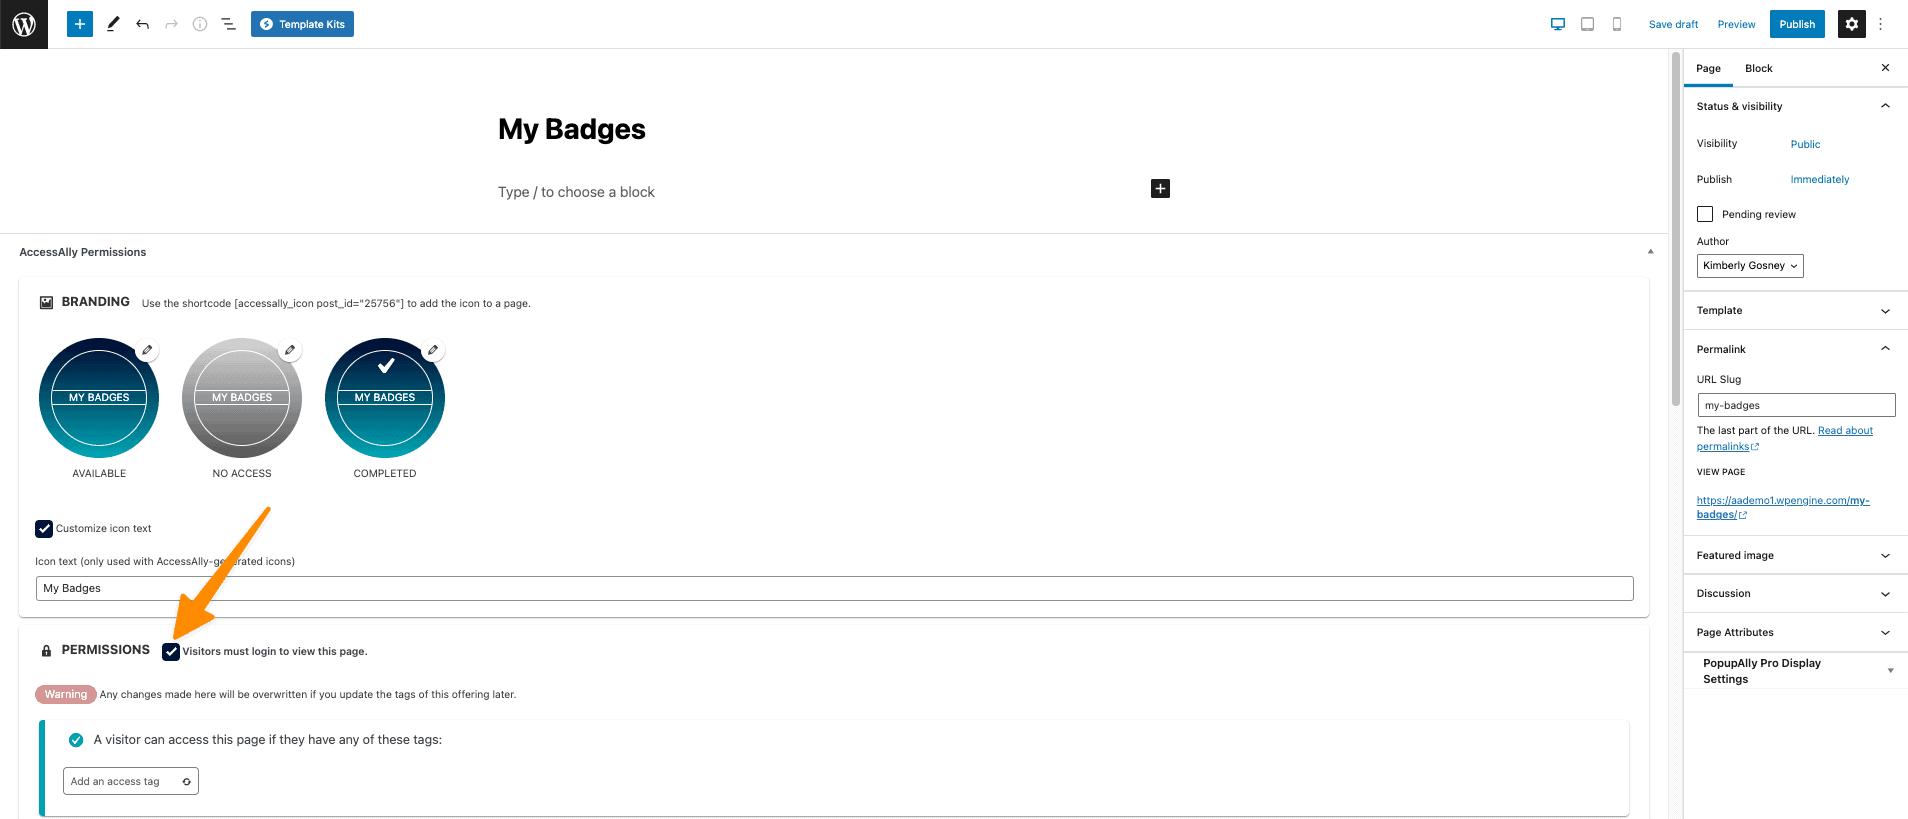
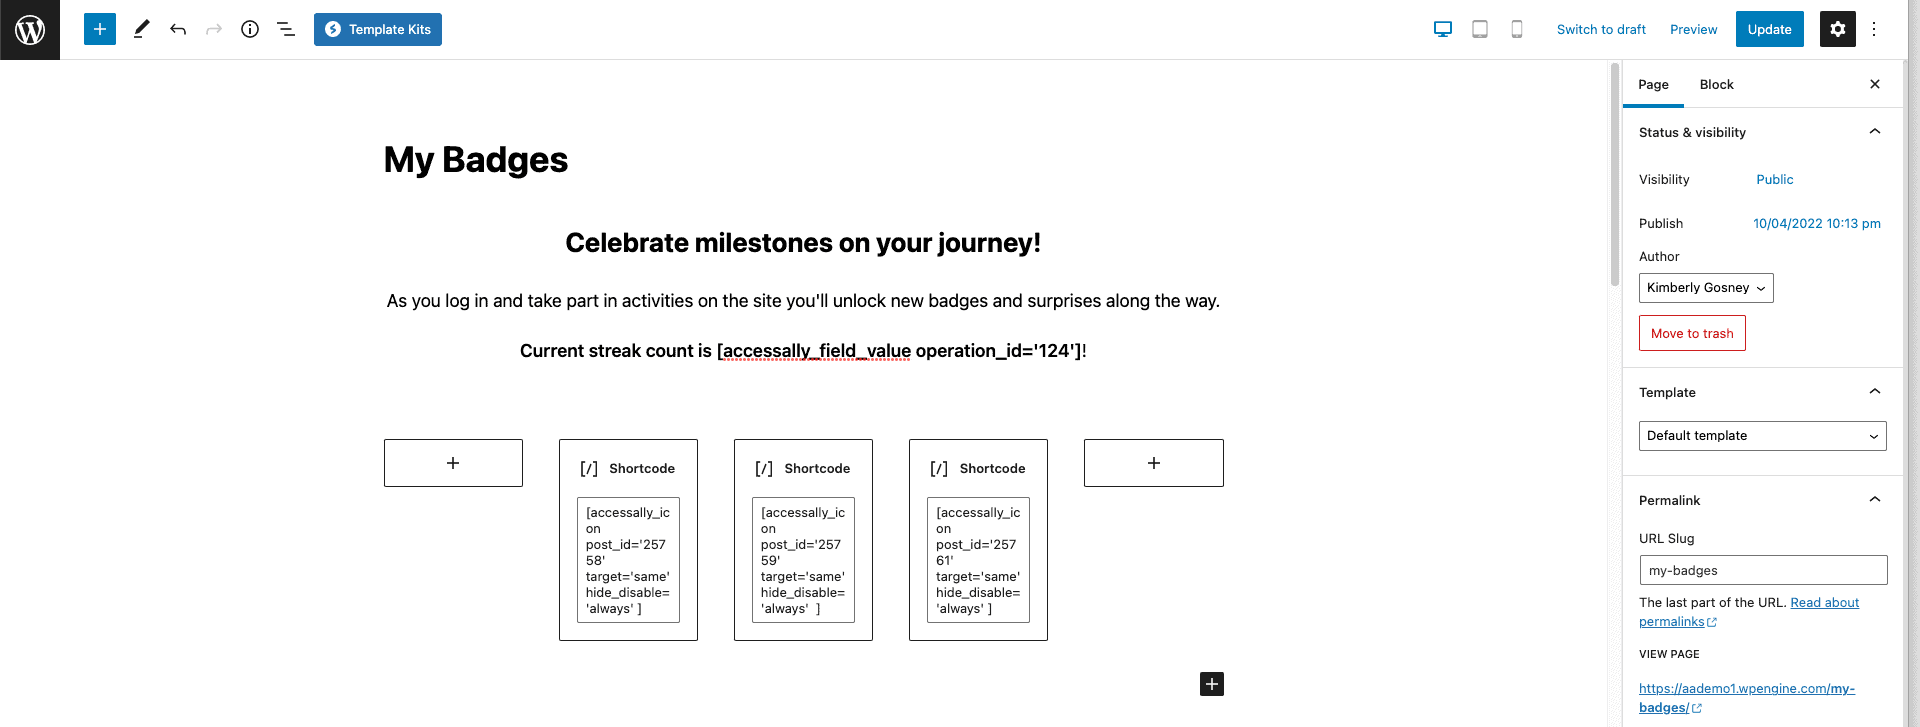
My Badges Page
Create a page on your AccessAlly site called “My Badges” this page should require users to be logged in to see the page.
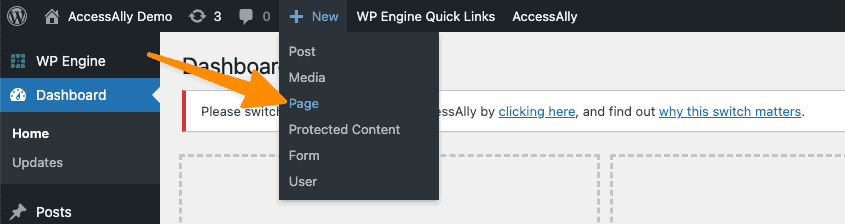
Go to your site and click “+ New” to add a new page called “My Badges.”
Sample settings for the “My Badges” page. This page should have permissions set to “Visitor must be logged in to view this page.”
Using the AccessAlly Shortcode Generator you’ll add the Offering Icon for each streak you created.
![]()
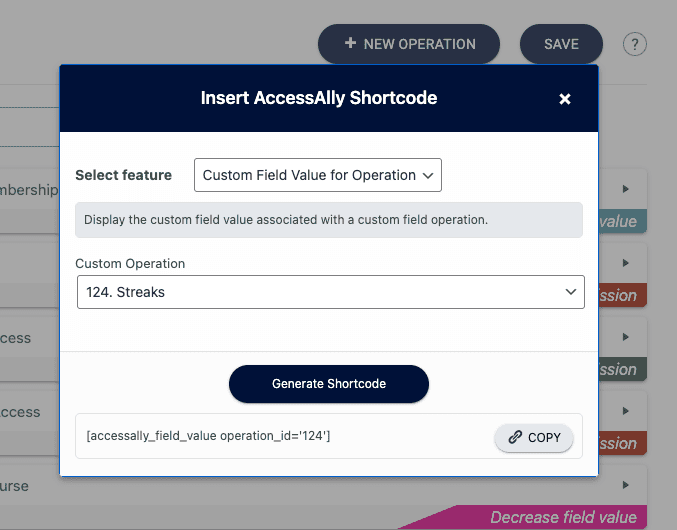
You can also use the AccessAlly Shortcode Generator to display the current number of streaks on the page.
Here is the backend view of building this page. Shown in WordPress Gutenberg builder.
Here is the front end user view!