Integrate Stripe with AccessAlly to sell your products, recurring subscriptions, and payment plans on WordPress. Stripe is our preferred payment integration.
ARTICLE CONTENT:
Using Stripe Connect with AccessAlly
This article covers two different scenarios when integrating Stripe Connect with AccessAlly. Select the option below that matches how you’re using AccessAlly.
Option 1: New AccessAlly Users
Use this workflow if you are installing the AccessAlly plugin for the first time.
Follow the steps shown here if you are new to using AccessAlly and have not connected Stripe to the AccessAlly plugin before.
Step 1: Log in to your Stripe Account
Log in to your Stripe account. This ensures AccessAlly can easily find it in the next step.
Step 2: Enable Stripe Connect
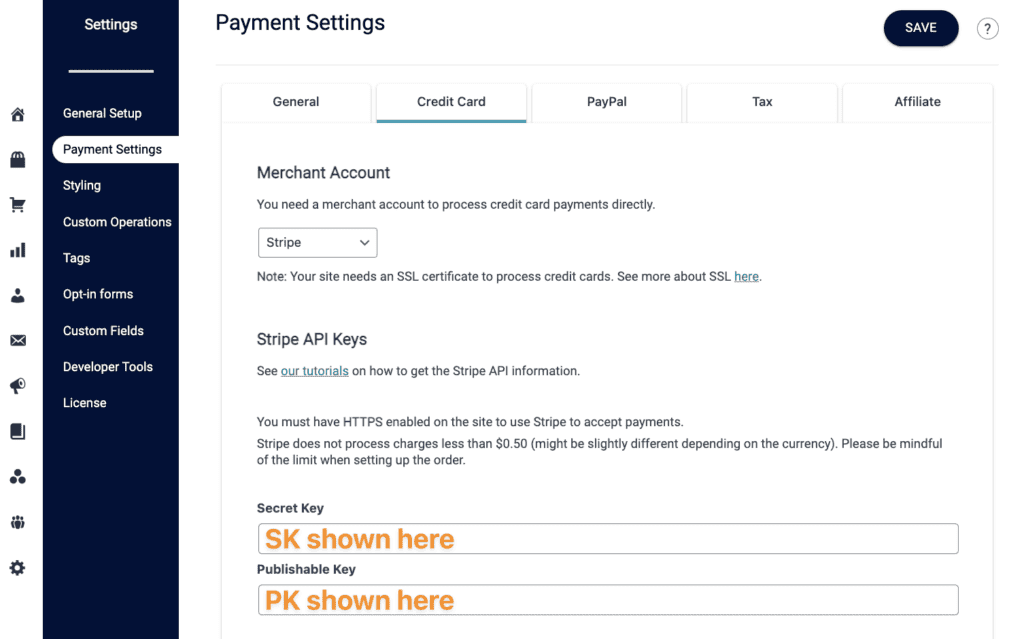
There are two ways to enable Stripe Connect as a new AccessAlly user. On your AccessAlly site go to: AccessAlly→ Settings → Payment Settings → Credit Card tab.
- Live mode – accepts payments via Stripe – click “Connect with Stripe” button
- Test mode – testing payments during setup – click “Command + Shift + Connect with Stripe” button.
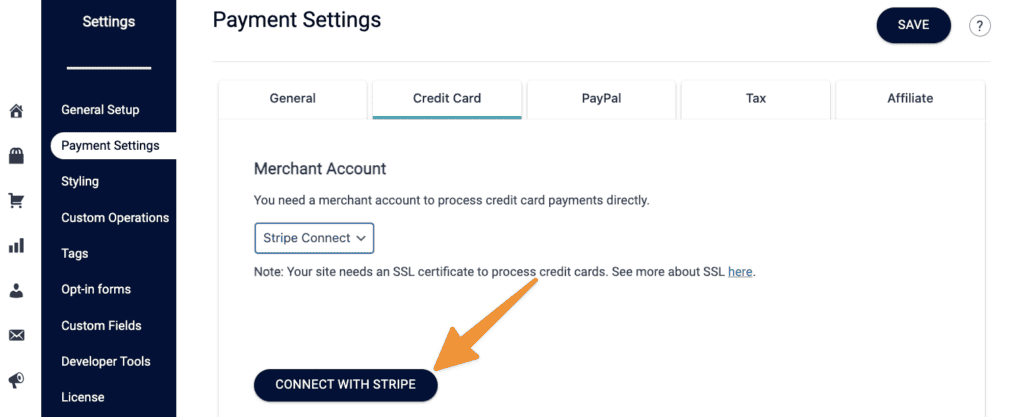
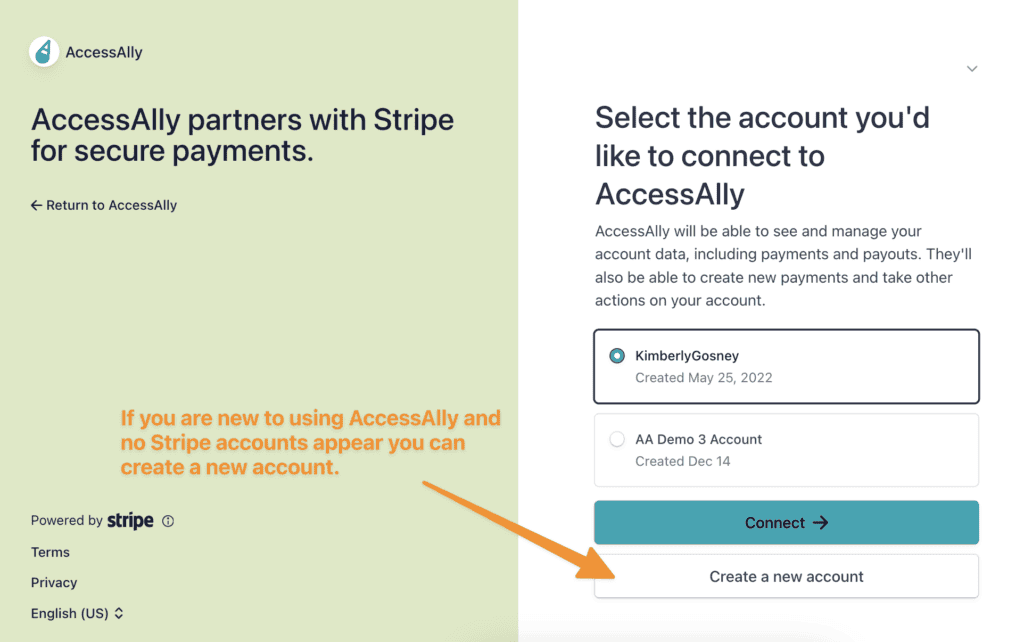
Follow the steps shown in the window to connect to your Stripe account. If you do not have a Stripe account you can create a new account.
⚠️ The steps shown here are for new to AccessAlly users. Creating a new account if you are already using AccessAlly will prevent your recurring subscriptions from being processed.
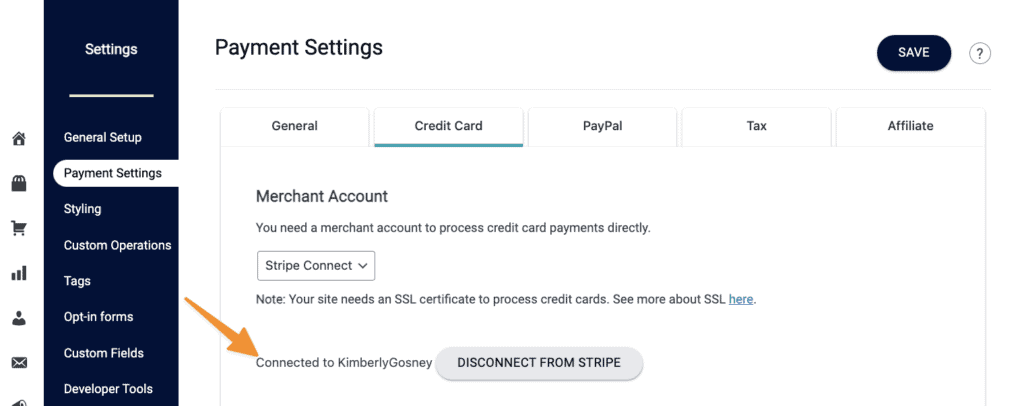
Step 4: Successful Stripe Connect Integration
Once Stripe Connect is successfully integrated you will see “Stripe Connect” and the name of your connected Stripe account.
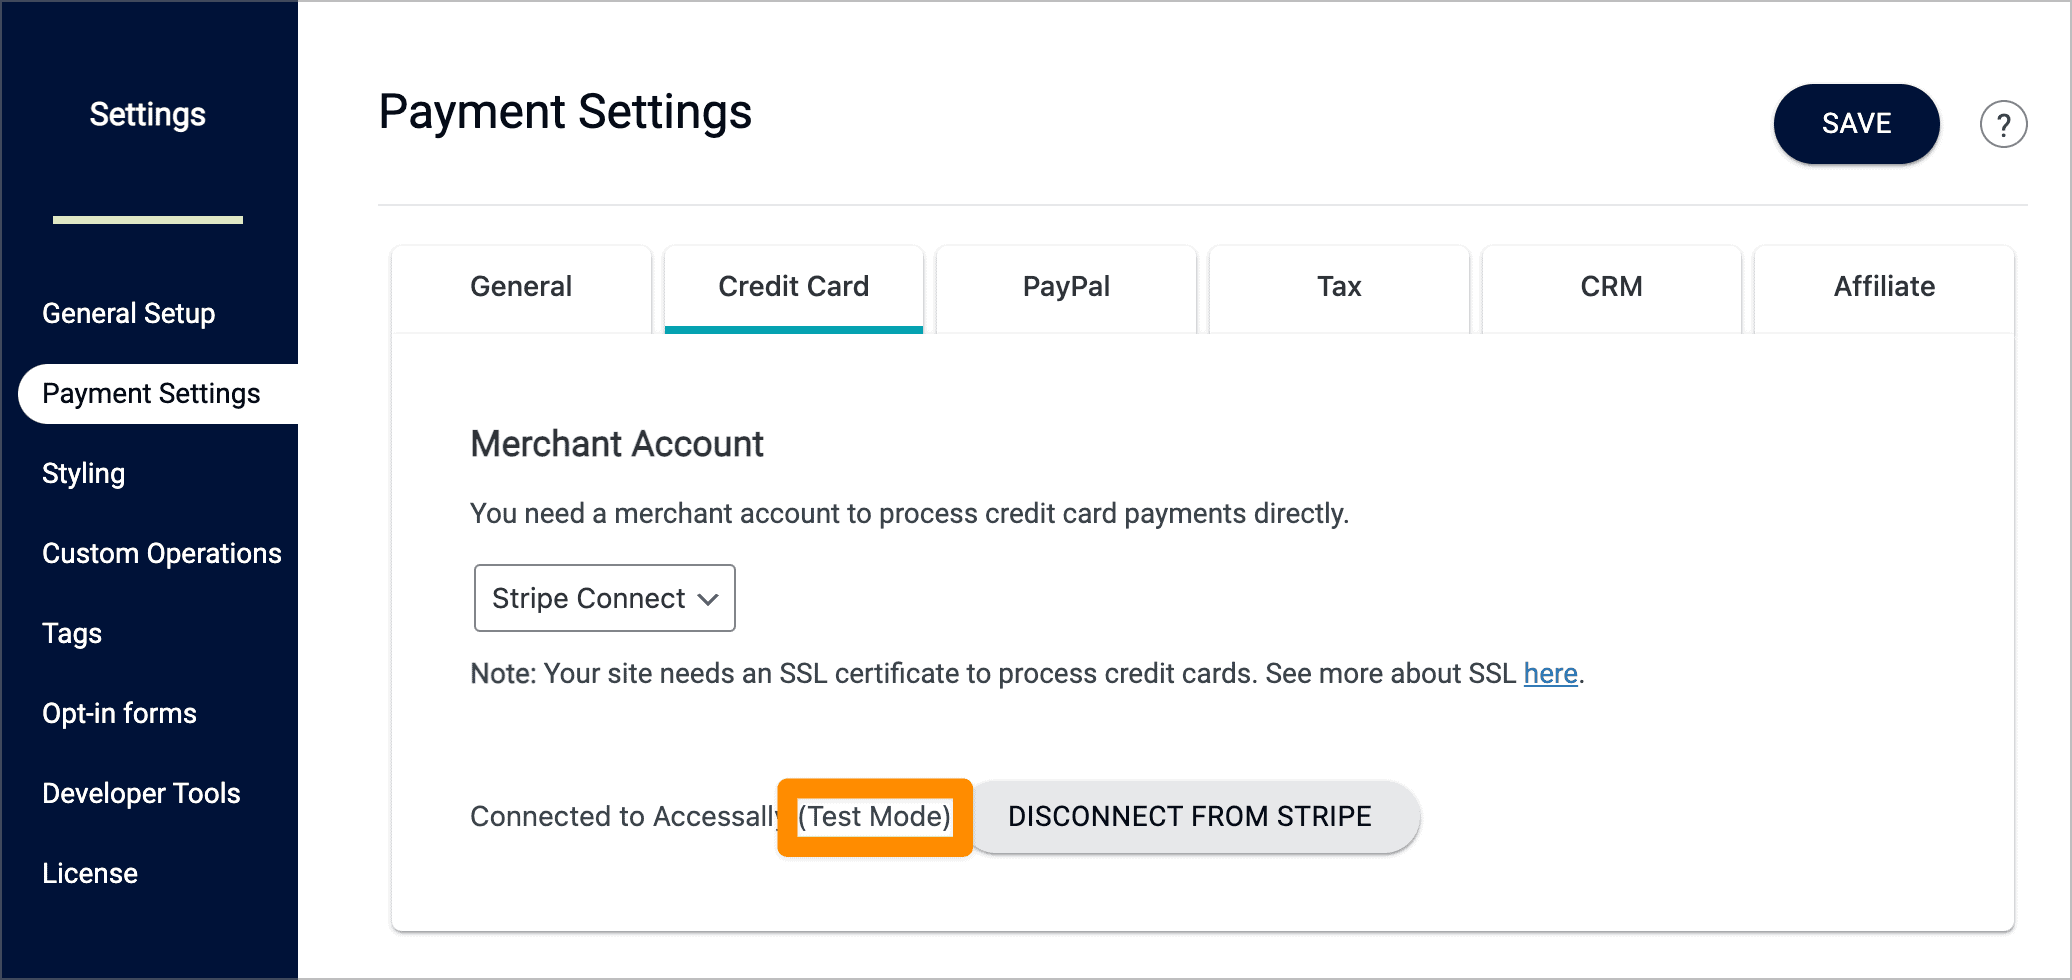
Step 5: For test mode accounts only.
If you selected test mode remember to disconnect from Stripe and press the “Connect with Stripe” button to connect to a live account after testing has been completed. No real payments are processed in test mode.
Option 2: Existing AccessAlly Users
Follow this workflow if the AccessAlly plugin is already connected to your Stripe account. This switches your account from using Stripe API keys to Stripe Connect.
Step 1: Review Credit Card Tab
Go to AccessAlly > Settings > Payment Settings > Credit Card tab
There are two options shown in the dropdown:
- Stripe – further action is required to move from API keys to Stripe Connect
- Stripe Connect – no further action is needed you are all set
Step 2: Switching from “Stripe” to “Stripe Connect”
If you see “Stripe” in the dropdown and API keys it’s time to switch your site to Stripe Connect. Here’s what this option looks like.
Step 3: Log into Stripe
Log into the exact Stripe account (email address and password) that you are currently using with AccessAlly. Confirm you’re in the right Stripe account by viewing your API keys. The secret and publishable keys will match what is shown in AccessAlly.
You can see your API keys by going to this link in your Stripe Account.
https://dashboard.stripe.com/apikeys
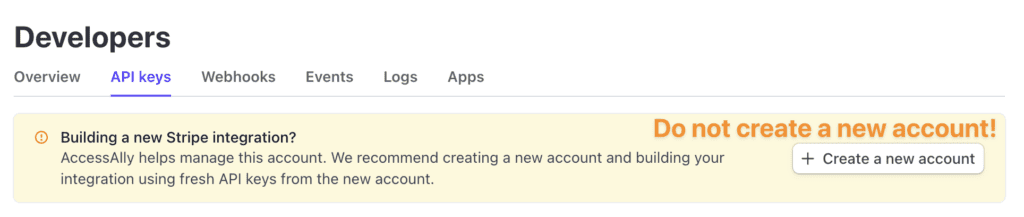
⚠️ If you see a message in yellow asking you to create a new Stripe account. Do not create a new account in Stripe. We recommend contacting Stripe Support. Creating a new Stripe account will stop existing recurring payments from working!
Here is an example of this message as shown in Stripe.
Step 4: Note the Account Name in Stripe
In the top left corner note the exact name of your existing AccessAlly Stripe account. You will need this in the next step.
![]()
Step 5: Switch to Stripe Connect in AccessAlly
Go to AccessAlly > Settings > Payment Settings > Credit Card tab
Switch the toggle from “Stripe” to “Stripe Connect” and click the “Stripe Connect” button.
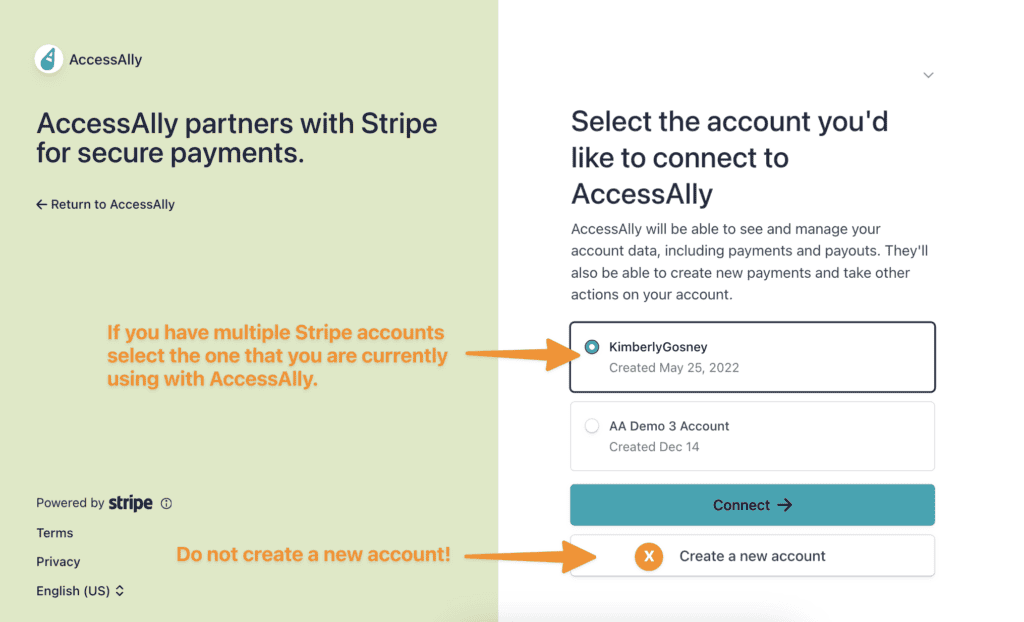
Step 6: Select the exact account that is already connected to your AccessAlly account.
If you have multiple Stripe accounts ensure you select the correct one. Do not create a new account as all past recurring payments will stop working. You will be prompted to log into your Stripe account from this screen.
Step 7: Successful Stripe Connect Integration
Once Stripe Connect is successful you will be redirected to AccessAlly. You will see “Stripe Connect” in the dropdown with the name of your Stripe account showing as connected to Stripe.
Additional Setup for CRM Syncing
There are special cases where someone who has opted out of your email list in your CRM makes a new purchase. In these cases, AccessAlly uses an opt-in form that you create specifically for AccessAlly to re-add them to your CRM so you can deliver your goods.
If you haven’t configured this yet, here’s how to do it in your CRM.
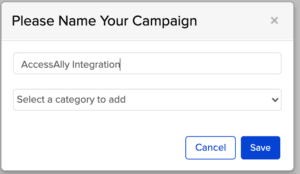
First create a new campaign:
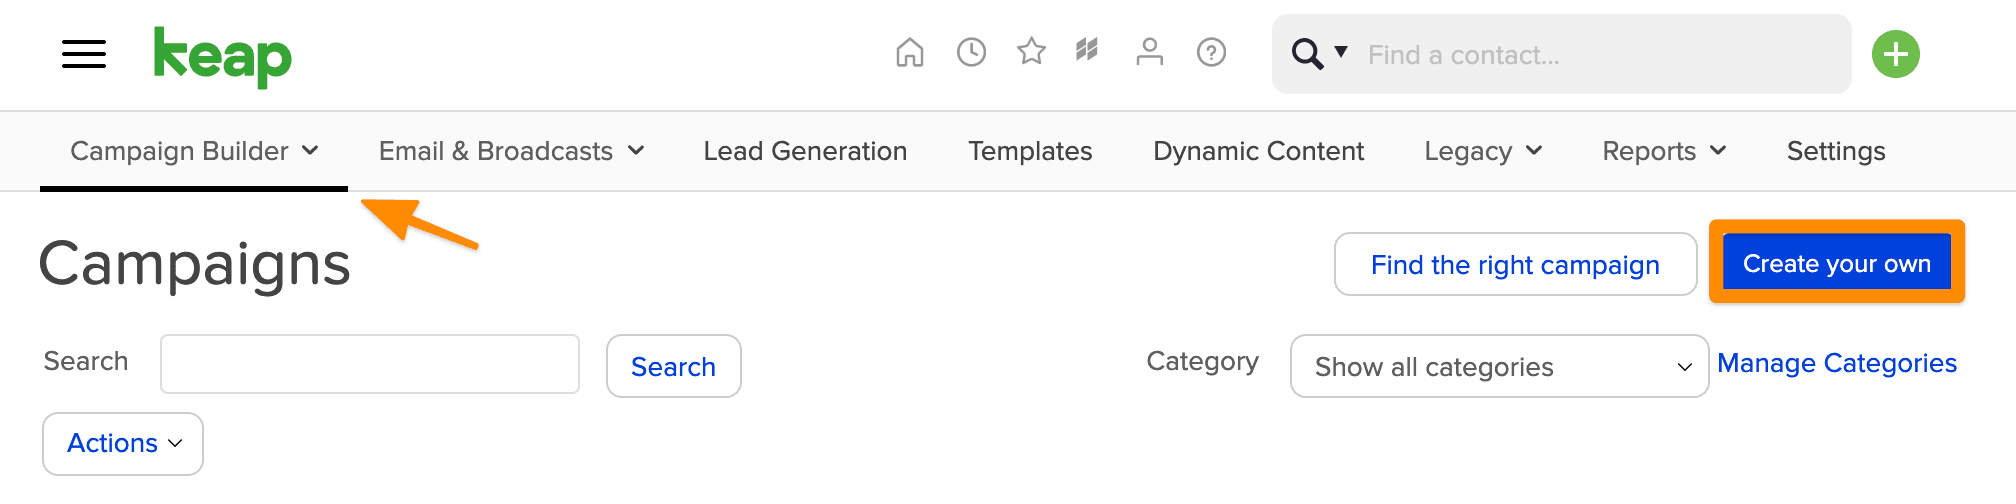
Name your campaign something that will remind you this is for AccessAlly Integration.
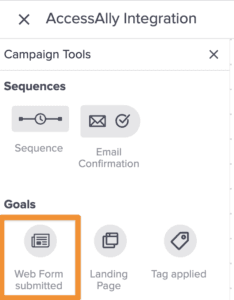
Add a “Webform submitted” option by dragging and dropping it into your campaign. Do not add any other elements attached to it, it should be on its own.
Name the form like AccessAlly Integration Form.
Edit the web form. You don’t need to make any changes to the default. Just make sure you switch from Draft to Live.
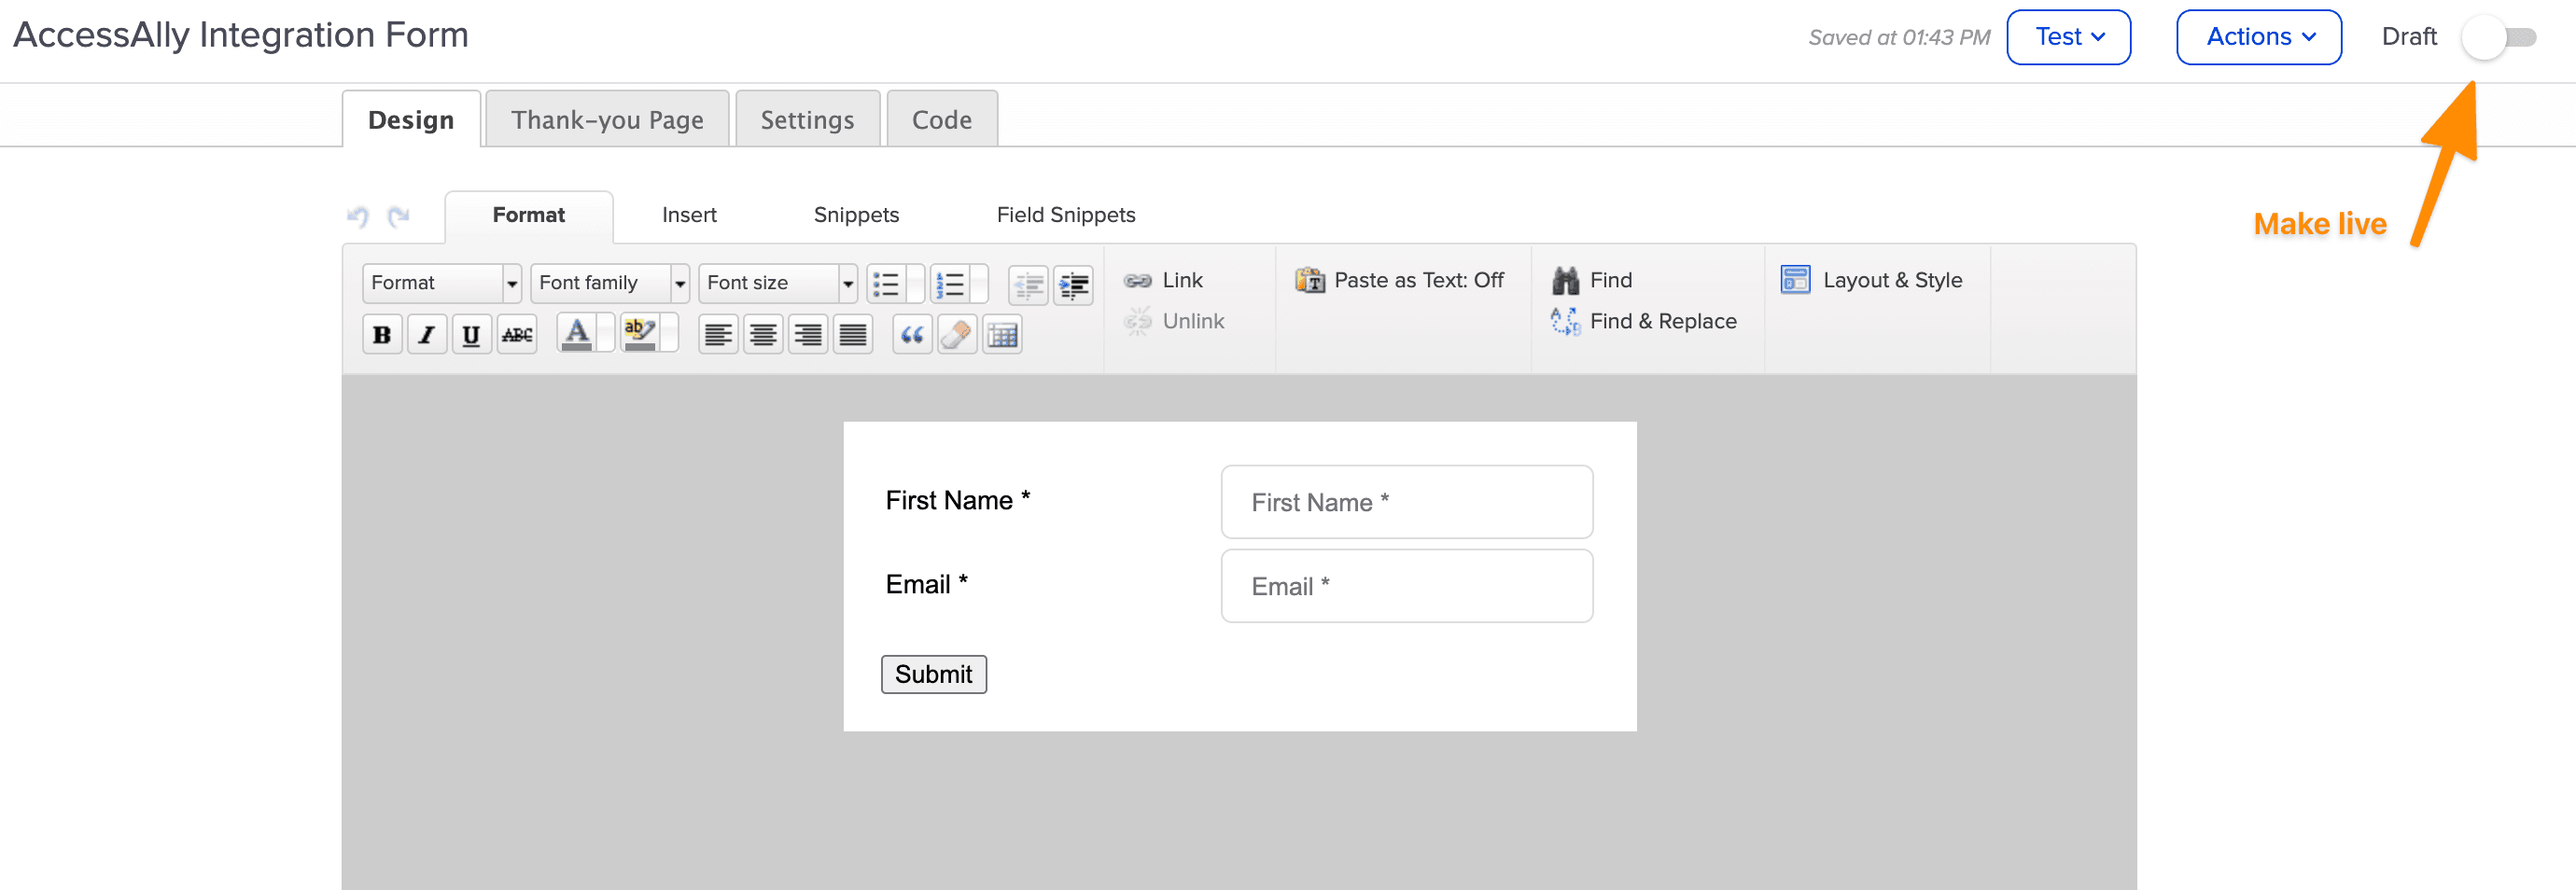
Then publish the campaign.

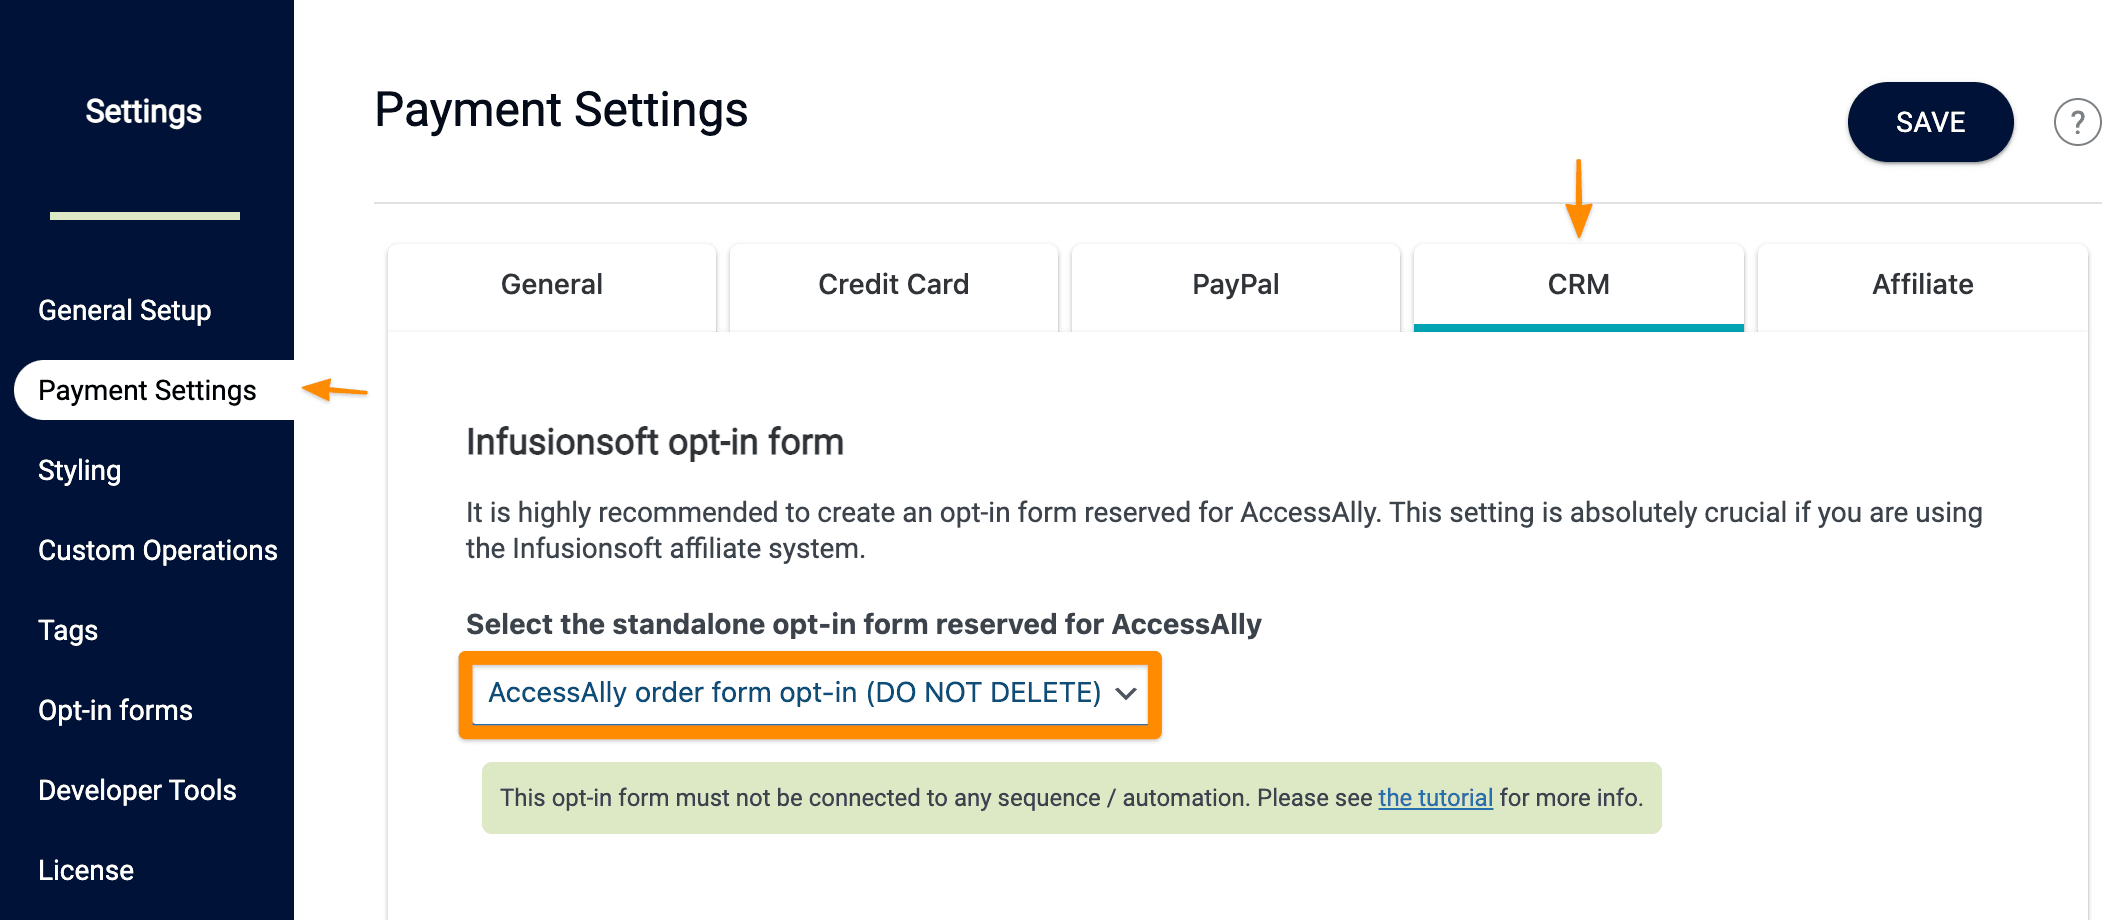
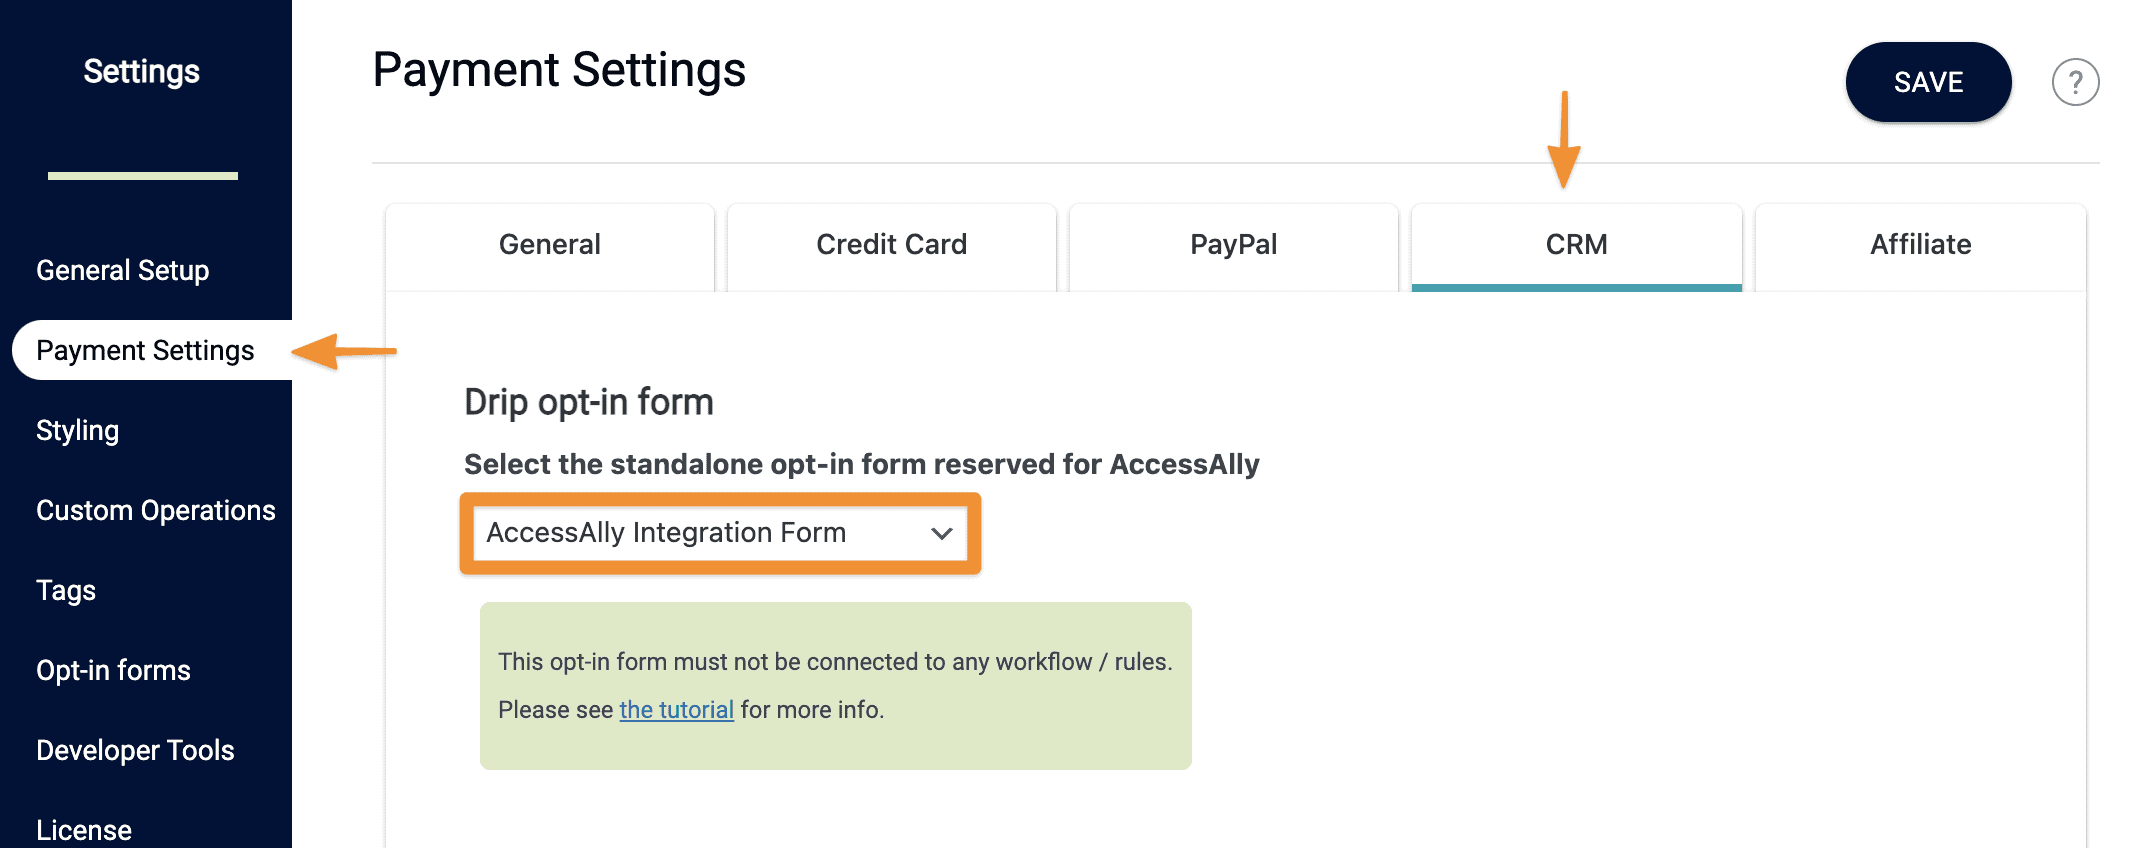
Now under AccessAlly > Settings > Payment Settings > CRM, choose the new Form you just created and hit save.
Hit Save.
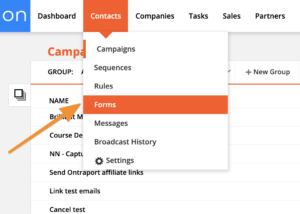
First go to Contacts > Forms.
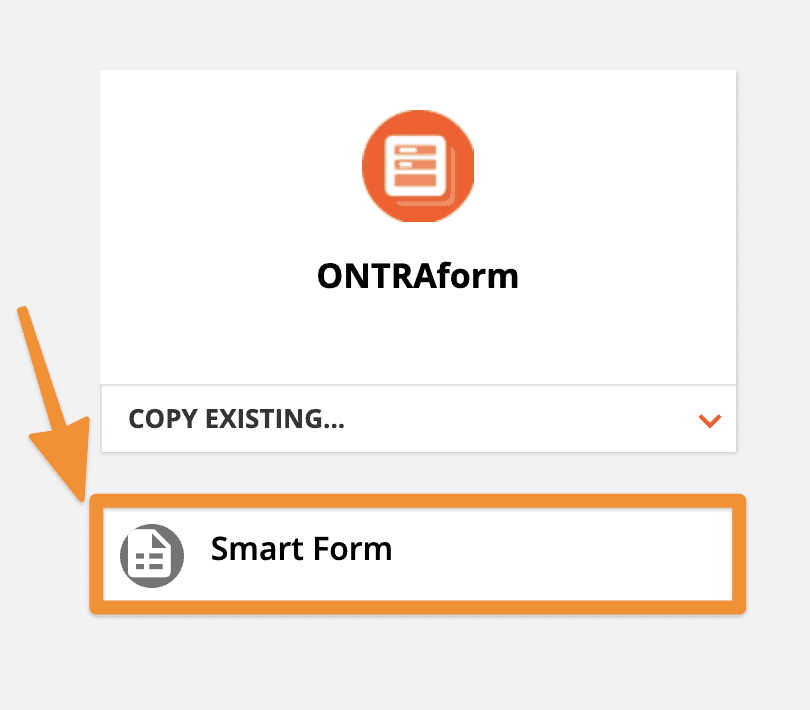
Choose the “Create new form” button.

Now select the “Smart Form” option to create the simplest type of Ontraport Form.
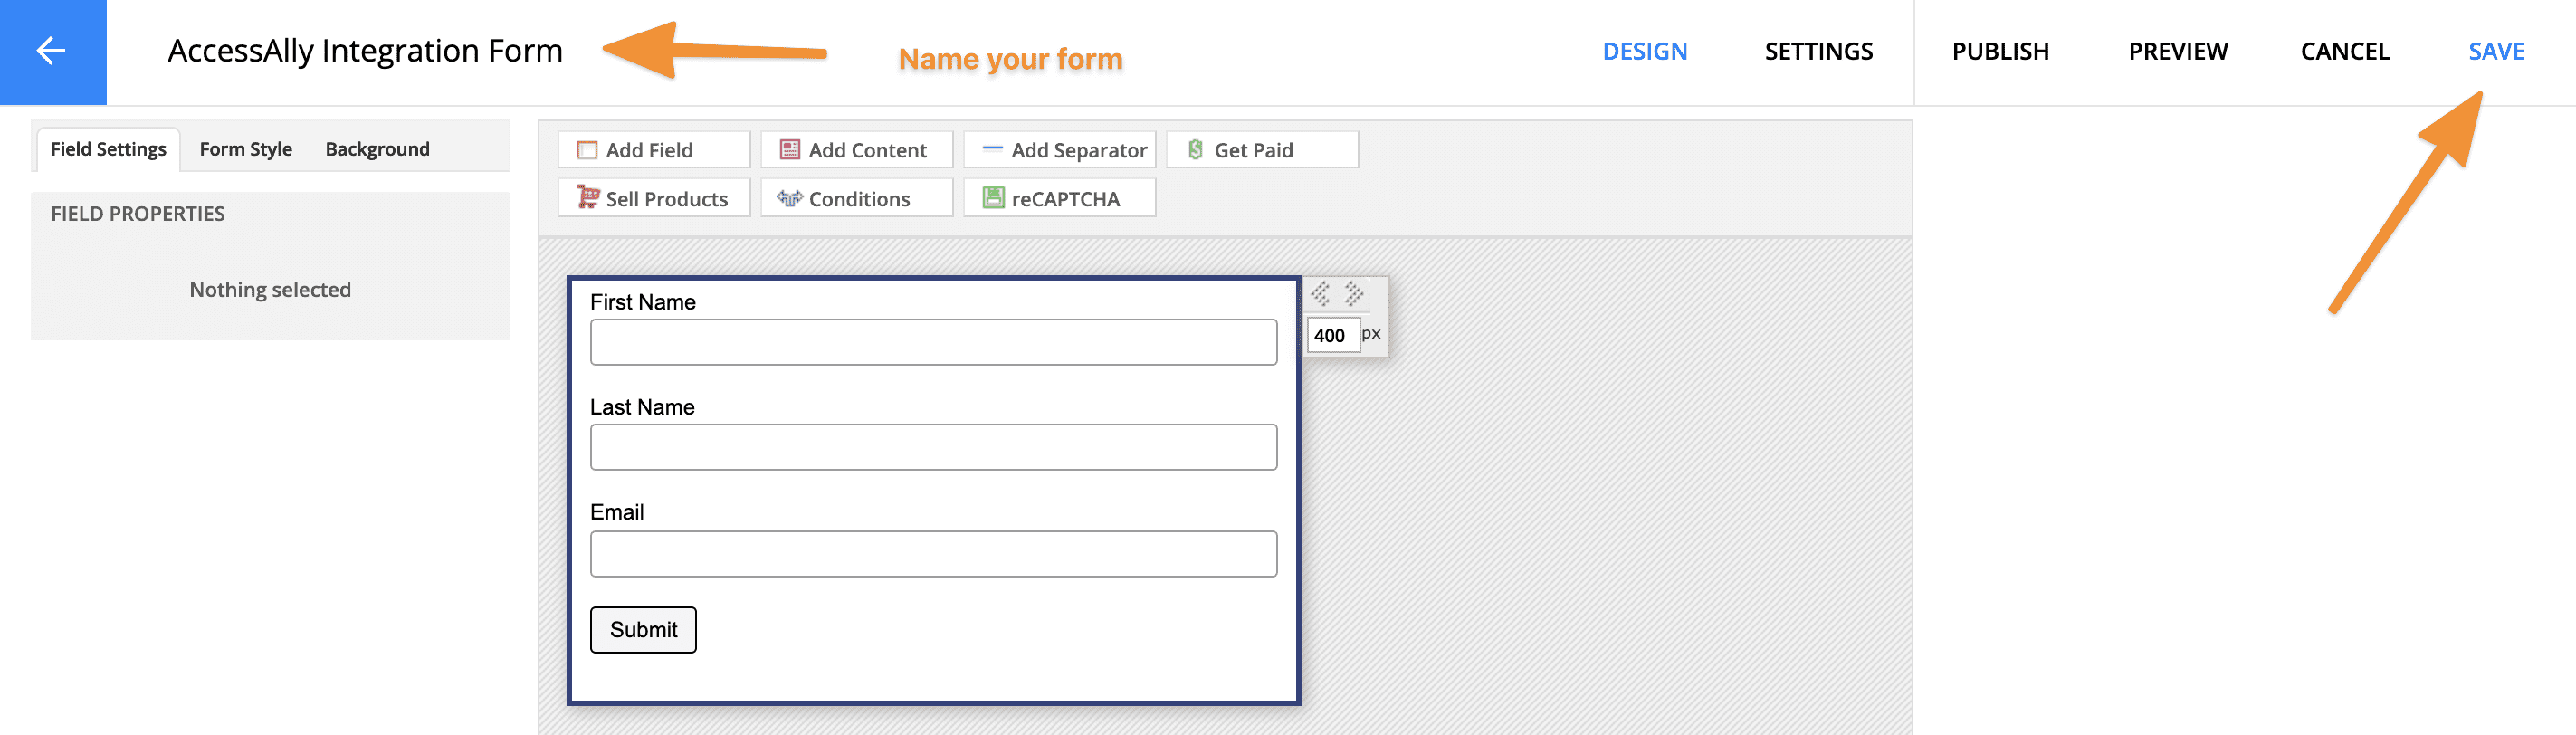
Here all you have to do is name your form so you can easily find it later, and hit save.
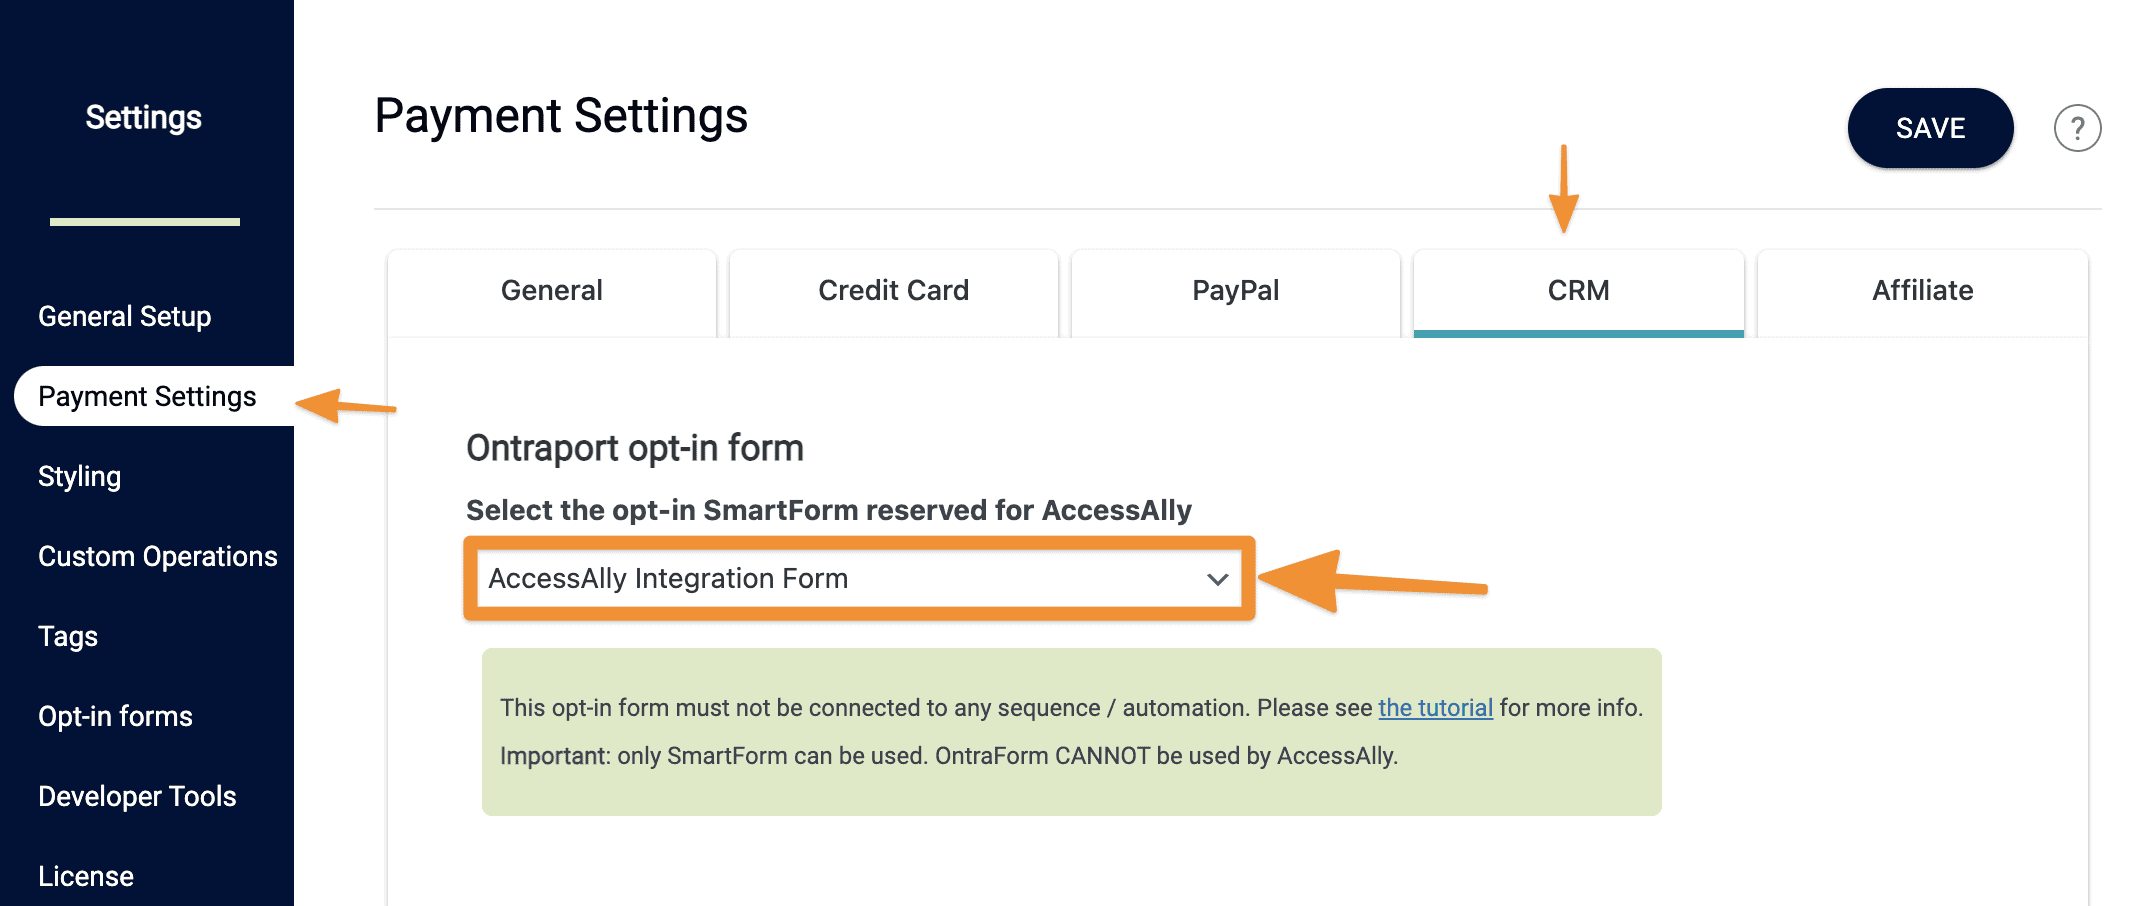
Now under AccessAlly > Settings > Payment Settings > CRM, choose the new Form you just created and hit save.
Step 1: Create a list in Active Campaign to use with AccessAlly.
Go to Contacts > Lists > “Add a list“

Create a new list called “AccessAlly” it’s important that all of your AccessAlly users are on a unique list – just for AccessAlly.
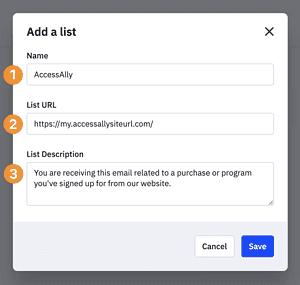
In your list options make sure that the opt-in confirmation is set to “off” as shown in the image below.
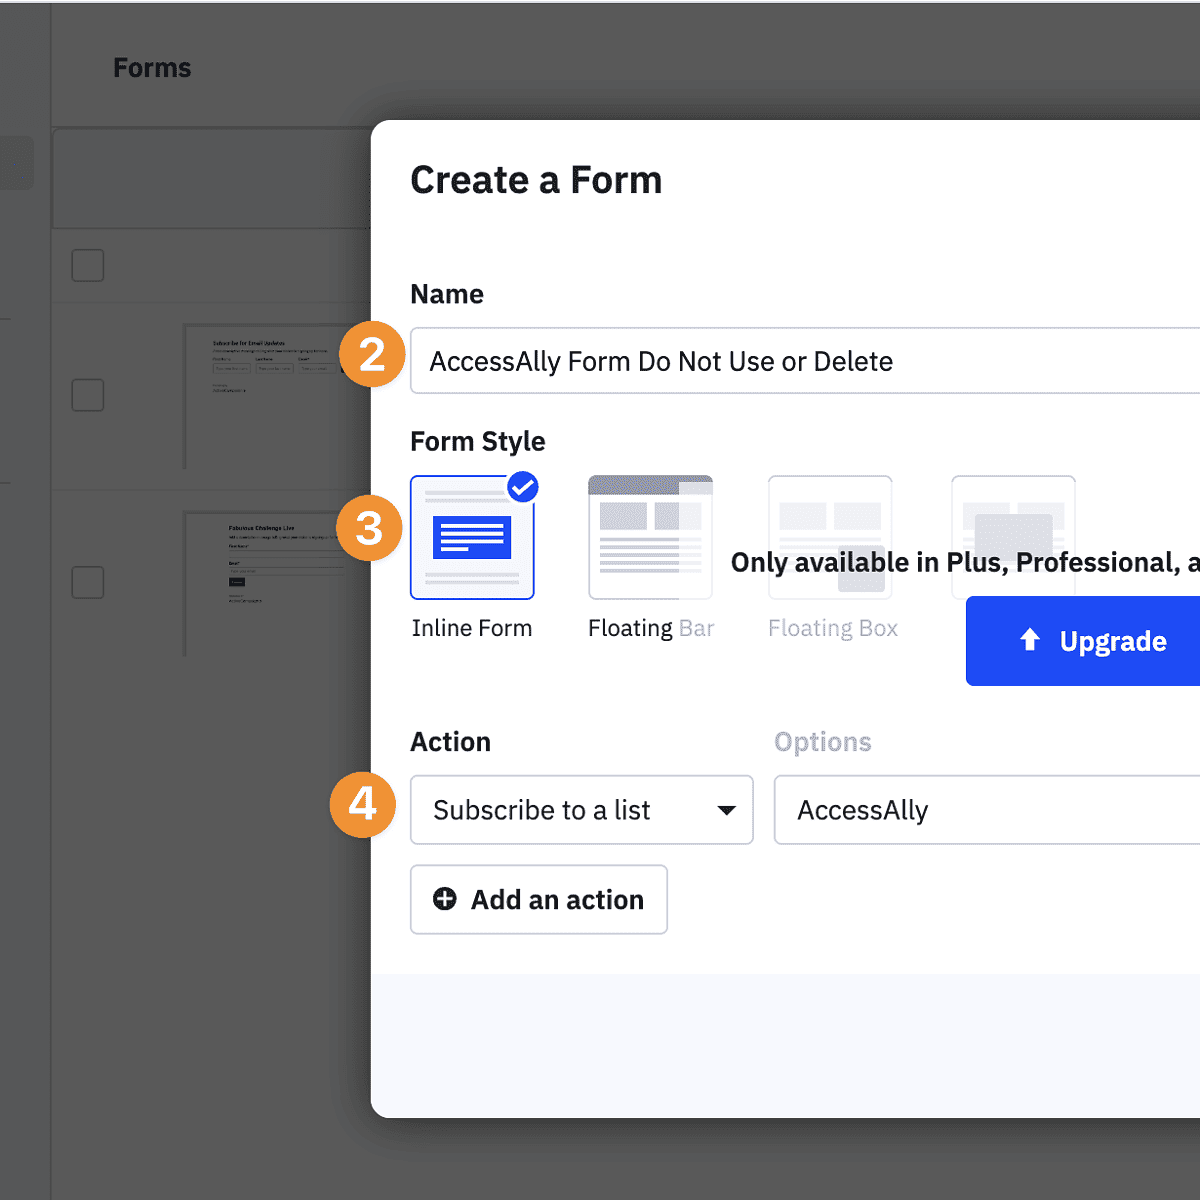
Step 2: Add a new form.
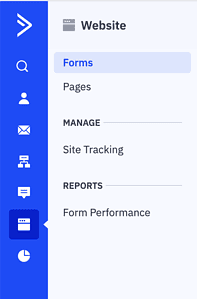
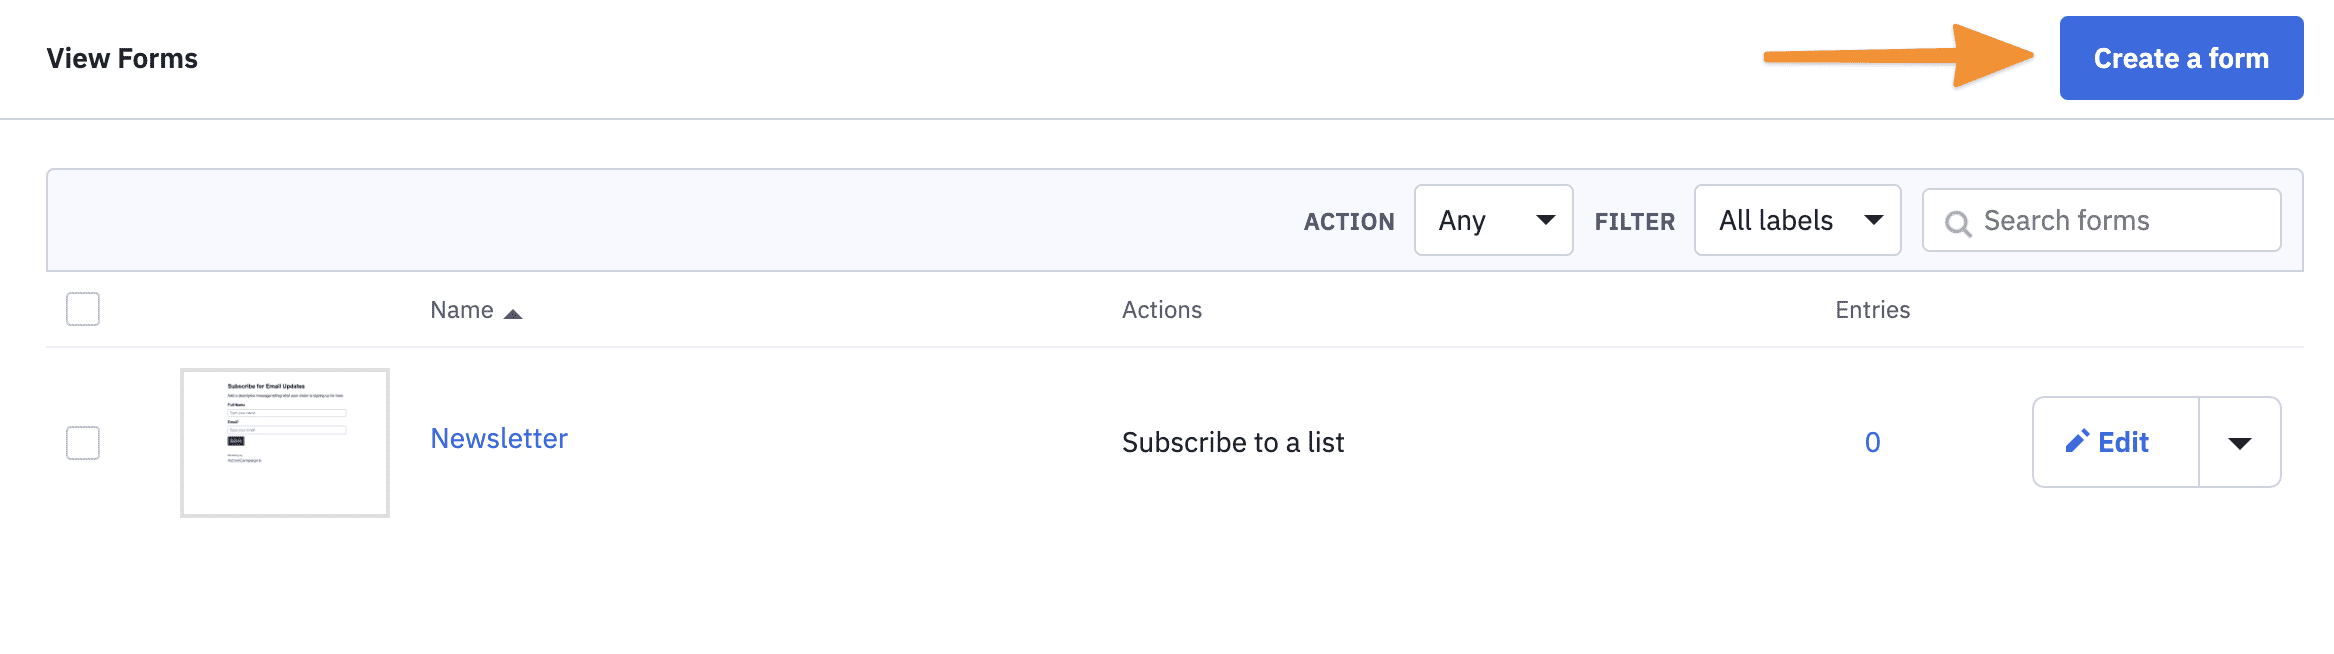
Go to Website > Forms > “Create a form”
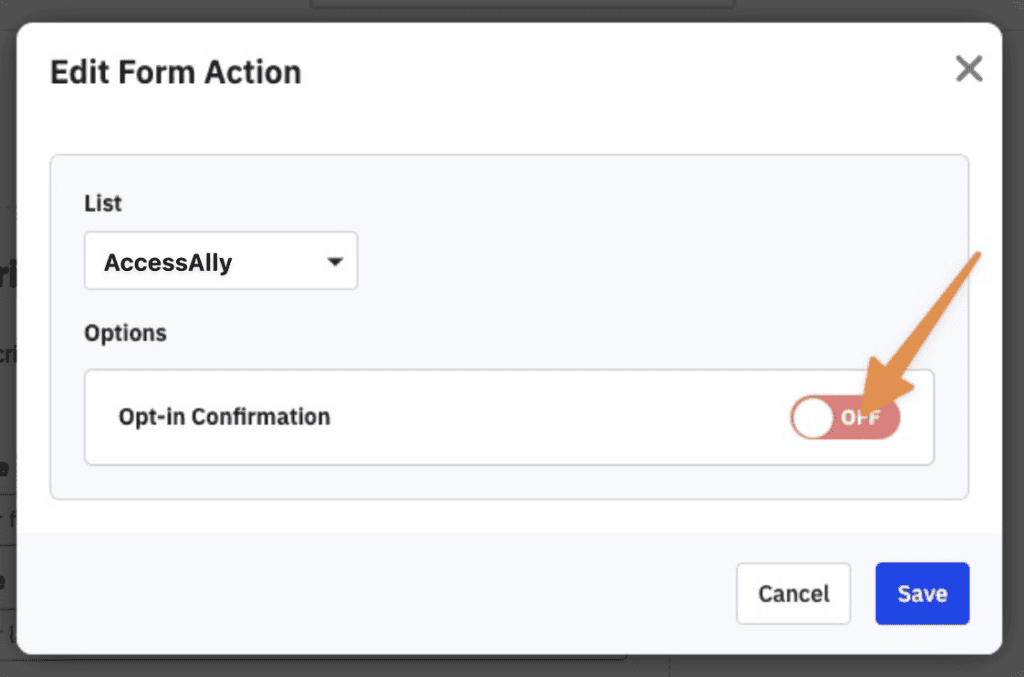
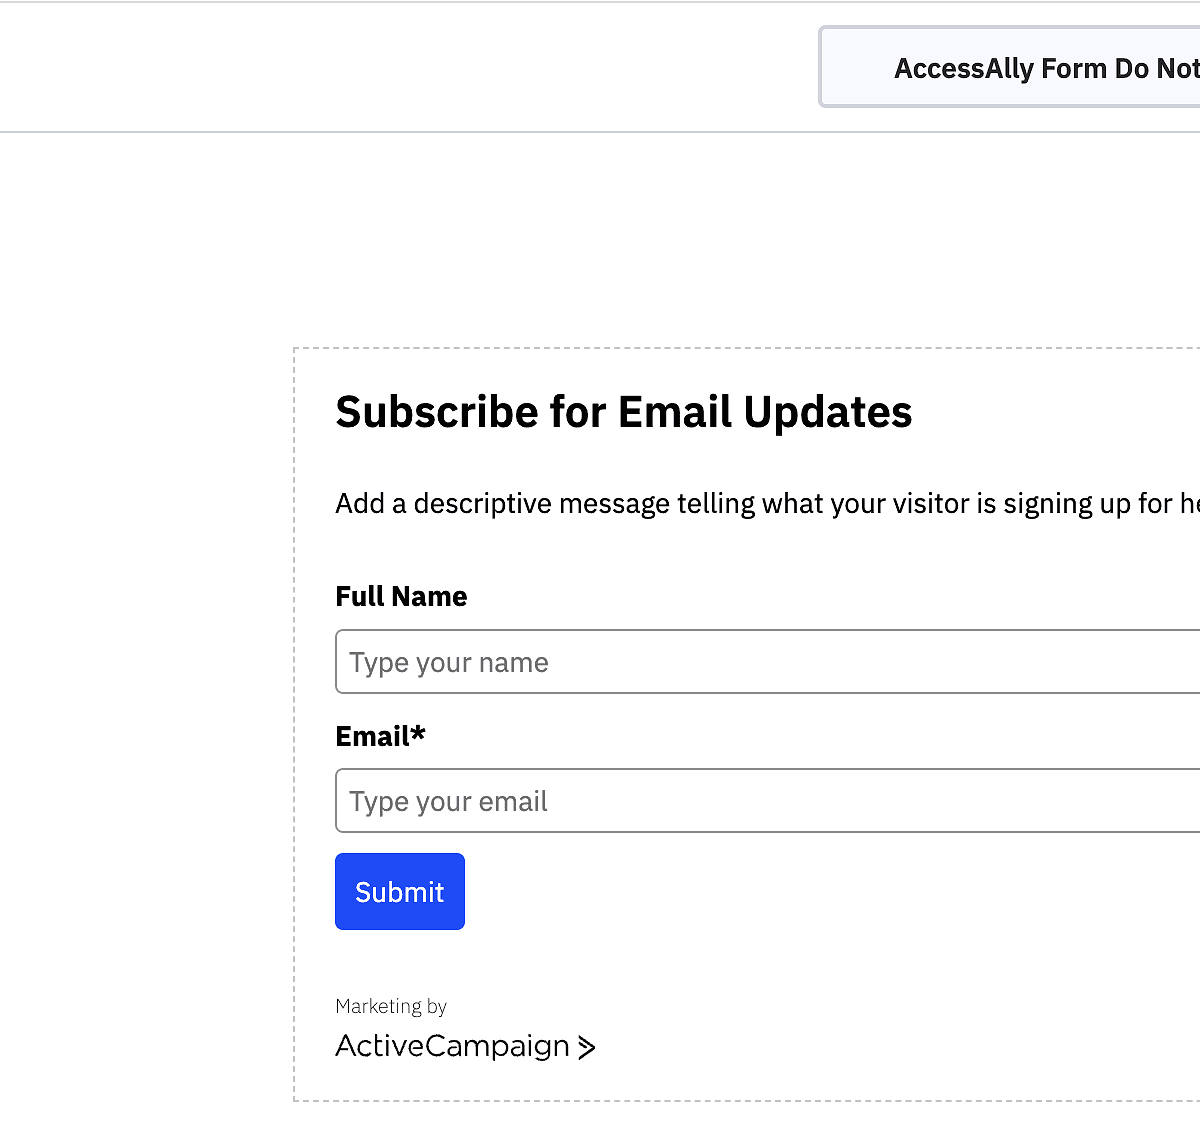
Name your form and under action choose “Subscribe to a list” and select your AccessAlly list from the dropdown. Double-check that opt-in confirmation is set to not required for the form.
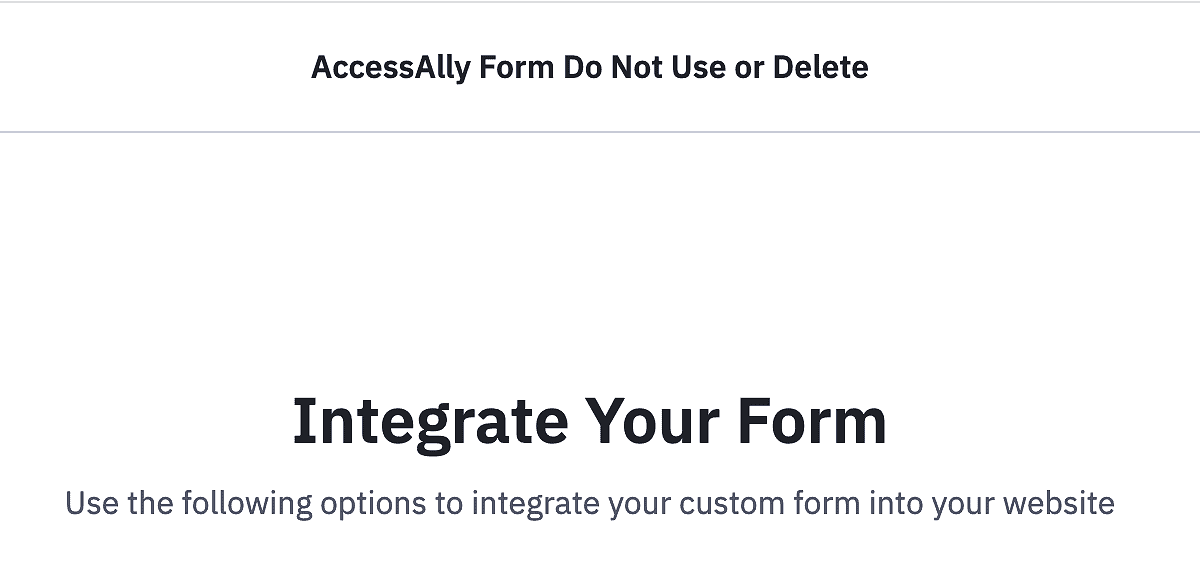
Go to the next step by clicking “Integrate”.
There is no need to save this code or use it anywhere, simply hit Save and Exit.
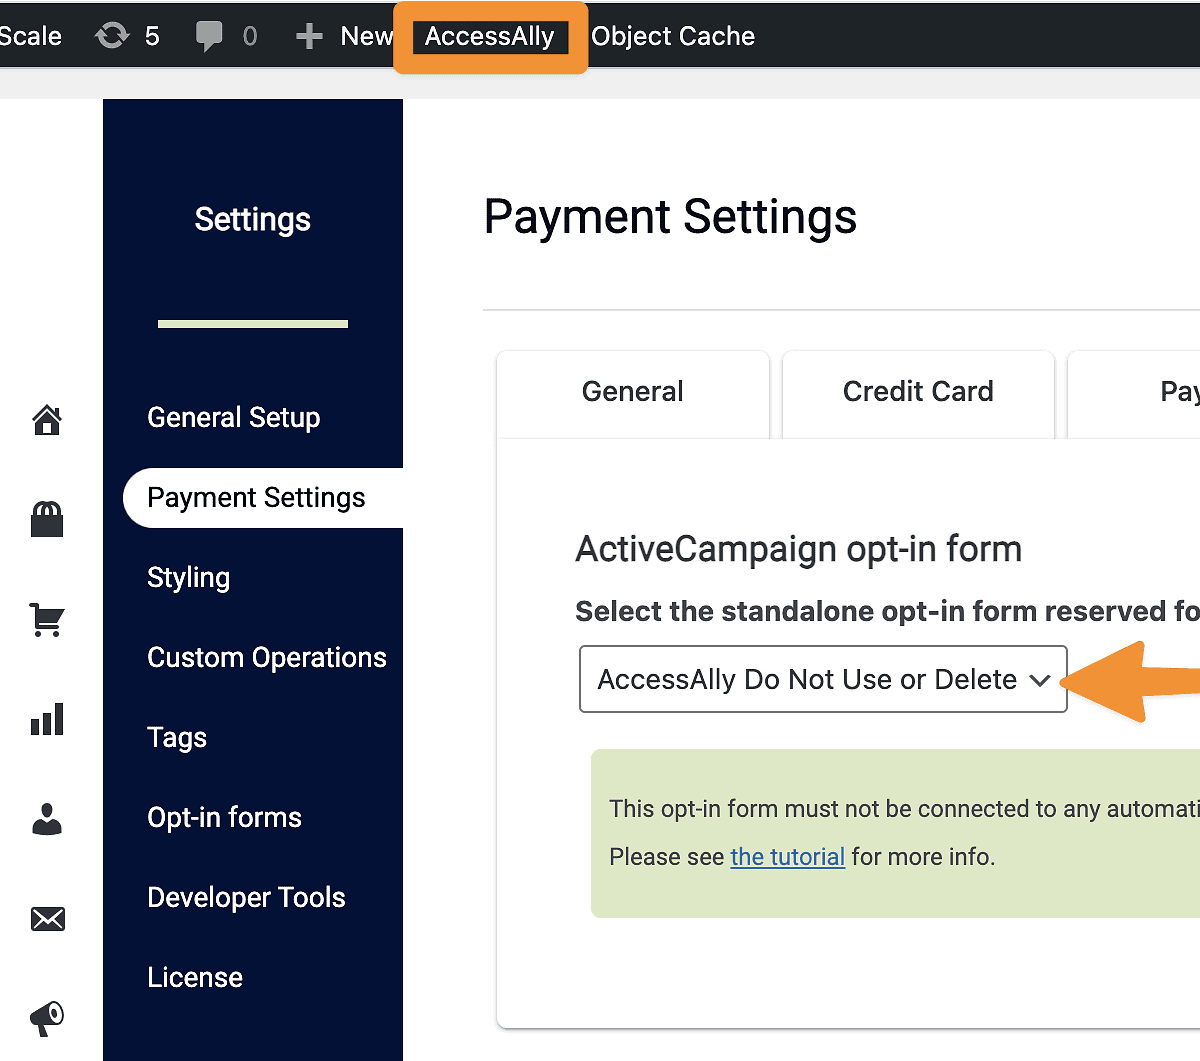
Now under AccessAlly > Settings > Payment Settings > CRM tab, choose the new Form you just created and hit save. If you do not see your form hover over AccessAlly in the top bar and click “Refresh CRM info”.
First choose “Landing pages and forms” from the top bar.

Choose “Create New”.

On the next screen, choose Form.

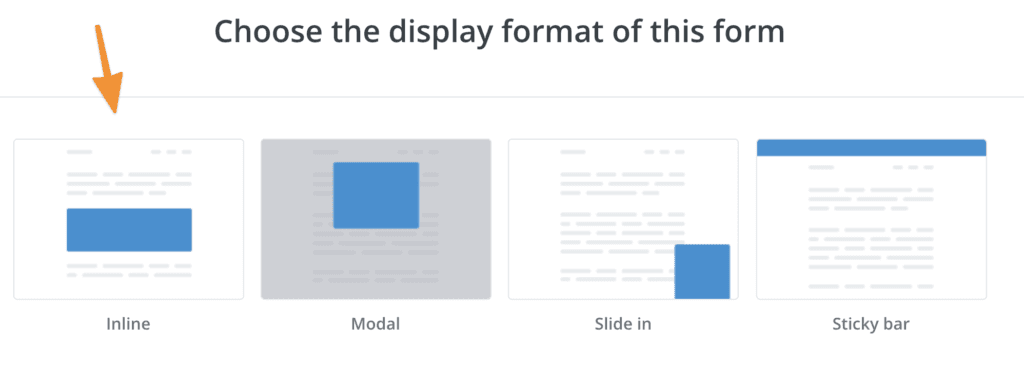
Select the Inline option.
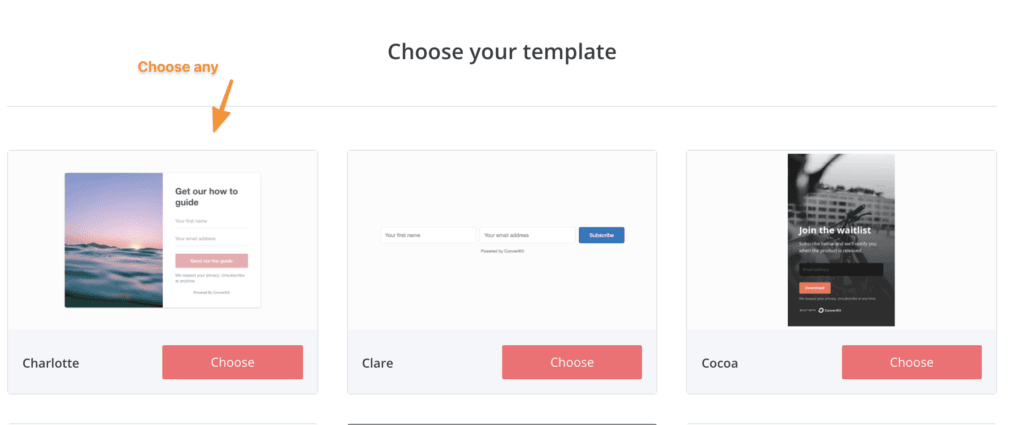
Next, you can choose any design since it won’t be shown publicly.
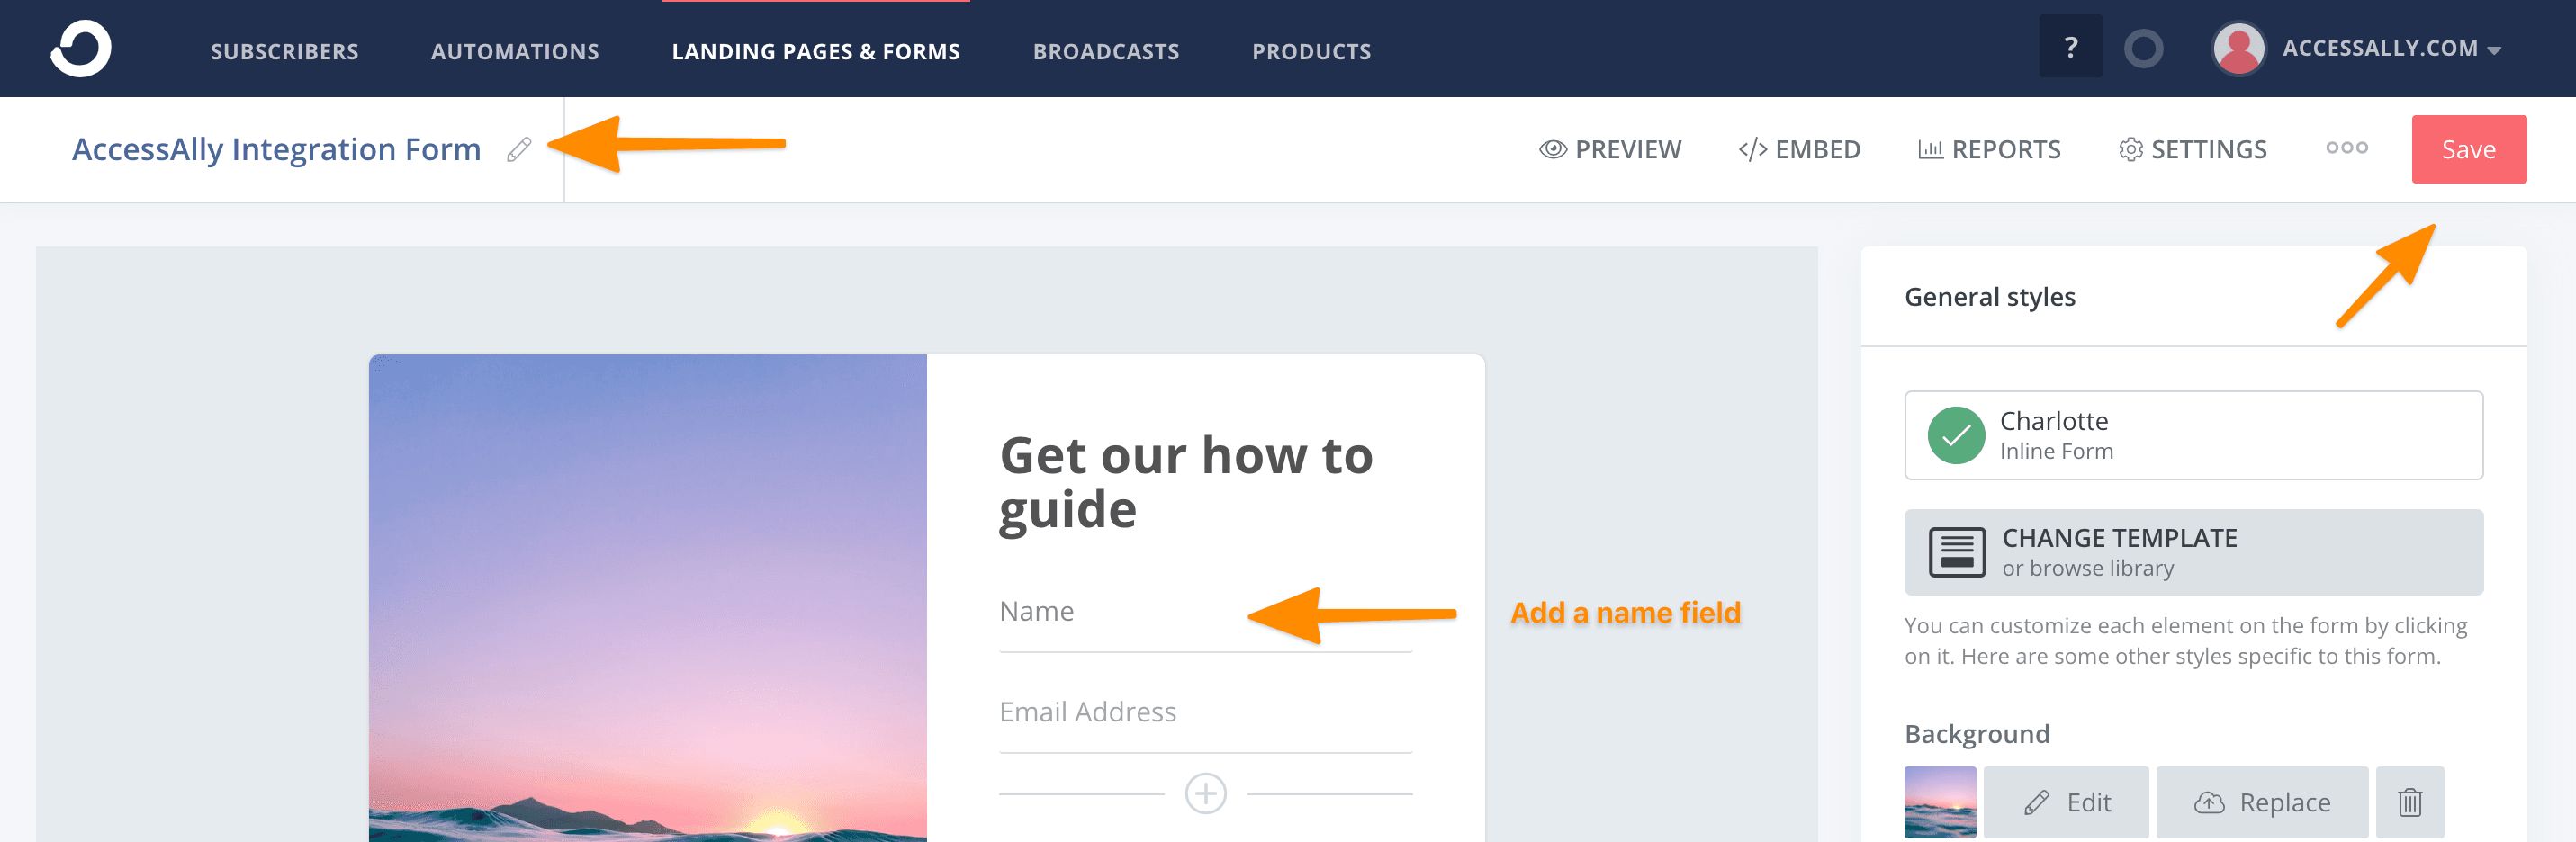
Name your form so it’s easy to find inside AccessAlly later. You should also add a name field that connects back into your Kit fields, so you have all the info you need.
Then click on “Settings” for your form. You have two options, under “Incentive”:
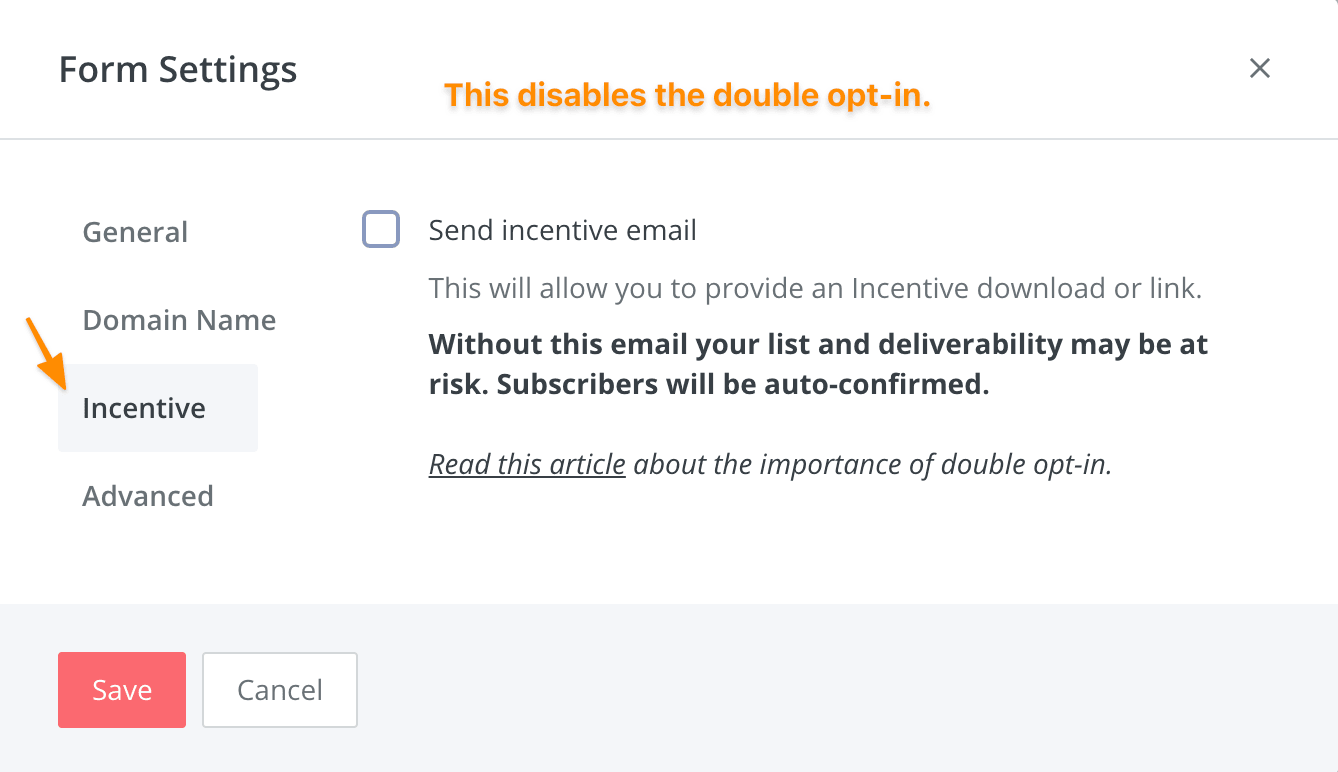
You can disable the incentive email which will turn off the double-opt in confirmation. This is the recommended option for order forms and taking payments through AccessAlly. This way people won’t need to confirm to receive their welcome email and access.
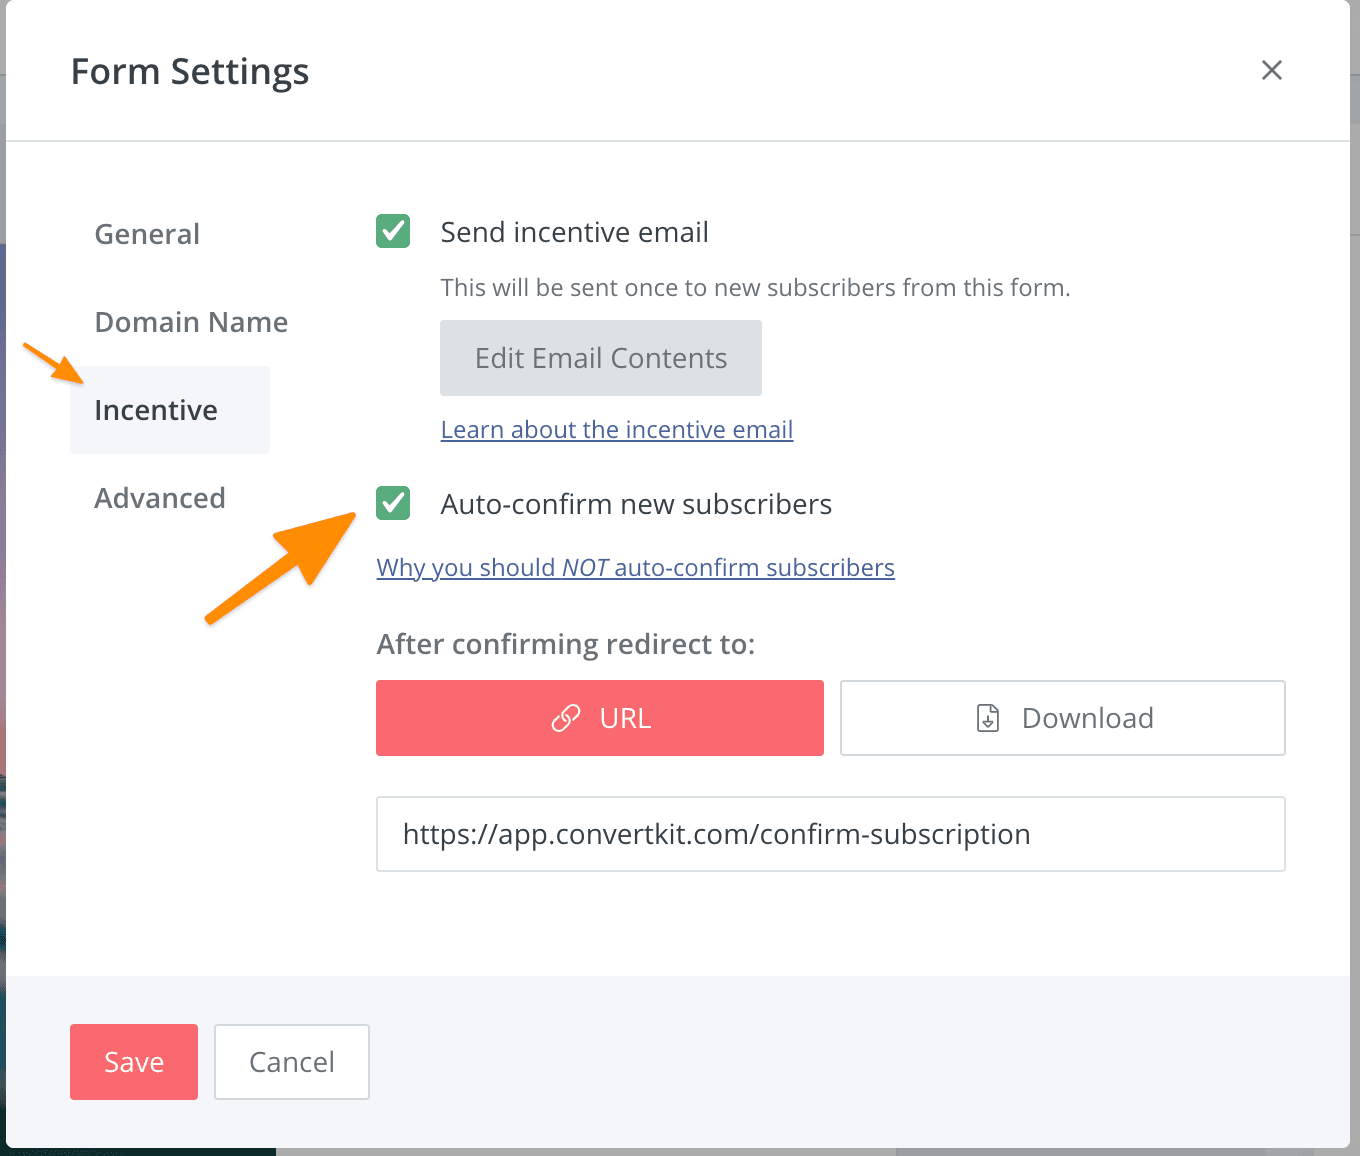
You can also keep the incentive email, but enable the checkbox to Auto-confirm subscribers, which will also help with getting people access as soon as possible.
Now under AccessAlly > Settings > Payment Settings > CRM, choose the new Form you just created and hit save.

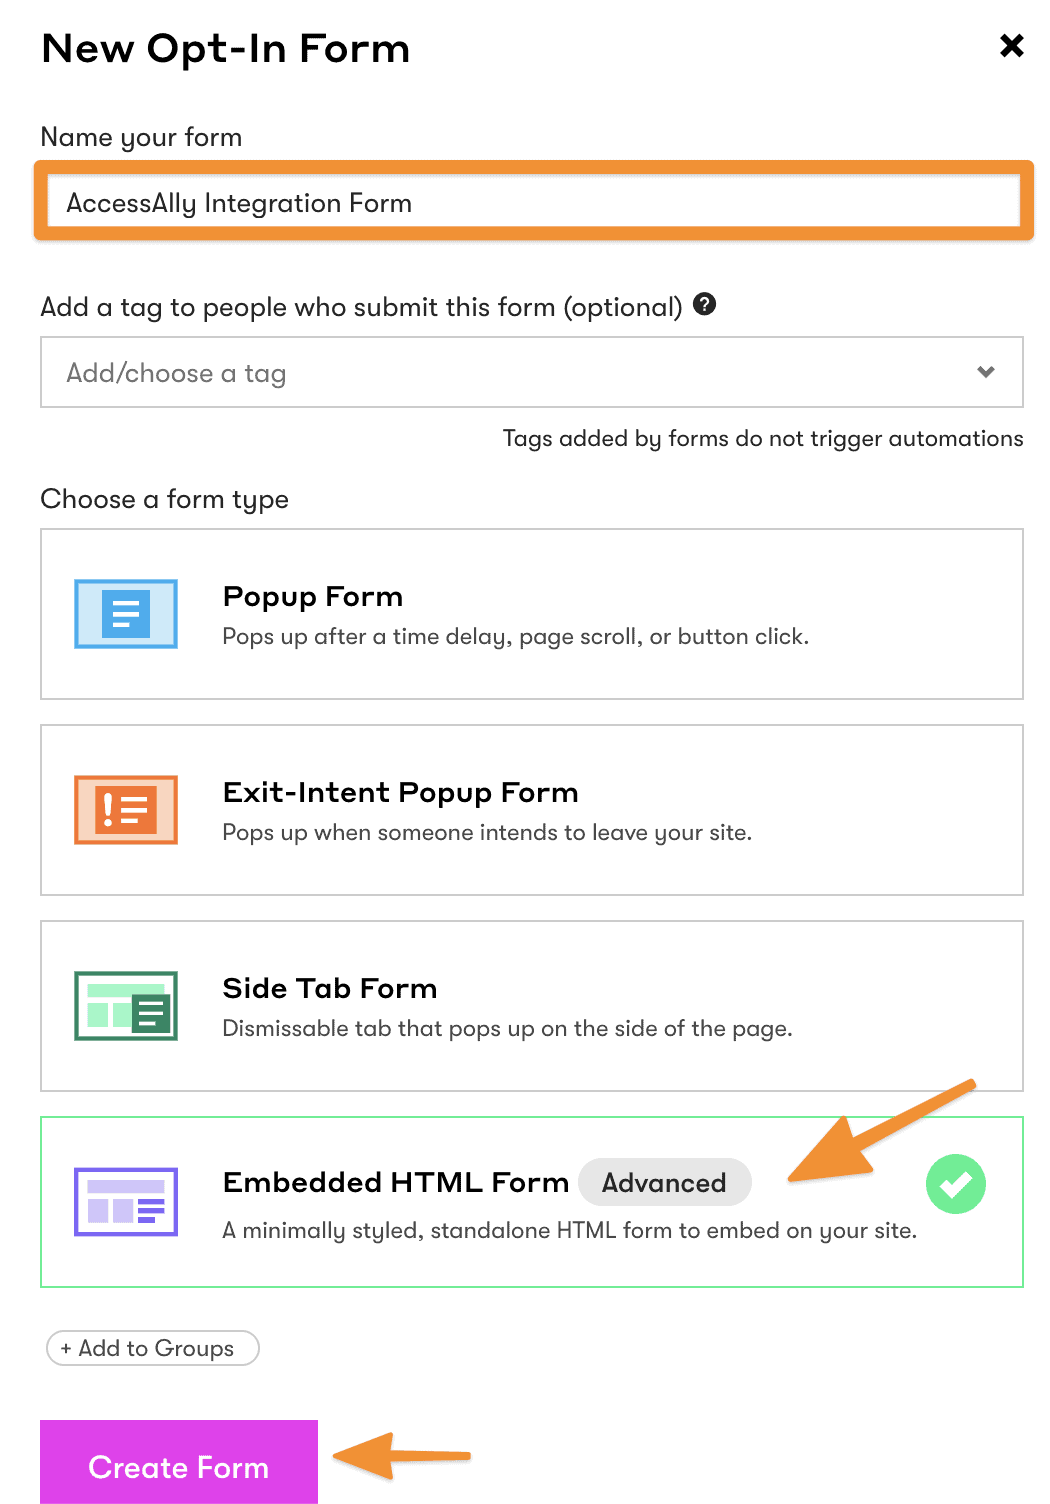
First, click on Forms in the top navigation.

Choose to create a new form.

Name your form something that you will be able to find later. Choose the “Advanced” form option, since we just want a plain form and it won’t be used anywhere else.
Make sure that you only use an Embedded HTML Form and Double Opt-in is disabled for this form.
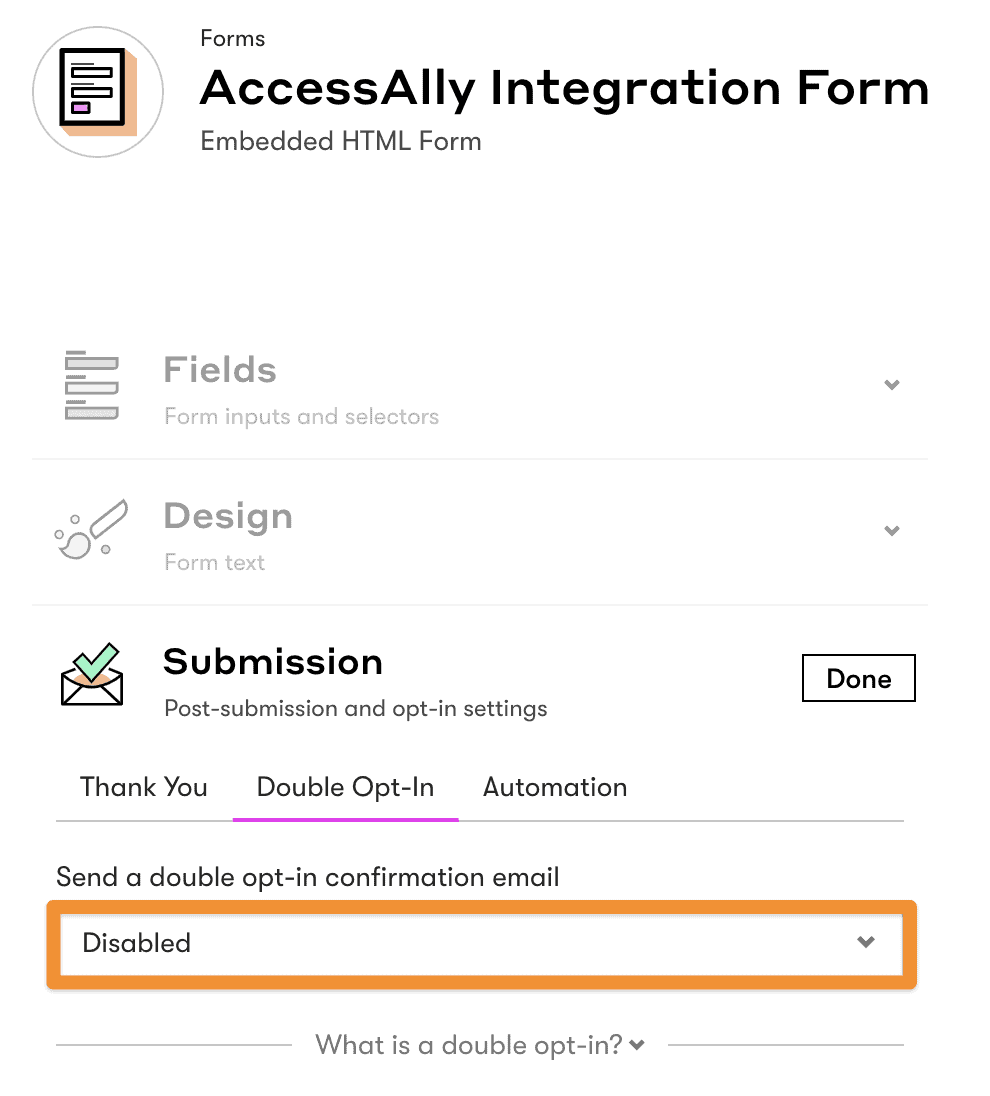
You’re done creating your form.
Now under AccessAlly > Settings > Payment Settings > CRM, choose the new Form you just created and hit save.
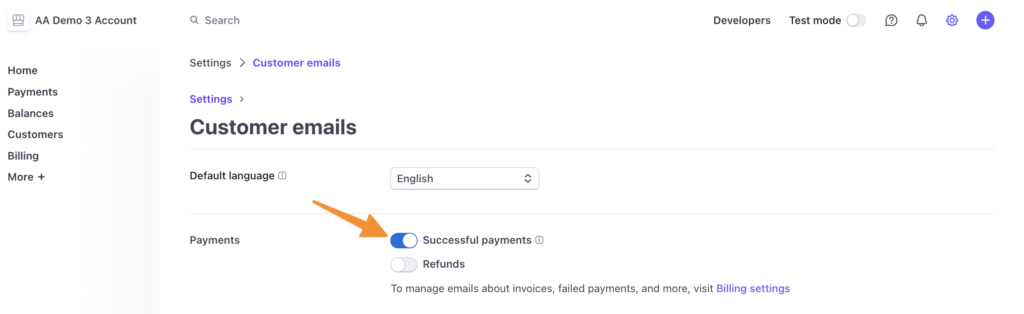
Sending Invoices from Stripe
Once you have setup the payment integration, you may want to enable the sending of invoices from Stripe as well. You could also send invoices through AccessAlly, if you prefer.
Stripe: Login to your Stripe account. On the Customer emails page you can select the option to send an email upon successful payment.
PayPal: PayPal automatically sends receipts to the purchaser at the time of a successful payment. There are no additional steps needed to have this setup.
AccessAlly Emails
In some cases your CRM system may prevent unsubscribed users from being re-added upon making new purchases. You can set up a series of default AccessAlly Emails to ensure that anyone that has previously unsubscribed will still receive important emails via your AccessAlly site like:
