Skill level: Advanced
In this article you’ll learn how to enable different payment options in Stripe Connect – like ApplePay, GooglePay, iDEAL, and more.
ARTICLE CONTENT:
AccessAlly Payment Settings
In AccessAlly → Settings → Payment Settings → Credit Card select the dropdown option for “Use the payment methods enabled in Stripe.”

Review Stripe Account
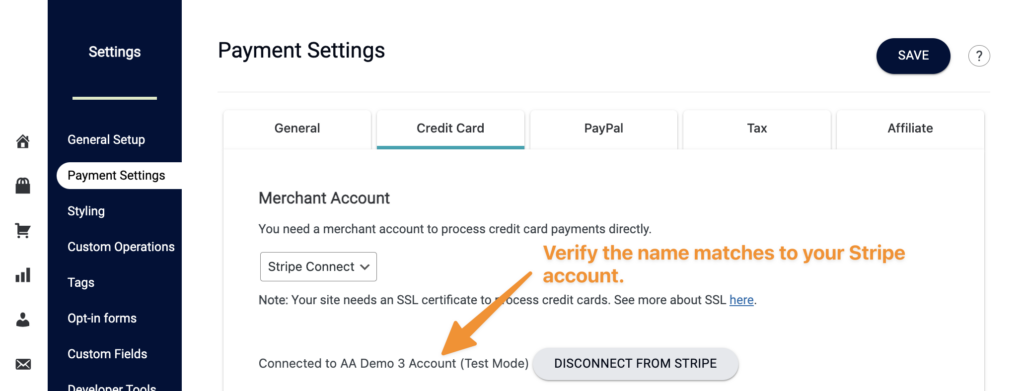
Log into the Stripe Account you’ve integrated with AccessAlly. It’s important to review the account name in Stripe to ensure it matches to the account name in AccessAlly.
View of Stripe Connect account name in AccessAlly.
View of Stripe Connect account name in Stripe.

When logging into Stripe use the email address and password linked to your account. If you have multiple team members, the owner of the Stripe account should perform the steps.
Stripe Settings
Default Payments
Hover over Settings and click Settings in your Stripe account.

Next, click Payments.
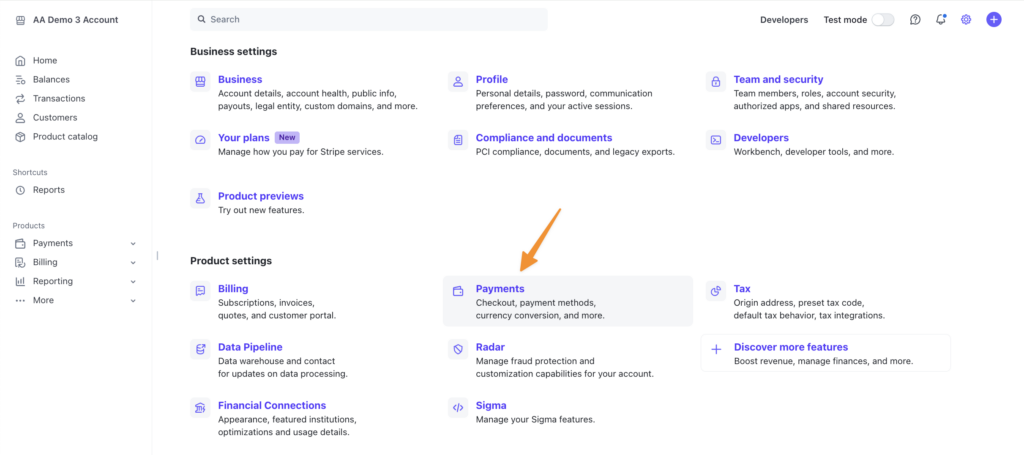
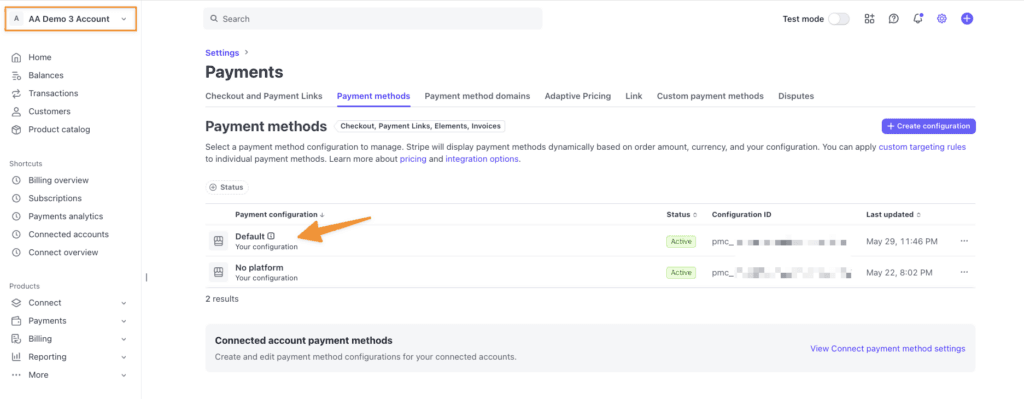
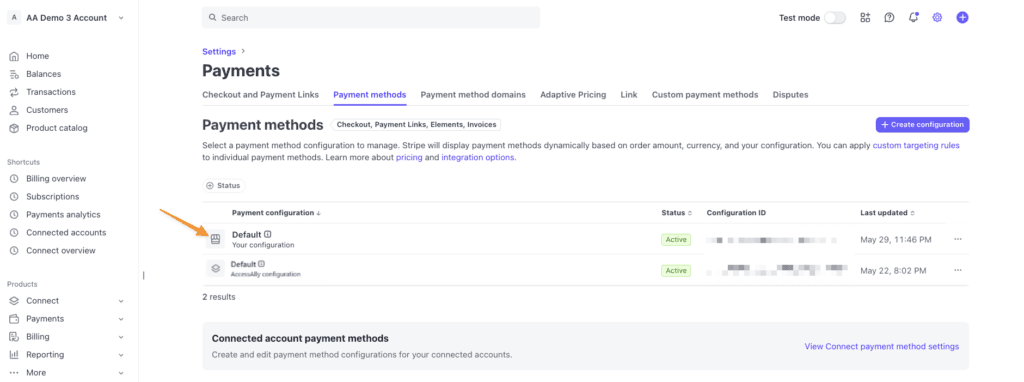
Select the Payment Methods tab. Ensure that the “Default” option is shown in the dropdown.
Multiple Default Payment Options
- If you see multiple default configurations, select the default with the “Shop” icon on left.
- Click on the “Shop” icon to add Available Payment Options.
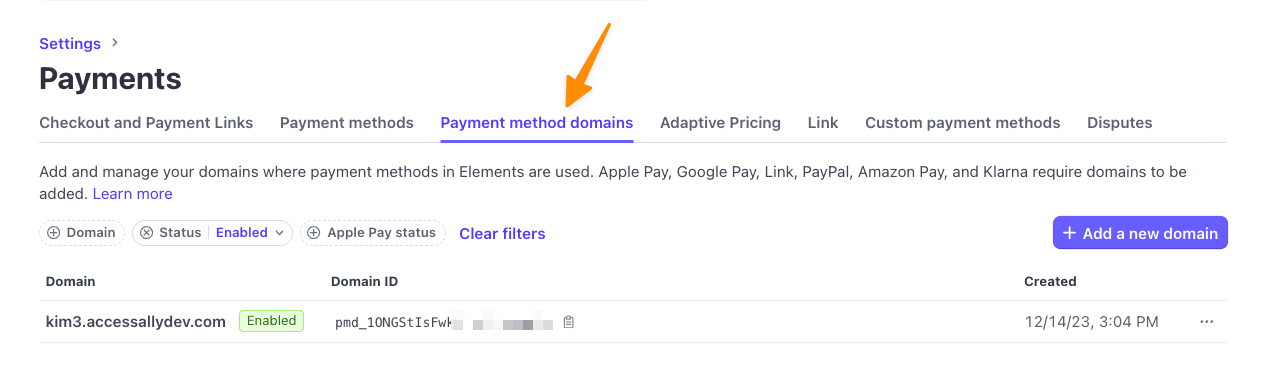
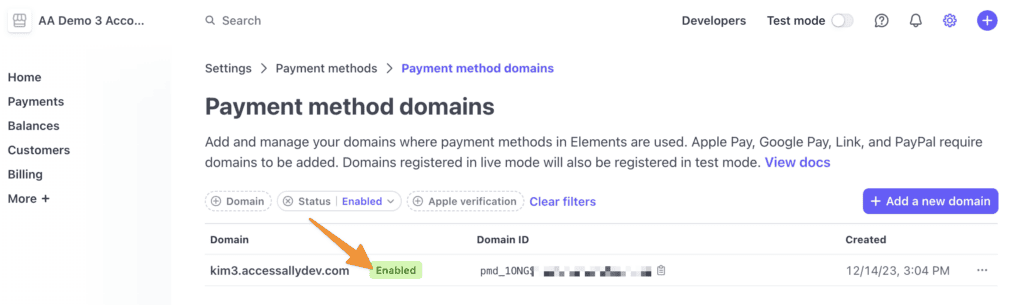
Payment Method Domains
In Stripe, review the “Payment method domains” tab. Your domain needs to be listed and verified here in order to take payments.
Available Payment Options
AccessAlly order forms connected to Stripe are able to accept the following payment options.
| TYPE | SLUG | RESTRICTIONS | RECURRING PAYMENT | NOTES |
| Credit Cards | card | None | Yes | |
| Apple Pay | card | None | Yes | |
| Google Pay | card | None | Yes | |
| US Bank Account (ACH) | us_bank_account | USD payments only. No immediate payment. | Takes 3-7 days to confirm payment. Payment will be in pending state. | |
| EPS | eps | Euro single payment only. | No recurring payments. | |
| iDEAL | ideal | Euro immediate payment only. | Recurring payments charged through SEPA. | |
| Bancontact | bancontact | Euro immediate payment only. | Recurring payments charged through SEPA. | |
| SEPA | sepa_debit | Euro future payments only. | Takes up to 6 days to confirm. Will display as processing. | |
| Affirm | affirm | USD and CAD only. Immediate payment. | No | Amount varies. Visit Stripe for available order form amounts. |
| AfterPay ClearPay |
afterpay_clearpay | USD, CAD, GBP, AUD, NZD must be greater than $50 | No | |
| Klarna | klarna | Only if currency in AccessAlly matches AUD, CAD, CHF, CZK, DKK, EUR, GBP, NOK, NZD, PLN, SEK, or USD. | No | Amount varies. Visit Stripe for available order form amounts. |
Enable Payment Options in Stripe
From the list of available payment options you can activate the types you would like to use in Stripe under Payment Methods Setup Tab.
Enable Credit Cards in Stripe
Go to the Payment Methods Setup tab in Stripe, set cards to “Active” and review “Summary” and “About This Payment Method” to see which cards are accepted.

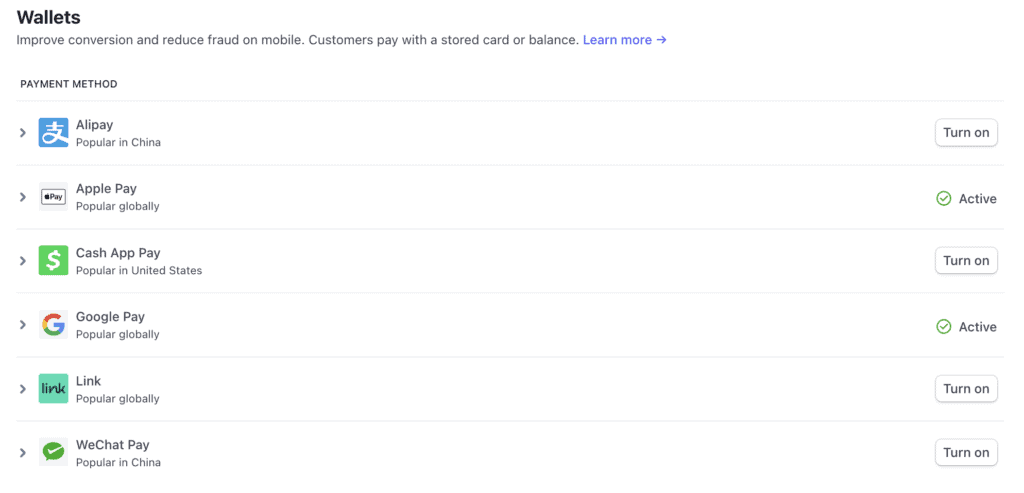
To accept Apple Pay and Google Pay activate these in the Wallets section.
While many wallet options are listed here AccessAlly integrates with Apple Pay and Google Pay at this time.
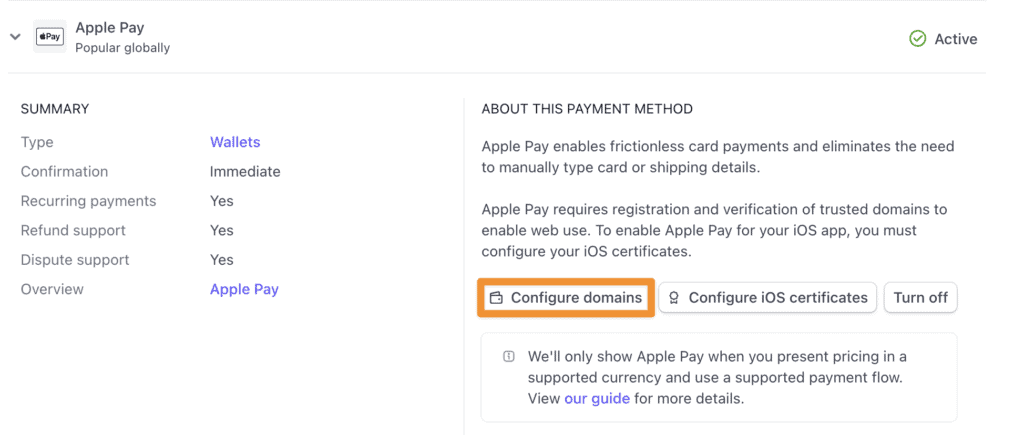
Configure Domains
Follow the steps to Configure domains when using Apple Pay and/or Google Pay. Under summary you’ll see that the payment is immediate and recurring payments are supported.
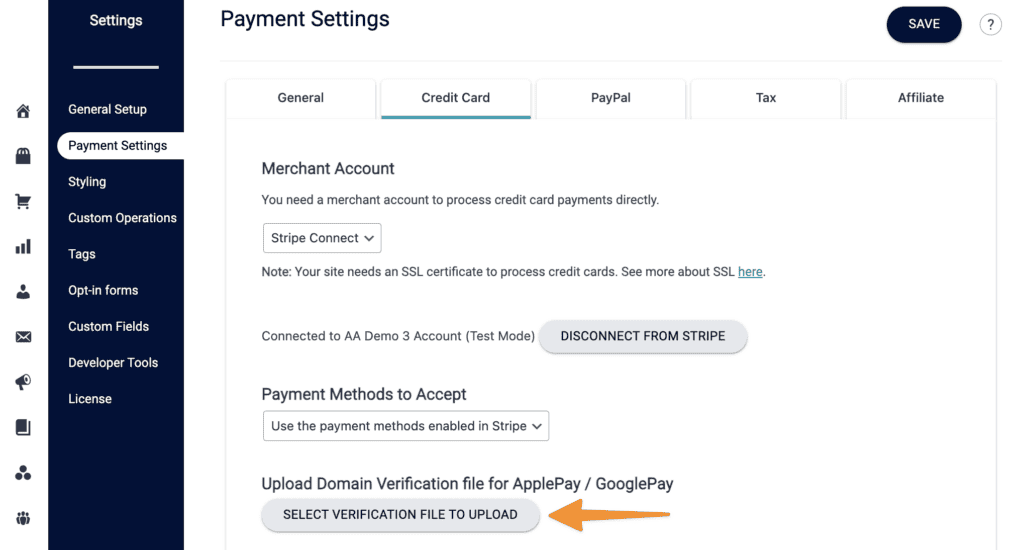
Add Verification File
* The Verification file upload is no longer required for Apple Pay.
When prompted to upload the verification file you will do this on your AccessAlly site by going to AccessAlly → Settings → Payment Settings → Credit Card. Click “Select Verification File to Upload.”
If adding both Apple Pay and Google Pay only a single file upload is needed and will cover both payment options.
Verify in your Stripe account.
Once your file has been verified your domain will show as enabled under “Payment method domains.”
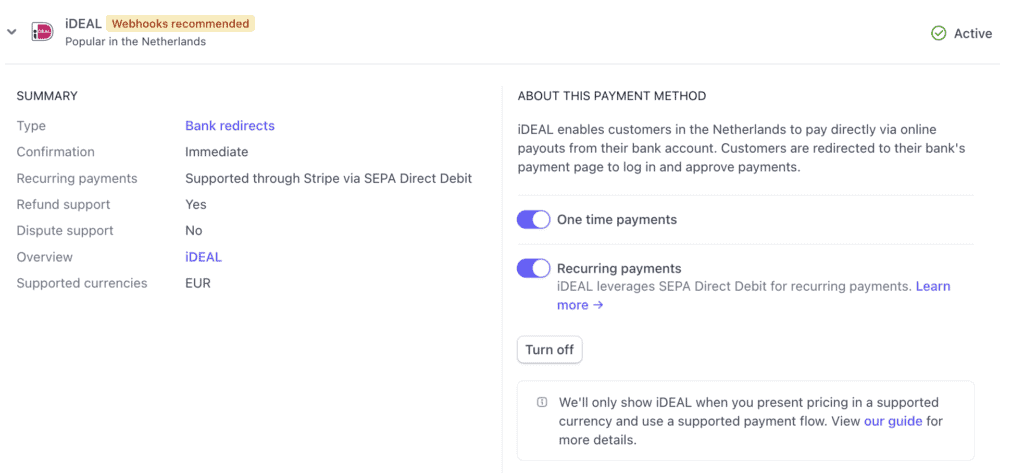
Enable bank redirects for iDEAL, EPS, and Bancontact.
While many wallet options are listed here AccessAlly integrates with iDEAL, EPS, and Bancontact at this time.
Set to “Active” and follow the steps to turn on One time payments (and recurring payments with SEPA if desired.)
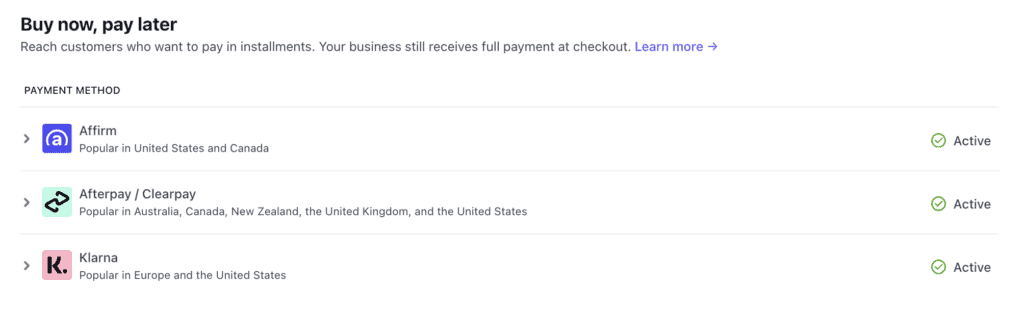
You can enable Affirm, AfterPay/ClearPay, and/or Klarna. by setting the dropdown to active.
Example of SEPA
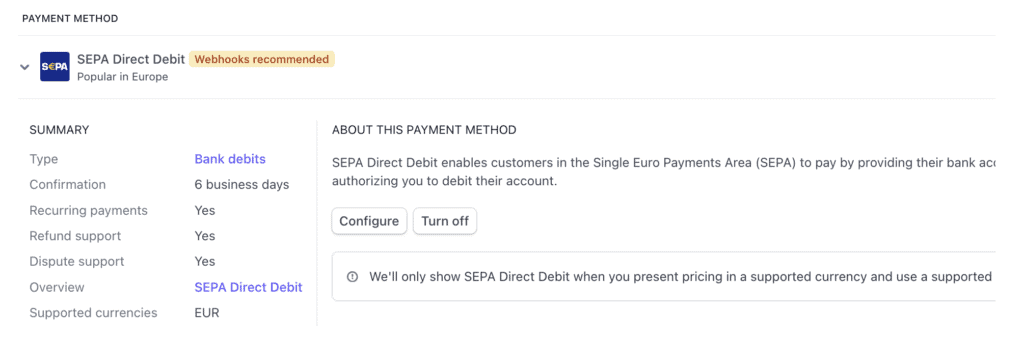
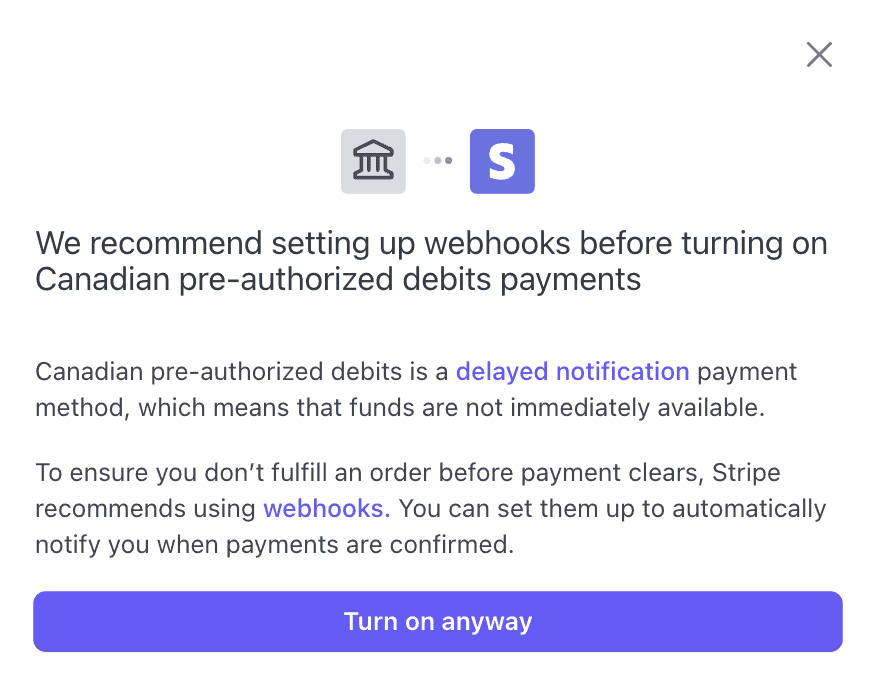
You can enable your desired options using the dropdown. You may see additional popups with details about that payment method.
Example Canadian pre-authorized debits popup.
Viewing Payment Options
The credit card option will automatically show on your order forms.
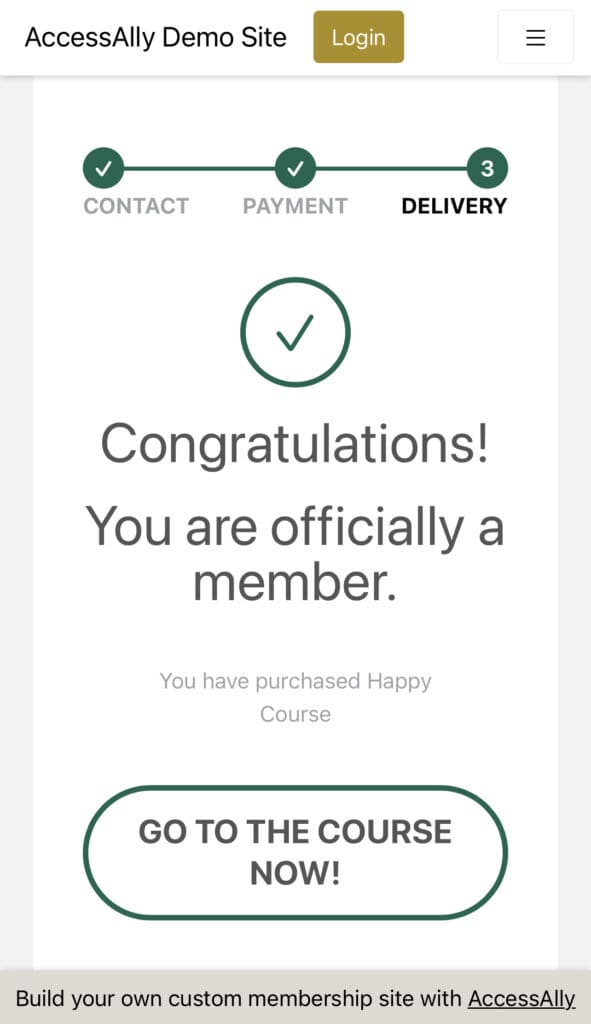
After purchase the customer is redirected based on your order form purchase success settings.
View of credit card purchase in AccessAlly Sales log.
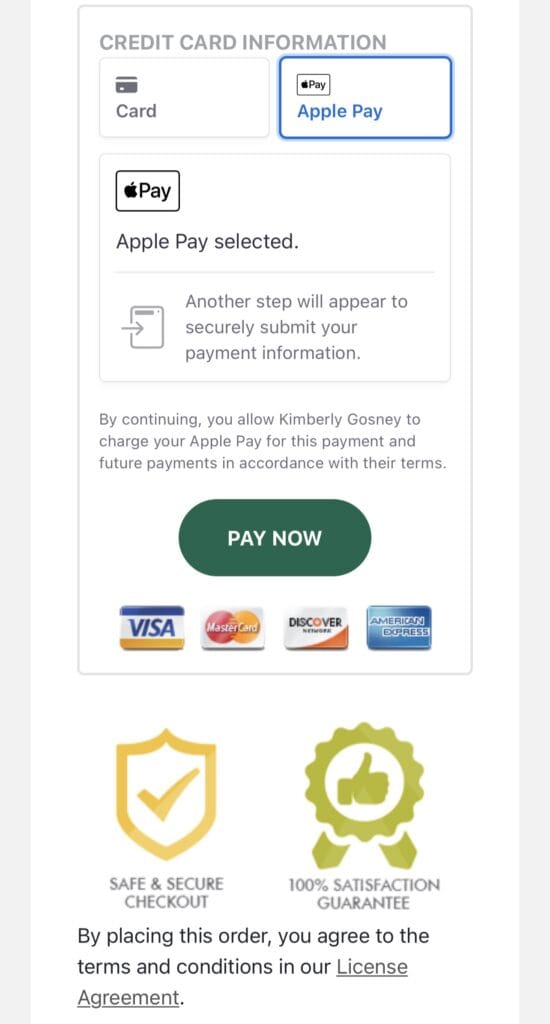
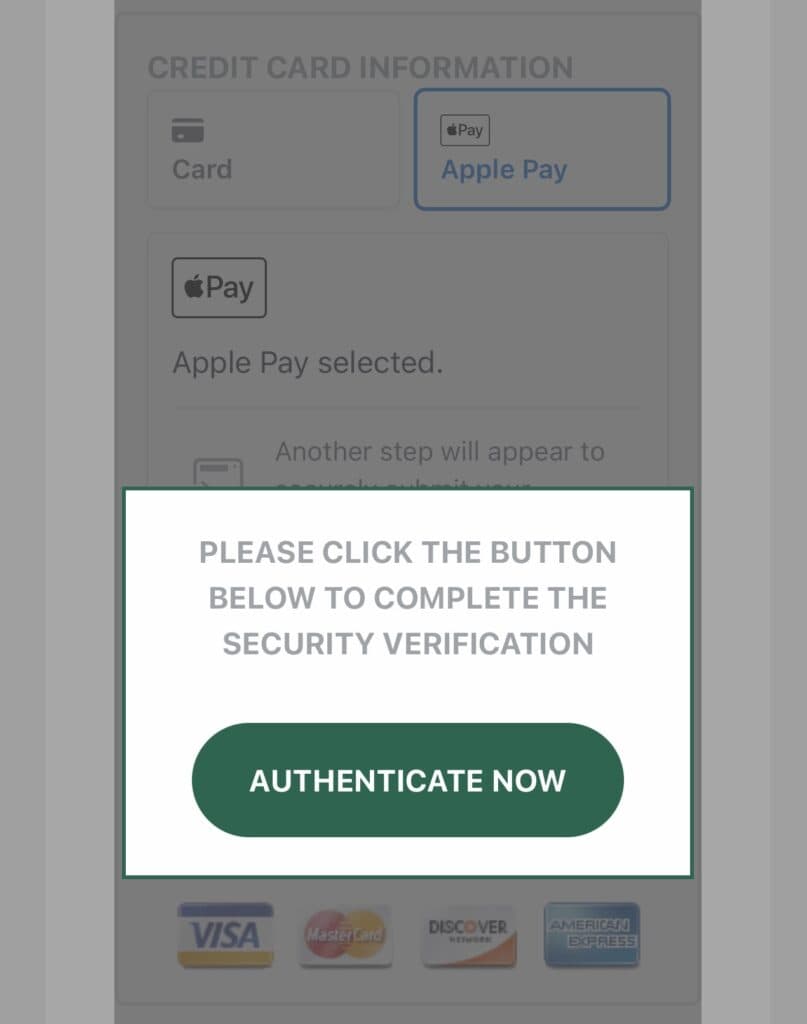
The Apple Pay option will automatically show when a potential customer is logged into a device with this payment option enabled.
View shown with Apple Pay on iPhone.
The next screen will show an “Authenticate Now” step.
After purchase the customer is redirected based on your order form purchase success settings.
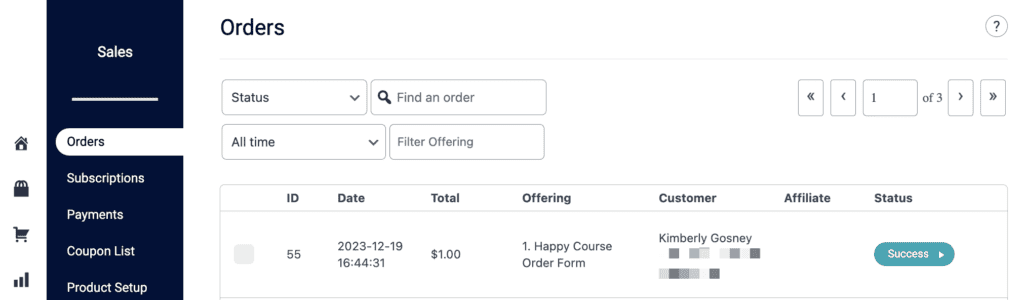
View of purchase in AccessAlly → Sales → Orders
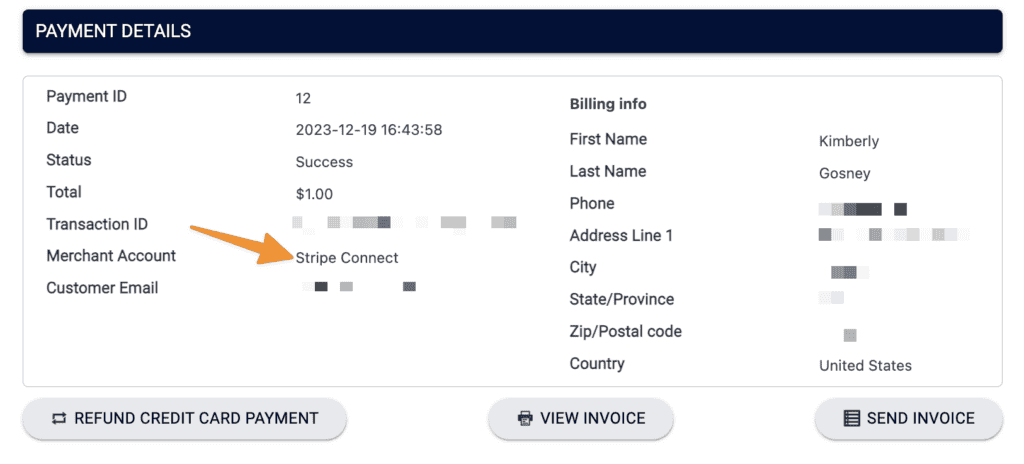
Payment Details will show the merchant account as Stripe Connect.
The Google Pay option will automatically show when a potential customer is logged into a device with this payment option enabled.
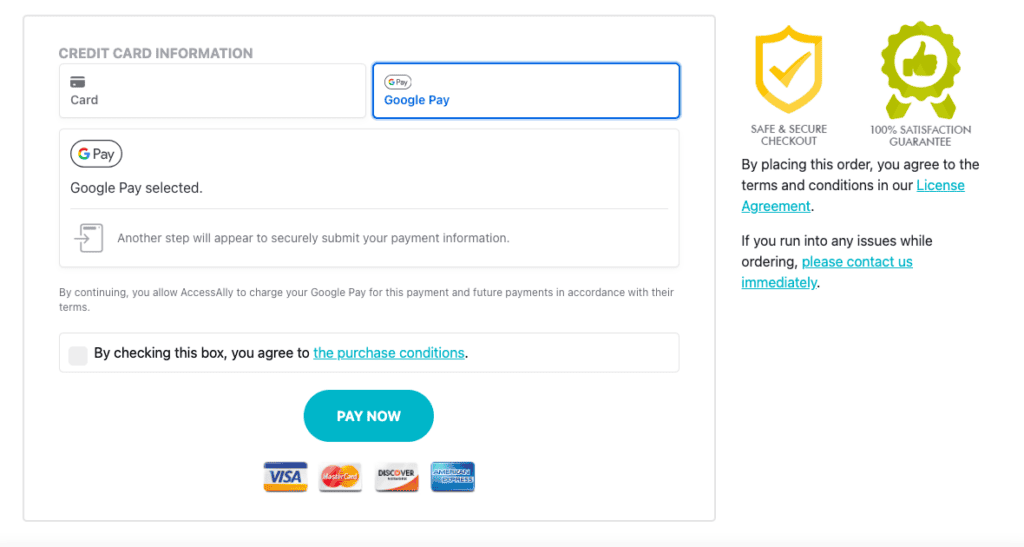
View shown in Google Pay.
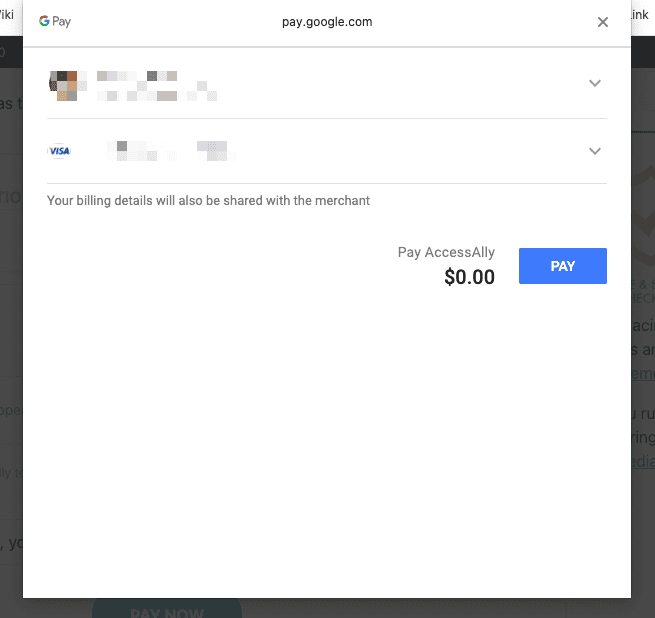
After purchase the customer is redirected based on your order form purchase success settings.

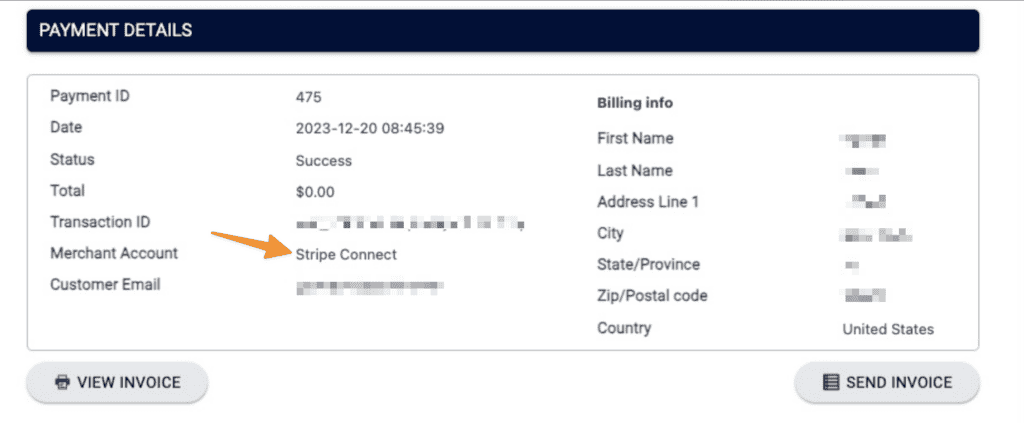
View of the purchase in AccessAlly → Sales → Orders. This purchase will show as being from Stripe Connect under Payment Details.
The Klarna option will automatically show when a potential customer is logged into a device with this payment option enabled. There is a Klarna extension available for Google Chrome users.
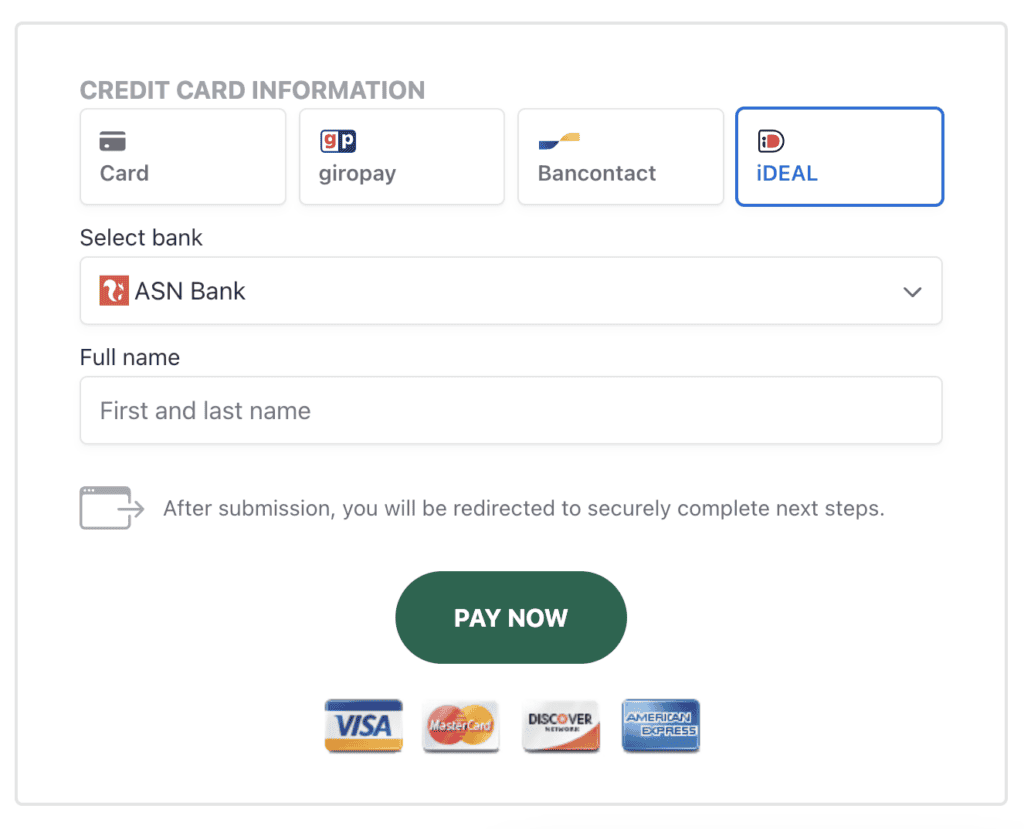
View of iDEAL for order forms with a one payment plan.
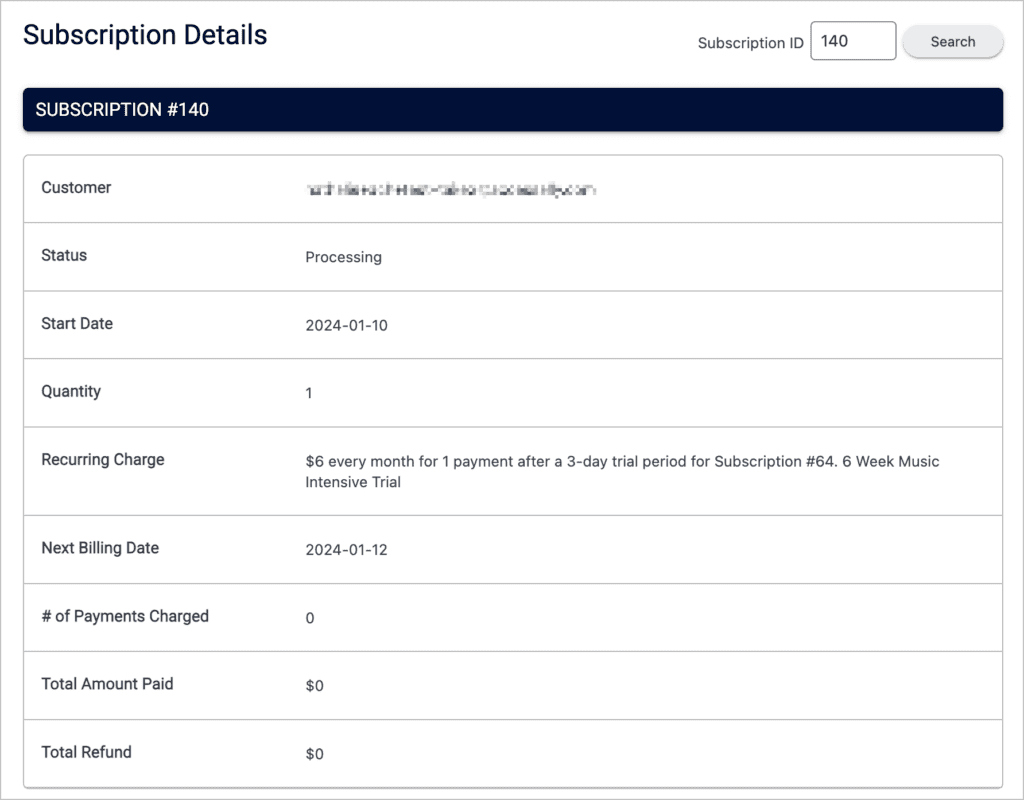
Example of the payment details in AccessAlly.
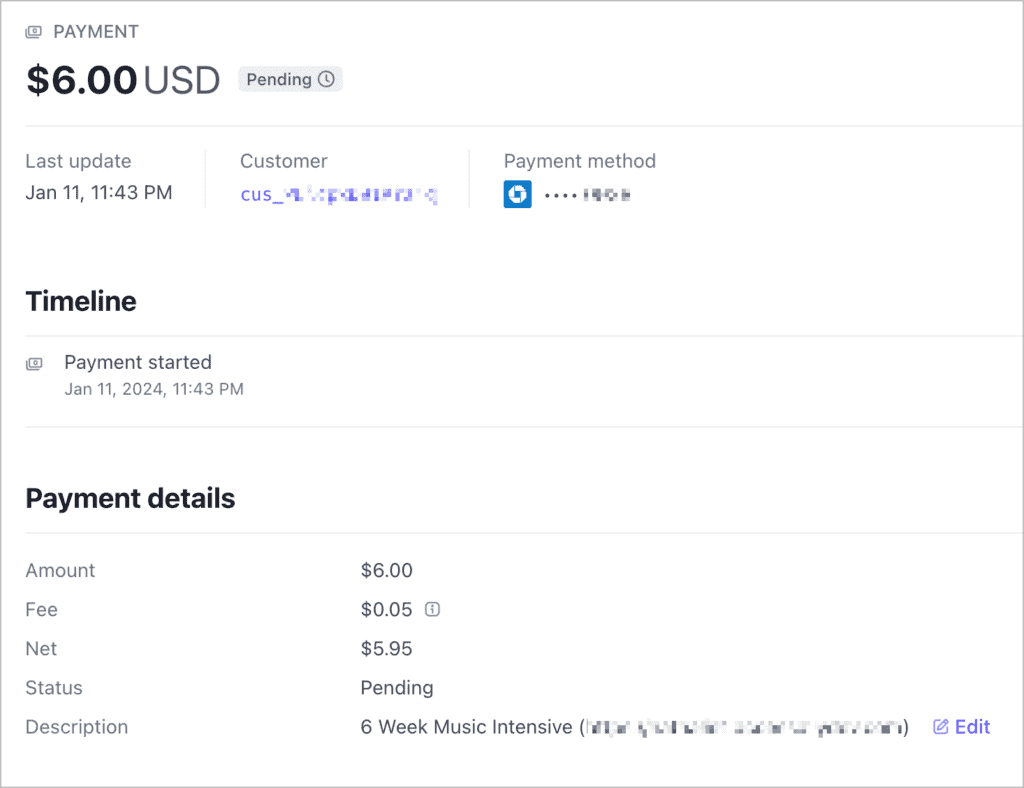
Example of the payment details in Stripe.
FAQs
Q: I’ve enabled these payment methods, but they’re not showing up on my order forms. How do I get these to appear?
A: Try saving your payment details again to sync in your new changes.
Go to AccessAlly > Settings > Payment Settings > Credit Card > Save Changes in top right corner.
