ARTICLE CONTENT:
Important Kit Details To Note
You’ll need a paid Kit plan when integrating with AccessAlly. We recommend creating Subscriber Preference links so your contacts can select to continue receiving items they’ve purchased from you, as an unsubscribe in Kit stops tags and automation rules from running.
Create Kit Automations
Once you’ve set your content in the AccessAlly Offering wizard, it’s time to head into Kit to create an automation to go with it.
This automation is optional if you’re using AccessAlly’s order forms and drip automation, but it is a great way to control exactly when new content is released and to send emails at the same time. It’s also necessary if you are using a 3rd party shopping cart, like ThriveCart, SamCart, WooCommerce, etc.
Not using Kit? Check out the other CRM automations here.
Release Automation Steps
1. Create a sequence to send out the welcome email
Go to Sequences in the main navigation menu. Click on “Create Sequence”.

2. Customize Welcome email (with login info)
You can send welcome emails directly in AccessAlly, but you could also send them here through Kit.
We only need the welcome email in the sequence. Once you are finished with customizing the email, you can click on “Save All” to publish the sequence.
Switch the email status to Published.
The email should be sent immediately so set “Delay Sending by” to ” days.
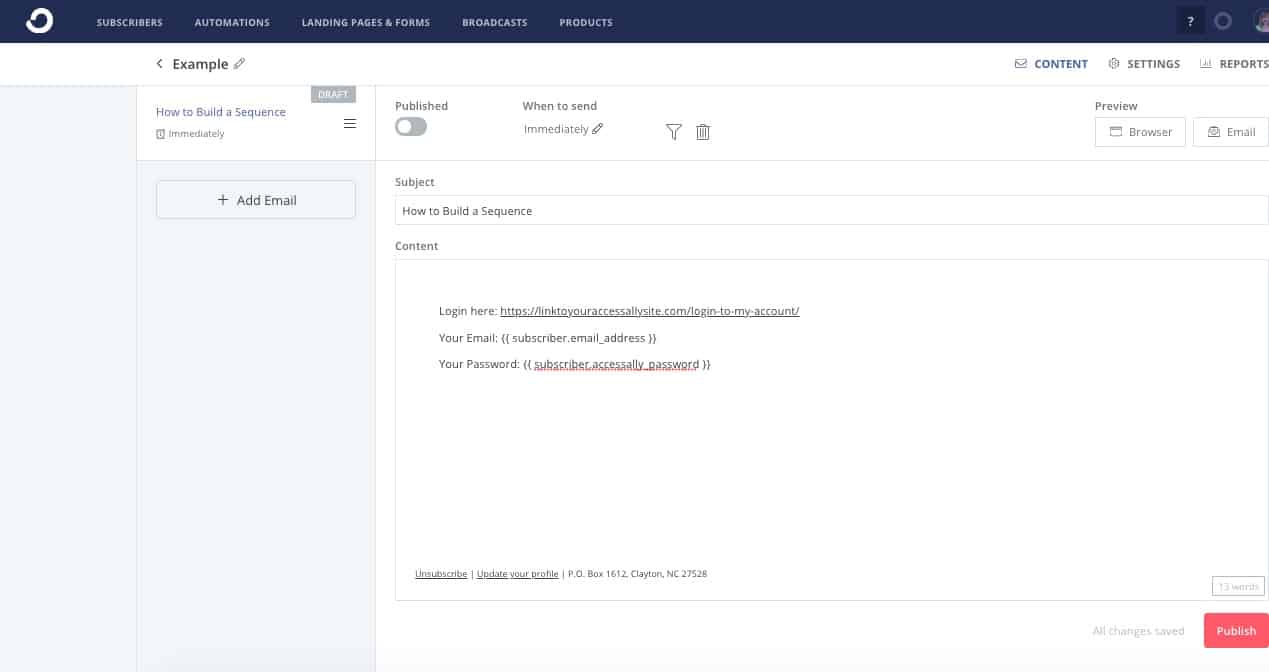
You can add anything to the welcome email that you’d like. You will include the link to your AccessAlly login page, the email address they used, and their password (optional.)
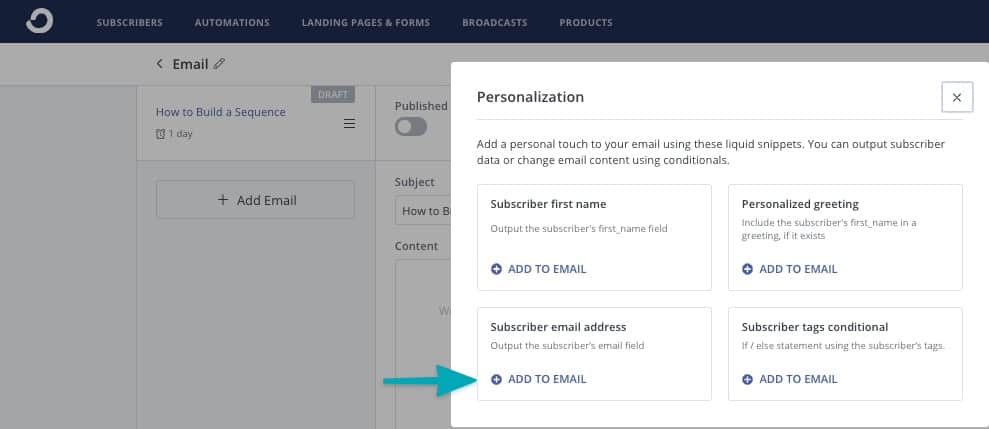
Email Address: Click the “+” sign in the email copy, then click Personalization. Next click “+” by subscriber email to add the email personalization code. As shown in the image below.
Password (Optional): Adding the password field to an email is only available if you are storing passwords in a custom field inside Kit. You will need to revise the example below by replacing accessally_password with the exact name you used for your password field stored in Kit.
Example: {{ subscriber.accessally_password }}
3. Create the welcome automation
We can now create an automation to start the sequence when a client signs up for a free offer or a paid course.
Go to Automations in the main navigation menu. Click on “AUTOMATIONS” and then the “New Automation” button.

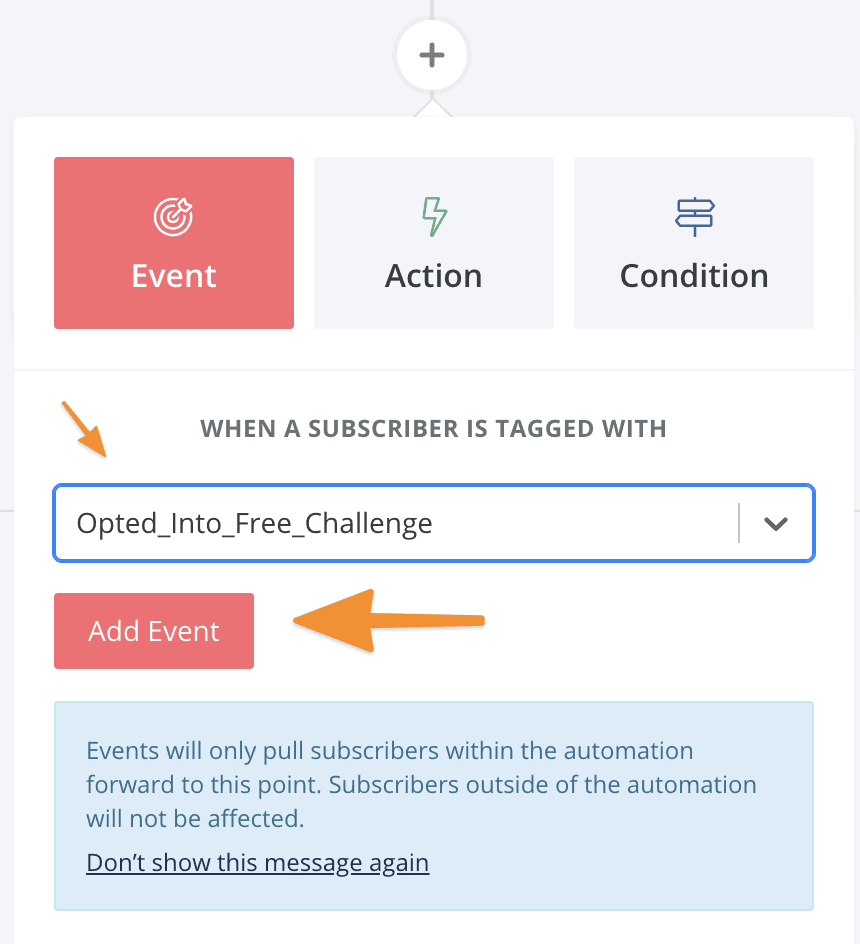
4. Configure the event that triggers the automation
Click on CREATE AUTOMATION to configure the event that will start the automation.
Since this is a paid course, select Tag is added to subscriber and choose the tag that is added on successful purchase of this course.
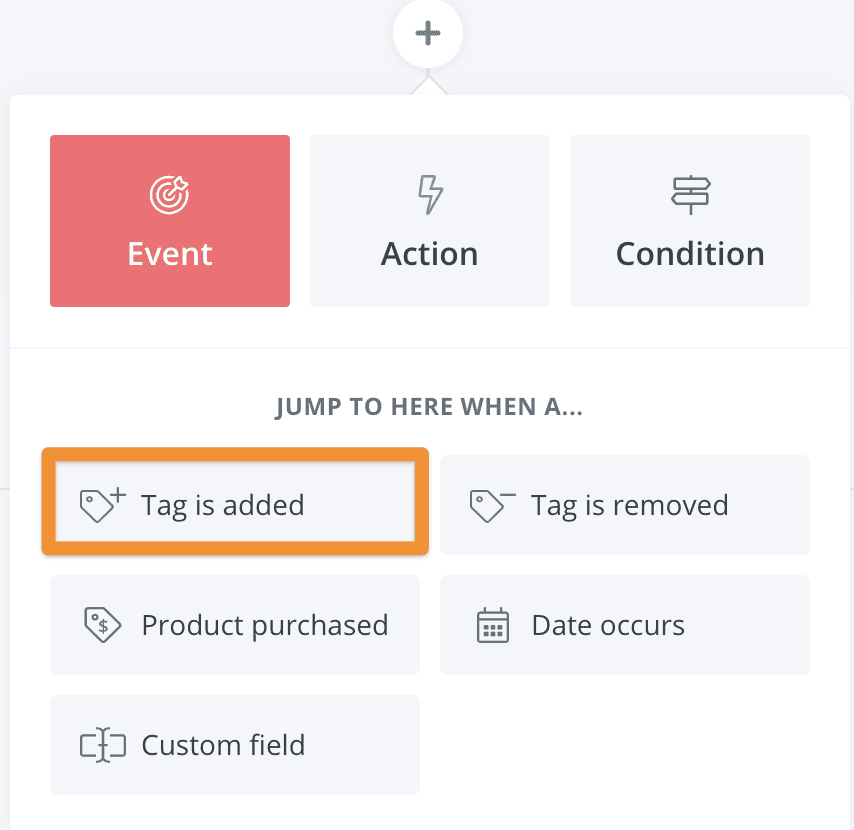
Click on Add Event when finished configuring.
If you’re using Kit’s payment system you can also use that as a trigger here instead of a tag.
Click on CREATE AUTOMATION to configure the event that will start the automation.
Select Tag is added to subscriber and choose the tag that is added on opt-in.
Click on Add Event when finished configuring.
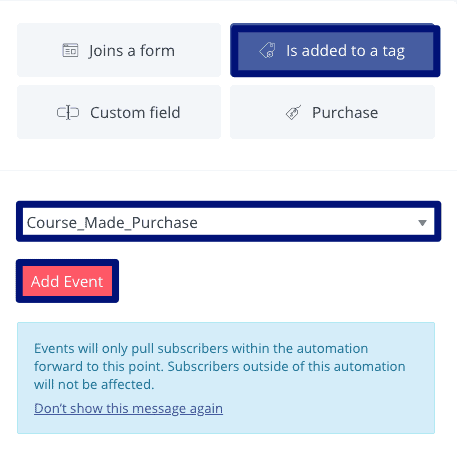
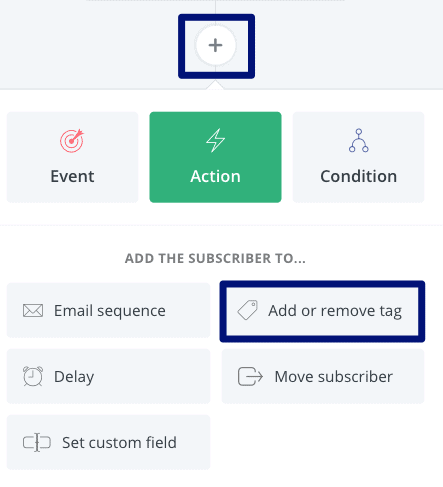
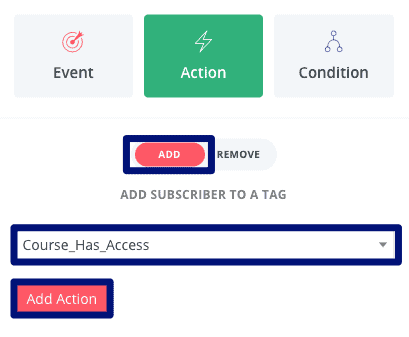
5. Apply the tag to trigger a webhook
Add a new item by clicking on the “+” and choose Add or remove tag.
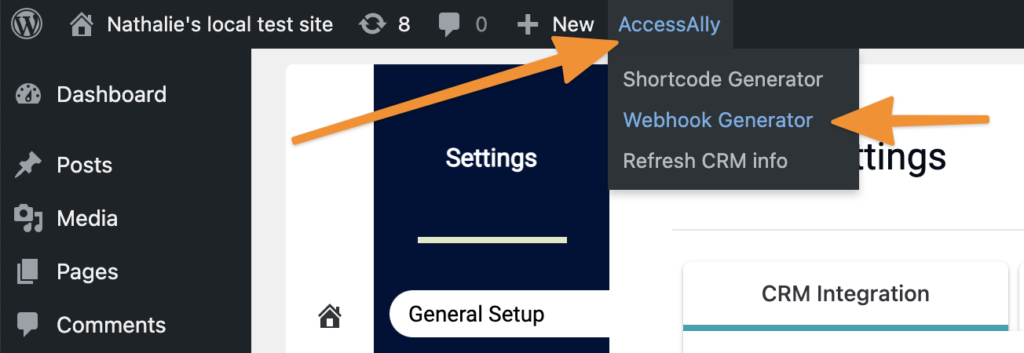
Then create a webhook associated with the tag, by going into your AccessAlly site and click in the top WordPress admin bar under Accessally -> Webhook Generator.
Select “Run Custom Operation” from the dropdown, and then start typing the name of your offering and choose the “Release Offering” option.
Choose the tag for success associated with the offering. This will create a webhook that sends information back to AccessAlly.
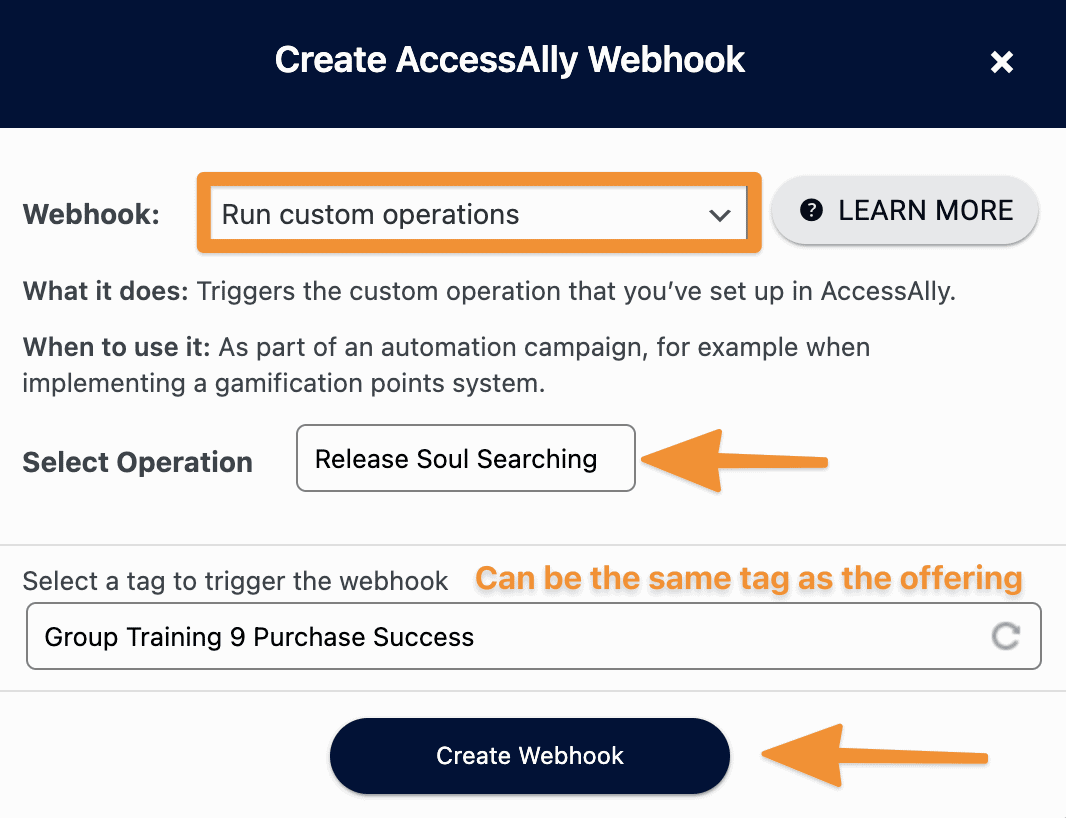
Select the Access tag as the tag to add. Click on Add Action once configured.
This will create a new member account and generate a password for the member, if they don’t already have one. It will also grant them access to the offering, and begin the drip automation process as set up in the AccessAlly offering.
6. Add to welcome sequence to send the login info
You can send welcome emails directly in AccessAlly, but you could also send them here through Kit.
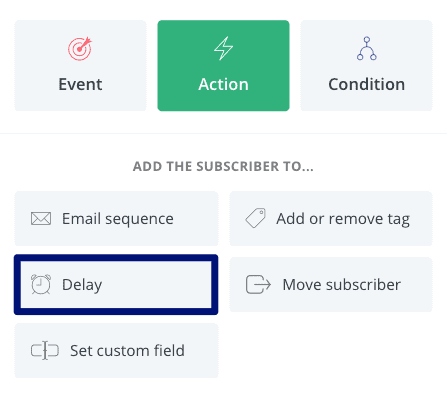
It might take a few seconds for AccessAlly to create the login info. To avoid the “Blank Password” issue, add a short delay before sending the welcome email. Clicking on the “+” and choose Delay.
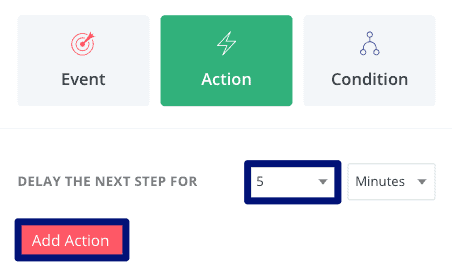
Select the shortest delay possible, 5 minutes. Click on Add Action once configured.
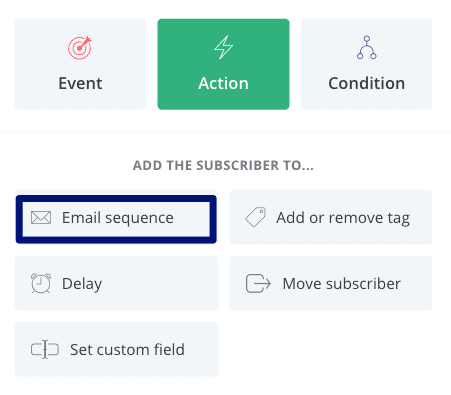
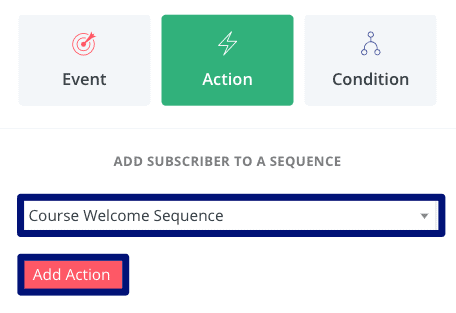
Now we can add the subscriber to the welcome sequence. Add a new item by clicking on the “+” and choose Email Sequence.
Select the welcome email sequence. Click on Add Action once configured.
AccessAlly will remove the webhook tag after running the webhook. However, as an extra precaution, we should remove the tag explicitly, so it can be added again in the future.
Add a new Add or remove tag action. Remove the tag that will trigger the Create Login webhook. Click on Add Action once configured.
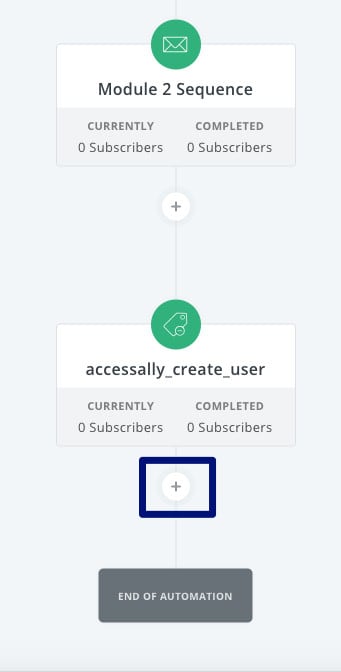
7. Add module release tags (optional)
If you want to drip content over time, then you will create a set of tag applications after a delay, followed by an update user webhook tag.
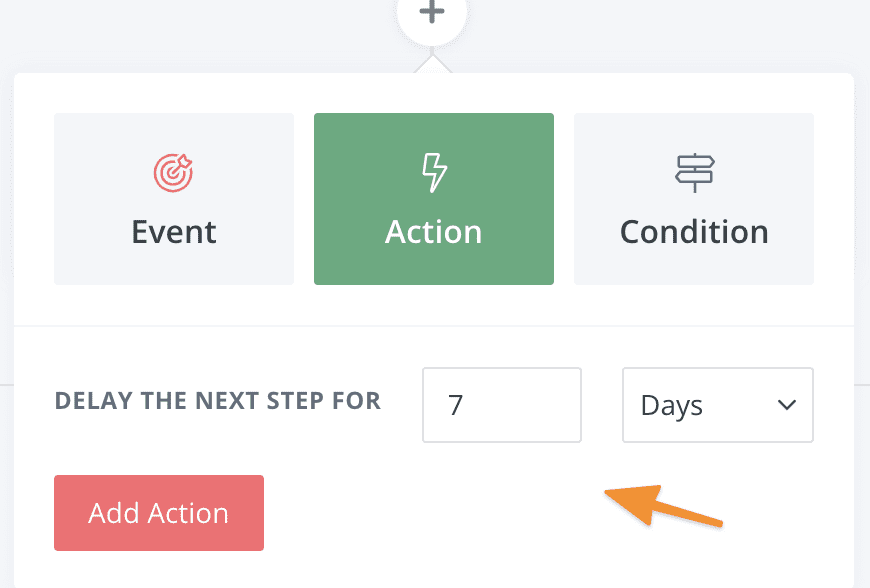
First add a delay:

Choose how many days to wait before unlocking the next module and sending an email:
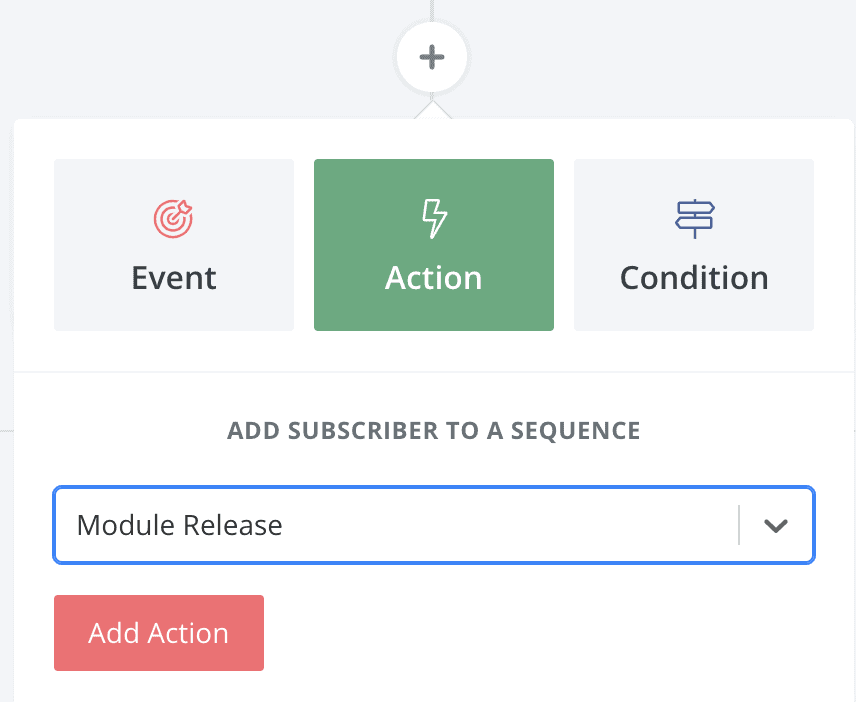
Then apply the tag for the next module:
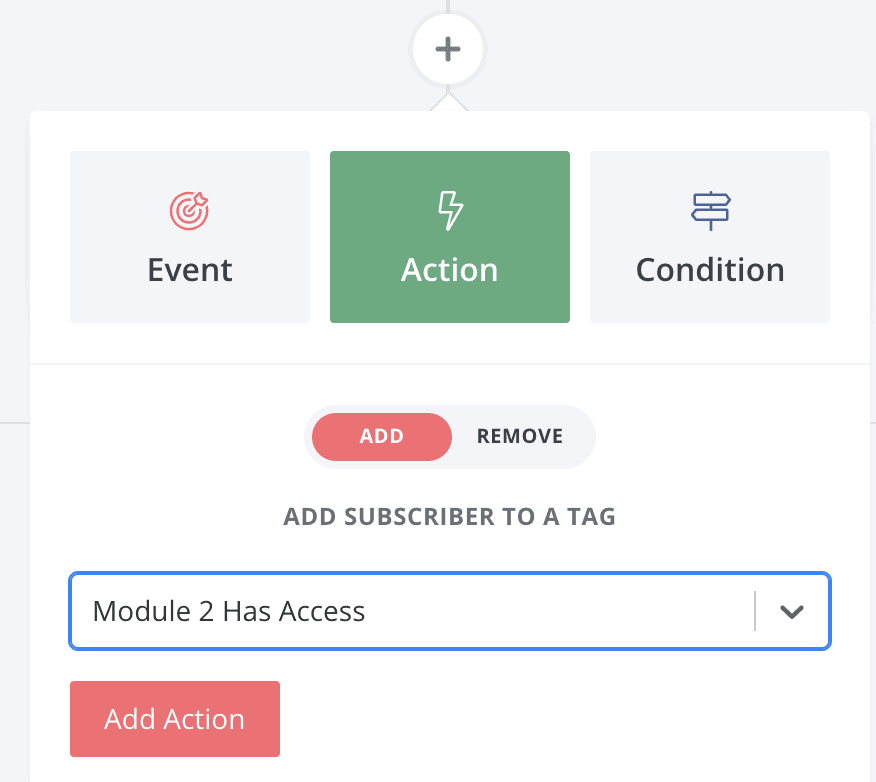
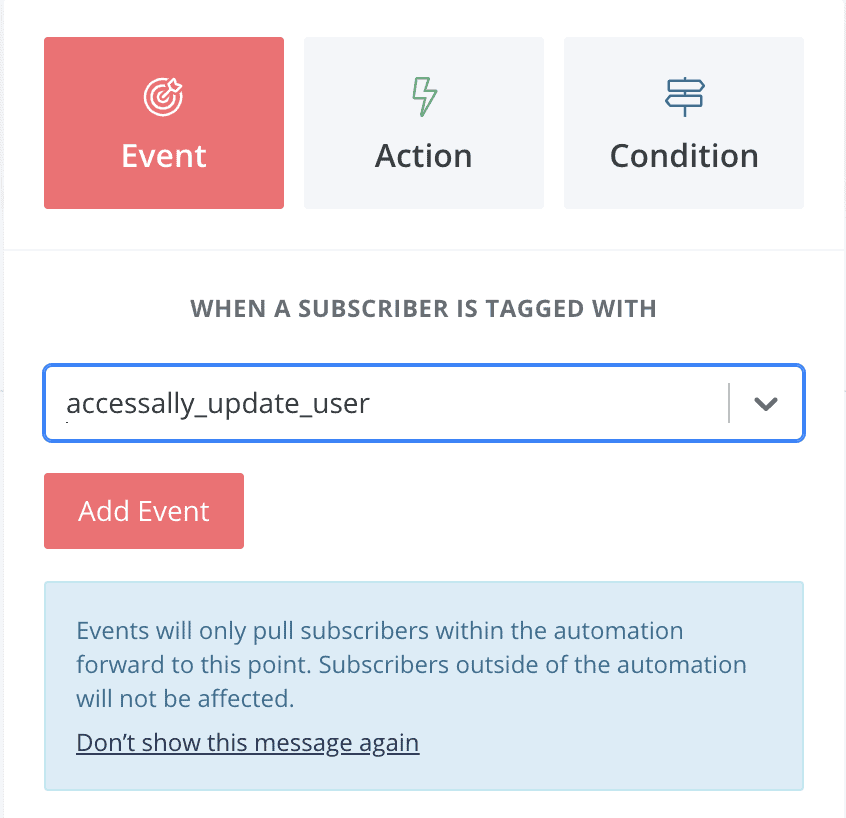
Once you’ve updated this contact’s tags, it’s important to tell AccessAlly to run the update user webhook.
Finally, you can send them through an email sequence that lets them know their next module is ready.
8. Create the Refund/Revoke Access Sequence (optional)
Why would you need to revoke access?
Revoking access to site content is a natural part of doing business, and might include any of the following scenarios:
- A client cancels their membership subscription
- A client’s payment card expires and cannot be charged for the next month’s subscription
- A course student cancels and requests a refund
- A client “downgrades,” and loses
partial access to the content
While you could manually apply the Revoke Access tag to a user inside AccessAlly, we recommend automating the process as a part of building out your CRM automation.
Important: The revoke sequence is only used for clients who can requested a refund / cancellation for the standalone course. It will negate the course access permission, so please use it with caution.
At the end of the automation (right before END OF AUTOMATION), add a new item by clicking on the “+”.
Go to the Event section and choose Tag is added.
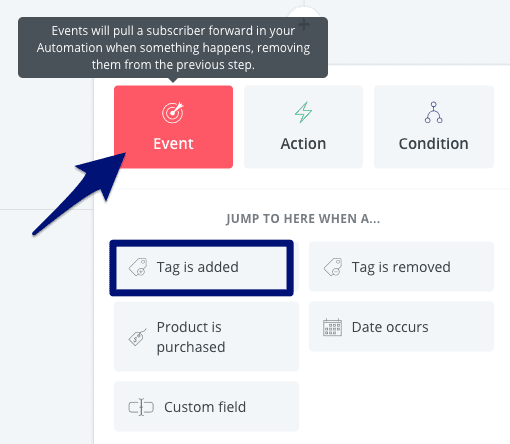
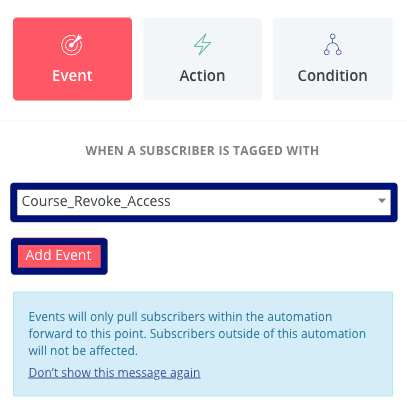
Choose the Revoke Access tag. Click on Add Event once configured.
Add a new item by clicking on the “+” and choose Add or remove tag.
Select the tag that will trigger the Update User webhook. Click on Add Action once configured.
The revoke access portion of the automation will be triggered with the Revoke Access tag is added, and it will remove access to the course and notify AccessAlly of the change.
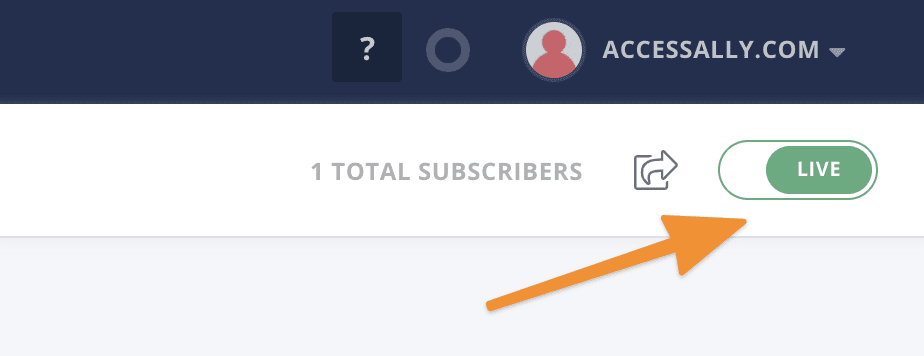
9. Make the automation Live
Give the automation a descriptive name and switch it from PAUSE to LIVE.
Now it’s a great time to follow our testing guide, to make sure everything is set up properly.
