If you’re using AccessAlly order forms, you can take advantage of the built-in Metrics dashboard… but you might also want to pull the sales data into your existing Google 4 account.
ARTICLE CONTENT:
Enable Google Analytics Ecommerce Tracking
The first step is to create a new property using your site URL.

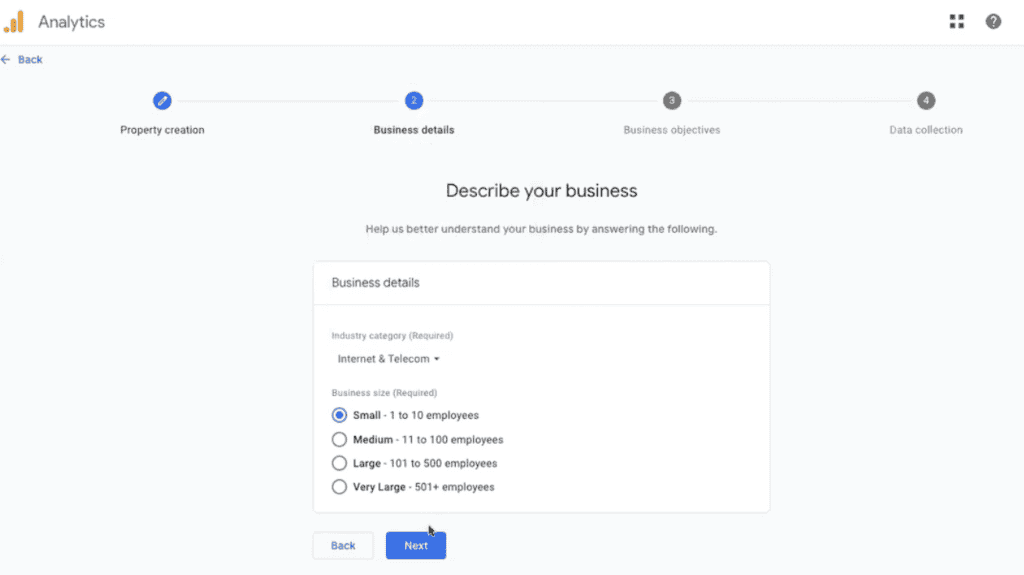
Select the options that are the best match for your business details.
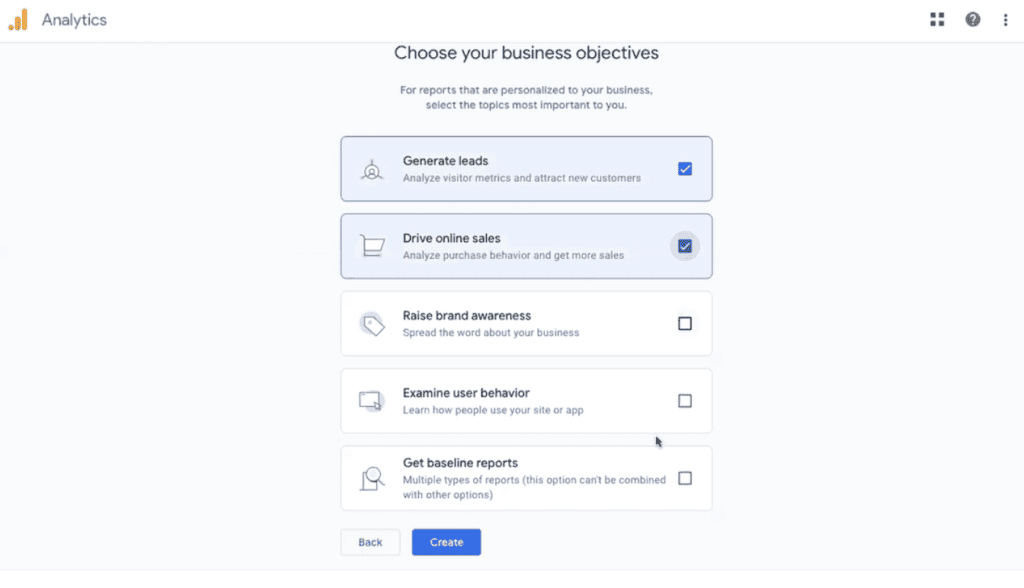
Select your desired business objectives.
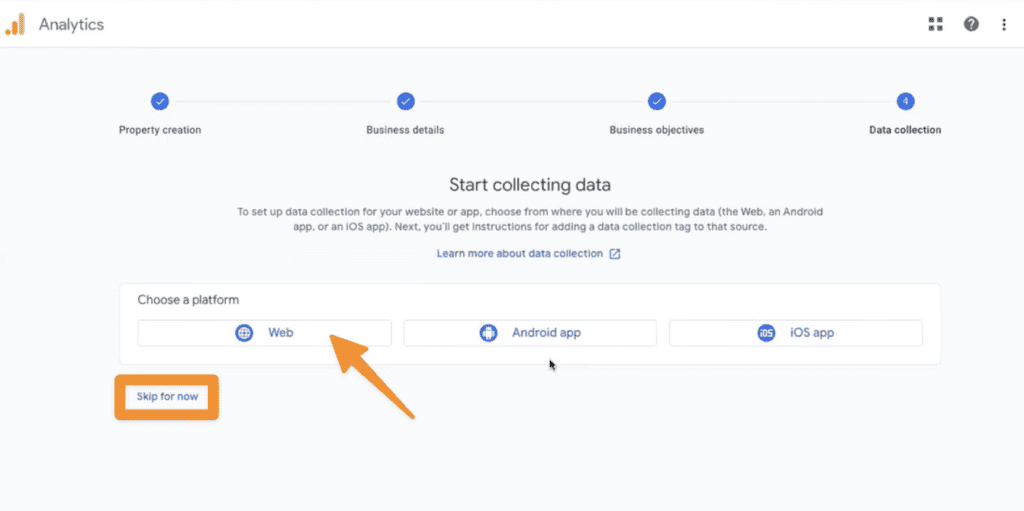
Select web (or skip for now if you’d like to review.)
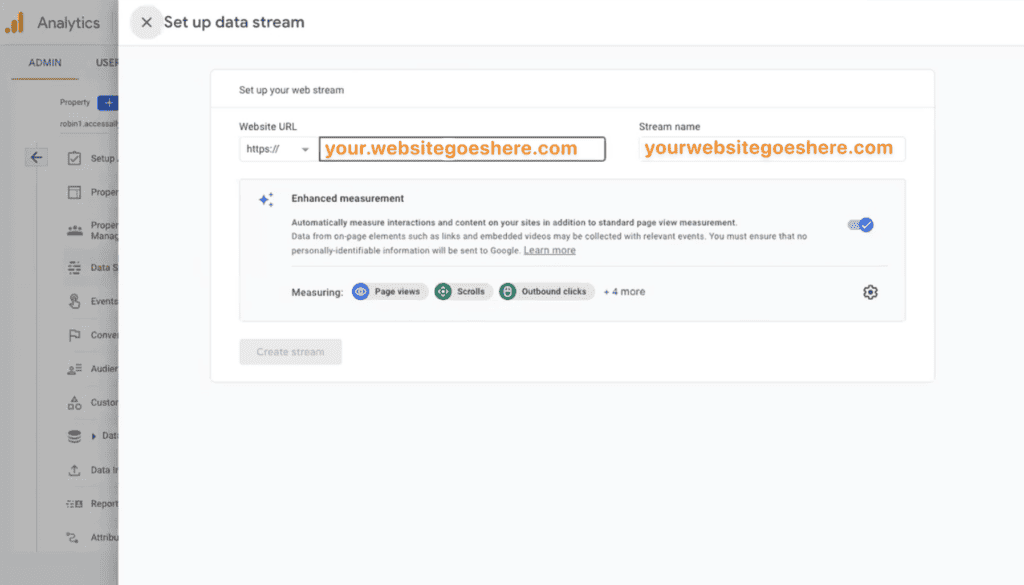
Add your site to both the website and stream name spots.
Click the view tag instruction button.
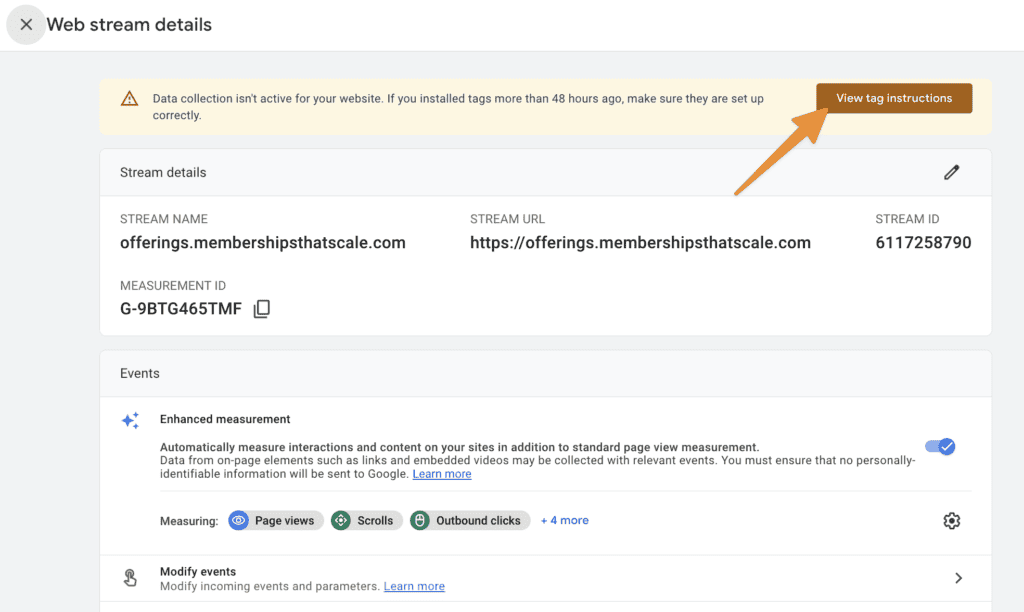
And select install manually and copy the code.
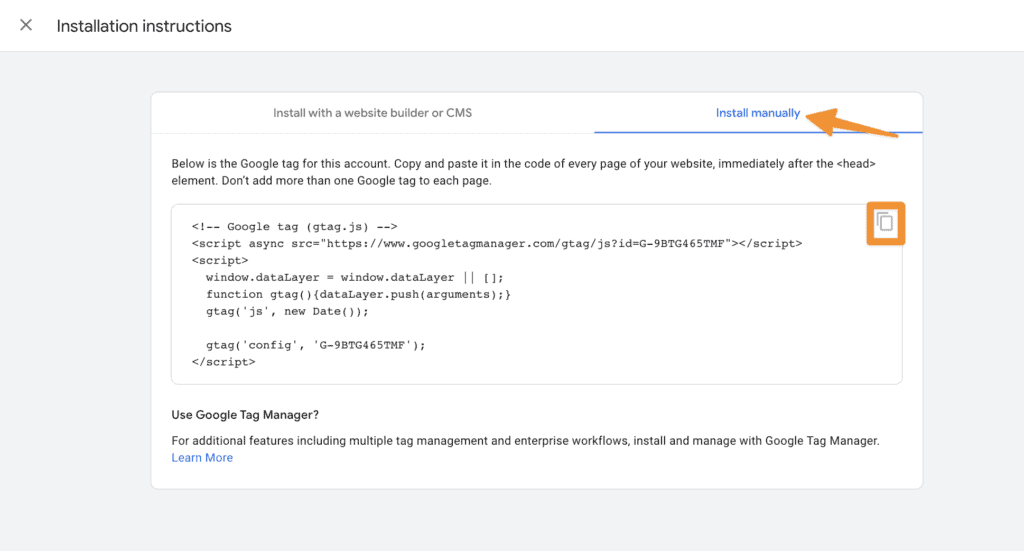
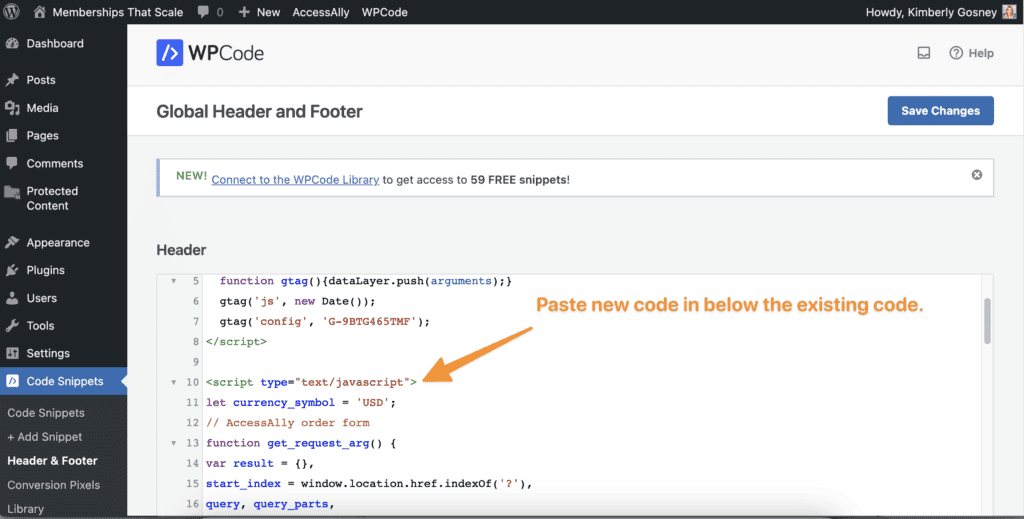
Add tracking code to the header of your site.
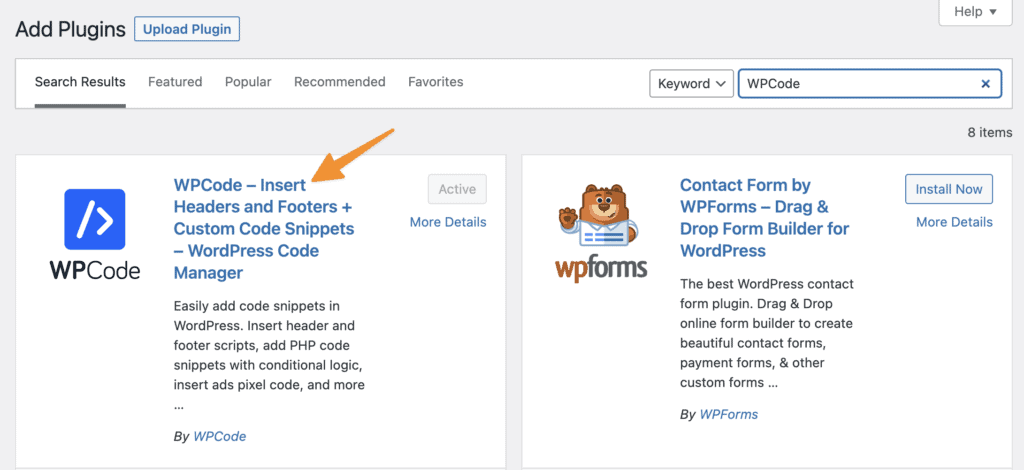
If you’re not familiar with this option or your theme doesn’t have a space to include it you can download the free WPCode plugin.
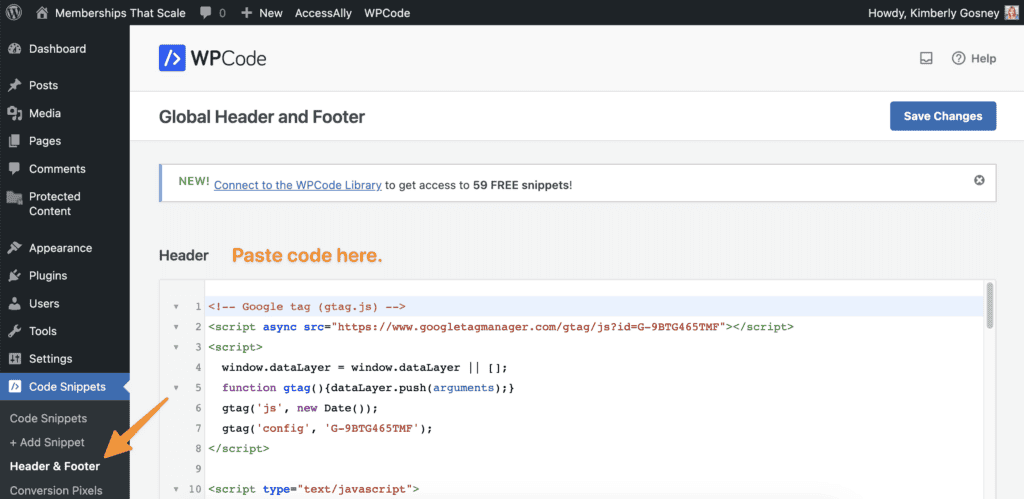
Add in the header code section.
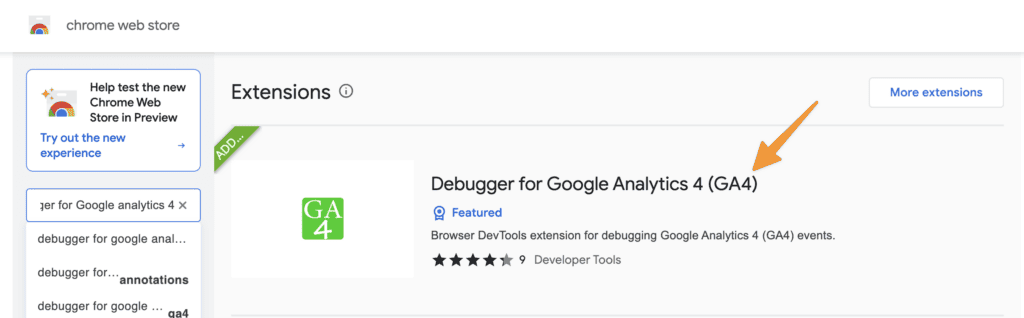
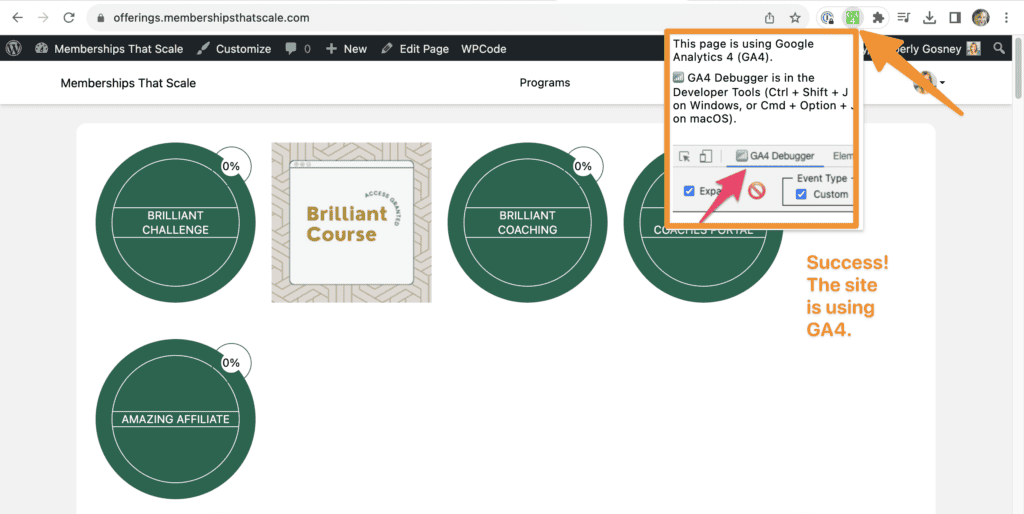
Add the Debugger for Google Analytics 4 Extension to Chrome this will show you if your header code is working.
Now visit a page on your site and click the GA4 button. A message will appear letting you know this page is using GA4.
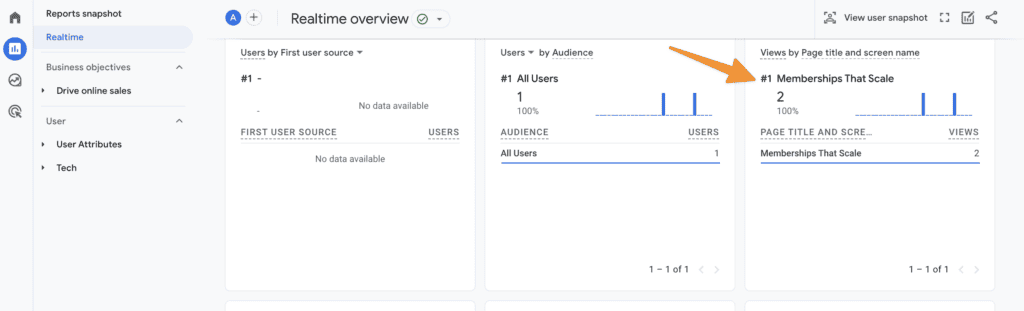
You can also see your views being tracked in Google Analytics.
Add AccessAlly GA4 Code to Header
Now it’s time to add the AccessAlly order form tracking script to the header section of your site. You can add this below the previous code.
Click here to download the code as a .txt file.
Using the WPCode plugin (or adding to header) place this code below the previous code added at the start of this article.
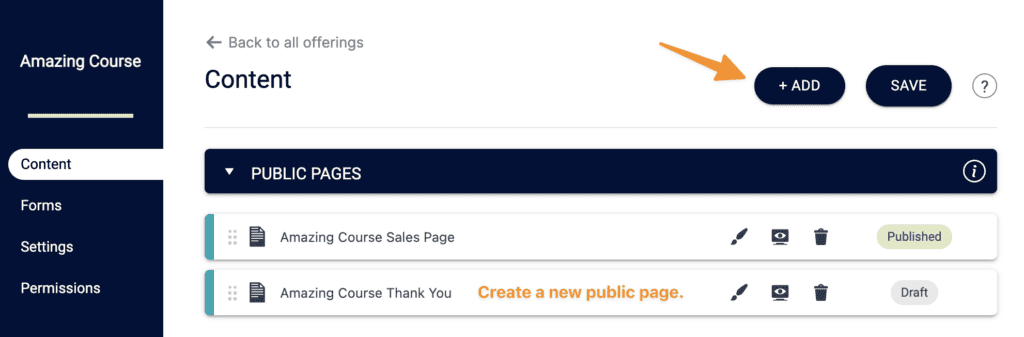
Create a Thank You Page
Make a new page (in an offering as shown below) or create a page in WordPress. Copy the link to your thank you page.
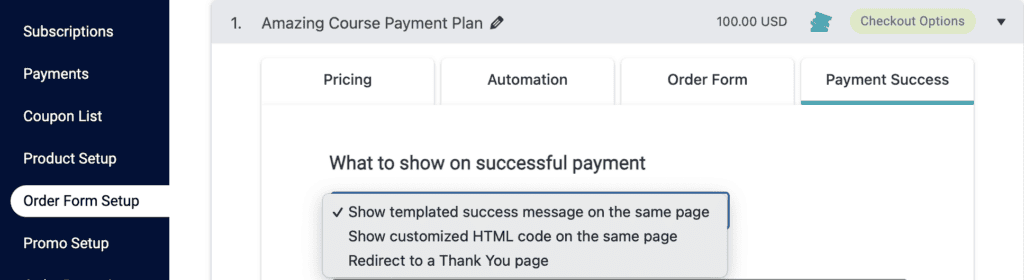
Review Order Form(s)
AccessAlly → Sales → Order Form Setup → search for the order form you’d like to track.
Note the order form number and name.

Create Thank You Page Tracking Link
At the end of the thank you page URL add the code below with your order form ID number and order form name.
/?item=##&product_name=Order_Form_Name_Goes_Here_Payment
Example below.
https://kim1.accessallydev.com/thank-you/?item=1&product_name=Amazing_Course_Payment_Plan
Select “What to show on successful payment”
- Show templated success message – if you want to allow password creation at time of purchase
- Redirect to a Thank You page
![]()
Show Templated Success Message
With this option, you will need to add the event data to success area message with HTML selected so that it counts the e-commerce event as soon as the purchase has been made.
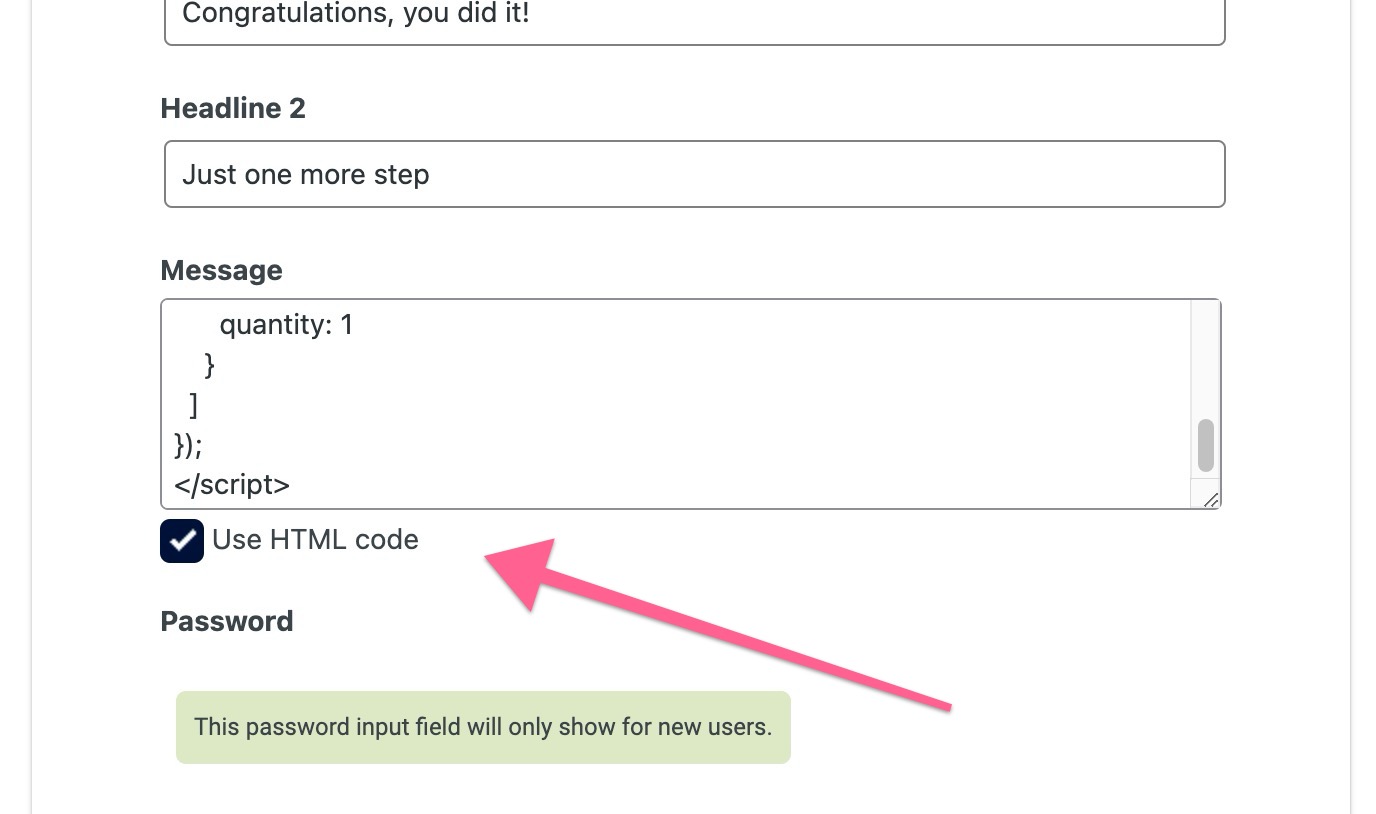
Once that’s selected, you will need to add in the information as javascript that you would like to capture. Here is an example:
<script>
  gtag("event", "purchase", {
    currency: "USD",
    value: 99,
    items: [
    {
      item_id: "1",
      item_name: "Name of Your Course",
      price: 99,
      quantity: 1
    }
   ]
  });
</script>
In the example above, the Item ID should correspond to your Order Form ID. You can also add additional values, if needed. Here is the documentation from Google for that.
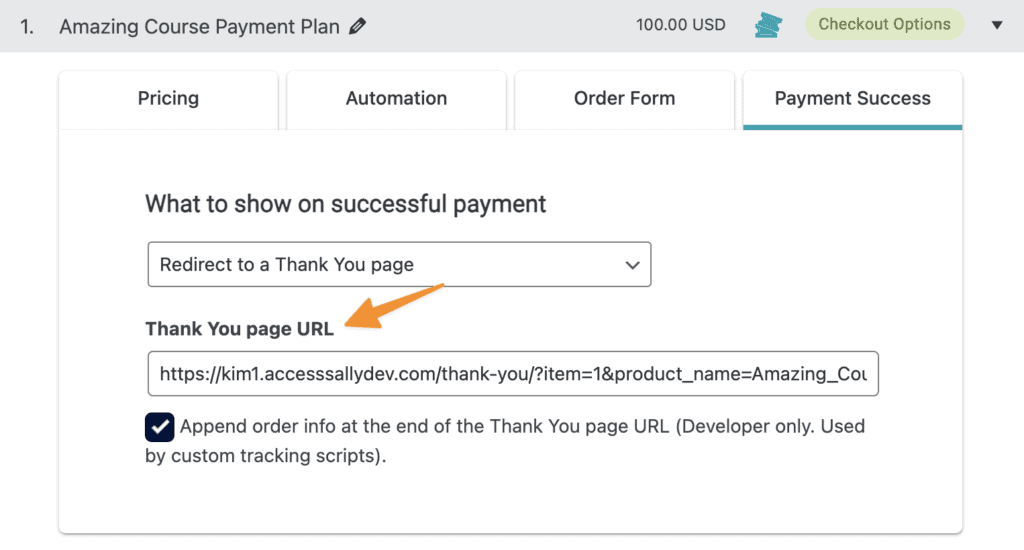
Redirect to a Thank You page
Add your coded link as the thank you page URL and check the box to append order form info.
Make a Purchase
Place a purchase from your order form and you will see your tracking info added.
![]()
View in GA4 after successful purchase event is tracked.
- Tracked thank you page visit.
- Tracked purchase event from your order form.
![]()
