AccessAlly’s “product trial” feature allows you to create a free (or paid) trial for your subscriptions.
ARTICLE CONTENT:
How to Use Trial Feature
With the product trial, you create unique incentives for your clients to test your products — without requiring them to commit to the full price.
This is great to use in scenarios such as:
- A paid trial, for example, where a user pays $1 to receive 14 days of access to your online course. In a paid trial, both the dollar amount and the length of trial are determined by you.
- A free trial, for example, that lasts a full 30 days, allowing new clients to take your product for a test drive totally risk-free. All they need to do is cancel within that time frame if they wish to avoid being charged for the product.
Free and paid trials work with one-time payment products, payment plans, and membership subscriptions.
How to Set Up A Free Trial or Paid Trial
The easiest way to create a flexible trial is when you’re first creating an Offering. Simply check the “Trial” checkbox, and select the price and how long you want the trial to last.
When selecting your pricing option, select the recurring payments option for best results.
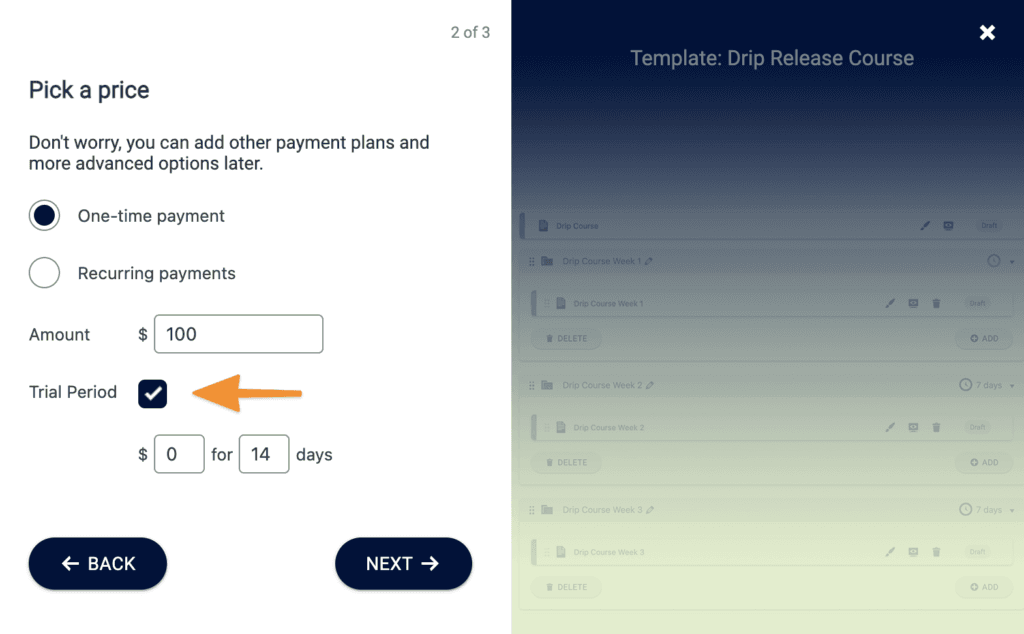
Choose 0 to offer a free trial.
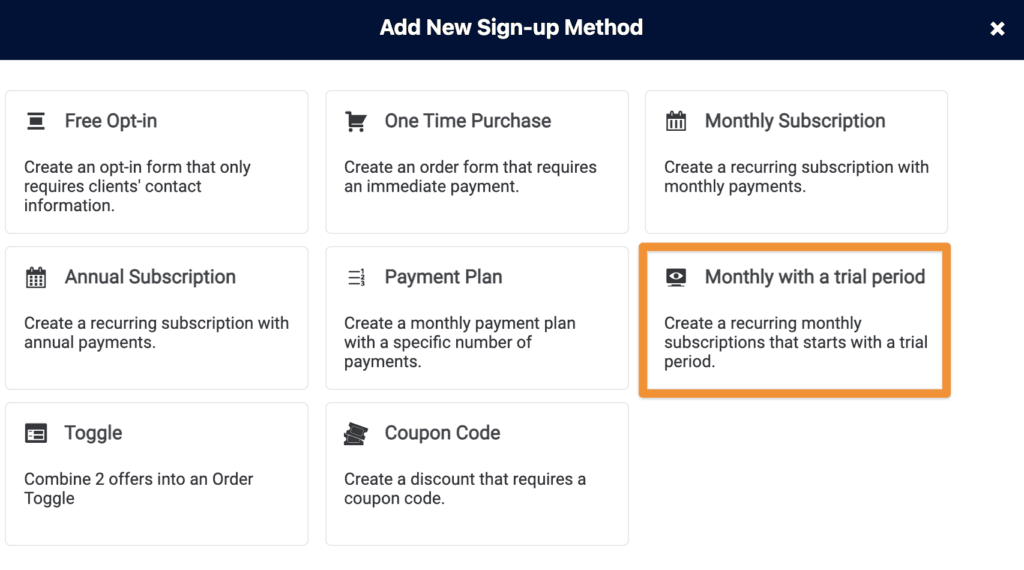
If you’ve already created an order form and you would like to add an additional Order Form, you can select it under Forms -> New Form, and select Monthly with Trial.
If you would like to add a trial to a different kind of payment plan after you’ve already created the Order Form, you can do that as follows.
First, click on the Edit icon next to the Order Form you would like to add a trial to. You will be taken to the order form, and you will want to click on the Product Setup tab in the left sidebar, and then find the equivalent Product that matches.
Then you will select Recurring Payment from the dropdown, and click on the Recurring Payments tab within that product.
You want to enable recurring payments even if this is a one-time payment because the trial essentially creates a future payment, in the same way that recurring payments are set up.
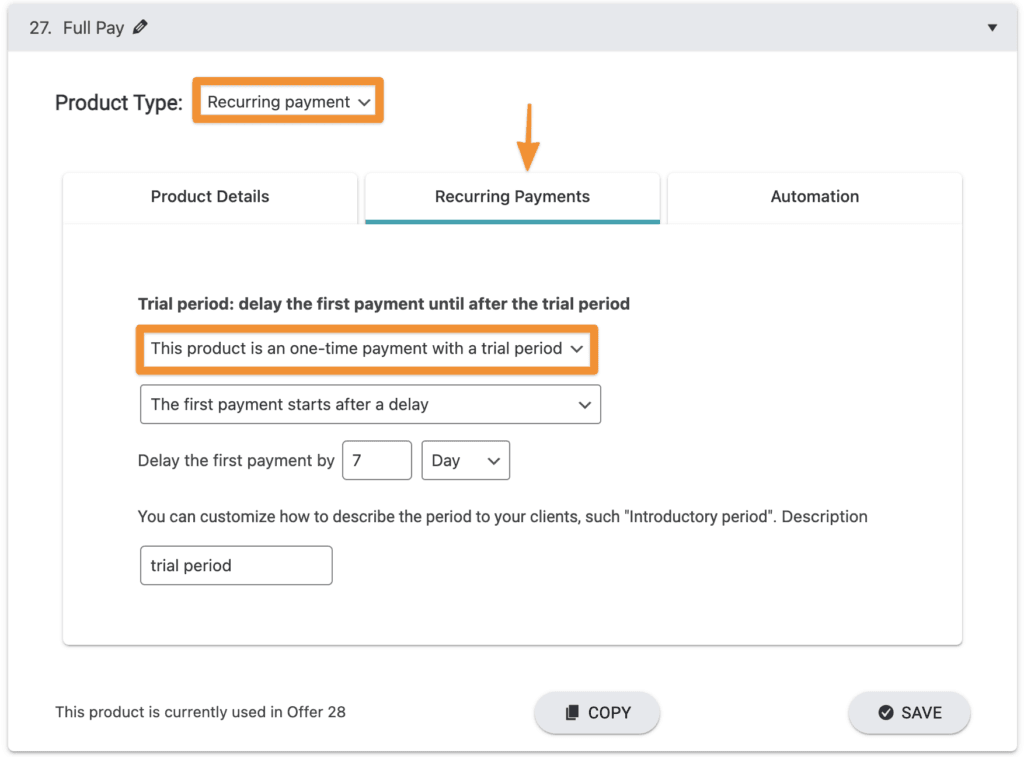
Now you can choose what kind of trial you would like to offer, and for how long.
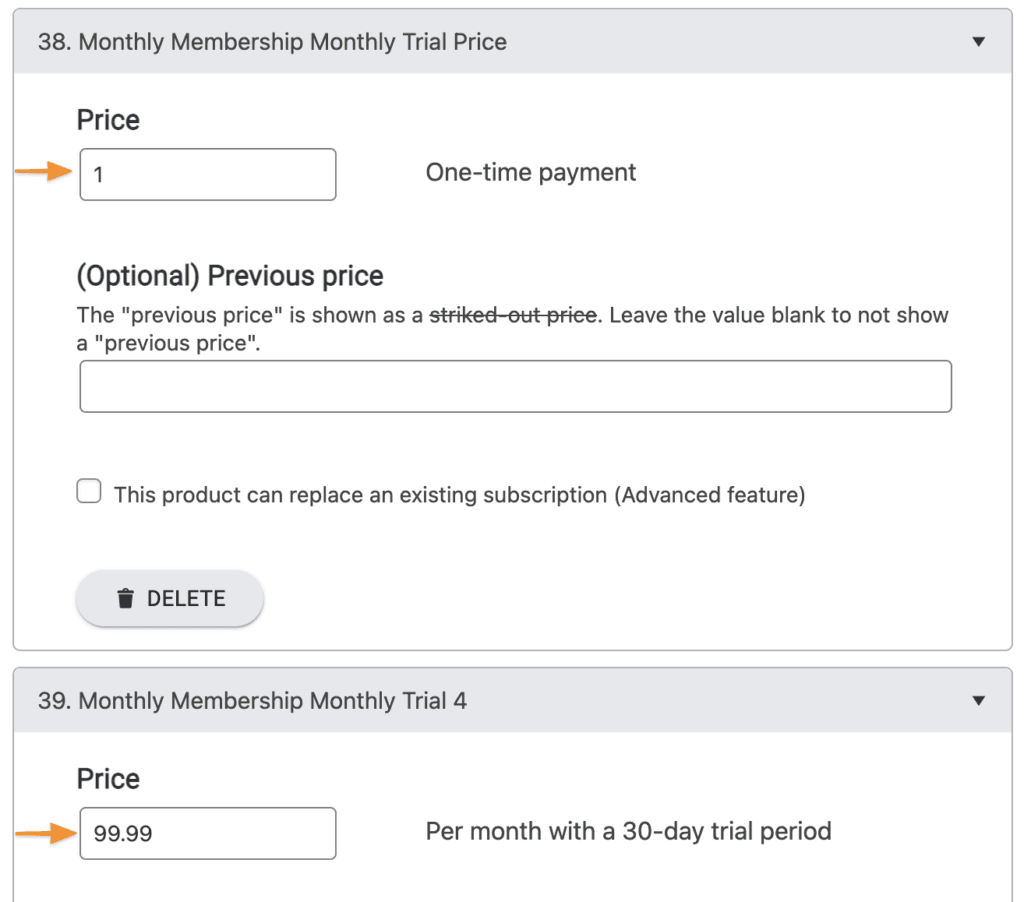
At this point, you have added a free trial. To create a paid trial, you will want to create a one-time payment Product for the cost of the trial, and add it to the order form as well.
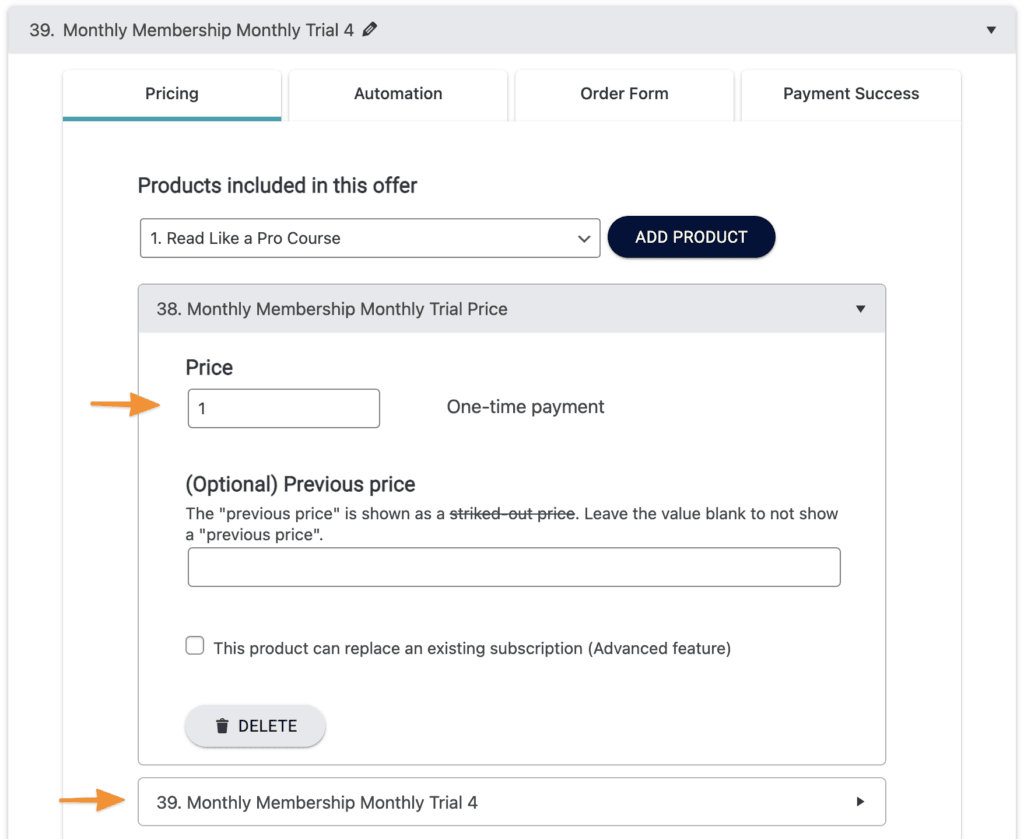
You should then have two products inside of your order form, one for the cost of the trial and for the rest of the payment that will happen after the period you’ve specified.
About Order Form Display of Free Trials
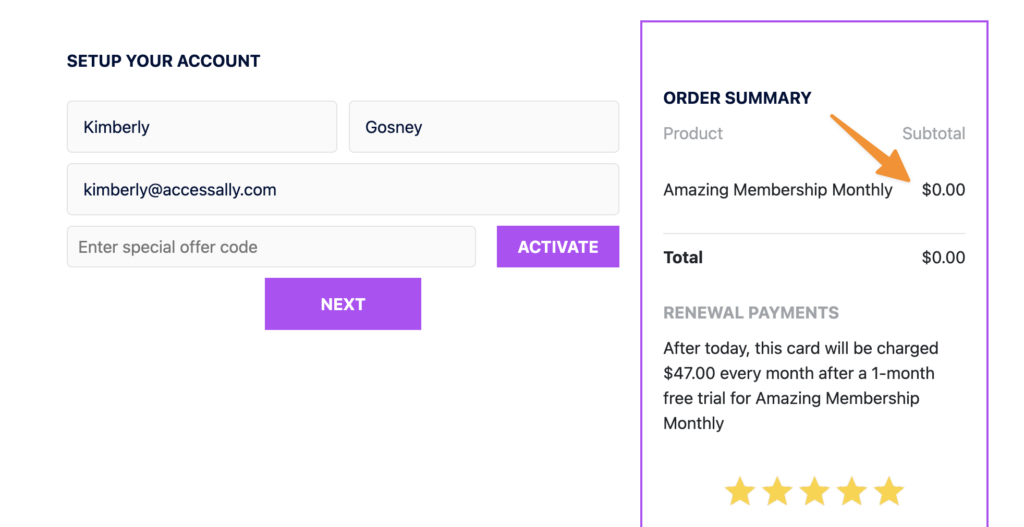
When using the Primary Look & Feel order form template, the amount of the recurring subscription is shown on the right.
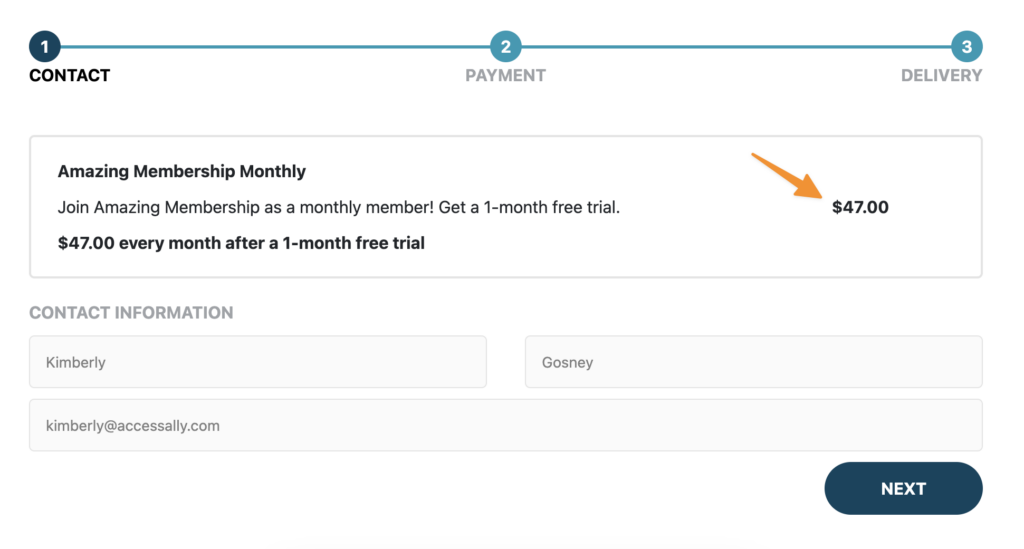
If your trial period is a free trial, you may wish to create an order form design template, which allows for more customization of the free trial in the first step of an order form.
Here’s an example of the same offer, presented on the flex: two-column left order form design template. This style showcases the $0 due today in the first step of your order form.
