Skill Level: Beginner
There are many different ways that you can create a team with levels inside an AccessAlly site. This is one example. If you have questions about anything in this article join our next Tune Up Call or Contact Support.
Scenario: You’ve got lots of products (like e-books or online courses) that you would like to sell from your AccessAlly site, but you’ve heard that there’s no shopping cart option in AccessAlly. You would like to create a shop style page where members can easily purchase multiple items quickly and easily.
Prerequisites: Two or more items you would like to sell from inside your AccessAlly site.
ARTICLE CONTENT:
Step 1: Create Your Shop Page
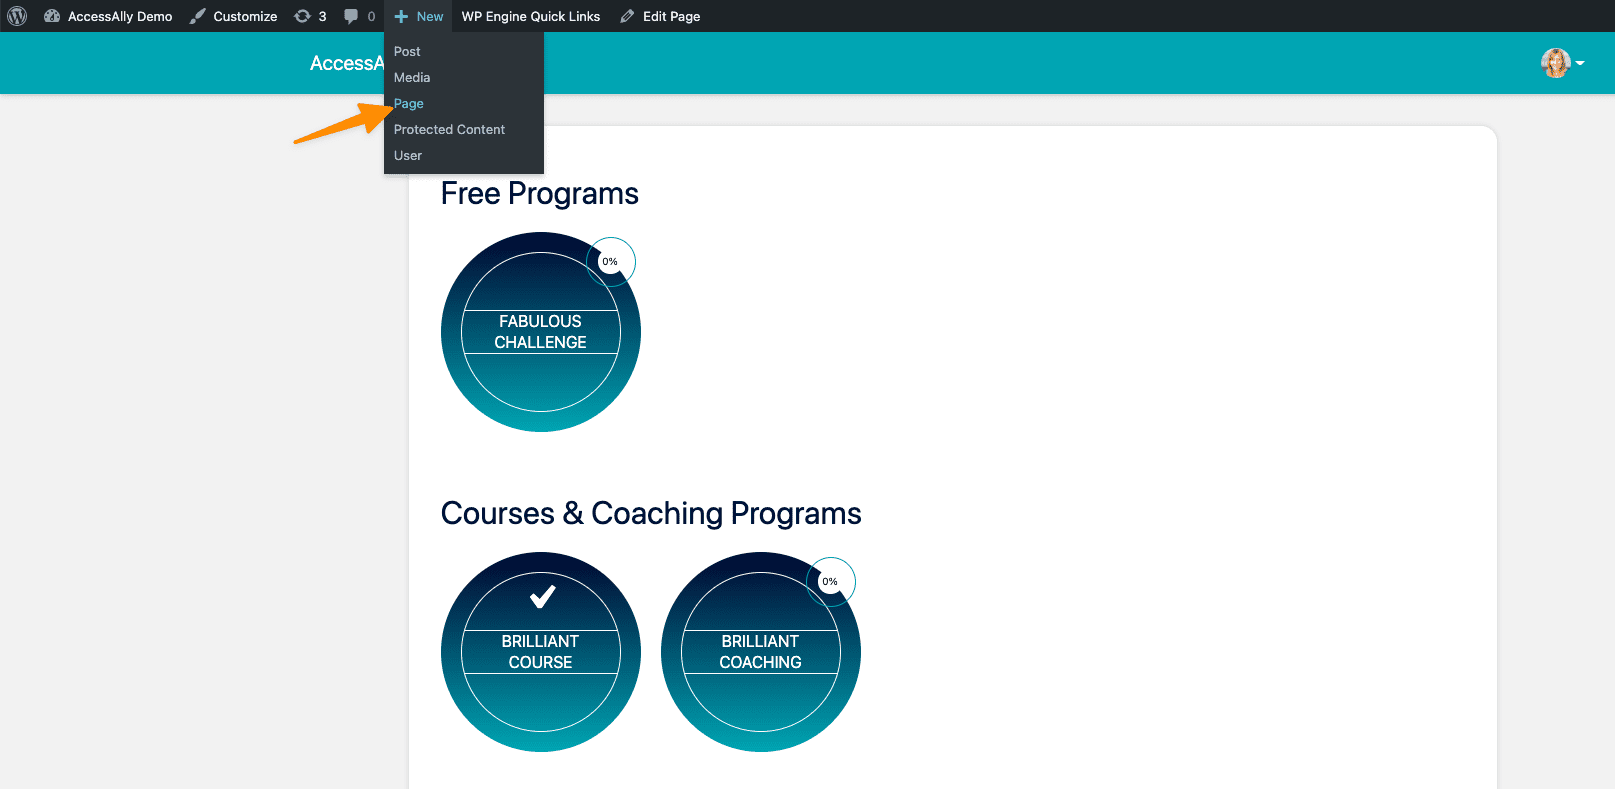
You can add a new page to your AccessAlly site and name it Shop.

Step 2: Decide Who Can View This Page
There are two possible ways you could create this page depending on what’s right for you and your business model.
- Open to the Public: anyone with the link to this page can view the page.
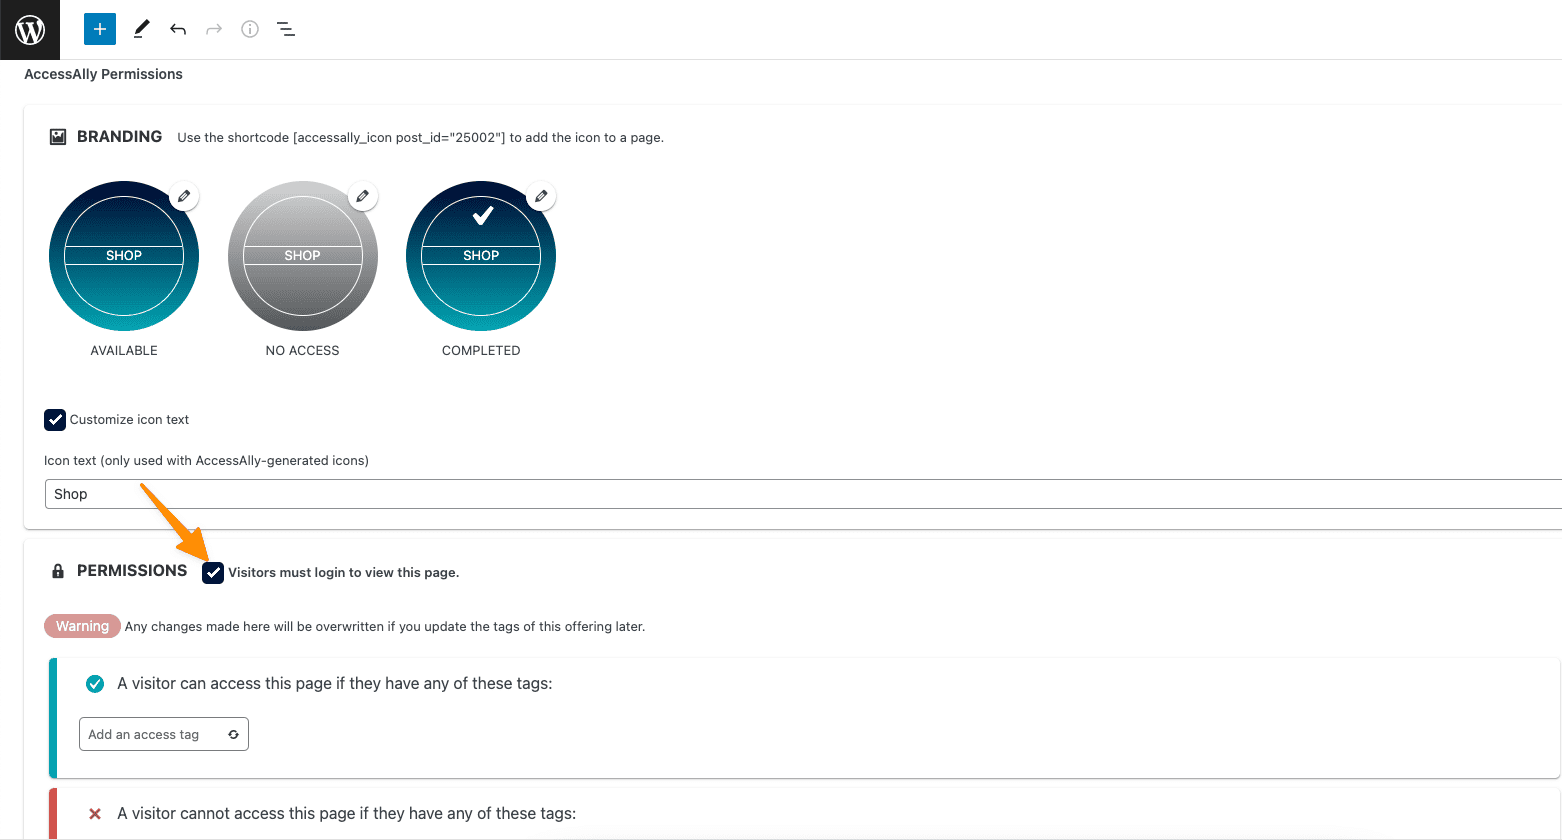
- Logged in to view: this option is great is you would like to create a “Members Only” style shop page. Scroll down to Permissions and check mark “Visitors must login to view this page” if you would like this option.
- Save your new Shop page.

Step 3: Create Your Offering(s)
Now you’ll create offering(s) to fill up your shop page.
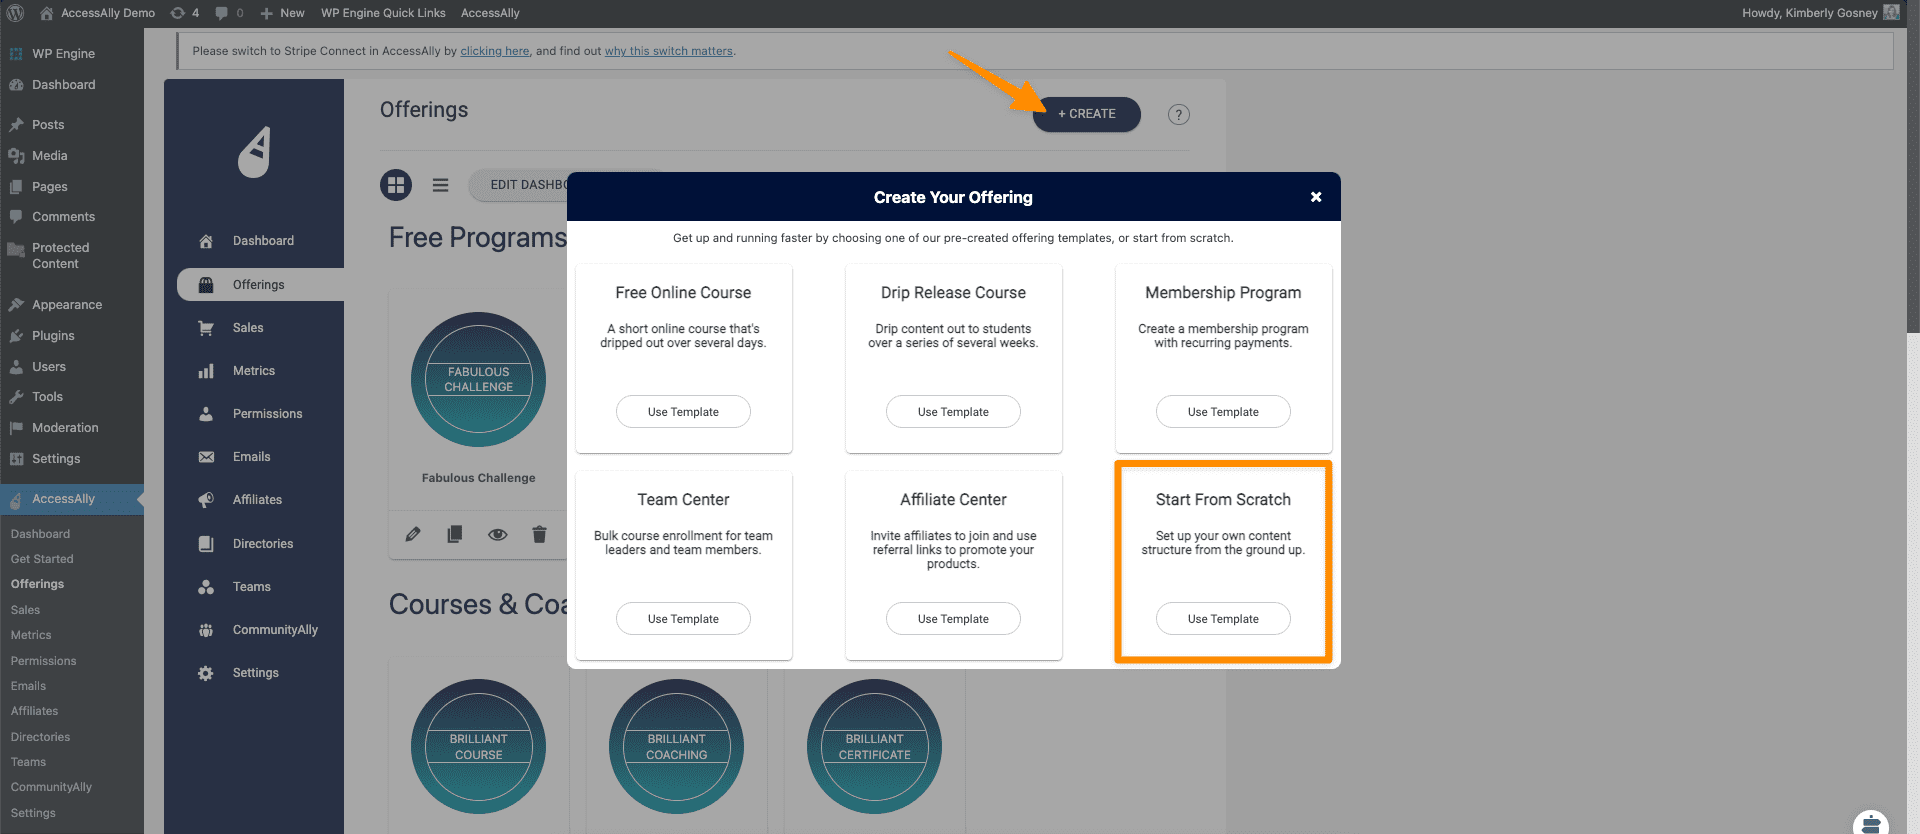
If you would like to sell your e-book the AccessAlly Protected Content feature along with the Start From Scratch Offering Template will give you everything you need to sell and deliver your e-book.
The Start From Scratch Offering Template allows you to create a single page to use for the delivery of your E-book immediately after purchase or for you to create a mini course to go along with your E-book if you would like.

Step 4: Design Your Shop Page
Now it’s time to design your shop page. The easiest way to create a shop style page is to use the AccessAlly Offering icons and WordPress buttons that link to the order forms you created in Step 3 above.
- Add the e-book offering icon to your Shop page using your theme and/or page builder.
- Add a button that links to the order form from your E-Book Start From Scratch Offering.
- Repeat this process for all of the items you would like added to your shop.

Frequently Asked Questions
Yes! You can. You can add a content section using your WordPress theme and/or page builder to place your description in for each shop item.
Yes, please see our article on delivering a membership with points to guide you.
Shipping Address: Yes, you can collect a shipping address. See how here.
Taxes and Shipping: These options are available in AccessAlly under Sales > Fee Setup. AccessAlly is also integrated with Quaderno for collecting taxes.
Yes! If you process payments on your AccessAlly site using Stripe (not recommended for PayPal) AND you require a member to be logged in to view your Shop page… you can replace the WordPress buttons that link to order forms with an AccessAlly order form that is set to use the 1-click upsell button option.
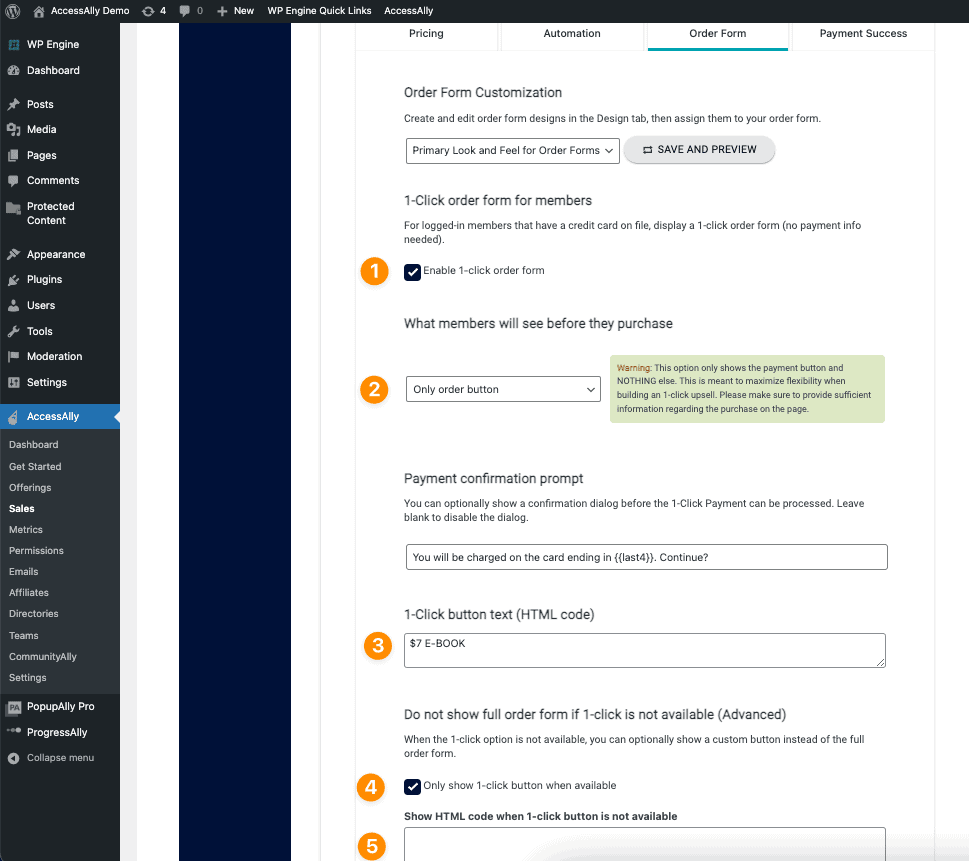
Here are the recommended settings for your 1-click order form button to give the best experience on your shop page.
- Enable 1-click order form
- Only order button option
- Add the wording for your button – visitors to your shop page will see this wording.
- Check only show 1-click button when available
- Leave the Show HTML section blank


