Skill Level: Advanced
Scenario: You have a monthly membership program that sells for $27/month. You would like to issue points members can redeem to purchase the programs they’re interested in. They’ll accumulate points every month for as long as they are a paying member and if they cancel, they’ll keep access to items they purchased with their points.
Need Help? There are many different ways that you can create a membership-based points system using AccessAlly. This is one example. If you have questions about this article join our next Tune Up Call or Contact Support.
ARTICLE CONTENT:
What you’ll need before starting this points redemption feature:
- A Credit (points) system already set up on your site
What you’ll have after completing this points redemption feature:
I’ll use Offering names and specific amounts so you can reference these as you build. You can price and structure the points to work best for your business. This works best when run as a monthly membership model as it is more difficult to deliver monthly points to a yearly paying subscriber.
- Fantastic Flowers Membership $27/month
- Three Offerings Redeemable for Points: Orchids, Roses, Tulips
- Points: 100 points upon purchase (recurs every month)
- 1-Click Upsell priced at $27 for 100 points for members that want to buy more than one offering that month (YAY! Extra revenue.)
Points Workshop Video
If you would like to see how all the pieces of this article come together on an AccessAlly site you can watch our Points Workshop replay.
Step 1: Create the Monthly Membership Offering
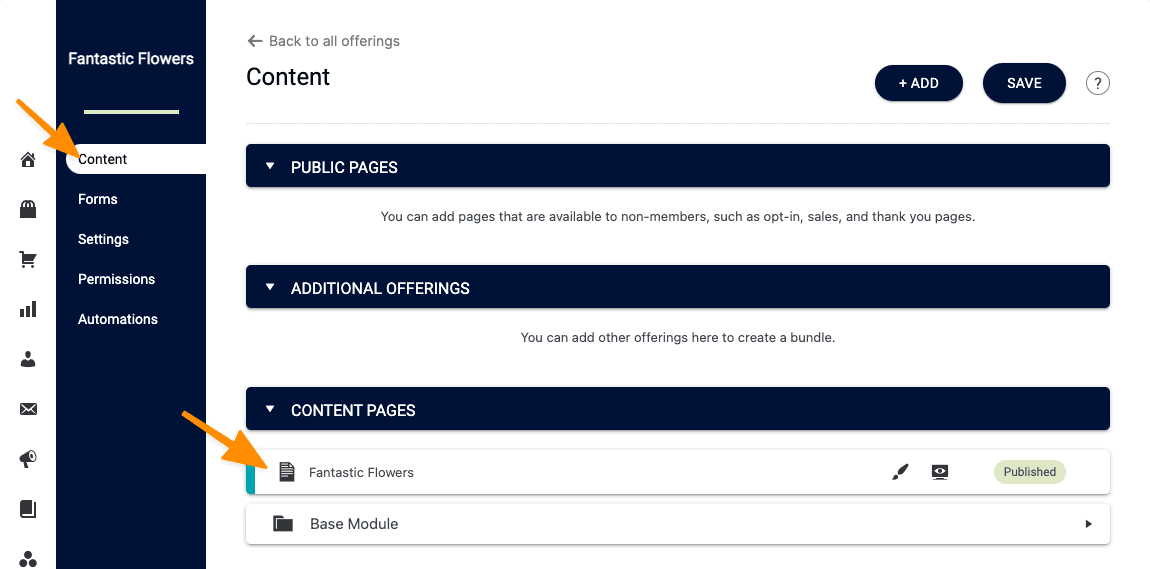
This offering allows for easy management of the membership and recurring payments plans. In our scenario example, this is shown as Fantastic Flowers Membership.
You’ll use the Start from Scratch AccessAlly Offering template to create an offering with a monthly recurring payment. Follow the wizard to create the offering and you’ll see the steps below once the wizard steps are completed.
Content Tab: One page for your monthly members. This page can be used to highlight member news, items that can be unlocked, and so much more. Don’t forget to publish this page.
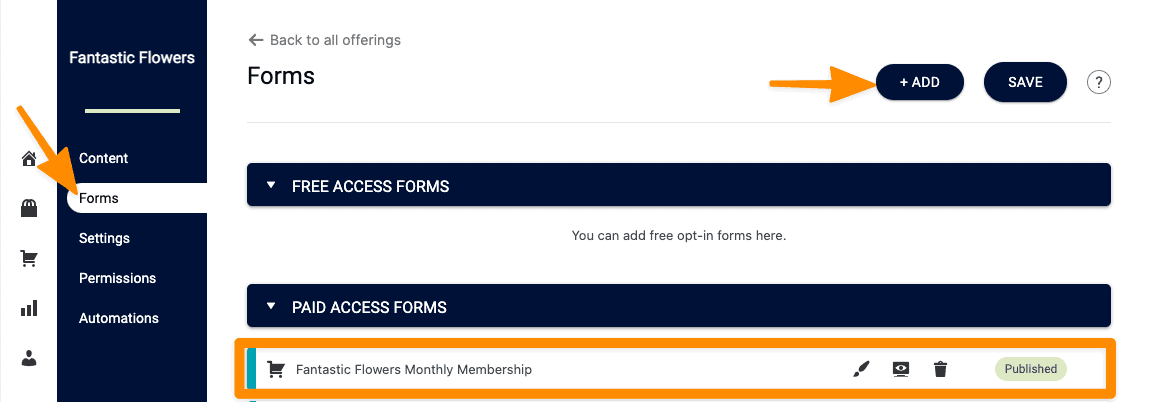
Forms Tab: Add a monthly subscription order form. Set the price you’d like to charge your members every month.
Don’t forget to save your changes! The page also needs to be published so that you’ll be able to see it in future steps.
Step 2: Create An Offering Members Can Unlock With Points
Your members will want to redeem their points. By creating an offering that is outside of the membership you’ll be able to use tags to unlock this item when a member has enough points to purchase it. And… because this offering is not using the same revoke tags as the main membership offering your members can keep what they buy with their points if they cancel in the future.
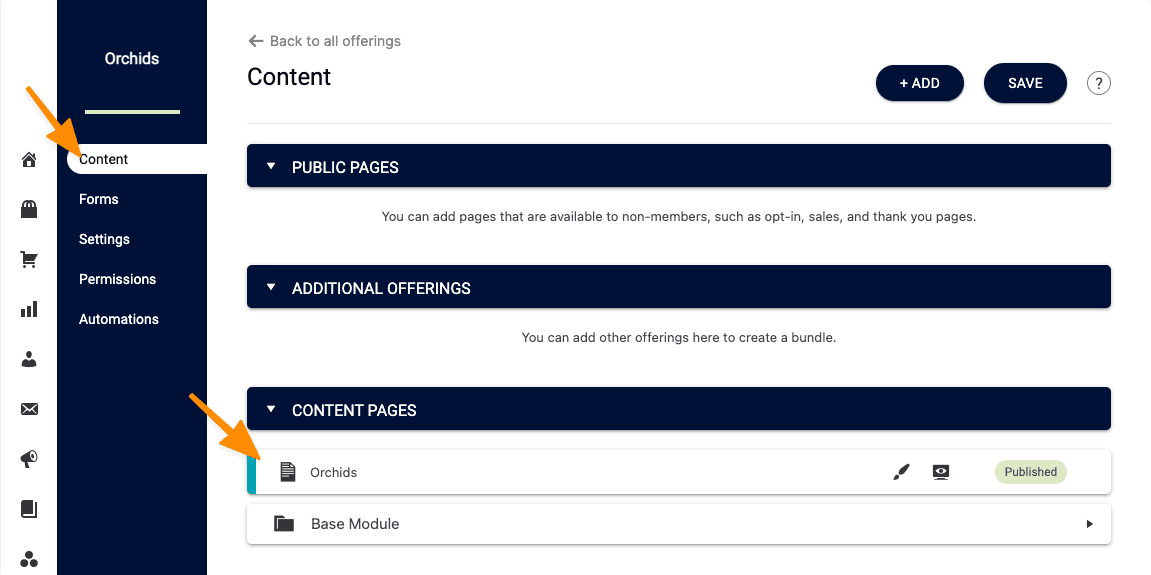
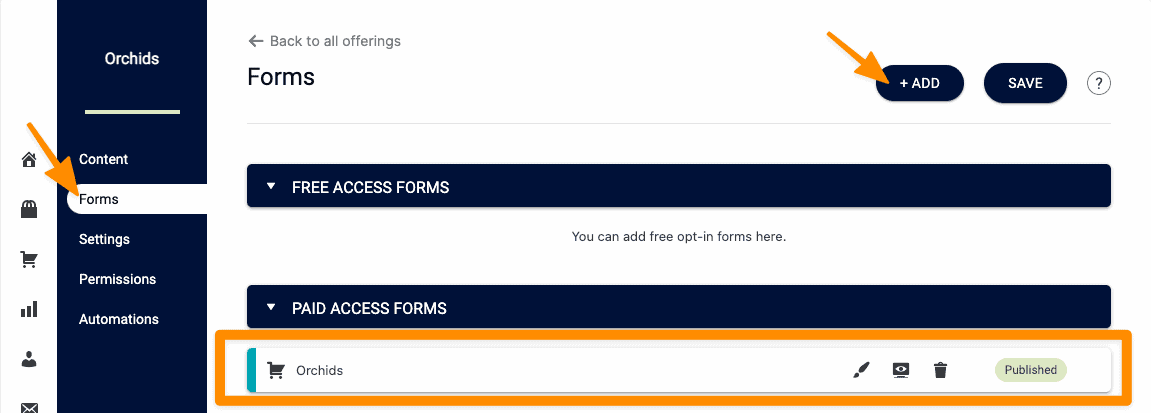
In our scenario example, this offering is called Orchids.
You’ll use the Start from Scratch AccessAlly Offering template to create another one-page offering just like you did in the step above. This offering will have a one-payment plan. This allows you to sell this offering outside of the membership if you would like to.
Content Tab View
Forms Tab View
Step 3: Rinse and Repeat to Add Additional Offering Members Unlock with Points.
It’s a good idea to start with at least three total items members can purchase with points. You can always come back and add more items so your members will always have something to redeem their points for.
Rinse and repeat following Step 2 above for any additional items. In our scenario example, I have created Tulips and Roses to go along with Orchids. You need at least two offerings in addition to the main membership offering to see how this works during setup.
Step 4: Increase Points Custom Operation
Go to AccessAlly > Settings > Custom Operations > + NEW OPERATION
*Heads up! You set this step up when you created your initial Credit (Points) System. If the number of points members earn every month is the same in your existing custom operation you can skip this step. If the amount is different you’ll follow the steps below.
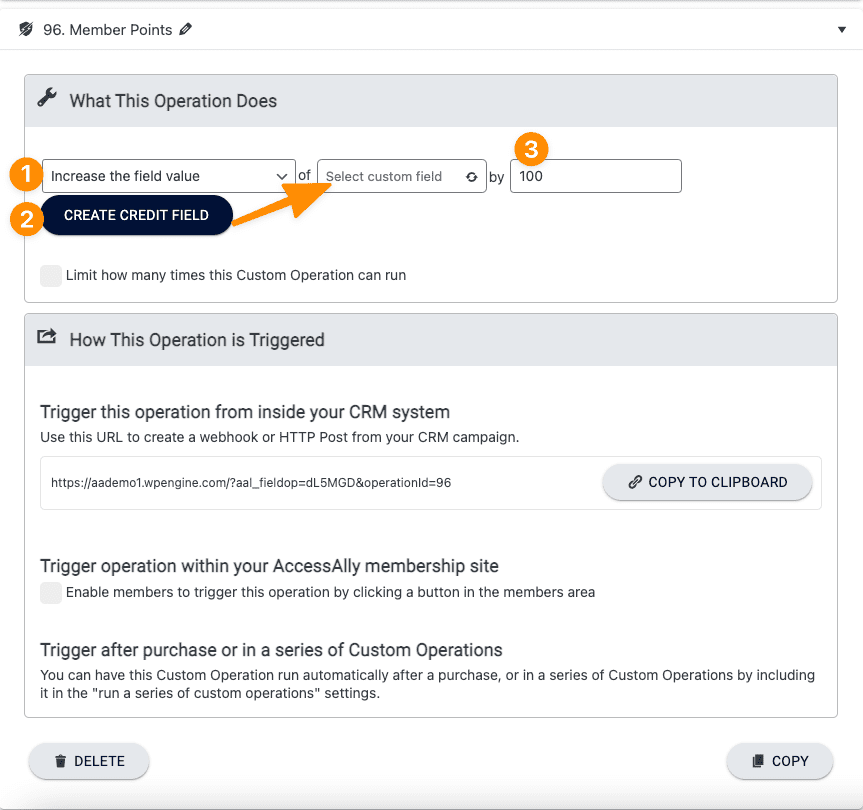
- Choose Increase the field value
- Click the Create Credit Field button > Name the field > Click Create in the popup video and you will see the name of your field has been added.
- Type the number of points you would like your members to earn every month.
Step 5: Using a Decrease Points Custom Operation to Unlock an Offering
Now it is time to create the custom operation for a member to redeem points to unlock an offering from inside your site. You create one of these for EACH new item that can be unlocked as each will be bound to the tags used for the exact offering.
In this example, I’ll create this for the Orchids offering from Step 2.
This custom operation has several parts.
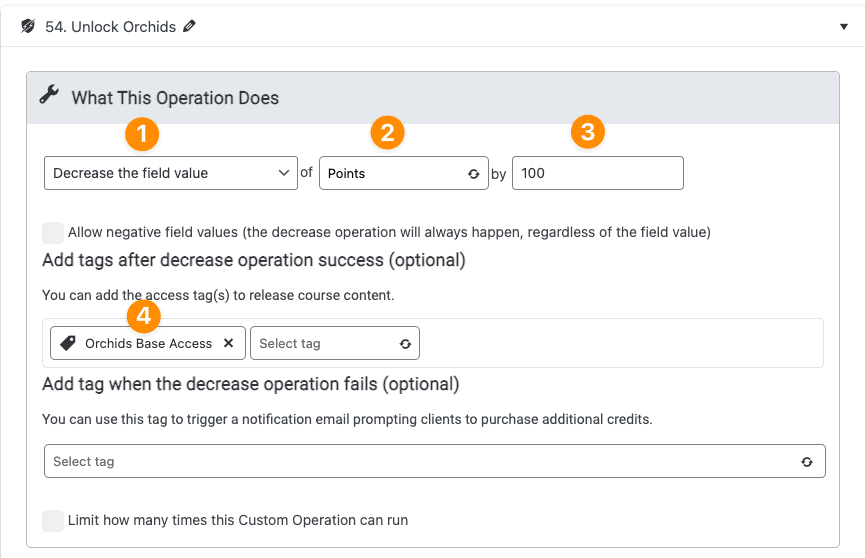
- Click + NEW OPERATION > Select Decrease the field value
- Type in the name of the field that holds your member points and click on it when it appears in the box.
- Type the number of points that Offering 2 costs a member to purchase
- Type in the name of Offering 2 and look for the Base Access tag to appear then click on it.
How This Operation is Triggered
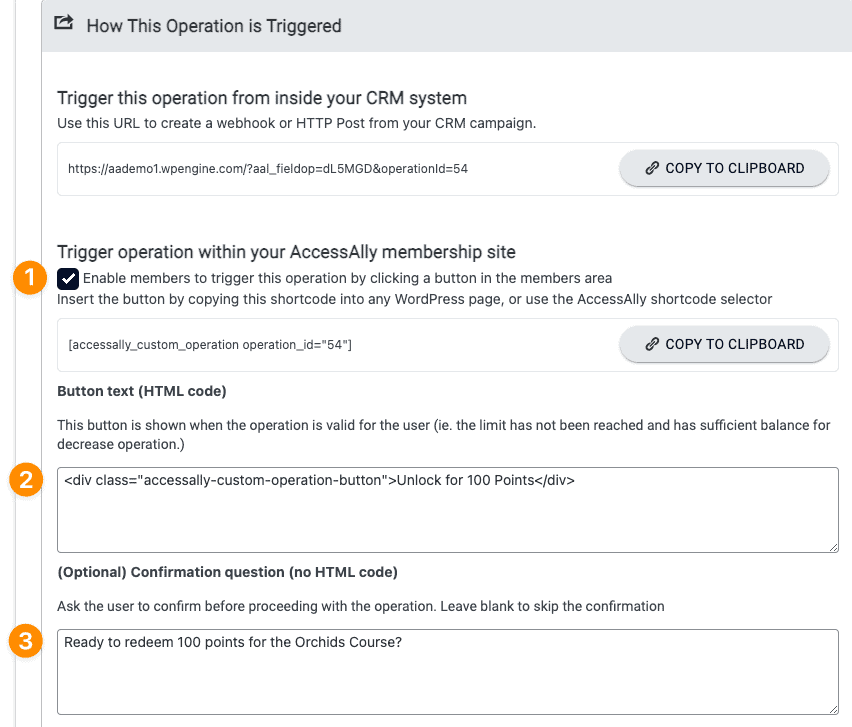
- Check the box by Enable members to trigger this operation by clicking a button
- Add the wording the member will see on the unlock button
- Ask if they are ready to unlock this program.
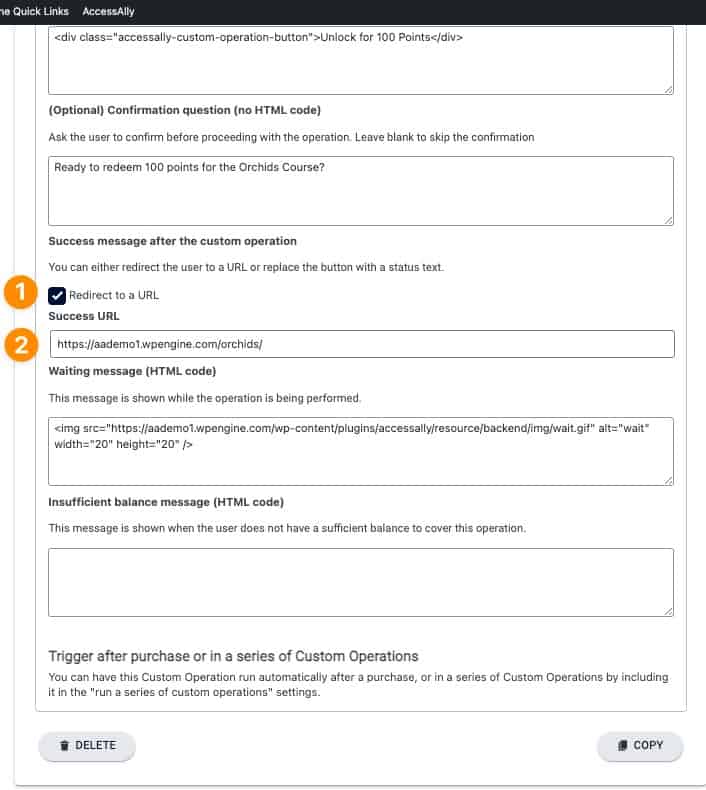
Now it’s time to redirect the member to the Offering so they can get started.
If you do not know the link to this page, save the Custom Operation before leaving this page. Go to AccessAlly > Offerings > click on the Offering > in the Content tab click the monitor view icon and copy the link in your browser.
Step 6: Rinse and Repeat for All Remaining Offerings.
Now that you’ve created the Points Decrease Custom Operation for the first Offering you can rinse and repeat Step 5 for any remaining Offerings. From our scenario example, I’ll create a decrease operation for Roses and Tulips.
Monthly Maintenance: As you add more content you can follow Step 5 for each new membership offering release.
Step 7: Give Points on Purchase to New Members
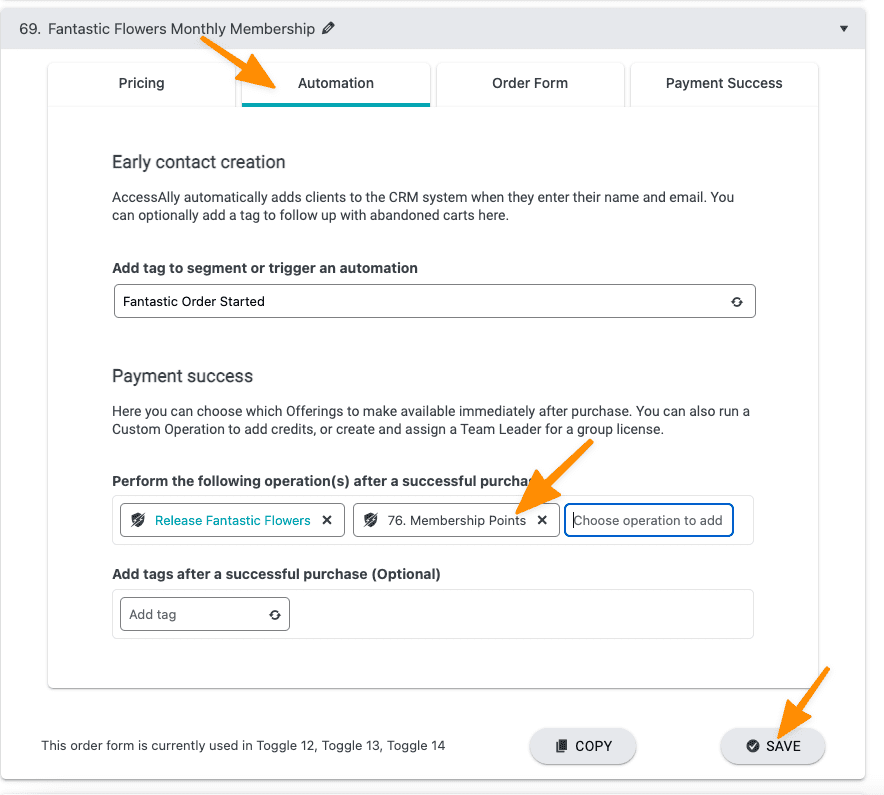
Now it’s time to add the points increase custom field operation (the one that adds points) to your monthly membership order form. This allows your new members to start with points the day they join, YAY.
Go to AccessAlly > Offerings > Membership Offering (scenario example: Fantastic Flowers) > Click on Forms > Click the brush icon to edit your form.
On the Automations tab in the Payment Success section type the name of the custom operation you created that increases (adds points). Once it appears in the dropdown select it. Save your changes.
Save your changes!
A note about points delivery. Right now you are only delivering the first amount of points. You will also need to create a CRM automation to deliver points to your members as they make their monthly membership payments going forward. Don’t forget to set this up in your CRM system.
Step 8: Review Your Dashboard Setup
In order to add your new monthly membership offering and all available offerings that can be purchased with points, you will need to find and review your Dashboard page. There are three different ways a Dashboard may have been built on your site.
Go to AccessAlly > Settings > General Setup > Key Pages tab. The name of your Dashboard page is shown in the Page After Logging In Section. Click the EDIT button in blue to go to this page.
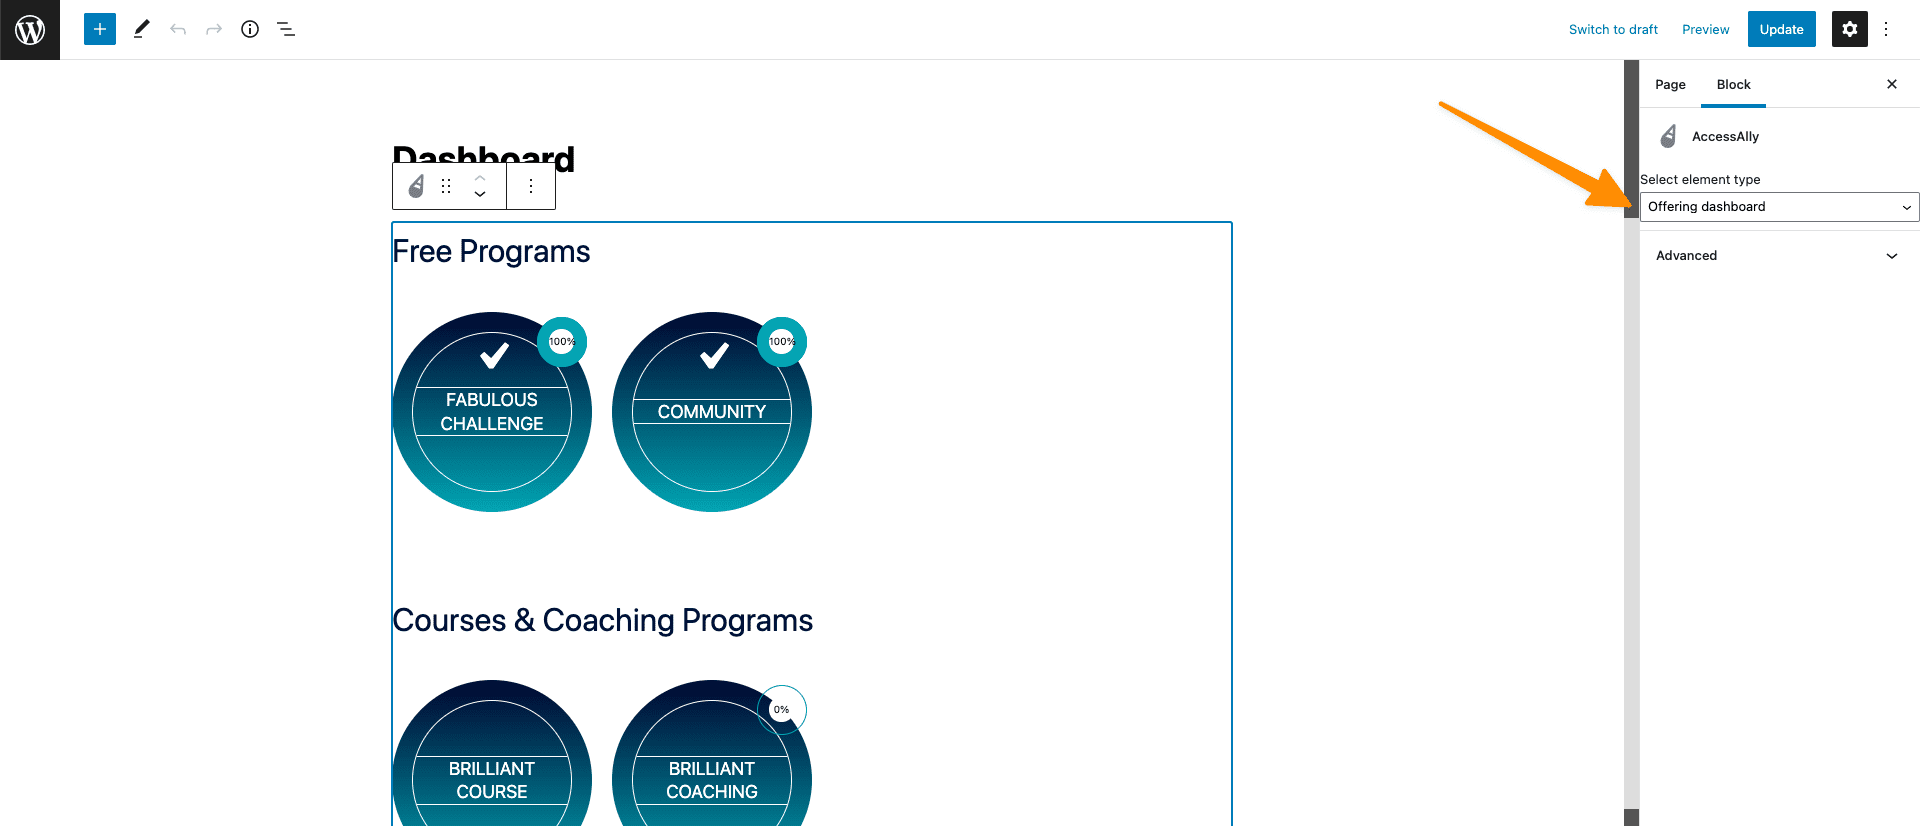
1. AccessAlly Offering Dashboard – this page will use a single block or shortcode that pulls everything into this page.
Shortcode example: [accessally_course_dashboard]
AccessAlly Offering block example:
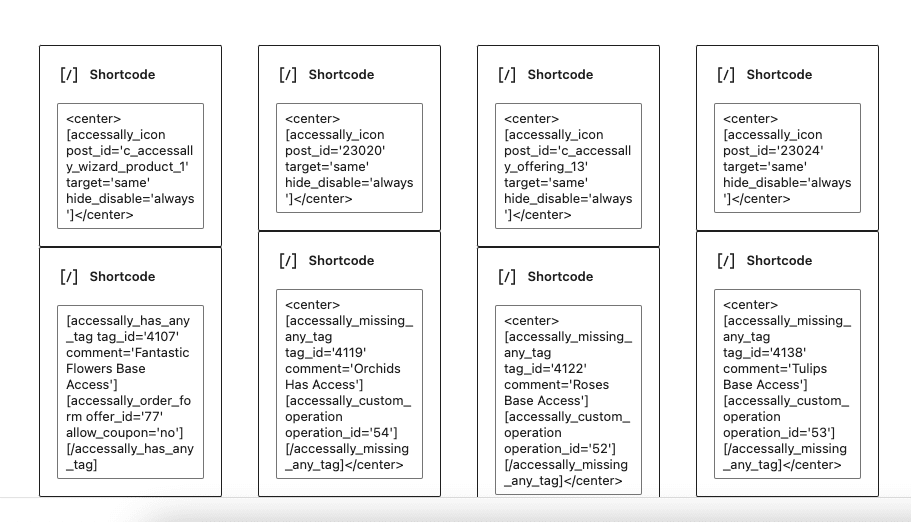
2. Individual Icon Offerings – this option is more robust and you will see a lot of shortcodes in use on the page… one for each offering, you sell from your site. You may also see headings, text, or other elements on the page.
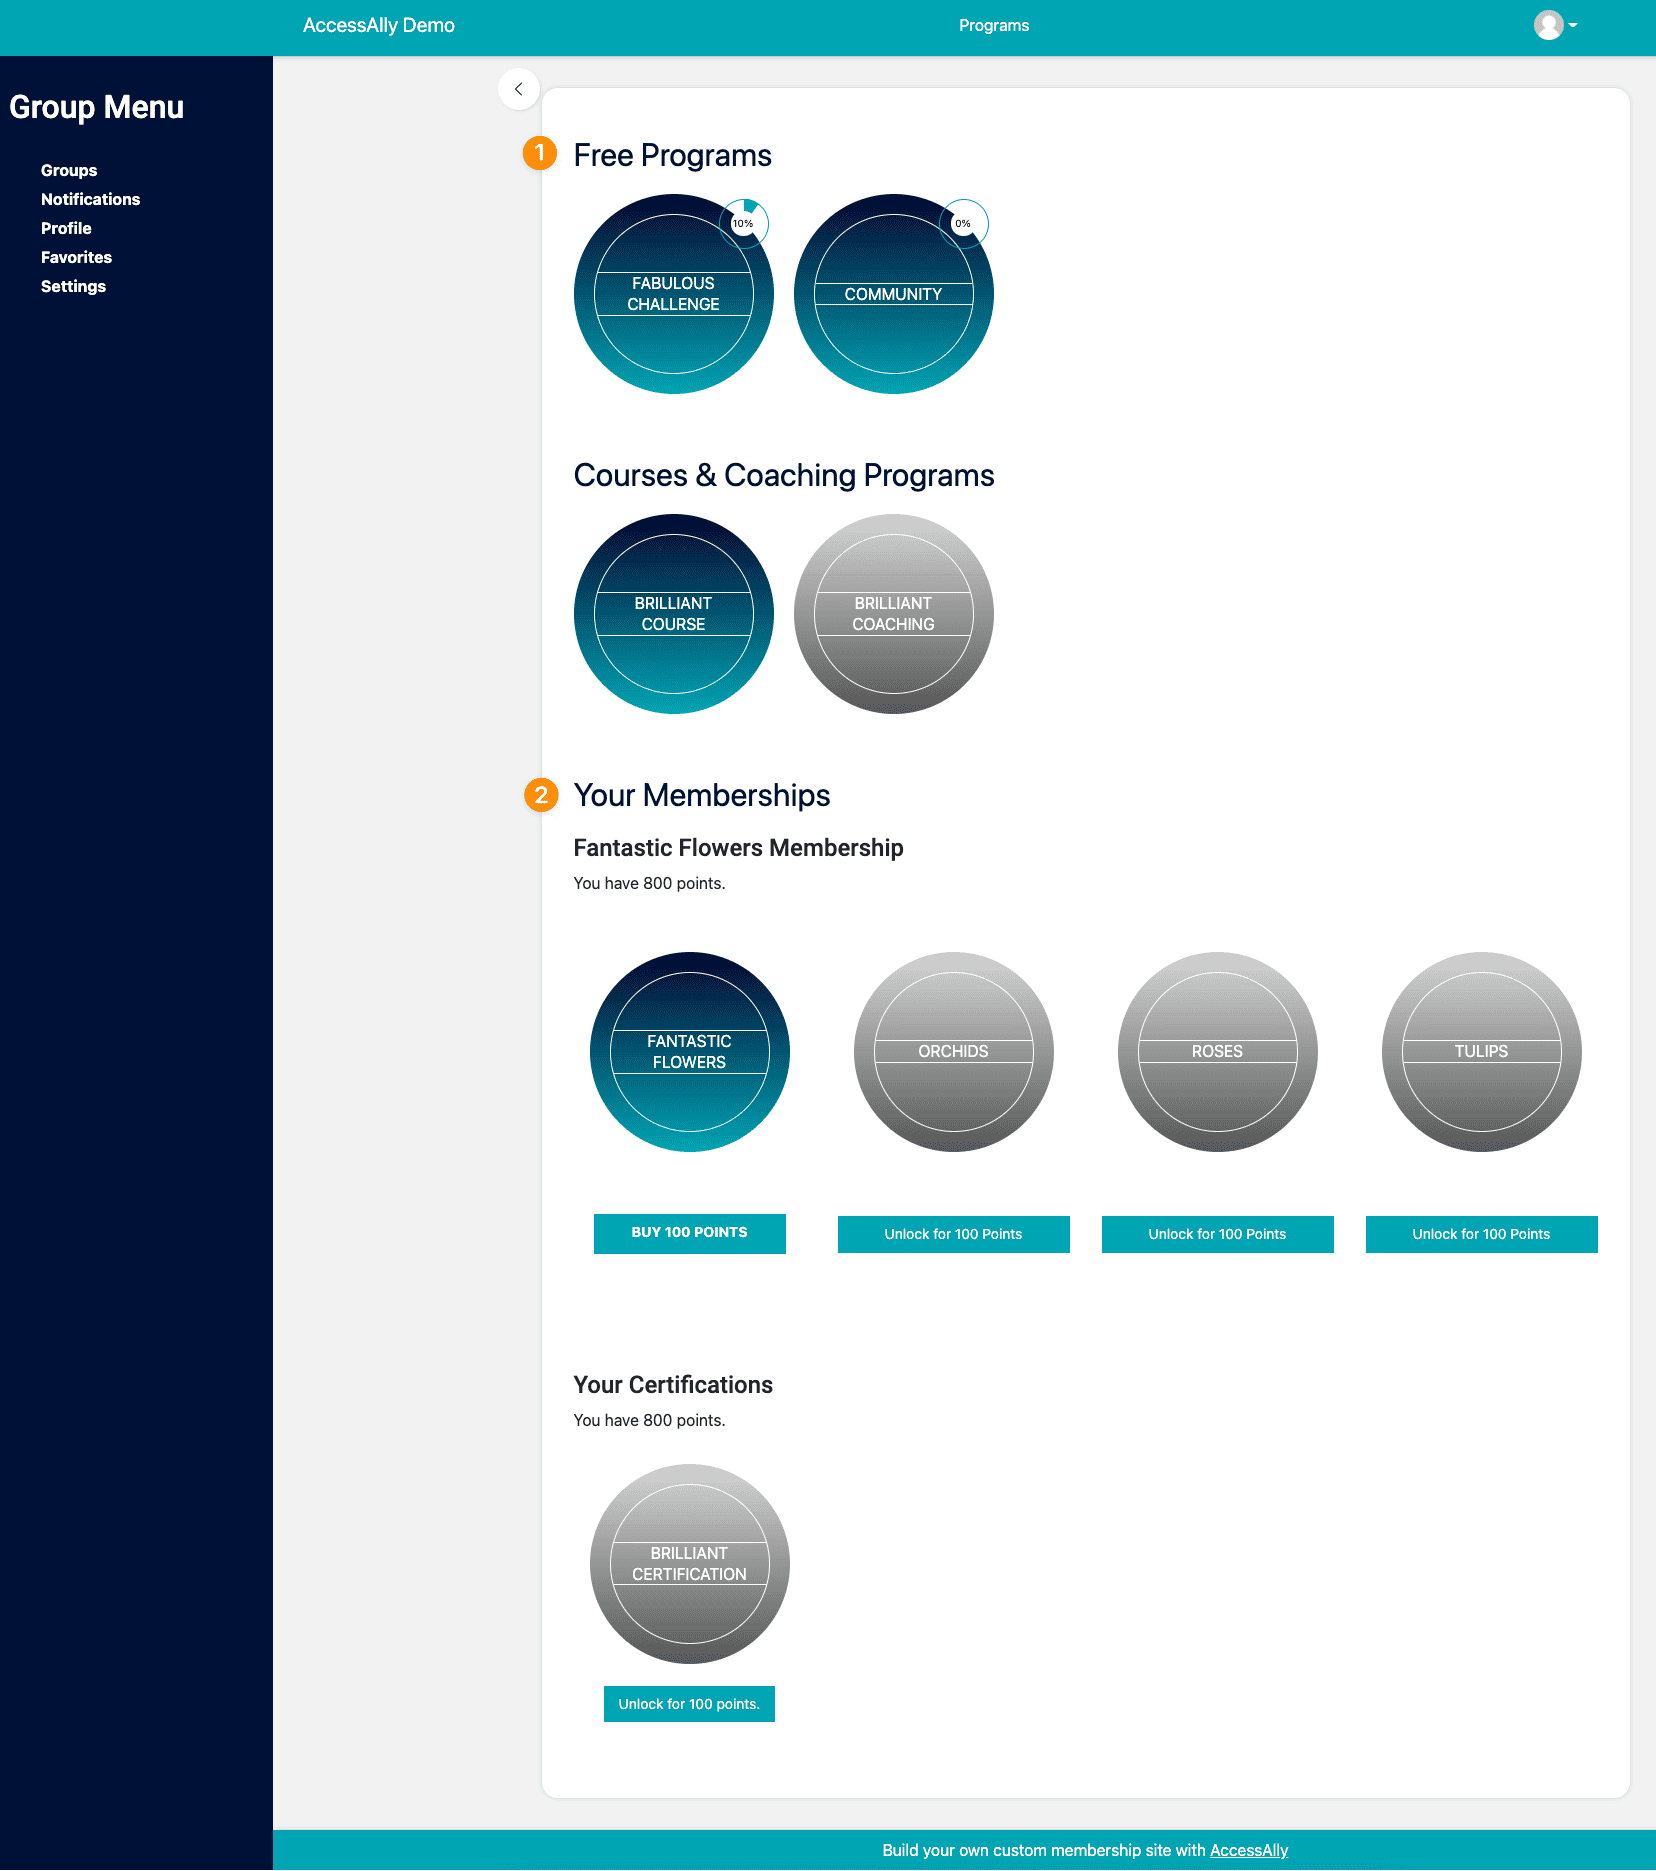
3. Blended Dashboard – this option is a blend of both options above. When viewing your dashboard you will see a section that uses the accessally_course_dashboard and has offering icons below.
Quick Tip! If you review your Dashboard page and are not sure which option your site is using Contact Us for support.
Step 9: Display Your Membership Content and Points on the Dashboard.
Now that you know what type of Dashboard you have it’s time to build what you need to display your new monthly membership with points.
If you have an AccessAlly Offering Dashboard or a Blended Dashboard setup you’ll follow this article for the Blended Dashboard Setup.
If you have Individual Icon Offerings you’ll create the same structure for your new membership. Remember you’ll add all offerings to the dashboard and the custom operation to decrease points for each offering underneath the corresponding icon.
Need Help? This is an advanced article with a lot of moving parts. It was created to assist users that ask how to create this type of membership in AccessAlly. This is one very specific example. If you have questions about this article join our next Tune Up Call or Contact Support.
Frequently Asked Questions About This Article
Yes and no. It depends mostly on what a member keeps when they cancel. When access is removed or revoked for a single offering everything built inside the offering is removed and no longer accessible to members. If your membership is built within one offering there is no easy way for a member to retain items they purchased upon canceling or being revoked.
Great question. All pages in a single offering use the same forbidden access tag the Membership_Revoke_Access tag. This means upon revoke everything in the Membership is no longer viewable.
This is also about access. Remember members can only see pages they have access to. If you would like for members to retain past items purchased with points the members will lose access to the Membership Offering (Fantastic Flowers Membership) upon being revoked.
Adding these items to the Dashboard page allows for viewing them after the member is removed from the Membership. It also allows them to “keep” these items if they join your membership again in the future.
When testing this workflow you’ll want to test with a new user that is not an existing user on your site. This test member will buy the membership and receive points and the items that are available will be shown at that time.
The user must be connected to the CRM system in order to see and use points. You can also use the Switch User plugin to test your setup.
It is possible to drip content in an offering purchased with points, but only via a dripped content release automation in your CRM. It is not possible to automatically drip content purchased with points using AccessAlly emails (or the AccessAlly offering timers) at this time.
We have logged this as a feature request.

