Skill Level: Intermediate
There are many different ways that you can use ProgressAlly Events and Objective Lists inside your AccessAlly site. This is one example. If you have questions about anything in this article join our next Tune Up Call or Contact Support.
Scenario: You would like to reward a member with “X” number of points when they complete a single item in an AccessAlly Pro (ProgressAlly) objective list.
ARTICLE CONTENT:
What you’ll need before rewarding points for objectives
- AccessAlly Pro (ProgressAlly plugin) installed on your site
- An Offering with at least one published page
- An Objective List with 2+ objectives added to the page
- A Credits (Points) system added to your site
What you’ll have after rewarding points for objectives
Instant points are added to a member’s account when they complete a single item on the objective list. You can rinse and repeat this process to add points for as many single items on pages as you would like.
Step 1: Increase Points Custom Operation
You’ll start by creating an increase points custom operation. This allows you to reward members with the exact number of points you would like for the single item(s) on your objective list(s).
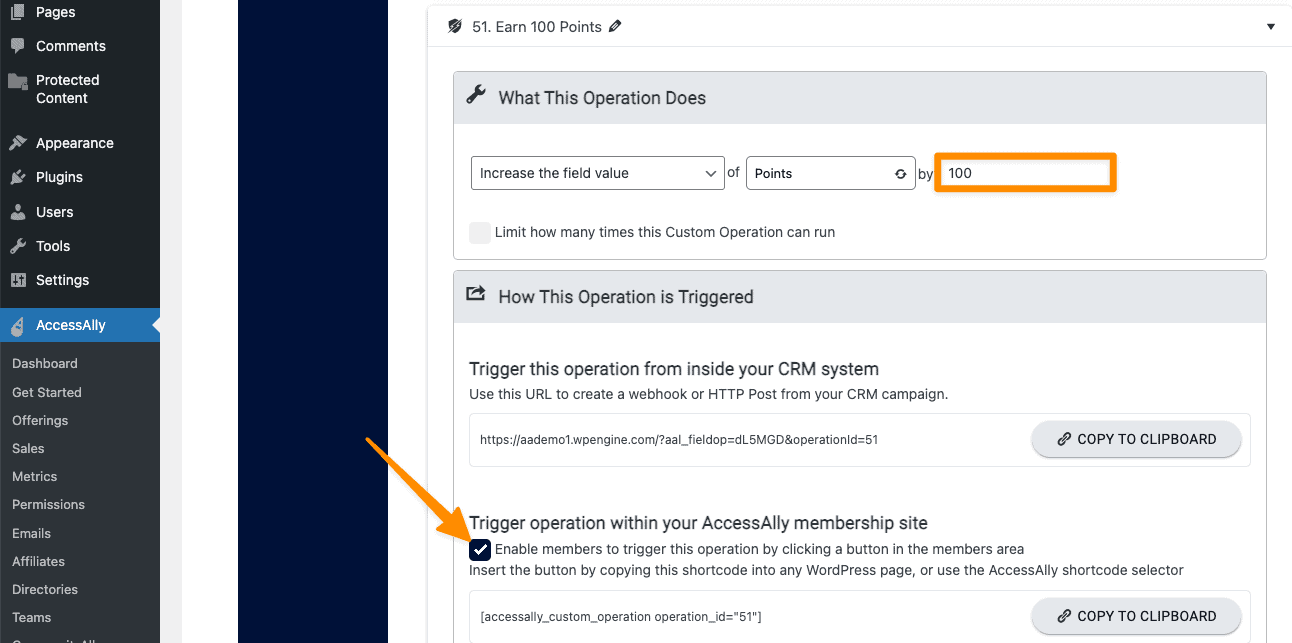
- Go to AccessAlly > Settings > Custom Operations and click the + NEW OPERATION button. Note the number of the operation in the example image this is custom operation 51.
- Select “Increase the field value” of “The Custom Field That Holds Points” by “number of points” in the example image 100 points will be added.
- Important! In the “How This Operation is Triggered” section mark the box by Trigger operation within your AccessAlly membership site.
Step 2: Create a ProgressAlly Event
Now you’ll use a ProgressAlly Event to note when the Objective List item has been completed to automatically issue points to your members.
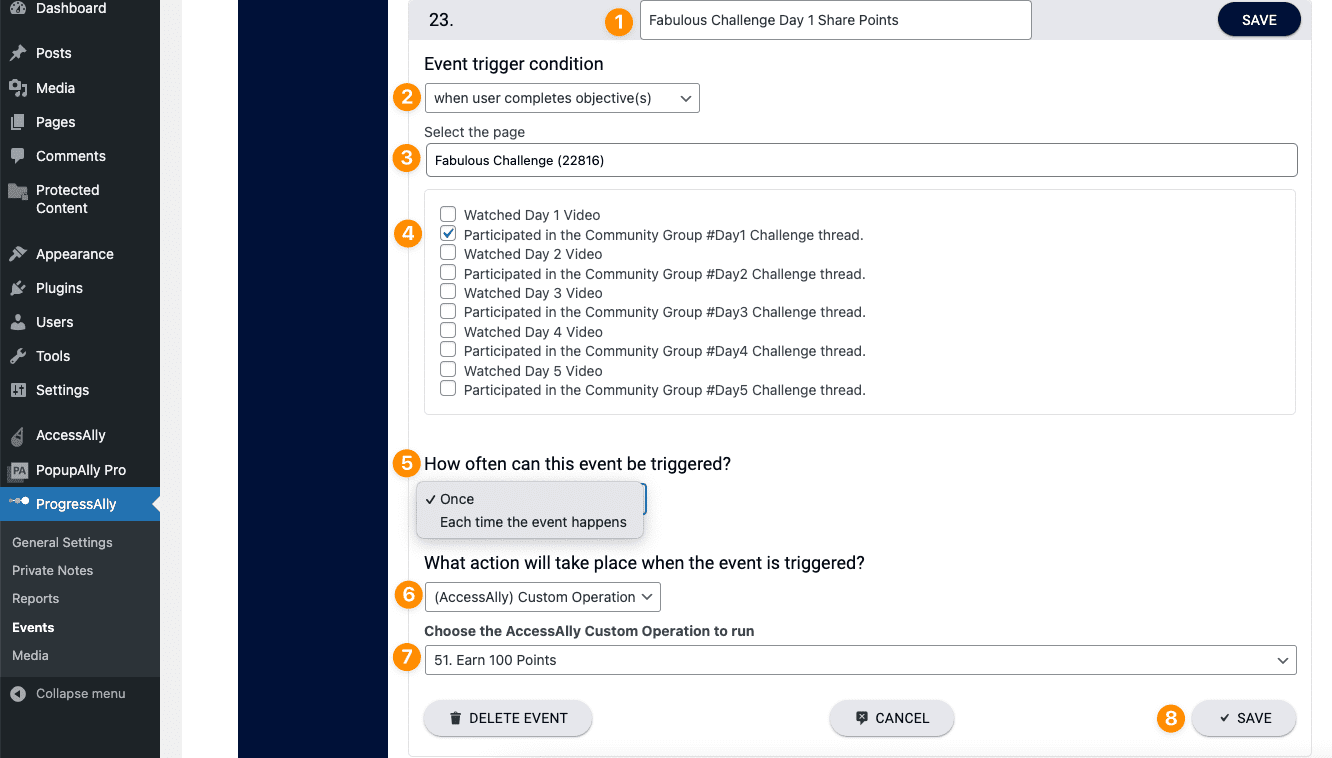
- Go to ProgressAlly > Events > Click the +ADD EVENT button
- For the Event trigger condition select when user completes objective(s)
- Type the name of the page your Objective List is on and select it from the dropdown
- Choose the single objective that you would like to reward member points for
- Choose how often a member can complete this single item and receive points. (Once is recommended)
- What action will take place when the event is triggered? Choose [AccessAlly] Custom Operation from the dropdown
- Now select your Increase Points Custom Operation from the dropdown list
- Save your changes
Step 3: Display Points
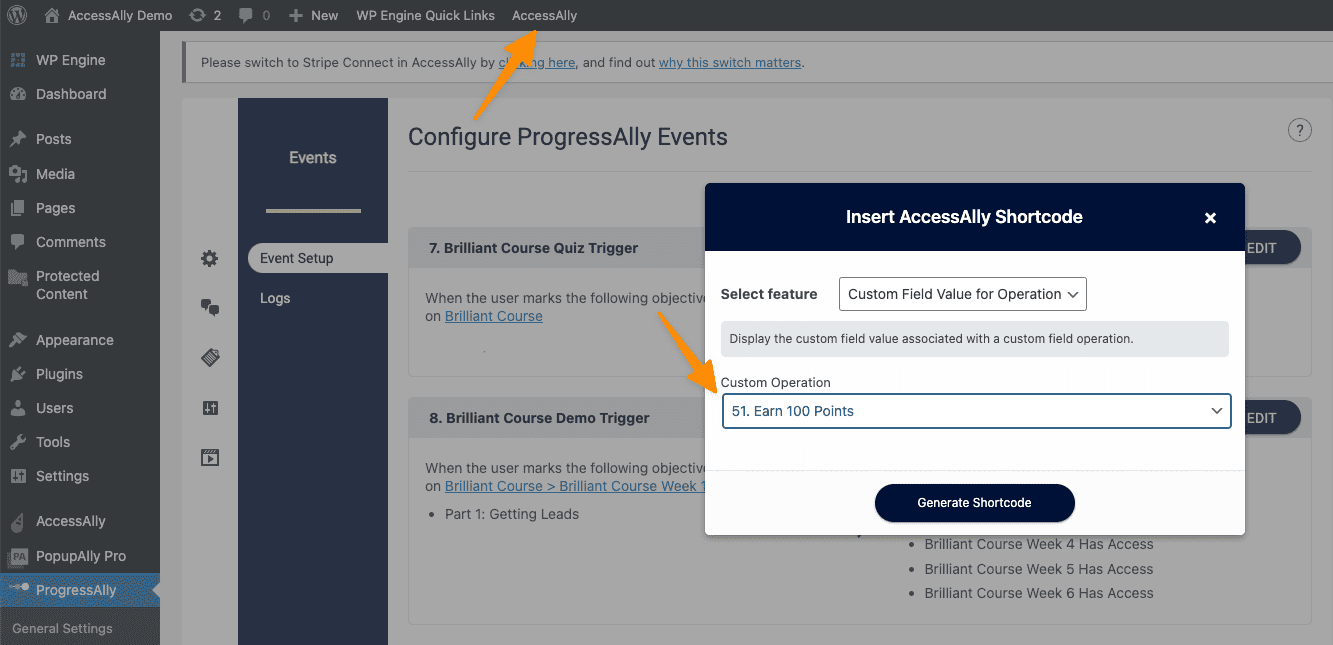
Your members will need to be able to see the number of points they have. You can add this to any page on your site using the AccessAlly Shortcode Generator.
Step 4: Test Your Setup
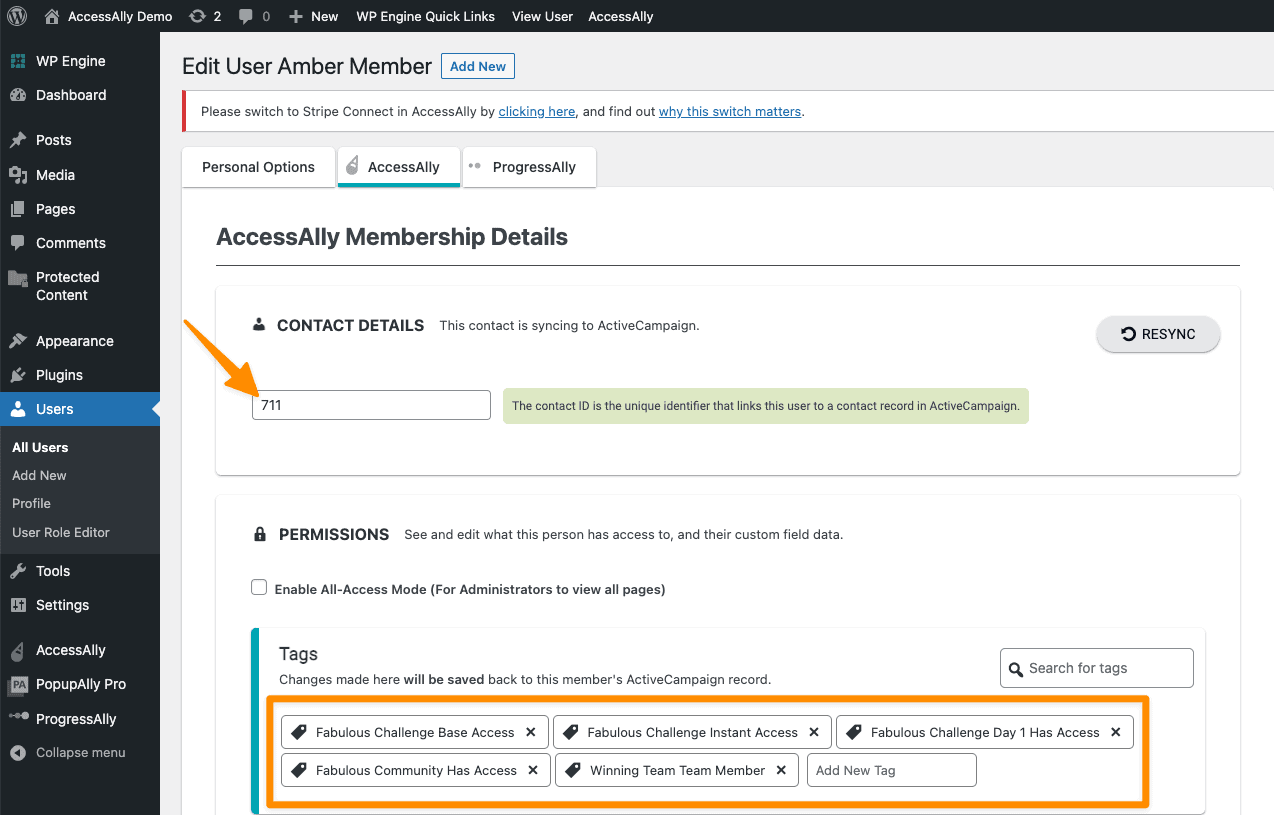
Part 1: It’s important to test your setup to ensure that everything is working as it should be BEFORE launching this to new members. When testing the user must have a valid contact ID and tags for the offering with the Objective List.
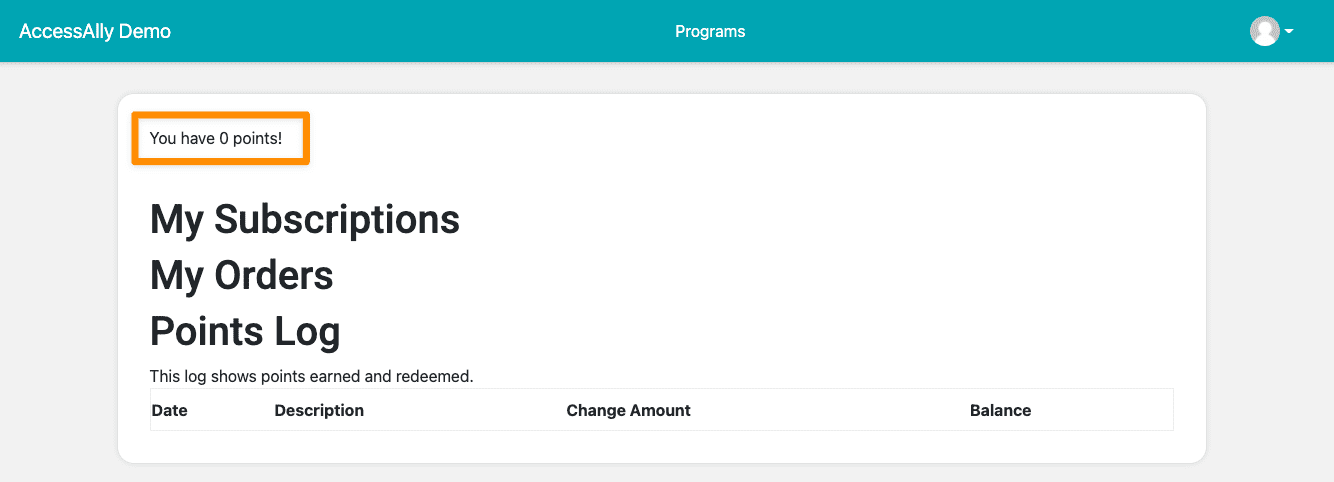
Part 2: View the current points balance to see how many points this user has. This shortcode was added to your site in Step 3 above.
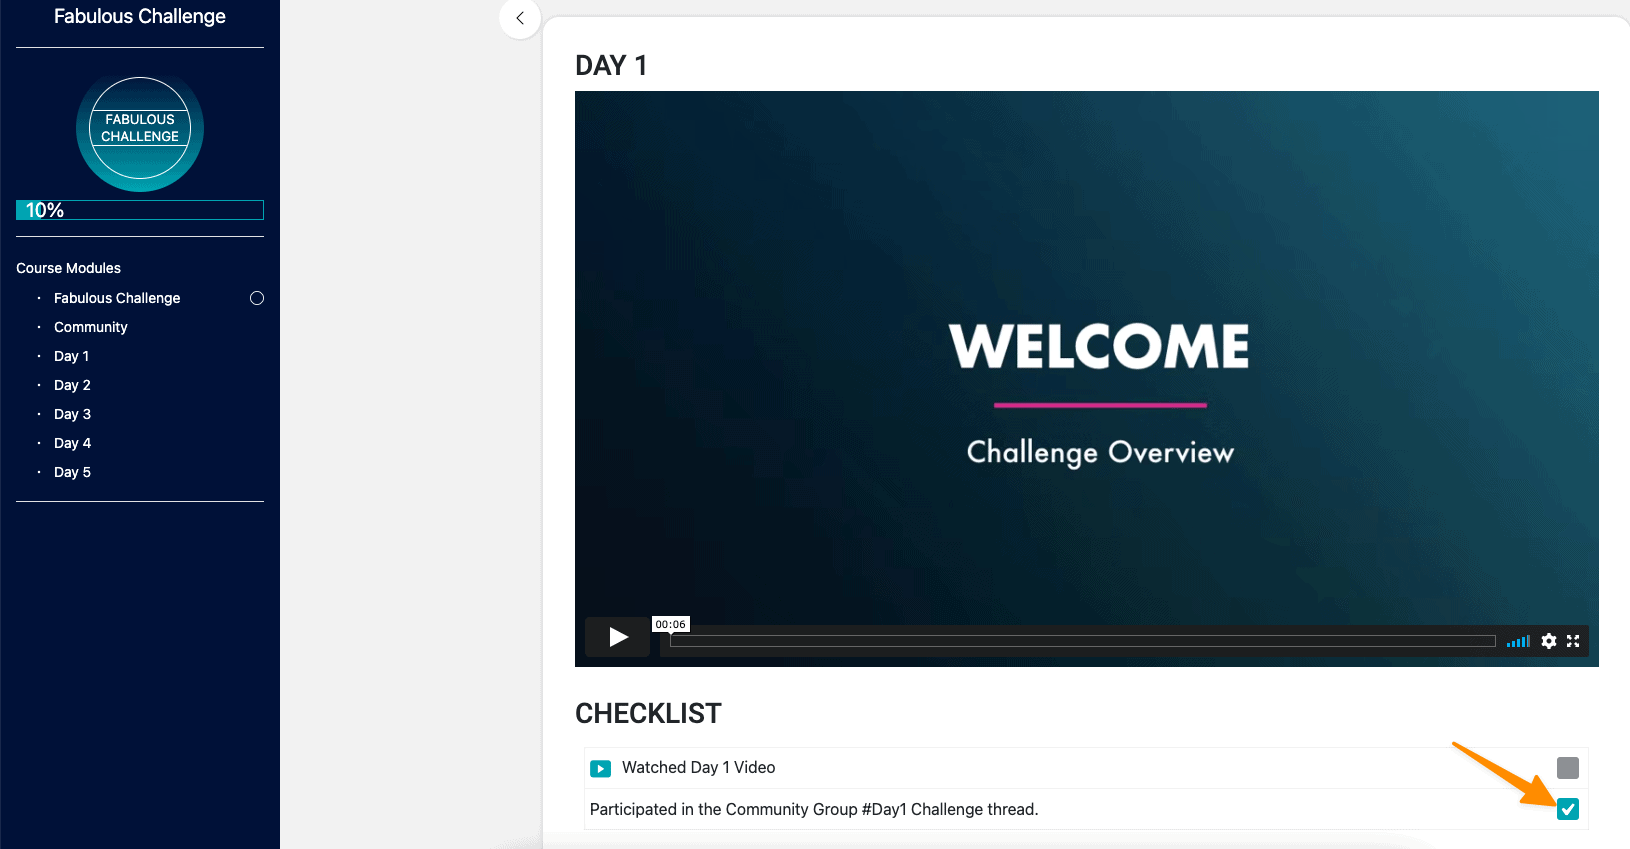
Part 3: Log in as your test user and complete the Objective List item that rewards this member with points.
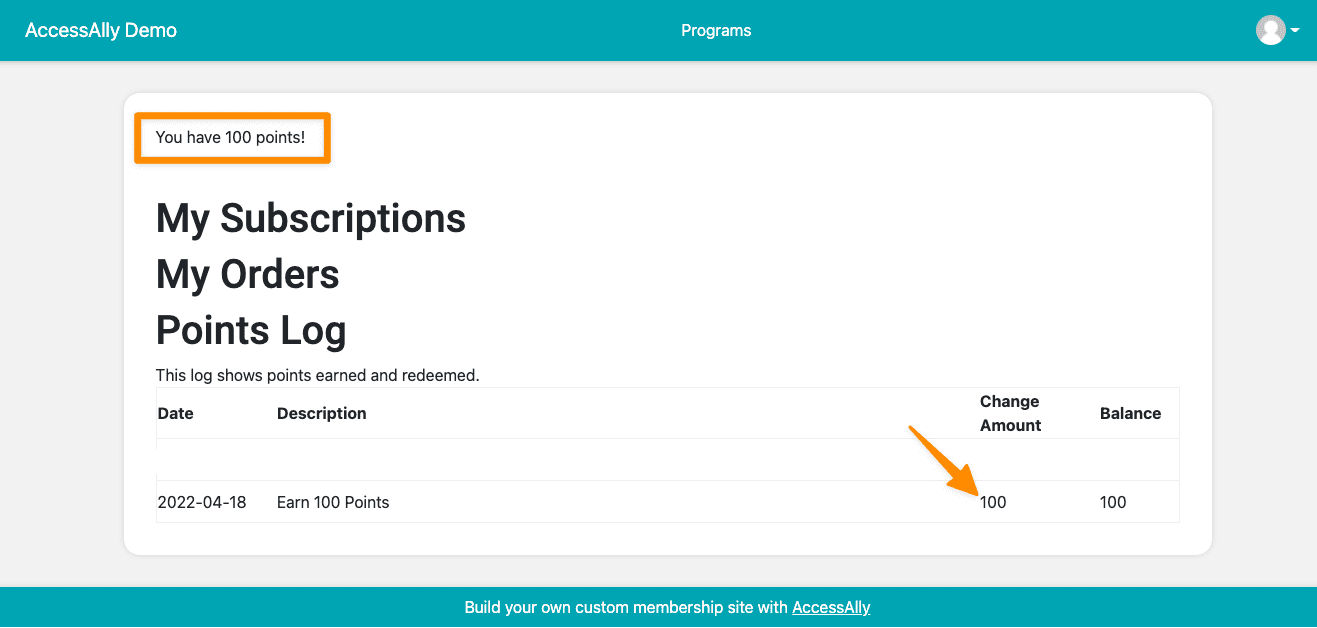
Part 4: View the current points balance to see how many points this user has. This shortcode was added to your site in Step 3 above. This should now reflect the number of points that completing this Objective List item is worth.
Troubleshooting
If your test user did not receive the right amount of points and you followed the steps in this article you can join our next free Tune Up Call or contact us for support.
Please note! When contacting support provide the email address of your test user along with login details so we’ll be able to assist you as quickly as possible.

