In this article you’ll learn how to use a button in WordPress with protected content to apply a tag upon click using a ProgressAlly event. This is a great option if you love the design look and feel of your WordPress theme buttons and want to apply tags in AccessAlly upon button click.
ARTICLE CONTENT:
1. Review Protected Content File
Visit Protected Content > All Protected Content > Click “Edit” to view your desired file.
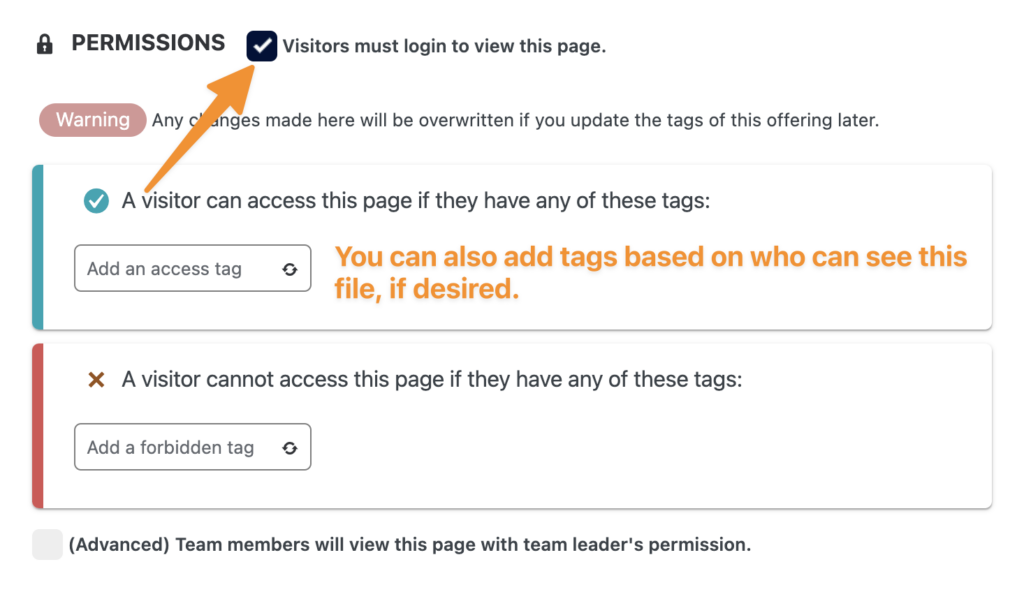
Make sure this is set with a check by “Visitors must login to view this page” otherwise this file will not be tracked. You can also add access permission tags (if needed.)
Next you will need two items, related to this file:
- Page URL for this file
- Number of this post in WordPress
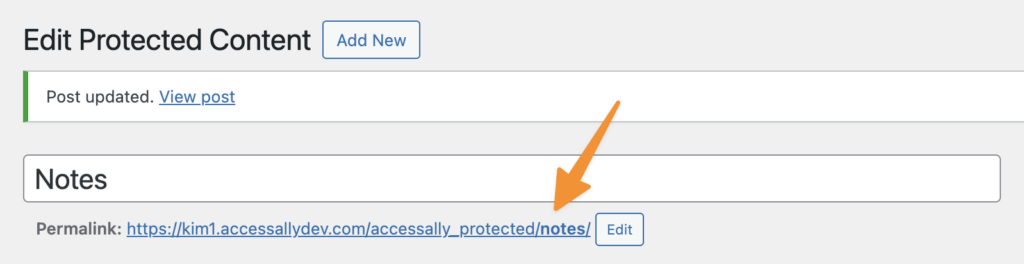
2. Page URL for Protected Content File
The page URL is shown here, you can copy this link. You will need this link for your button in WordPress.
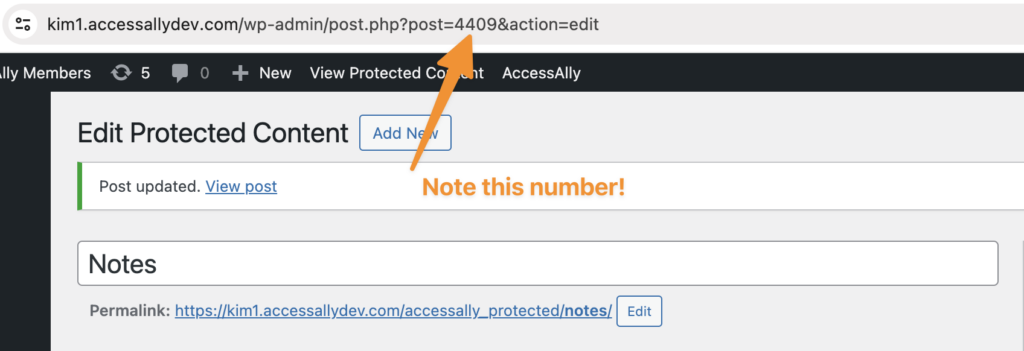
3. WordPress Post Number
Next, you’ll need the number of this post in WordPress to use with your ProgressAlly Event.
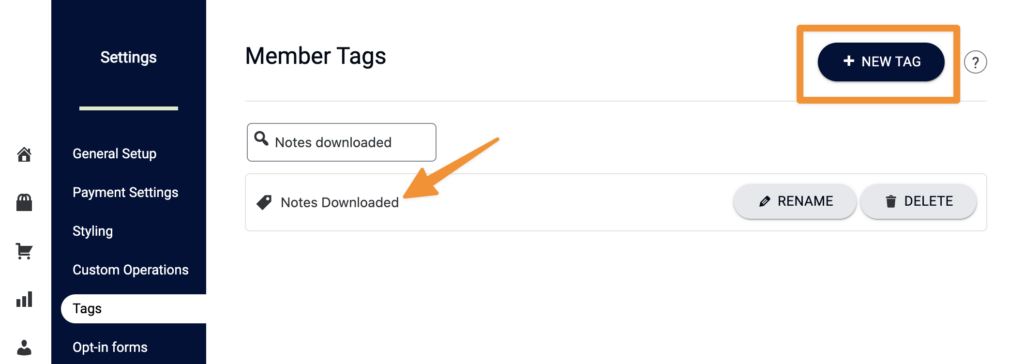
4. Create a Unique Tag
If you would like to tag a user based on downloading the protected content file, you can add a unique tag.
AccessAlly > Settings > Tags and create a new tag. This tag is automatically added to your CRM if created in AccessAlly.
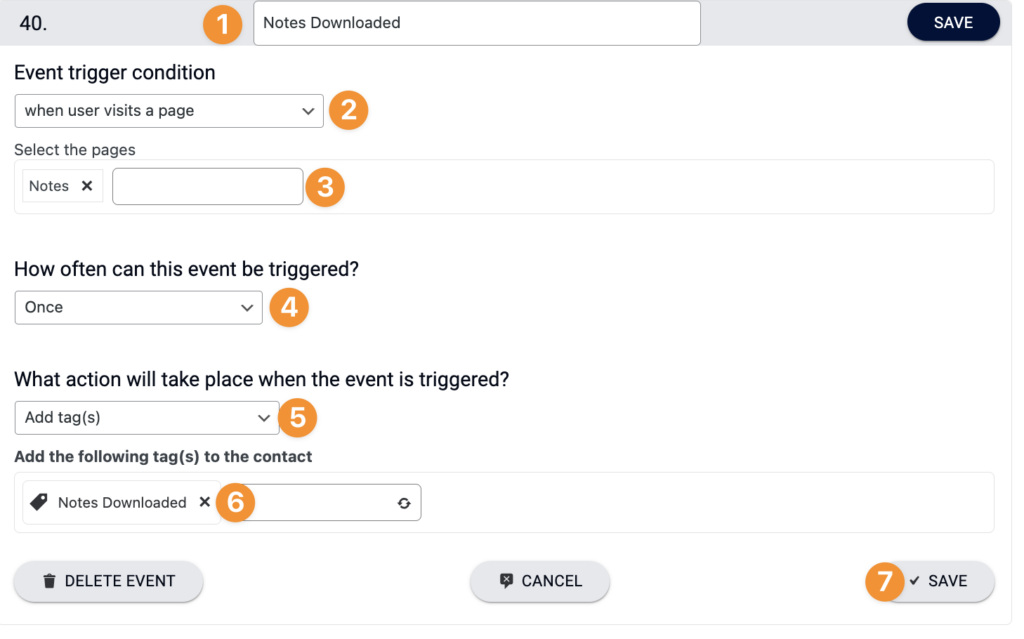
5. ProgressAlly Event
We’ll use a ProgressAlly Event to determine when someone downloads the file. This option is great if you’d like to use buttons in your WordPress Theme and tag someone upon download of your file.
Go to: ProgressAlly > Events > Create a new event
- Name event
- Select “when user visits a page”
- Type in WordPress post ID number (from step 3 above)
- Select how often the tag can be applied
- Select “add tag(s)’
- Add tag (from step 4 above)
- Save your changes
6. Add Button to WordPress Page
Now you can go to the page where the user will download the protected content file. Create a button on this page using your WordPress page builder. You can add as many protected content files via buttons as you would like. You’ll need one ProgressAlly event for each button.
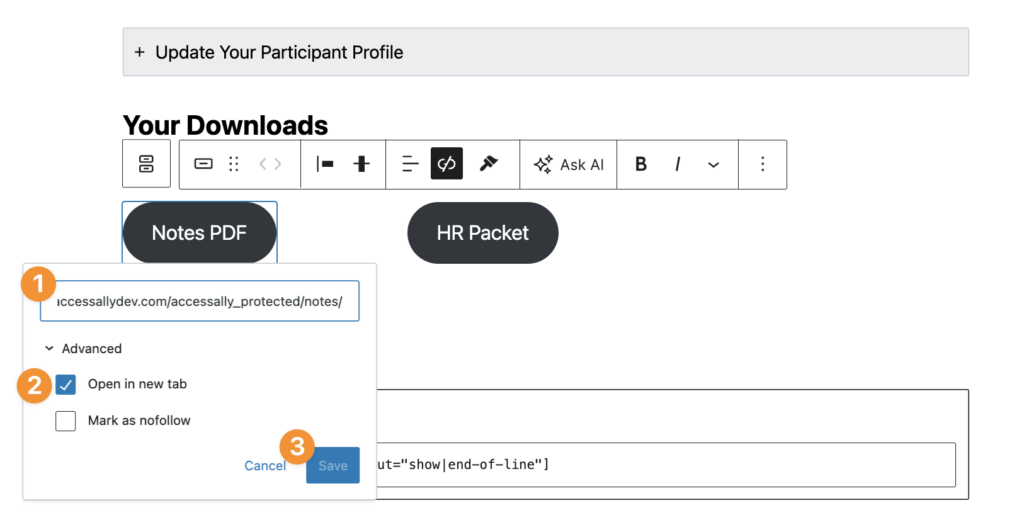
- Add the protected content URL from step 2 above as the button link
- Set to open in a new tab
- Save your changes
7. Save page changes, test button.
Remember to save your WordPress page changes, click “Publish” in top right corner.
To test your new button, click on it, then review your profile tags at User > Profile > AccessAlly tab. You will see the tag from step 4 has been applied upon clicking the button.

