AccessAlly Pro comes with a built-in progress tracking feature that allows you to create progress bars and pie charts, and track the user’s journey through your online courses. Progress tracking depends on “Checklists” to gain the necessary progress information. The tutorials on this page show you how to create these checklists and start tracking your students’ progress.
ARTICLE CONTENT:
How To Add Checklists to A Page
This is a basic tutorial to show you how the checklists work – and how you can easily add them to any WordPress post or page with the shortcode adder.
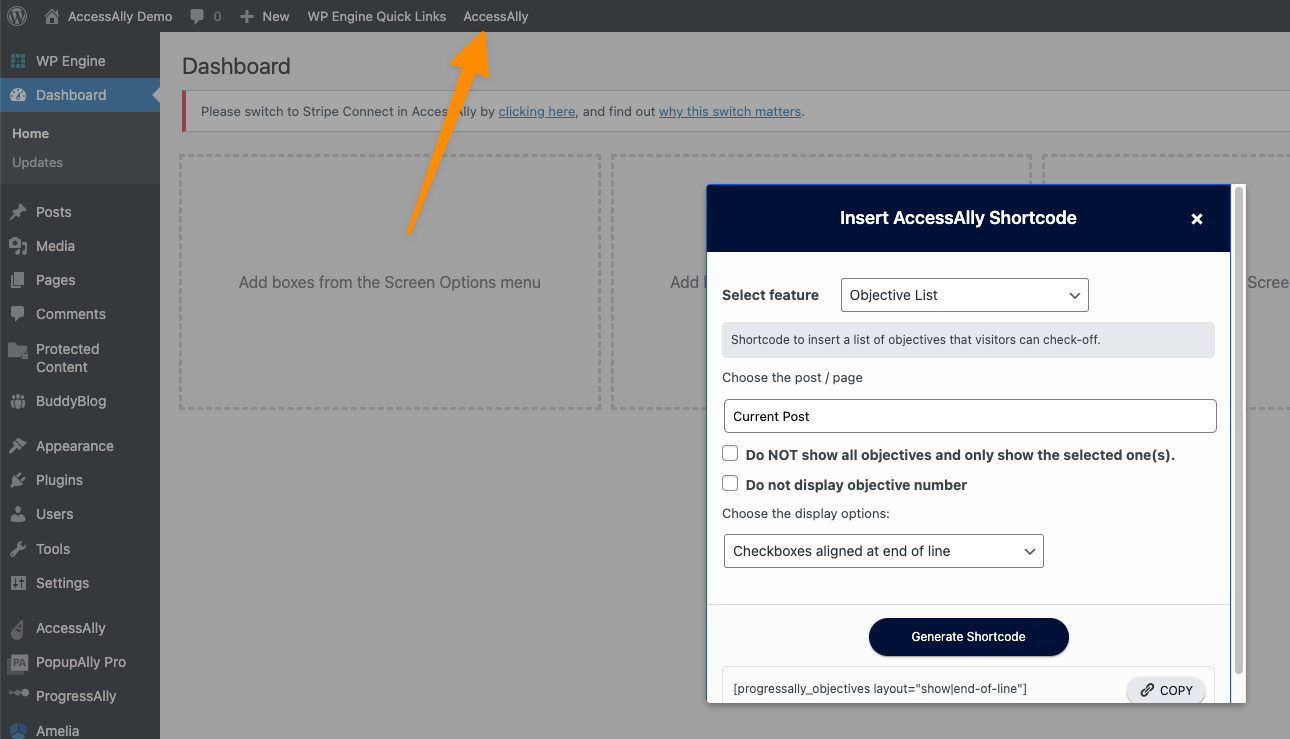
Please note that the shortcode generator is now located on the top admin bar of your WordPress site.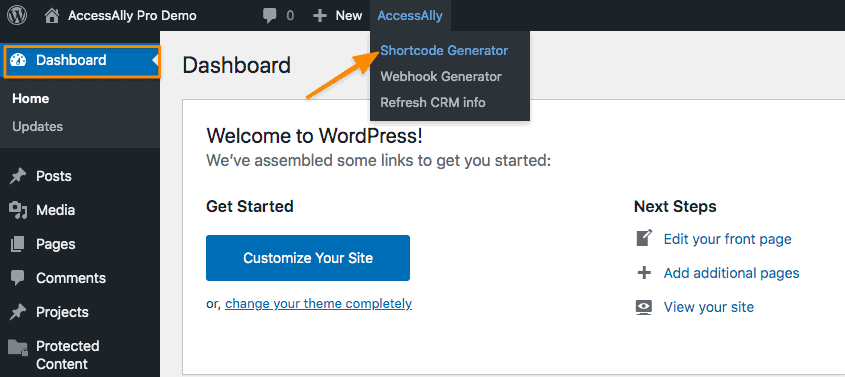
ProgressAlly objective lists
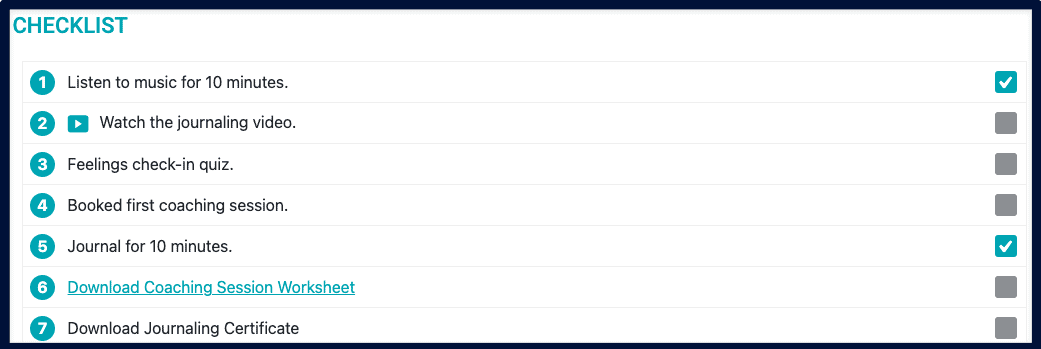
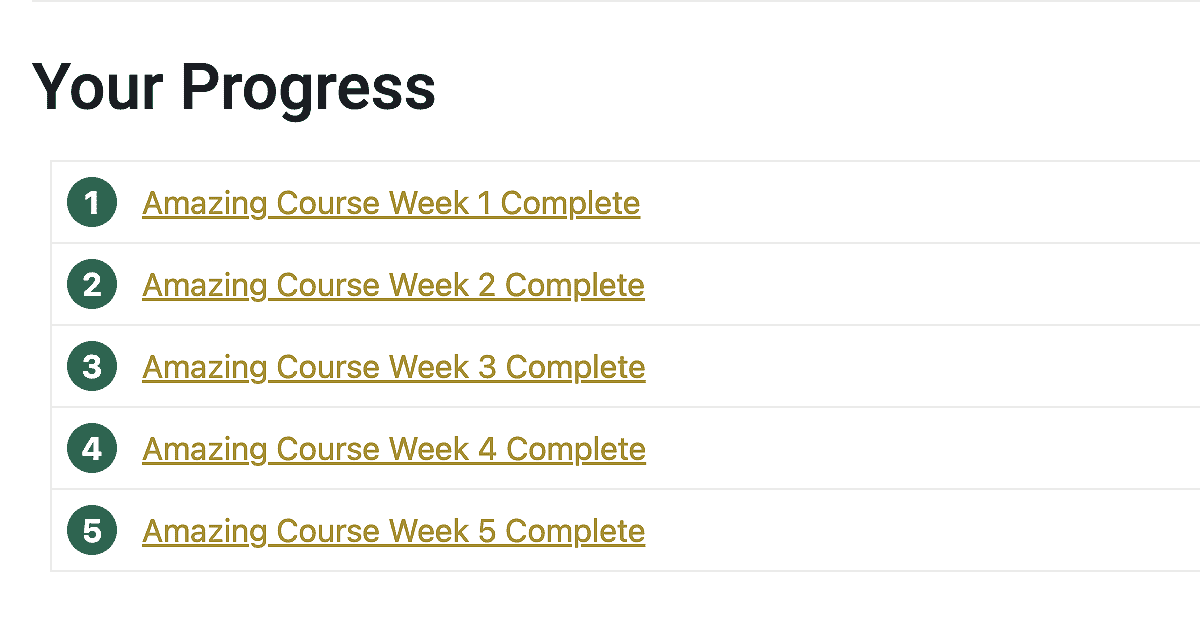
Front-end example (checklist the user sees)
Step 1: Edit the page
To set this up in ProgressAlly, go to the page where you’d like to add the checklist items. This is located under Pages > All Pages and can be opened by clicking on the ‘edit’ link.
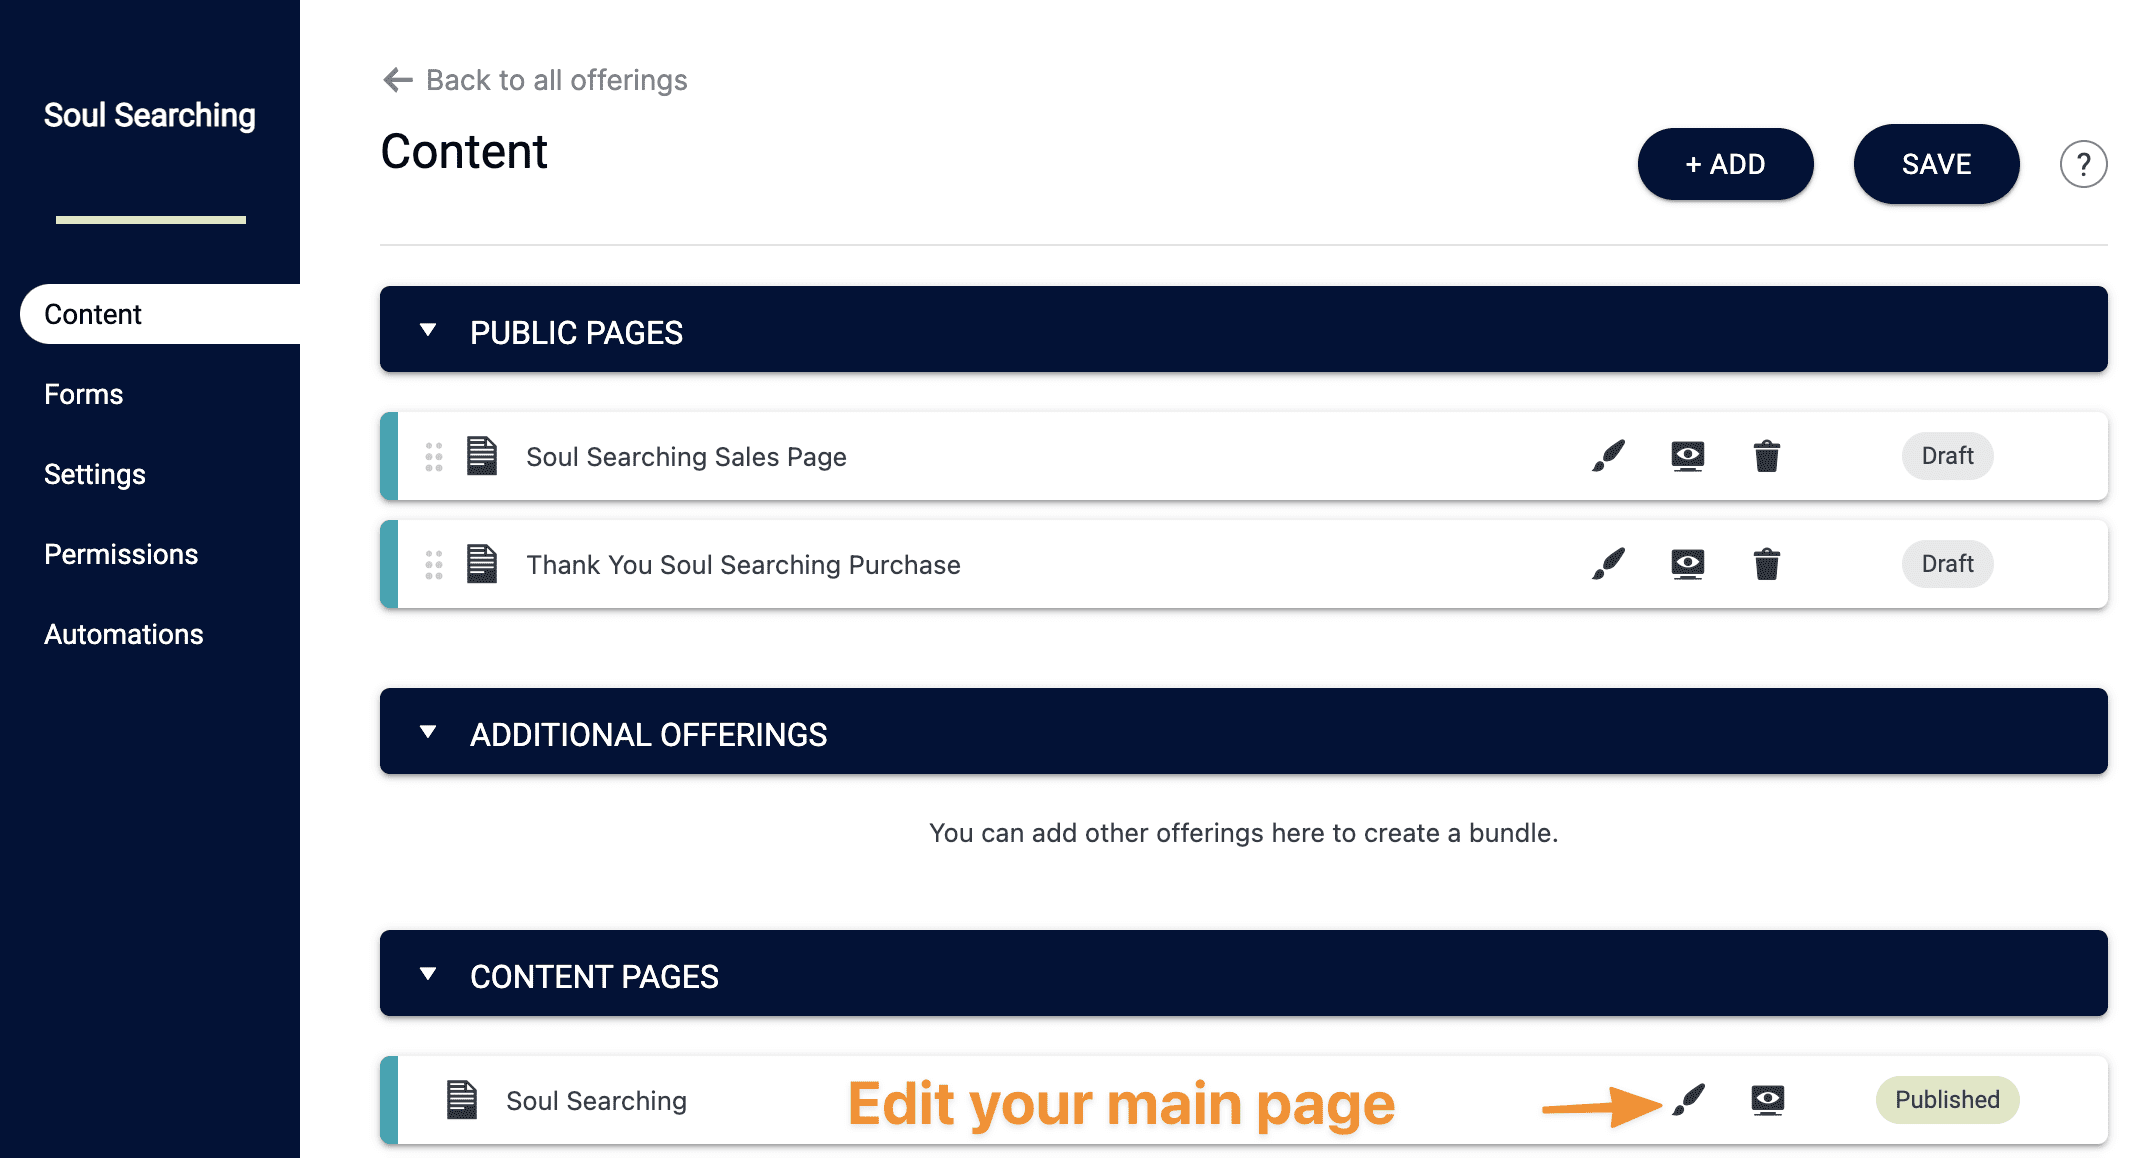
You can also edit pages from your Offerings content area.
Step 2: Add objectives to the page
Add new objectives to the page by scrolling to the ProgressAlly Page Settings area and selecting the ‘Objectives’ tab.
Back-end example (what the site admin sees)
After adding the first objective you can click the “+” to add another. Objectives are drag and drop if you would like to reorder them.
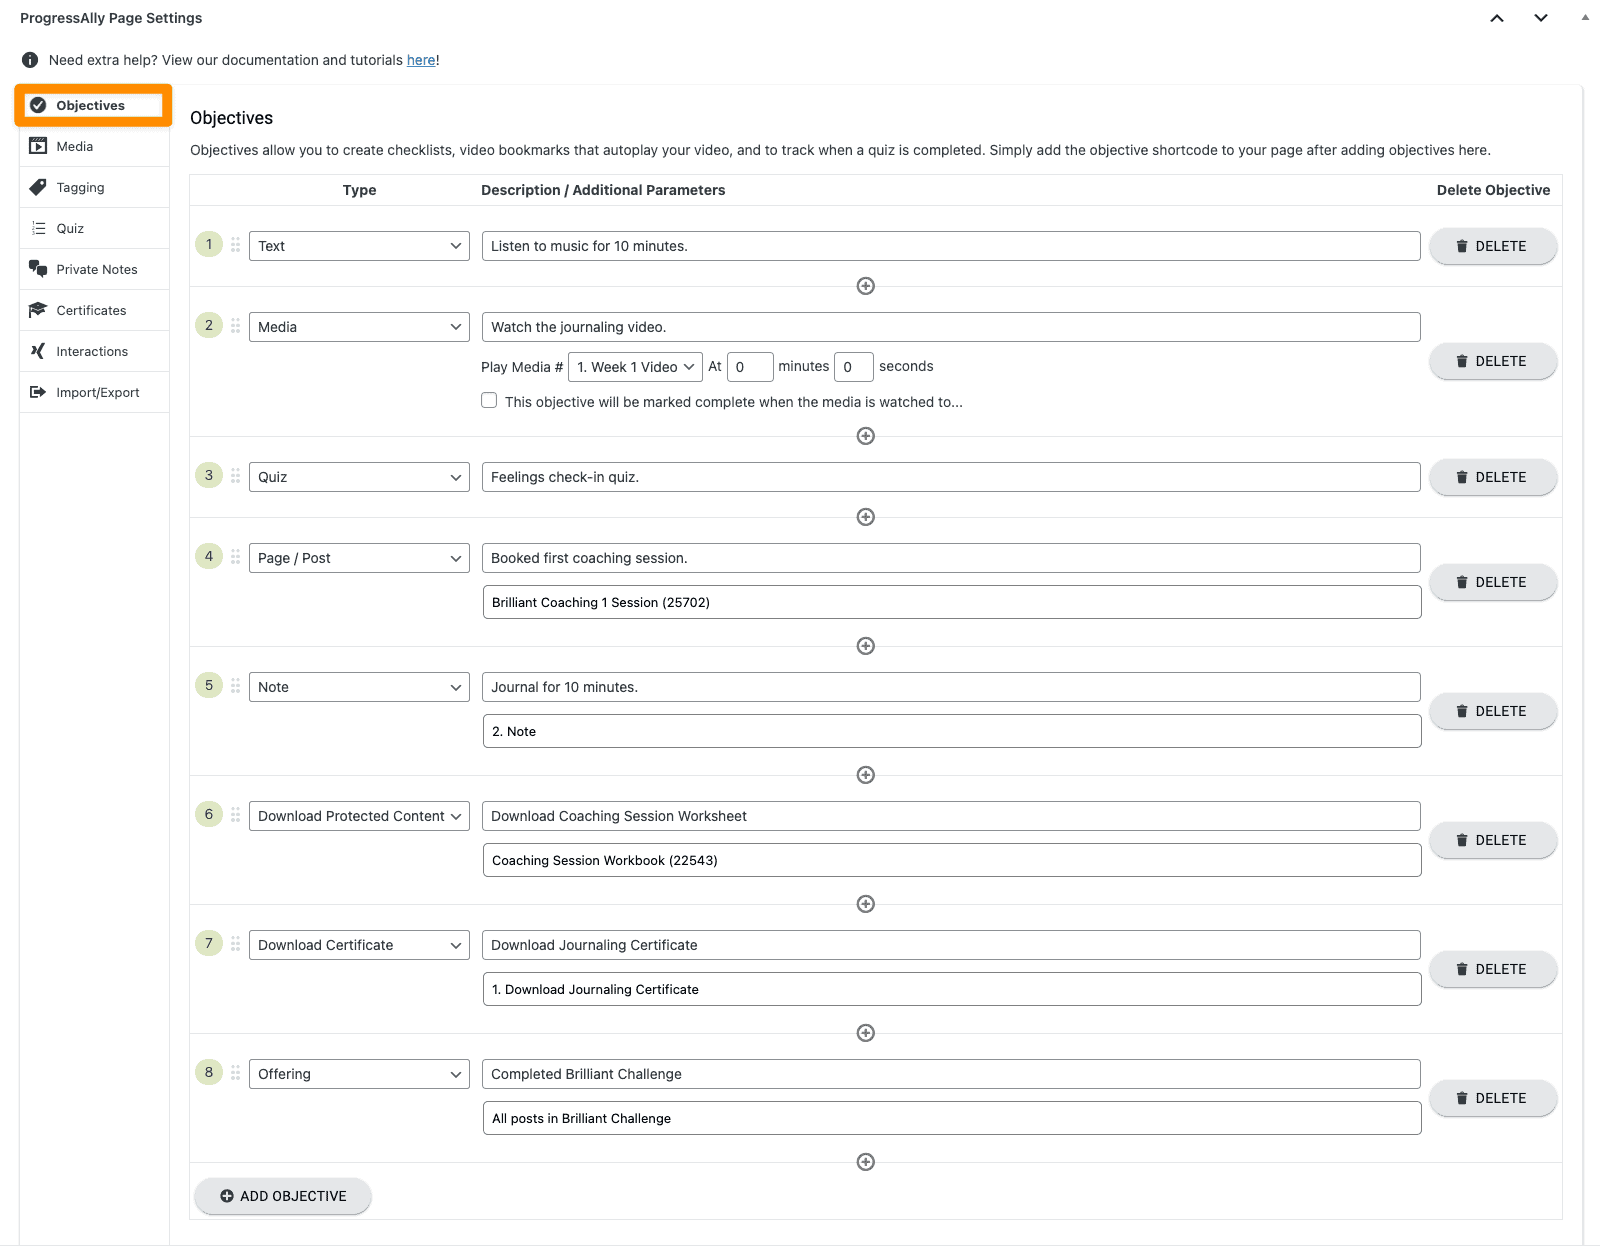
Add your choice of text. This is the easiest objective to start with.
After adding a video to the page (in the Media tab) you can use the Media objective to create time-stamped bookmarks from the video.
After adding a quiz to the page (in the Quiz tab) you can track quiz completion with this objective.
This objective type tracks completion of objectives on other pages/posts on your site. When using this objective type clickable links are shown to take a user right to the page.
After adding a note to the page (in the Private Notes tab) you can track note completion with this objective.
After adding a file to the Protected Content section on your site you can use this objective type to create a download link in your checklist
After adding a certificate to the Certificates section on your site you can use this objective type to track when the certificate was downloaded.
The Offering Objective is perfect for the first page of your offerings. This objective type will automatically pull all pages/posts in an offering that have checklist items to track progress over an entire offering. Clickable links take the participant right to the page.
Adding an offering objective.

Front end view for users.

Add the Objective List Shortcode
Use the AccessAlly Shortcode Generator to create the code for your objective checklist. You can follow the prompts to customize your progress checklist.
This shortcode will be added to the page in WordPress.