ARTICLE CONTENT:
Contact Management Information
There are two ways you manage contacts with AccessAlly.
- Have AccessAlly Managed manage your contacts
- Have a CRM system (Active Campaign, Keap, Kit, or Ontraport) manage your contacts
Password Storage Options With Your CRM
1. Recommended: Do not store passwords
- Go to: AccessAlly > Settings > General Setup > Password Field
- Leave the password field is blank so that no passwords will be stored in your CRM.

2. Store Passwords
You will be able to use auto-login links and display passwords in emails with this option.
- Go to AccessAlly > Settings > General Setup > Set Up Password Field
- Select the Custom Field in Your CRM to store passwords

Reset a User Password
There are two ways that an existing user can reset their password.
1. Use the Forgot Password link on the log in form
- The user can click on the Forgot Password link on the login form.
- They’ll be prompted to enter their email address and get a new password.
- They’ll receive an email from WordPress that has a link to reset their password.
Note: You can update the language in your login widget to reflect how you want your users to use it.
2. Configure an Account page for your users
You can set up an Account or Profile page for your users and give them the option to update their password. Click here for more information on how to create an Account Profile page.
Alternative Ways to Emailing User Passwords
1. New User Creates Their Own Password
With this option a new user on your site will see a box on the order form to accept a pre-generated password or change this to a password of their choice. This works for both paid order form purchases and checking out for free using an AccessAlly order form.
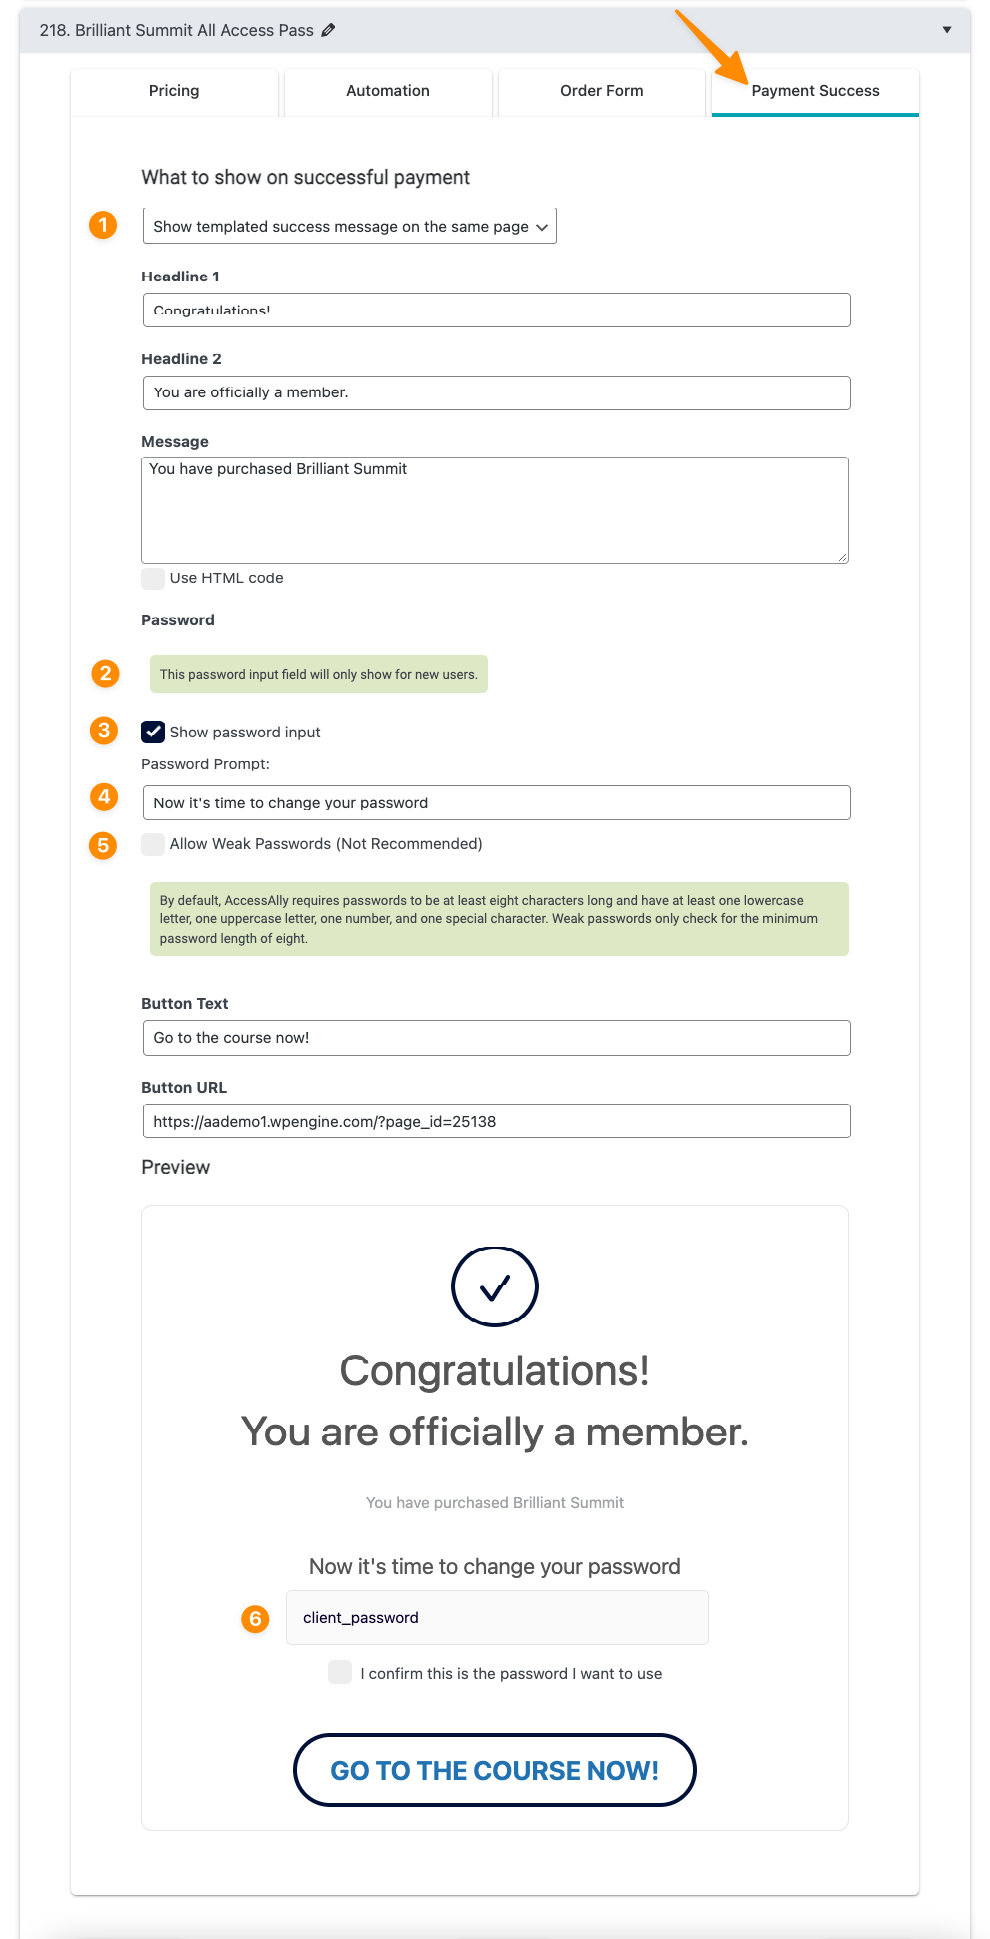
Go to AccessAlly > Sales > Order Form Setup > Choose the order form > view Payment Success tab.
- Show templated success message on the same page – this is the only option that allows for a new user to create their own password.
- A note about what users will see the password input section.
- Checkbox if you would like to “Show password input” on the order form.
- Password Prompt allows you to customize the default wording that appears for a new user in this section.
- Allow weak passwords checkbox (not recommended!) by default there are password requirements that appear for new users creating a password to ensure safety for your site.
- The coding used to display the user password do not remove or alter this coding!
What this option looks like in the back end of an order form for an admin or tech team member setting this up.
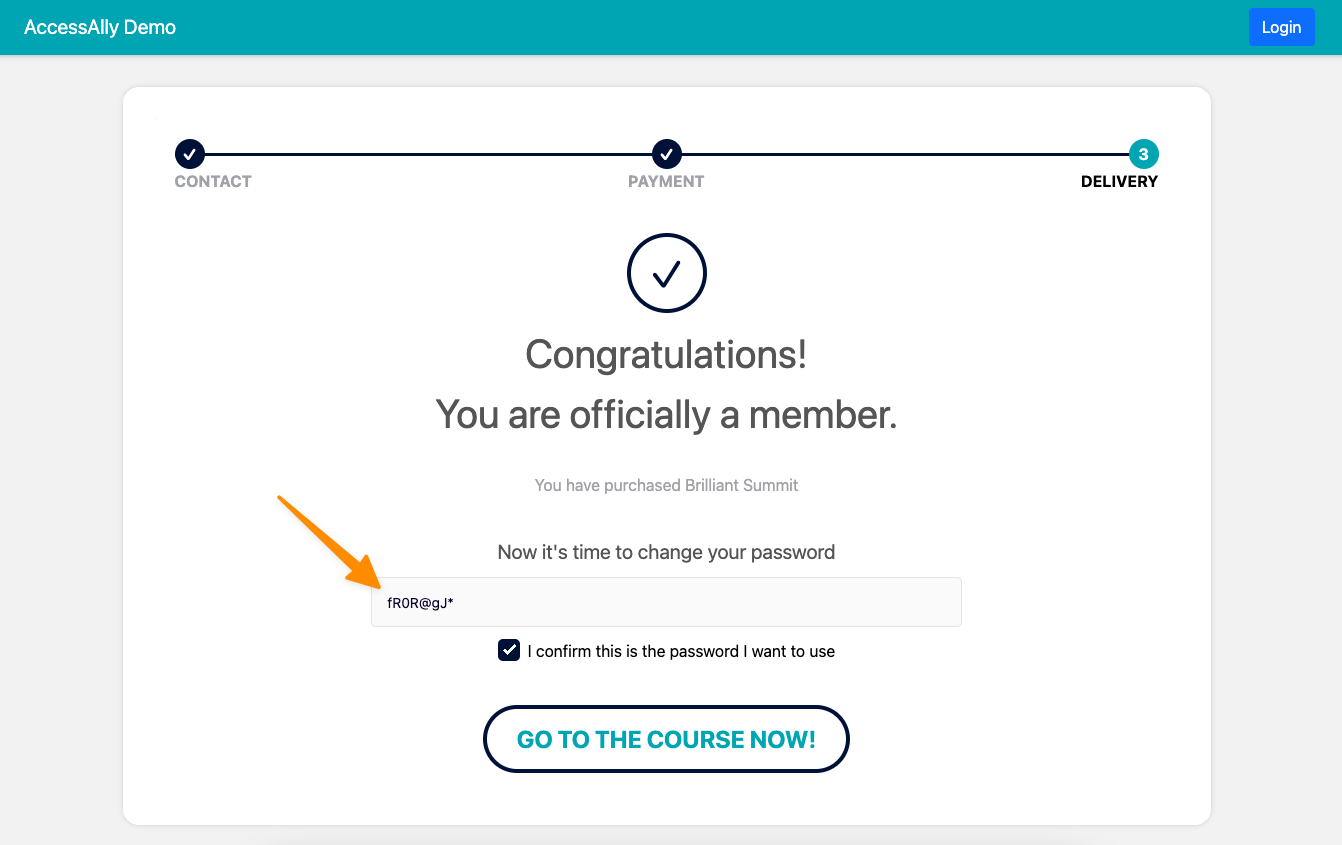
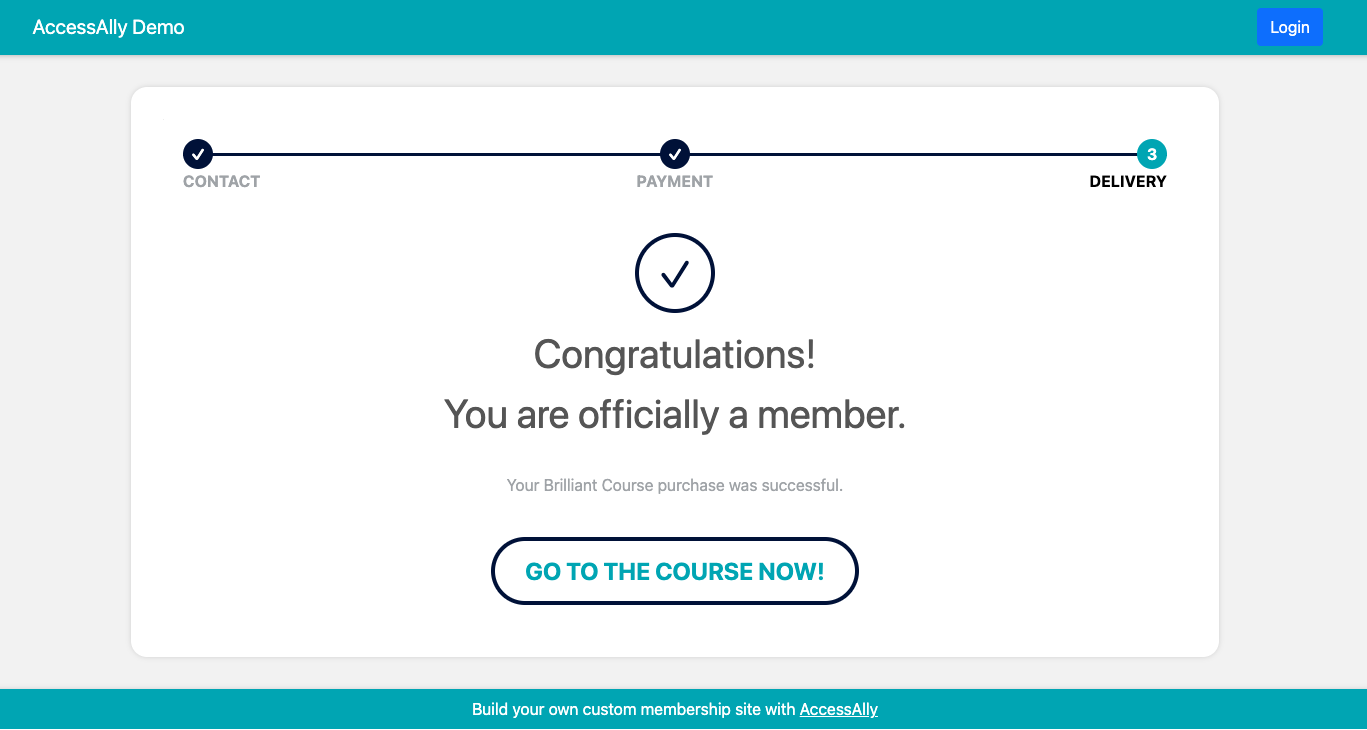
What this option looks like on the front end to a new user that accepts the default password.
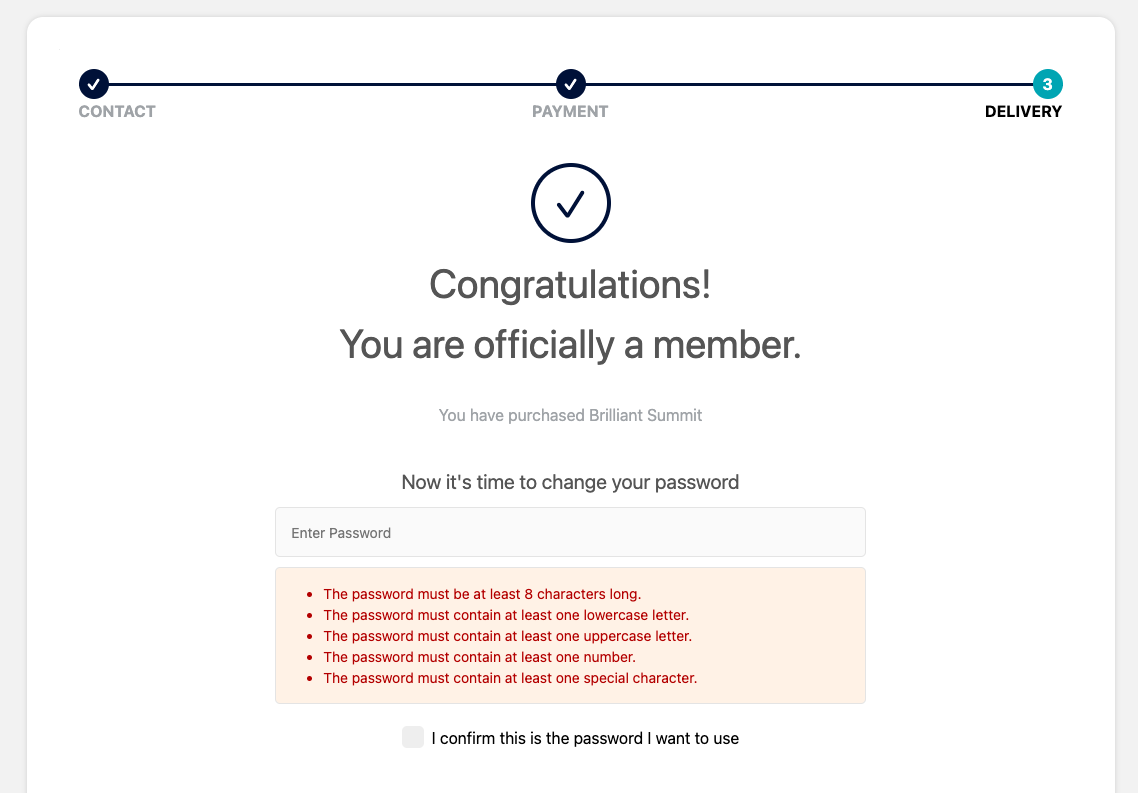
What this option looks like on the front end to a new user that creates a new password. Once the password prompt has each required item in red they can confirm their password.
Items that are required:
- The password must be at least eight characters long
- The password must contain at least one lowercase letter
- The password must contact at least one uppercase letter
- The password must contain at least one number
- The password must contain at least one special character
If this user makes future purchases the password section will be hidden because they already have a password.
Frequently Asked Questions About Users Creating a Password
Yes, we’ve added a webhook to allow external plugins to check for password strength at reset.
Yes, but only if they “check out” on an AccessAlly order form for free. This option does not work if they complete a CRM opt-in form signup, or if they fill out an AccessAlly opt-in form. This option only works AccessAlly order forms using the templated success message option at purchase.
No, this method would only work for the team leader as they are the only person paying using an AccessAlly order form. This has been added as a future feature request.
2. On-Demand Login Feature
Free Opt-ins: You can use the On-demand login feature to automatically log your new users in.
The On-Demand login will not log people in if they already have an existing account on the site – instead, it will ask them to enter their username and password. This is done for security reasons so that a stranger doesn’t use someone’s email address to gain access to their account.
3. Snappy Login Links™️ feature (never use a password)
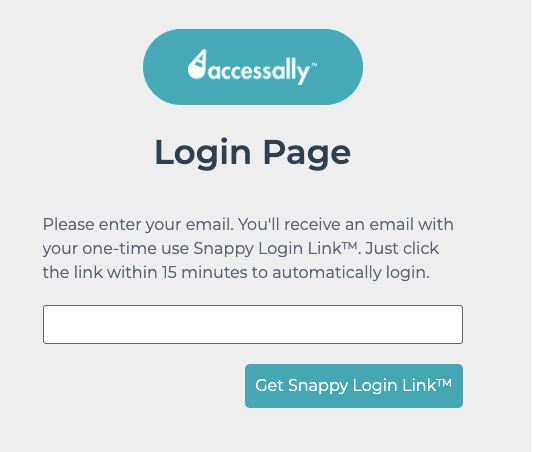
You can opt-out of using passwords altogether with the Snappy Login Links™️ feature.
If a member already exists, you can use Snappy Login to have a one-time expiring link sent to a member’s email address that allows them to log in without a password.
4. AccessAlly Welcome Email Functionality
You can use AccessAlly’s Welcome Email to send out a password reset link to your user after they have purchased. From there they can easily set a chosen password.
5. Display the user’s login information after purchase
You can deliver your new users’ password directly after purchasing on the thank you / confirmation page. This is a good option if you don’t want to store passwords in your CRM.
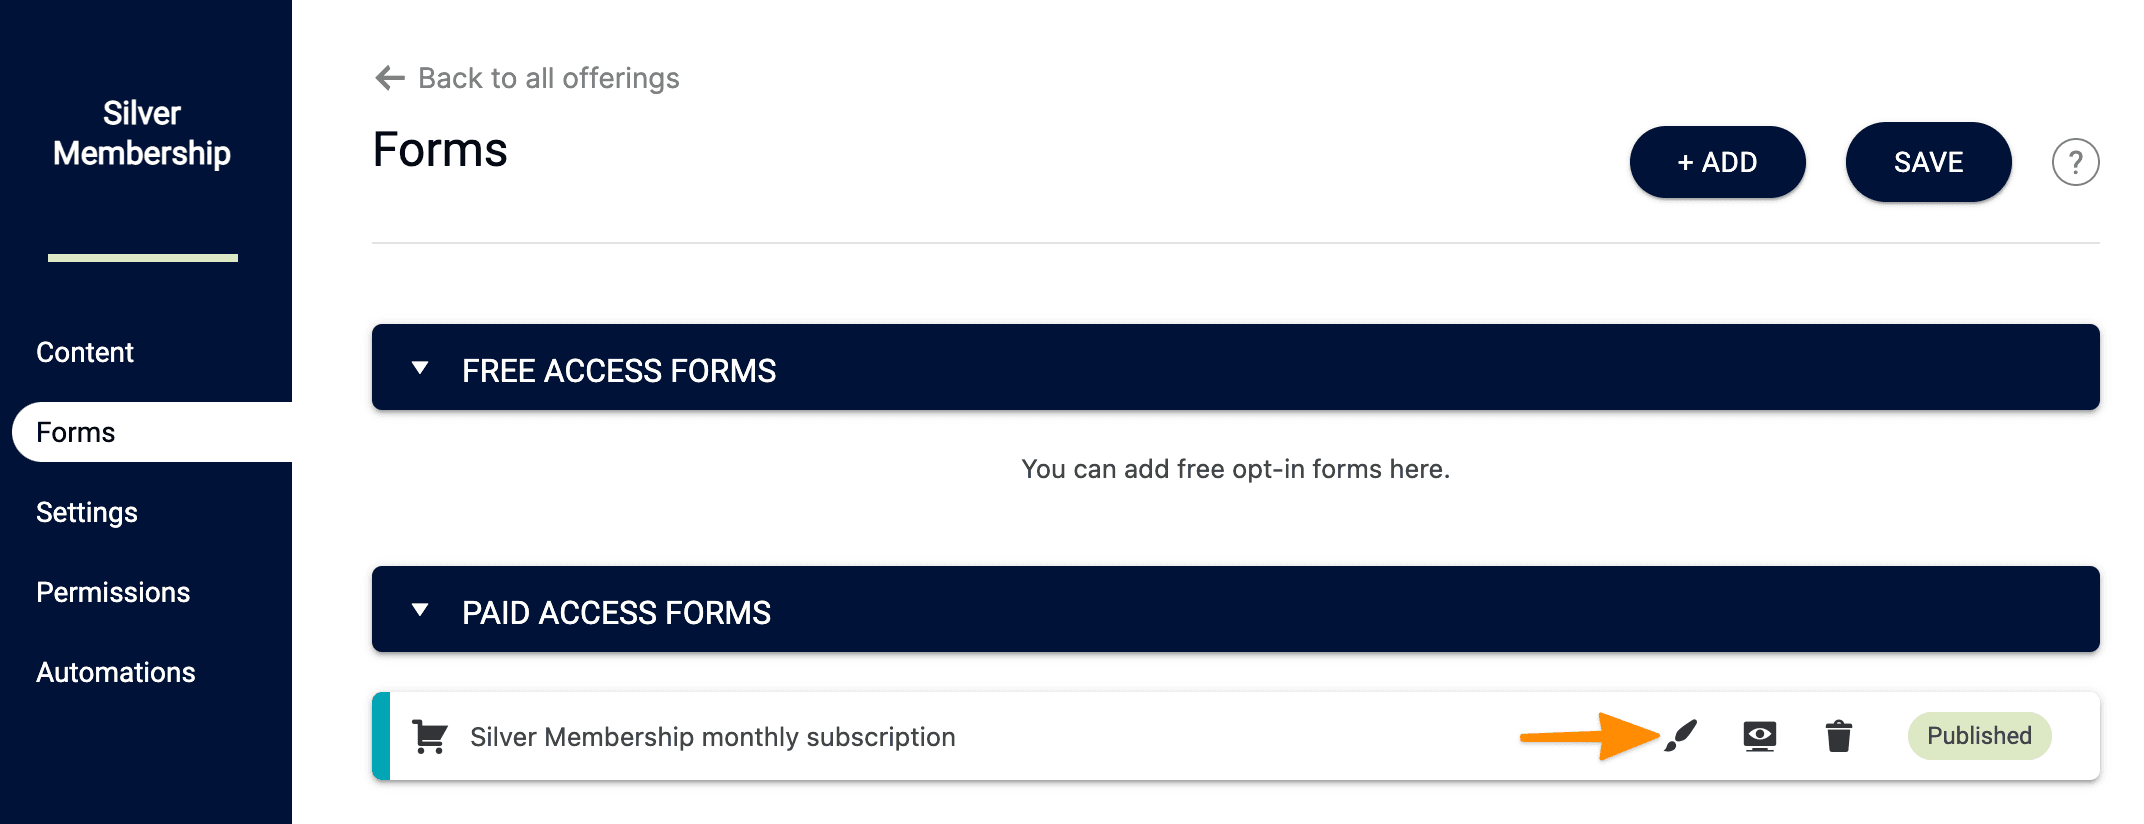
Go to: AccessAlly > Offerings > Choose the offering you want to edit > Go to Forms > Click the pencil icon to edit.
Go to the Payment Success tab, and in the message area, you will add the following text:
Username: {[username]}
Password: {[password]}
This will dynamically load the username and password for the user.
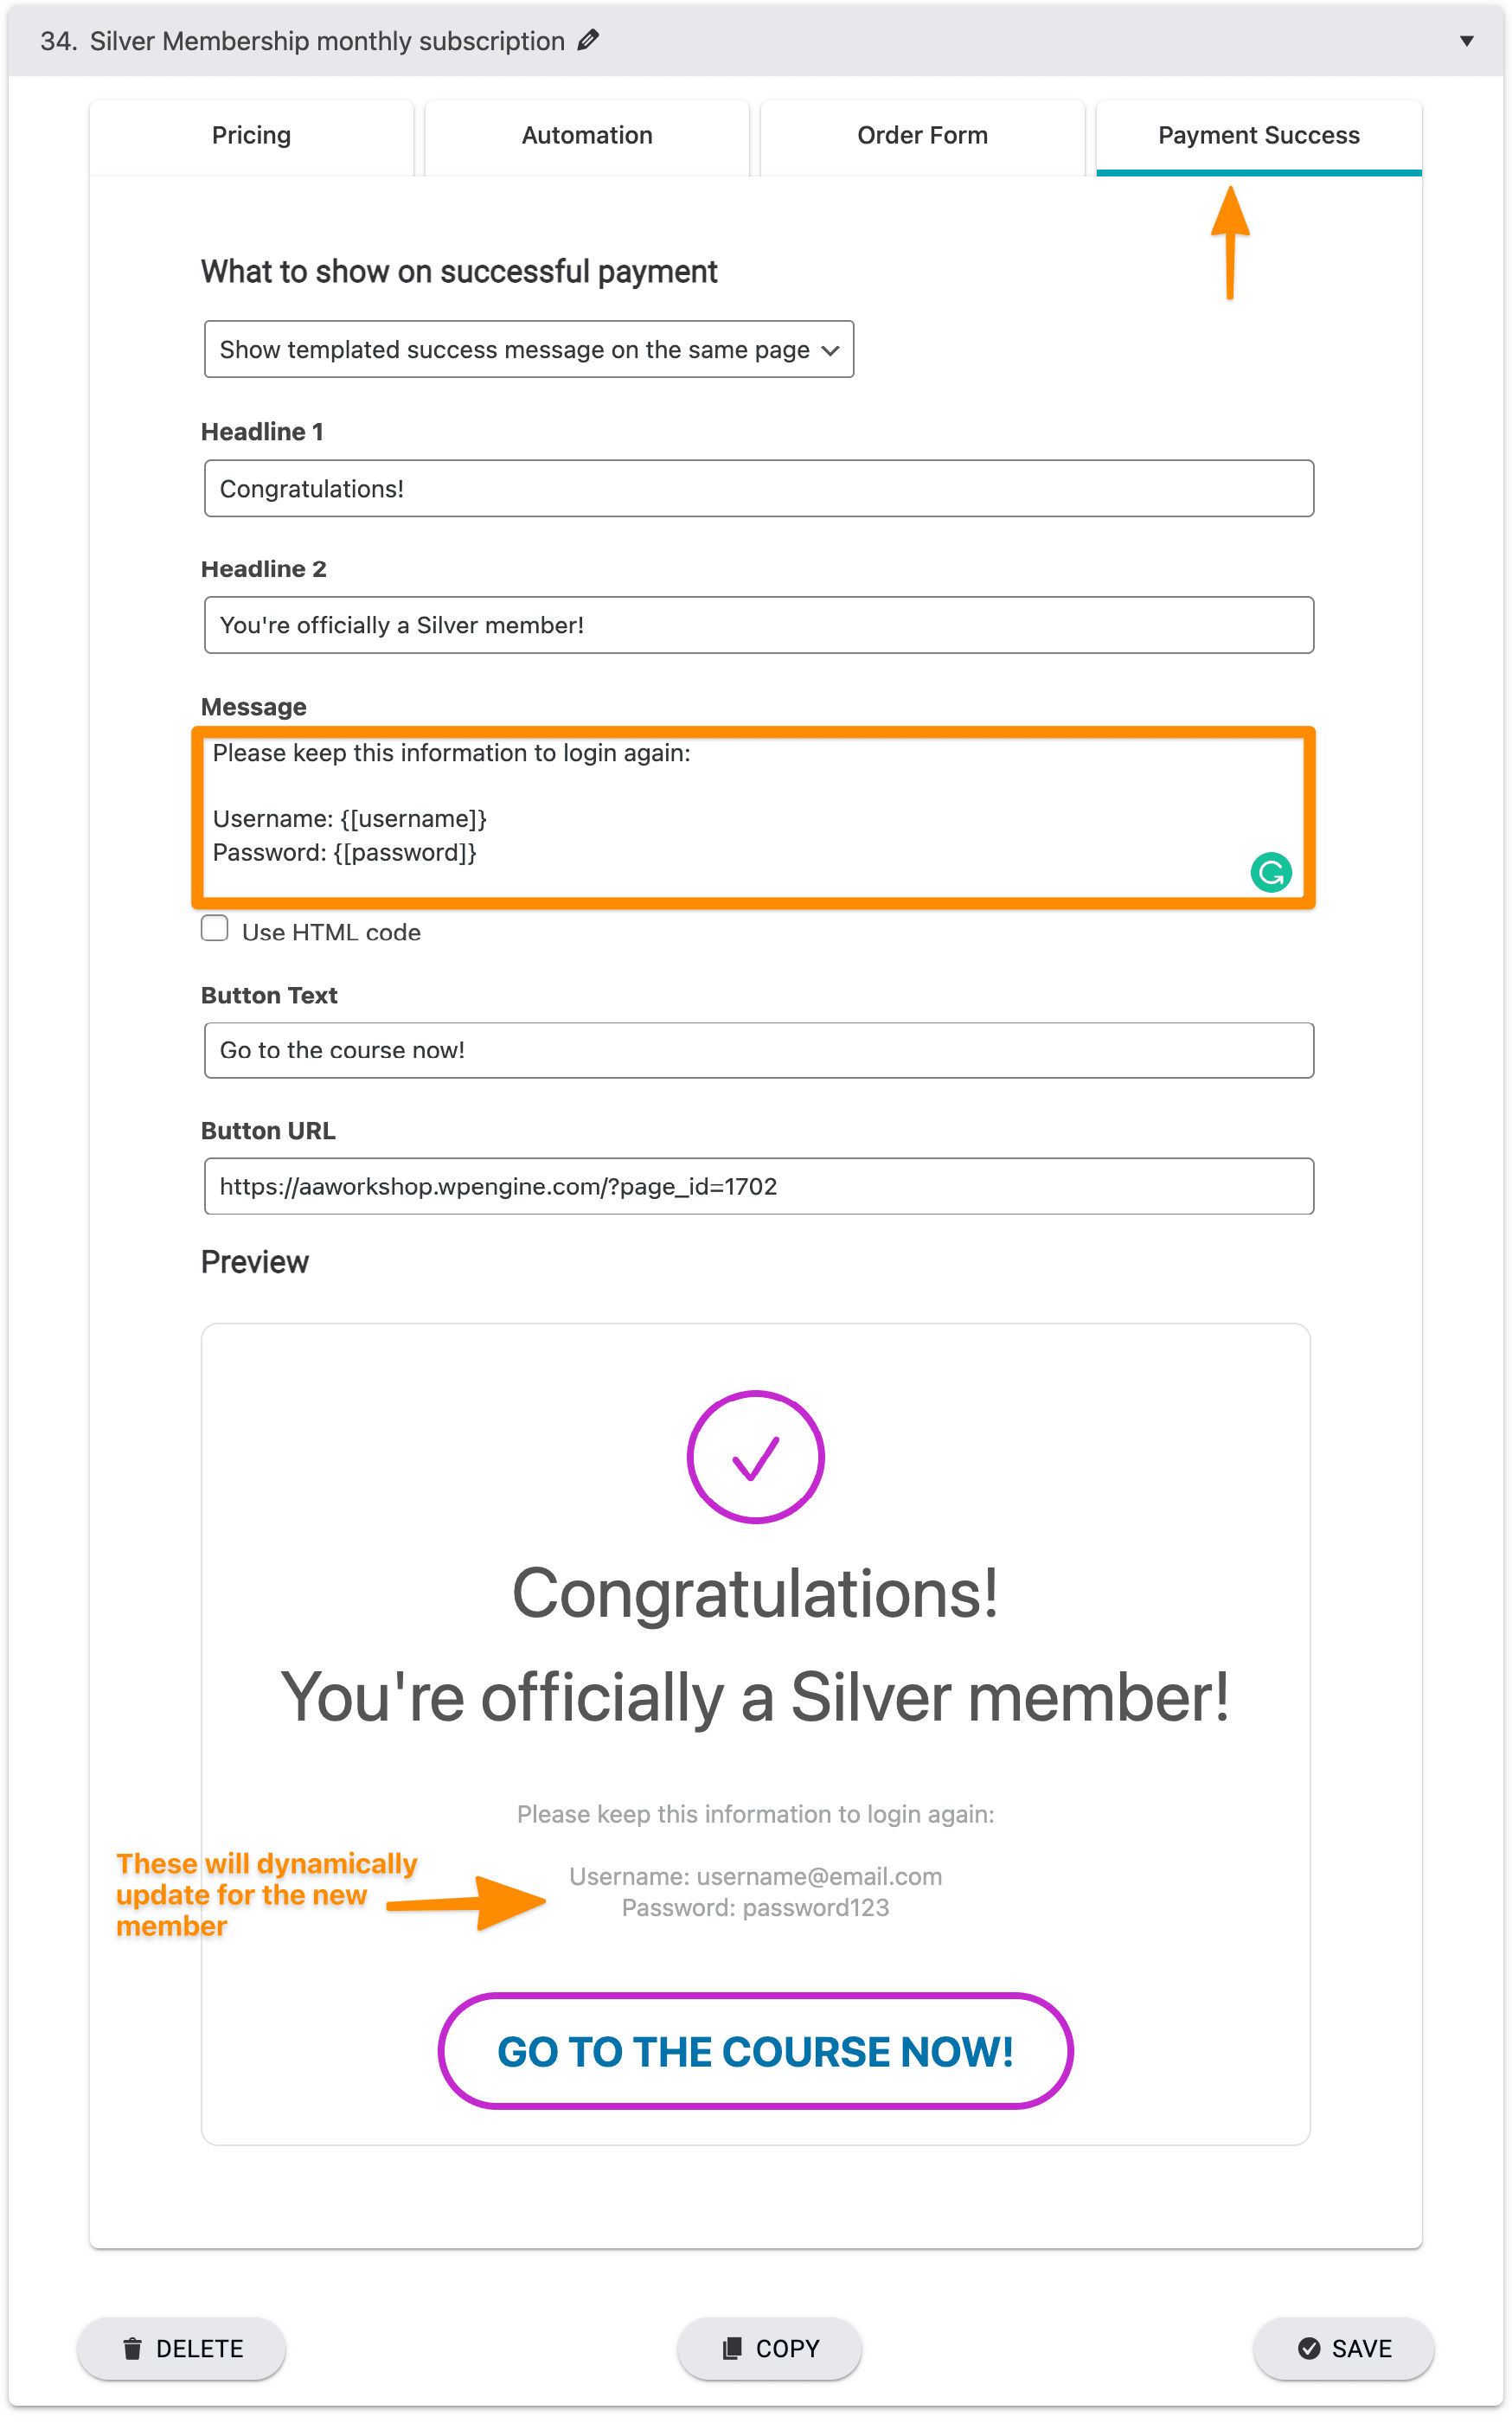
Once entered, click Save.
Now when a customer purchases this Offering they will automatically be logged in and will be provided their username and password on the Thank You success page.
Password Troubleshooting
Issue: Users Receiving Empty Passwords in Welcome Emails
Step 1. Purchase using a test user to see if you can recreate the issue. If the issue presents with your test purchase, move to Step 2. If the issue doesn’t persist with your test purchase, check to make sure the contact IDs match for the user that purchased. Once the contact IDs match in your CRM and AccessAlly, resync your user.
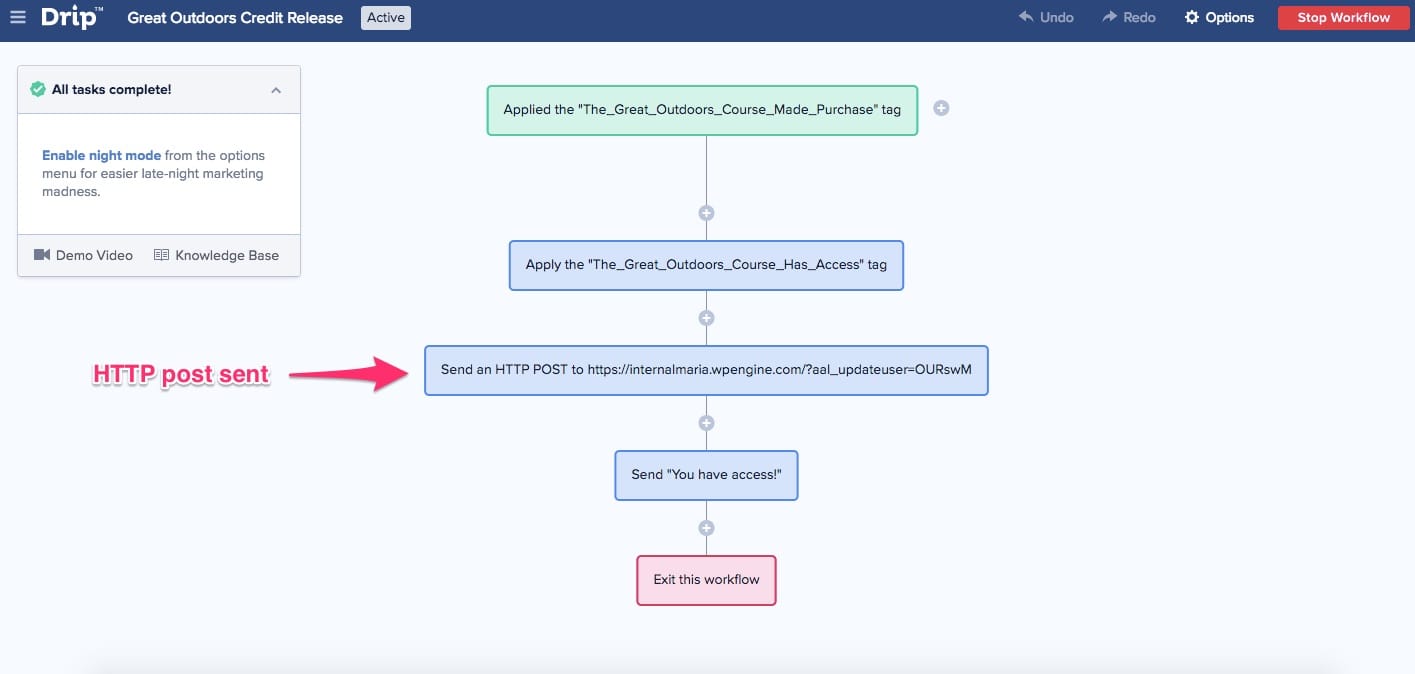
Step 2. Check the HTTP post/webhook in your CRM
Check to make sure an HTTP post/webhook sends to AccessAlly in your campaign after someone opts in/purchases, and before the email is sent.
Step 3. Verify the HTTP post is correct
If the Webhook is in the right location, check that the URL to make sure it’s correct. Remember to check for extra spaces before or in the URL.
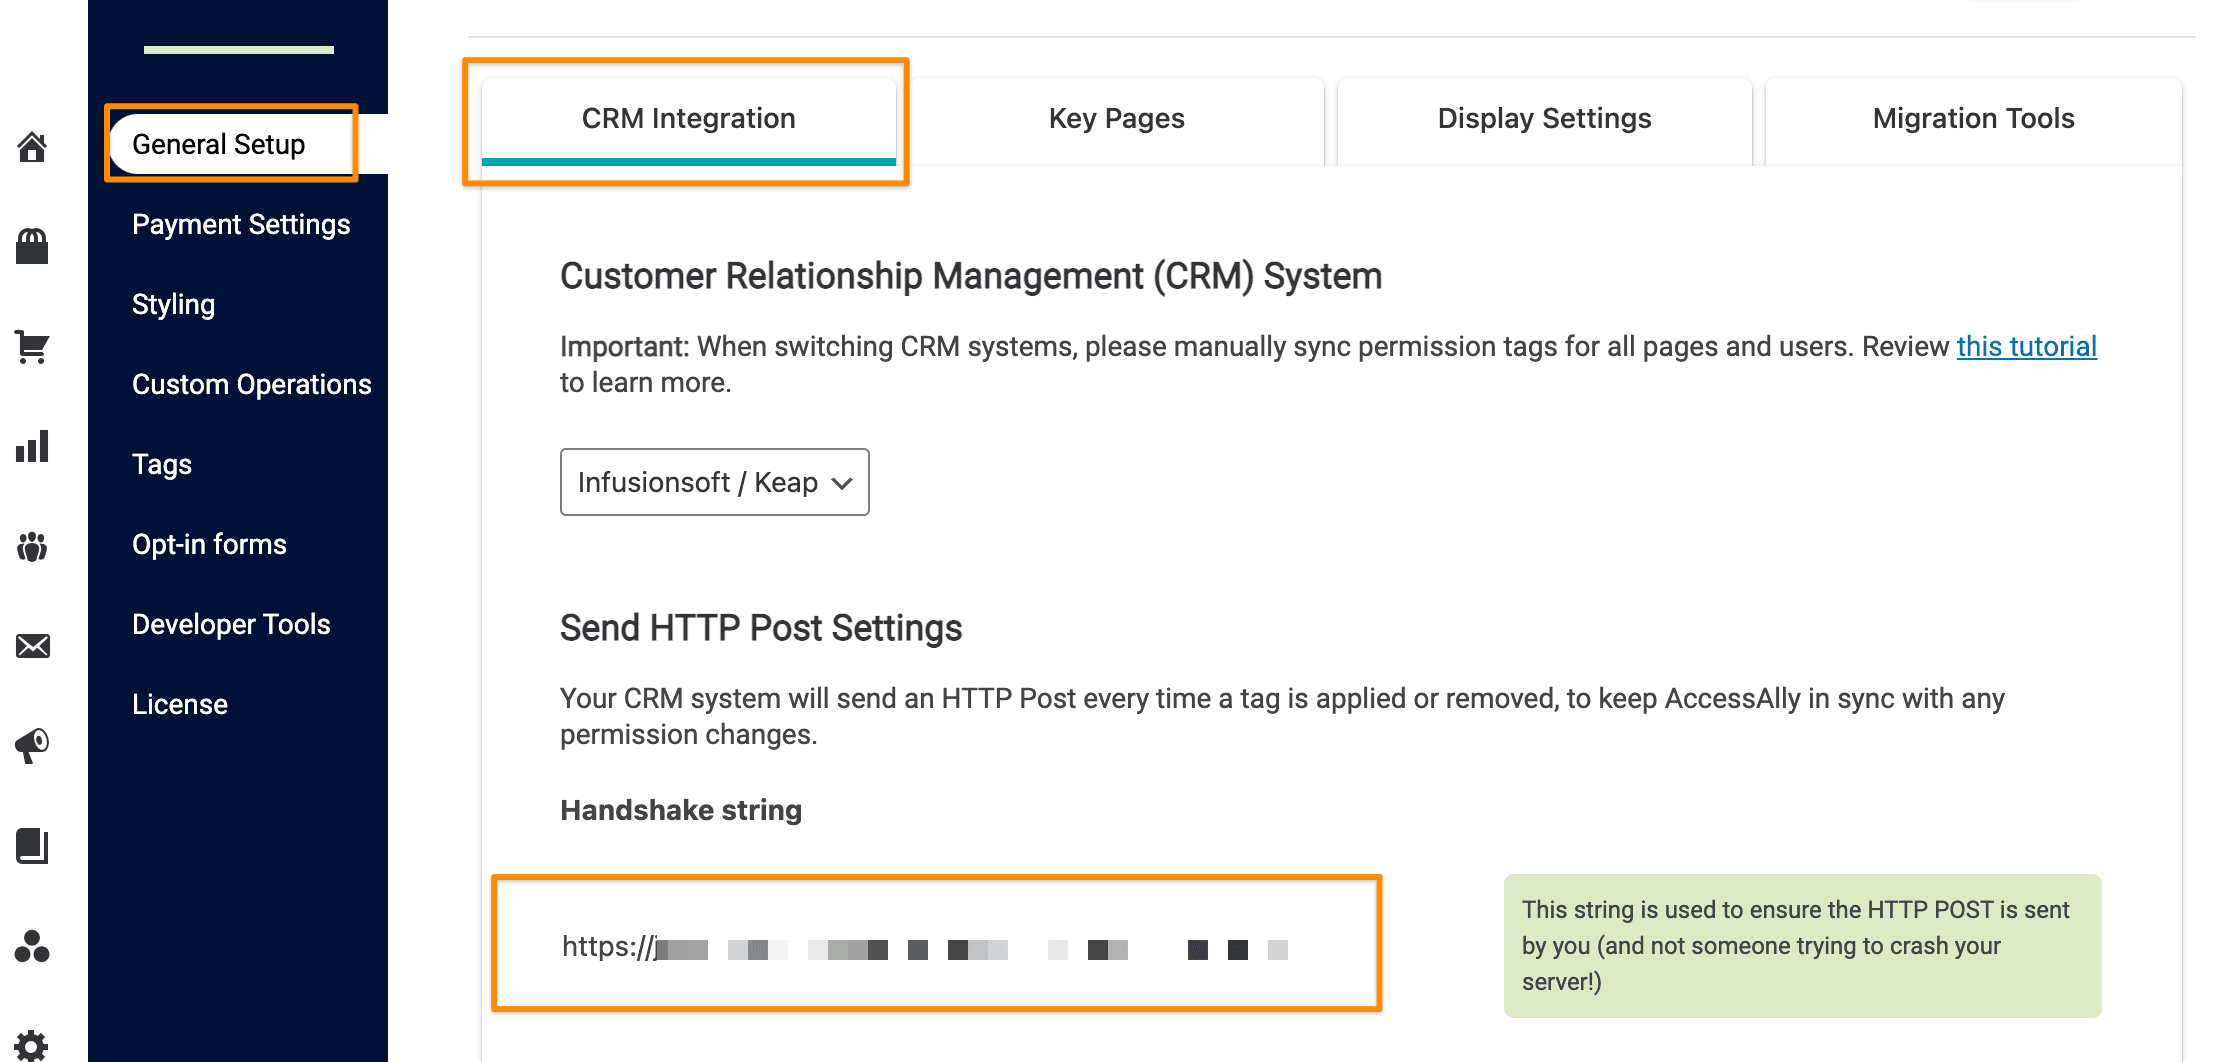
Find your unique HTTP Post in AccessAlly. Go to: AccessAlly > Settings > General Setup >Send HTTP Post settings > Find your HTTP Post URL.
