The Members Tab allows you to filter users so you can add or remove tags, release or revoke offerings, and run custom operations to multiple contacts in bulk at once.
Available in AccessAlly 4.0 and above.
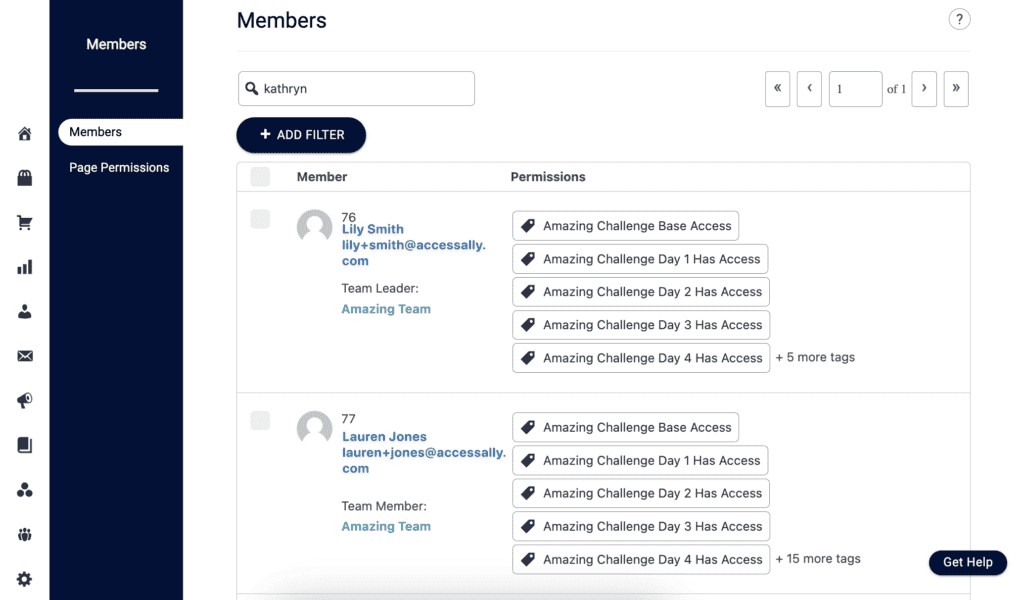
The members tab is located at AccessAlly > Members or by clicking the Members icon.
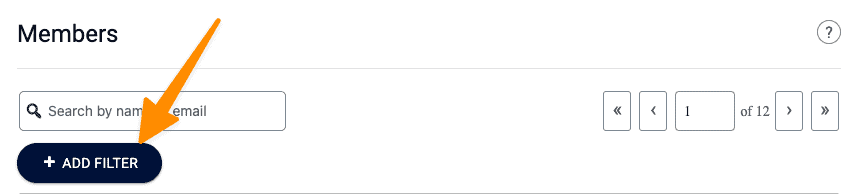
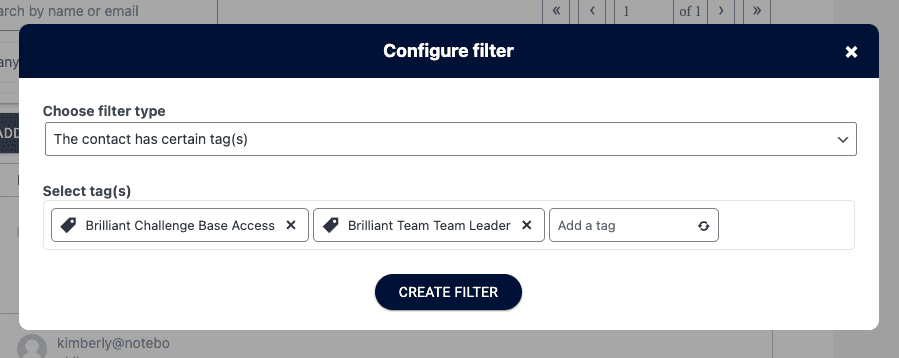
Click the “+ ADD FILTER” button to select how you would like to filter your members.
Options include:
- Contact ID – shows contacts with a specific Contact ID number(s)
- This contact has certain tag(s) – contacts must have any of the tags to be shown
- This contact has ALL selected tag(s) – contacts must have all tags to be shown
- This contact is missing certain tag(s) – contacts missing any of the tags will be shown
- This contact is missing ALL selected tag(s) – contacts must have all of the tags entered to be shown
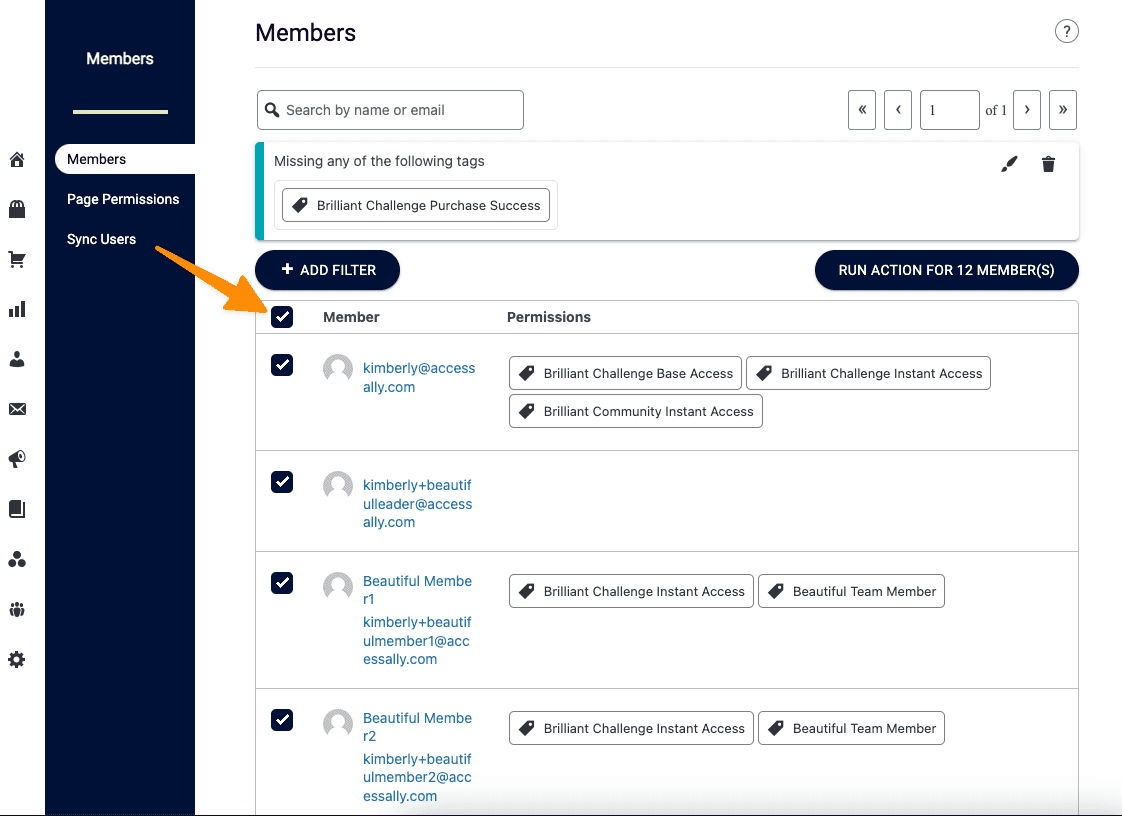
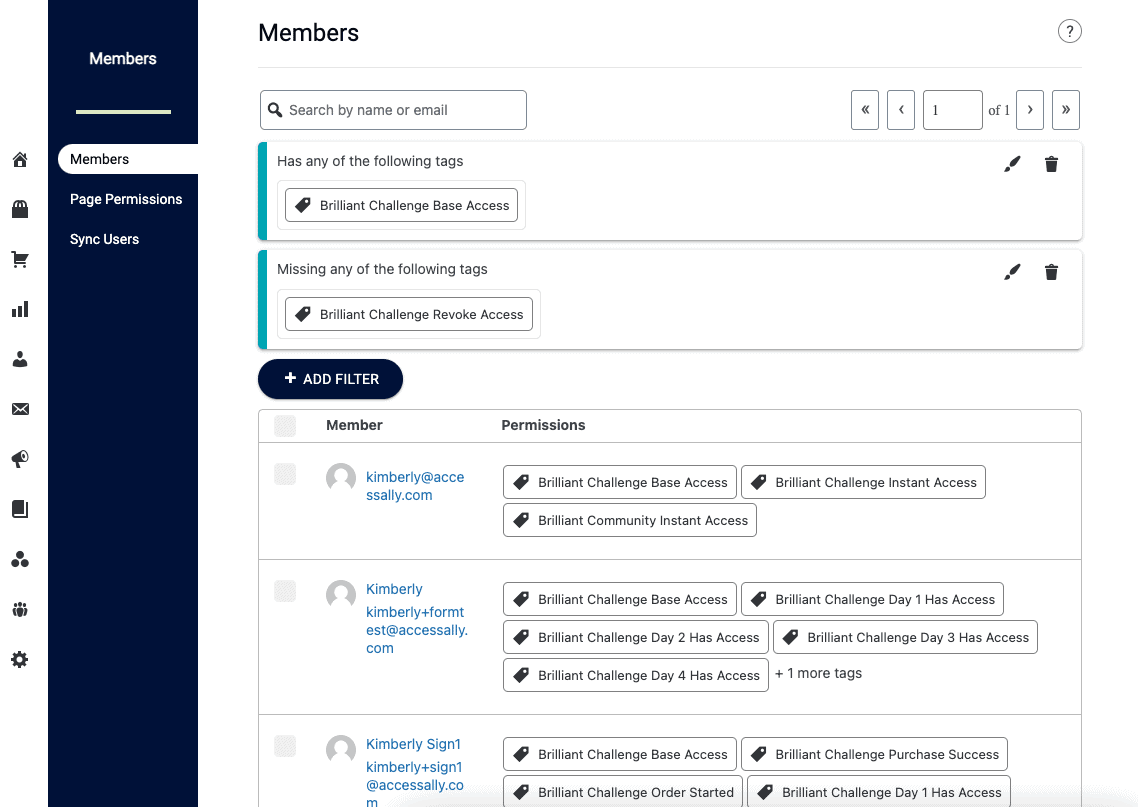
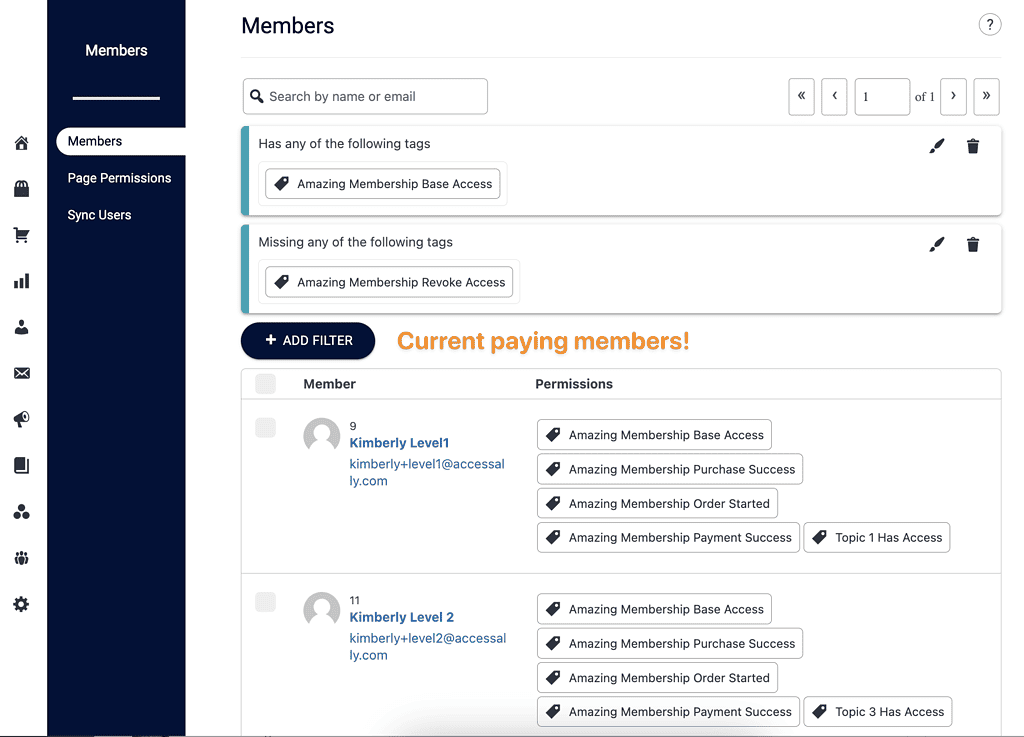
Here’s what the filtered view looks like.
- Brush icon to edit the filter
- Delete button to remove the filter
- Add a checkmark by Member to select all filtered members or select members individually
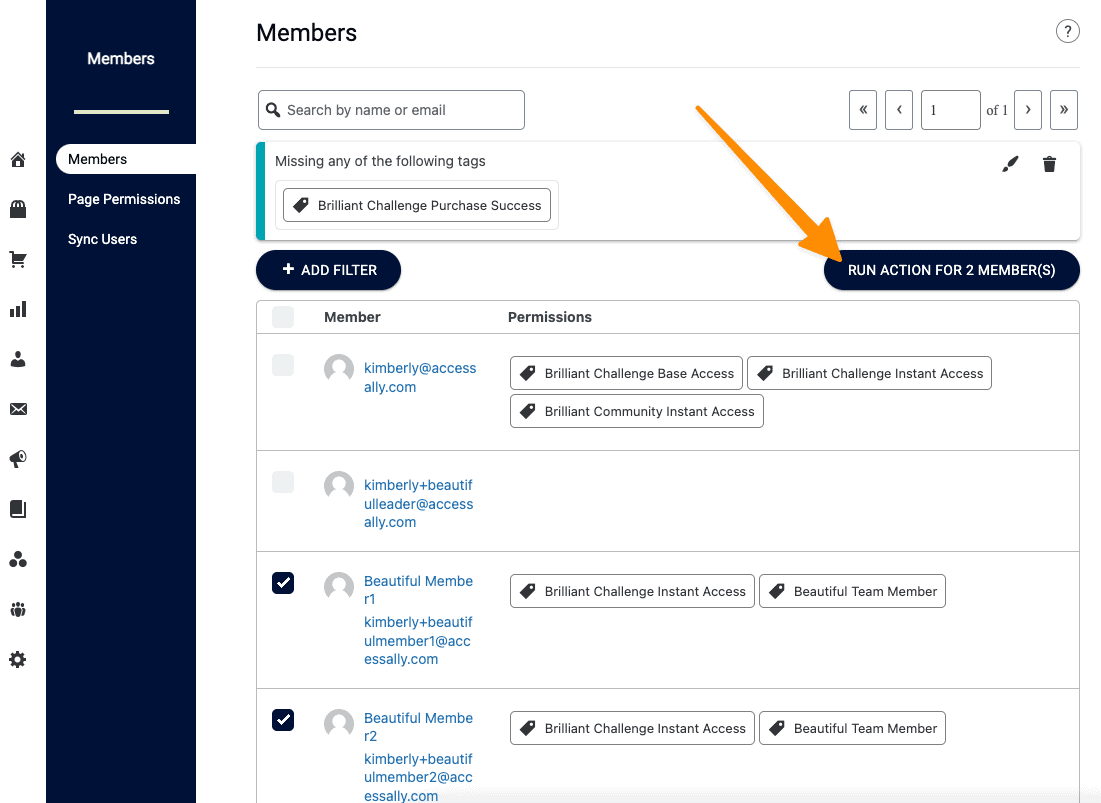
If you need to further refine your results, click the “+ADD FILTER” button and add a second filter.
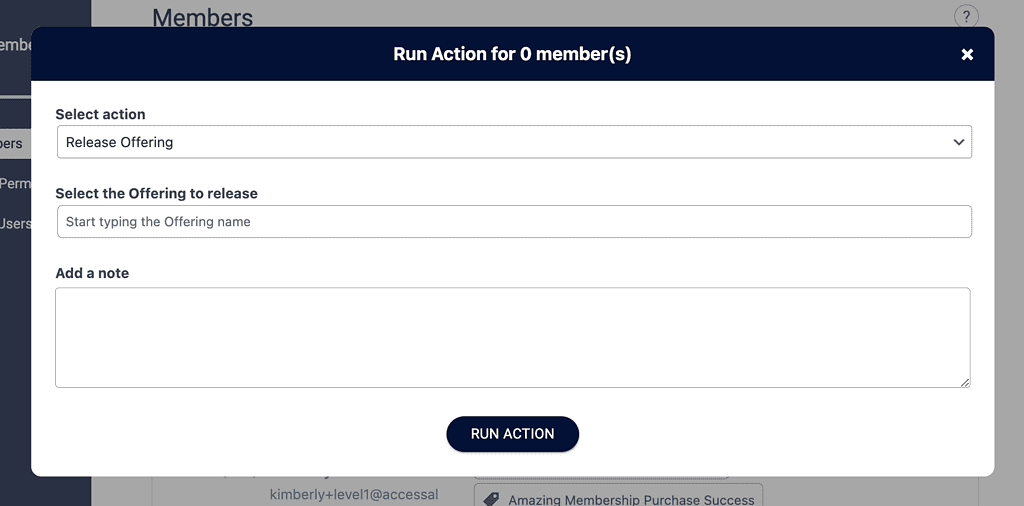
Click RUN ACTION to set up what you like to happen for the selected members.
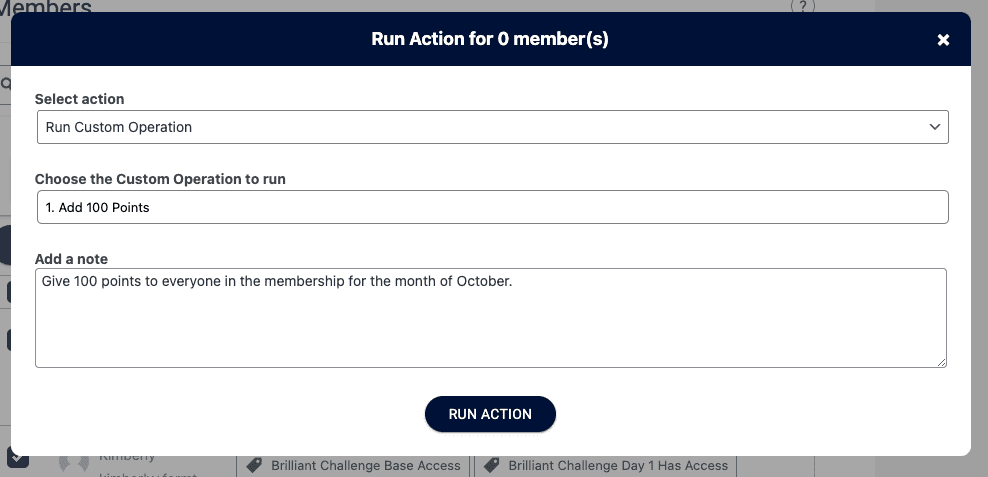
Here are the available options.
- Release Offering – will release content in an offering based on module release timers.
- Revoke Offering
- Add Tags
- Remove Tags
- Run a Custom Operation
Here is an example of creating an action.
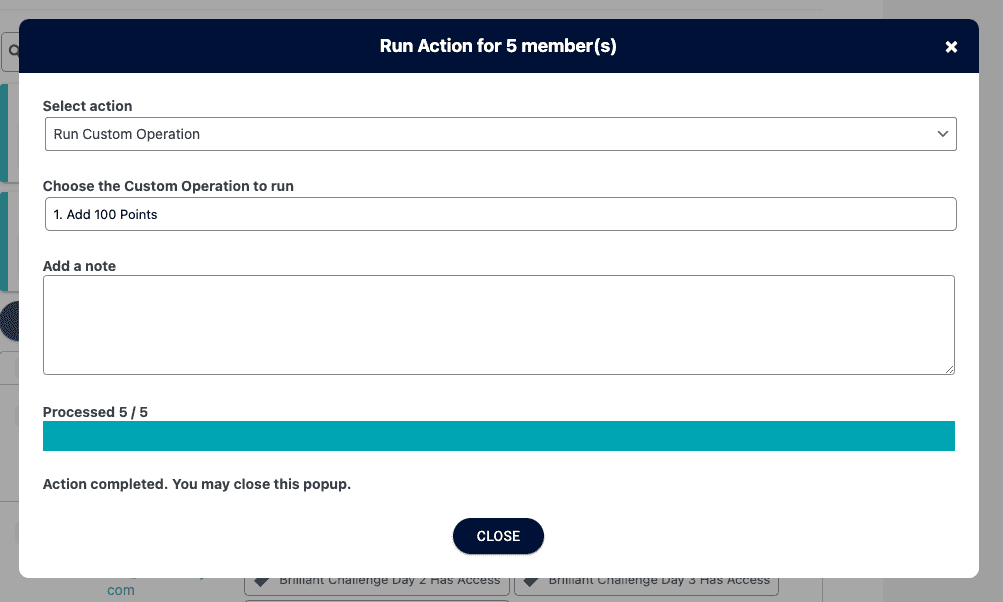
Once you click Run Action all selected members will be processed and you will see a success message and can close the popup.
We recommend using completion tags applied to pages of your site using ProgressAlly.
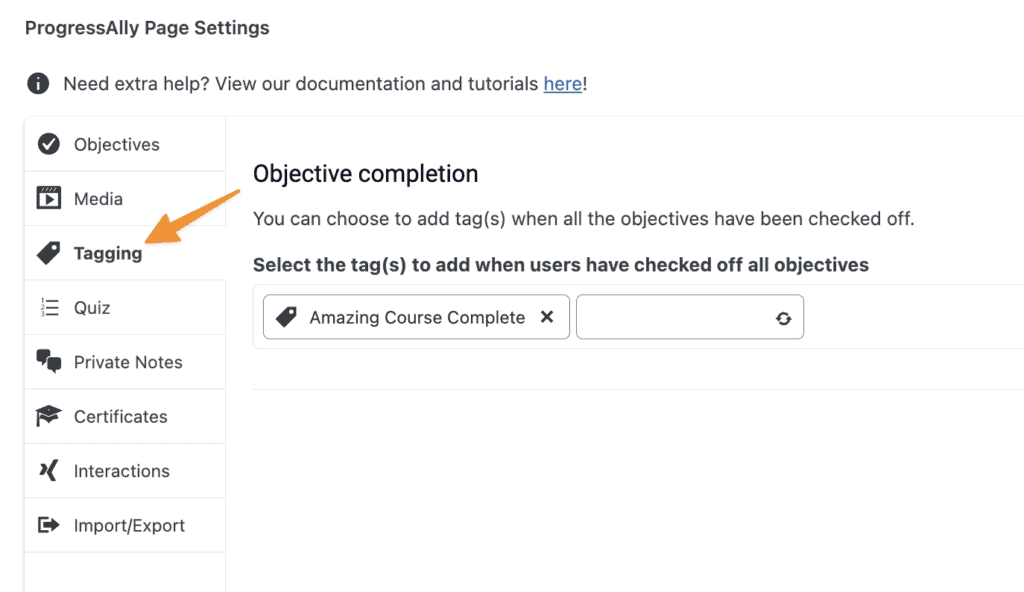
This allows you to filter for members with or without the tags.
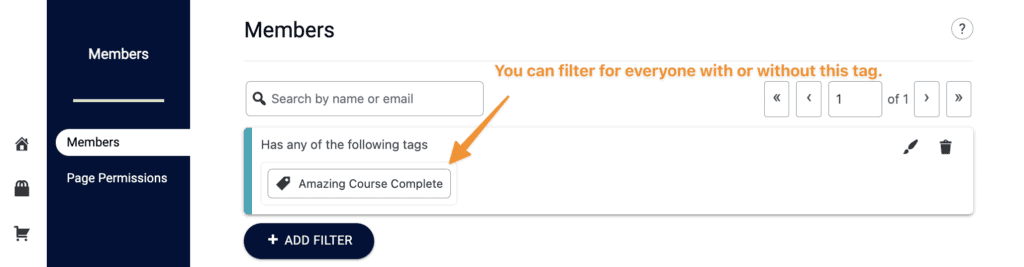
Once filtered you can then run any action from inside the Members tab (shown in Step 4 above) if you’d like to create something like a CRM email automation to follow-up with everyone that hasn’t completed your course.
ARTICLE CONTENT:
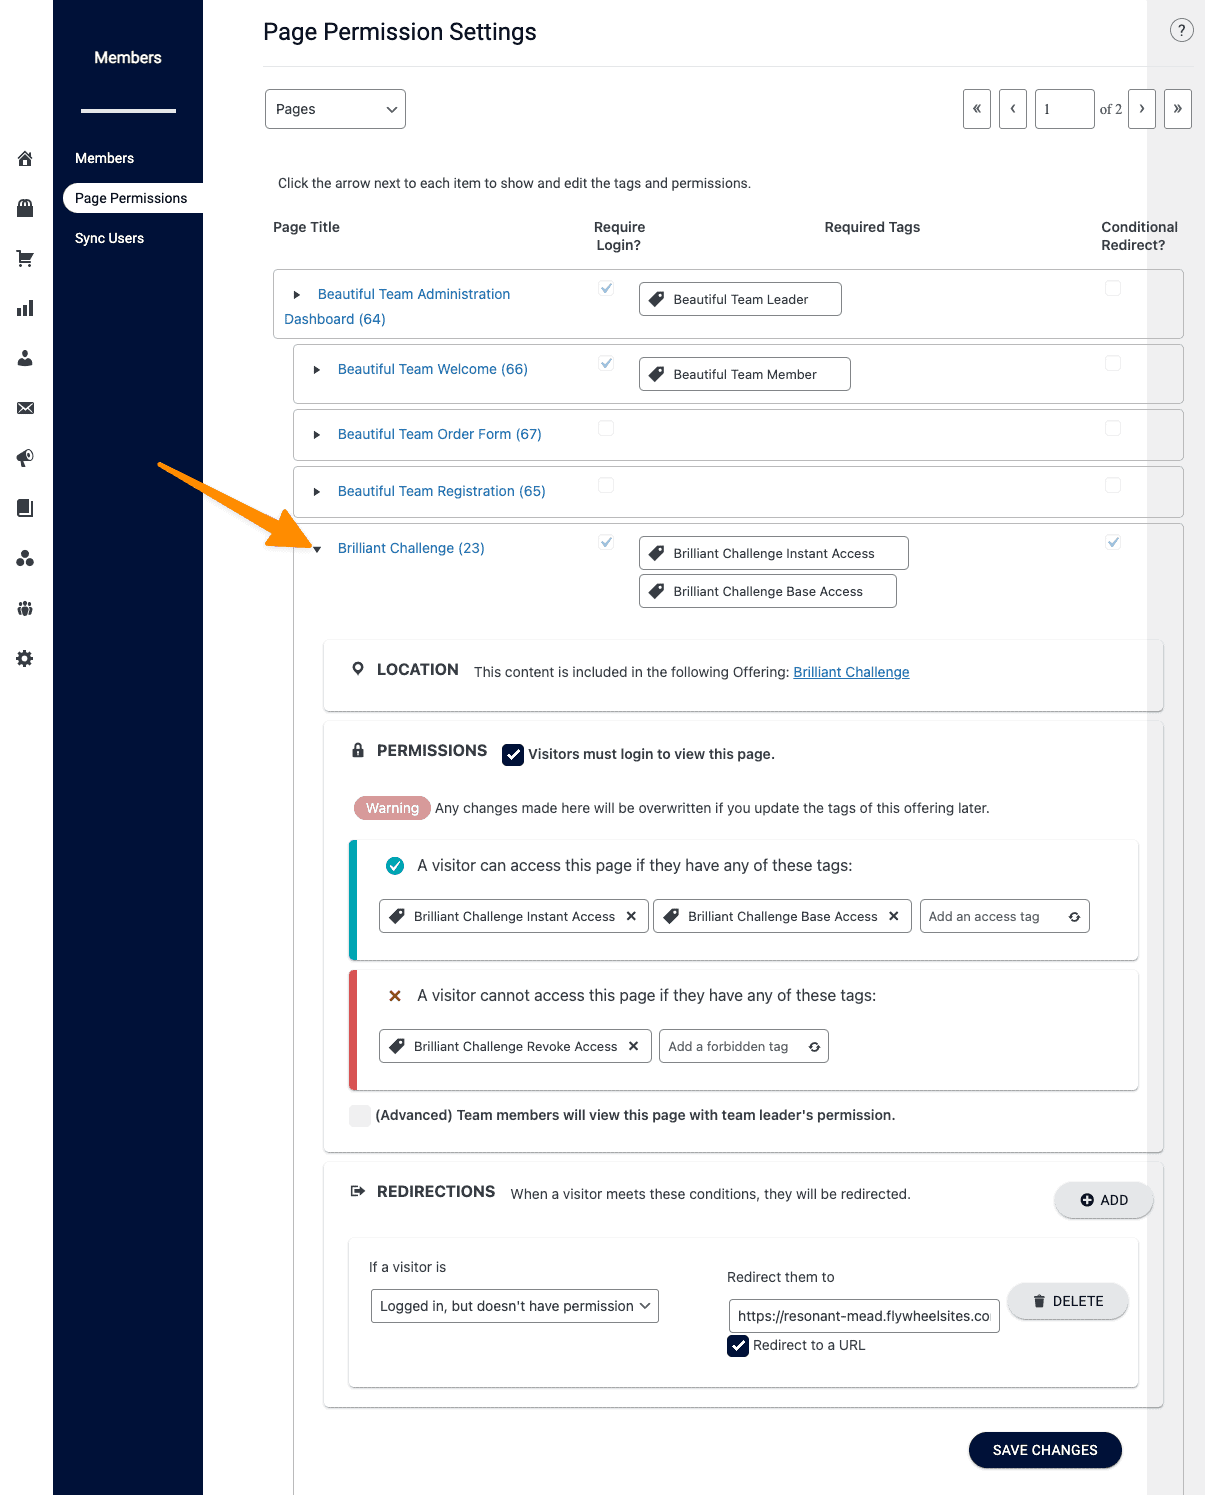
Page Permissions Tab
A convenient way to see the permissions for pages, posts and Protected Content. Switching to this tab shows all the details without having to leave the members tab and go back to the offerings area.
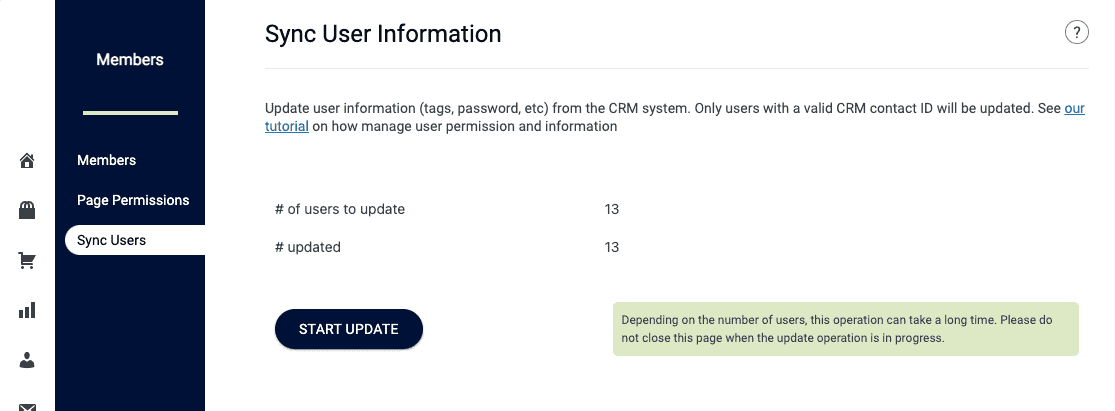
Sync Users Tab
This tab is shown if your site is integrated with a CRM.
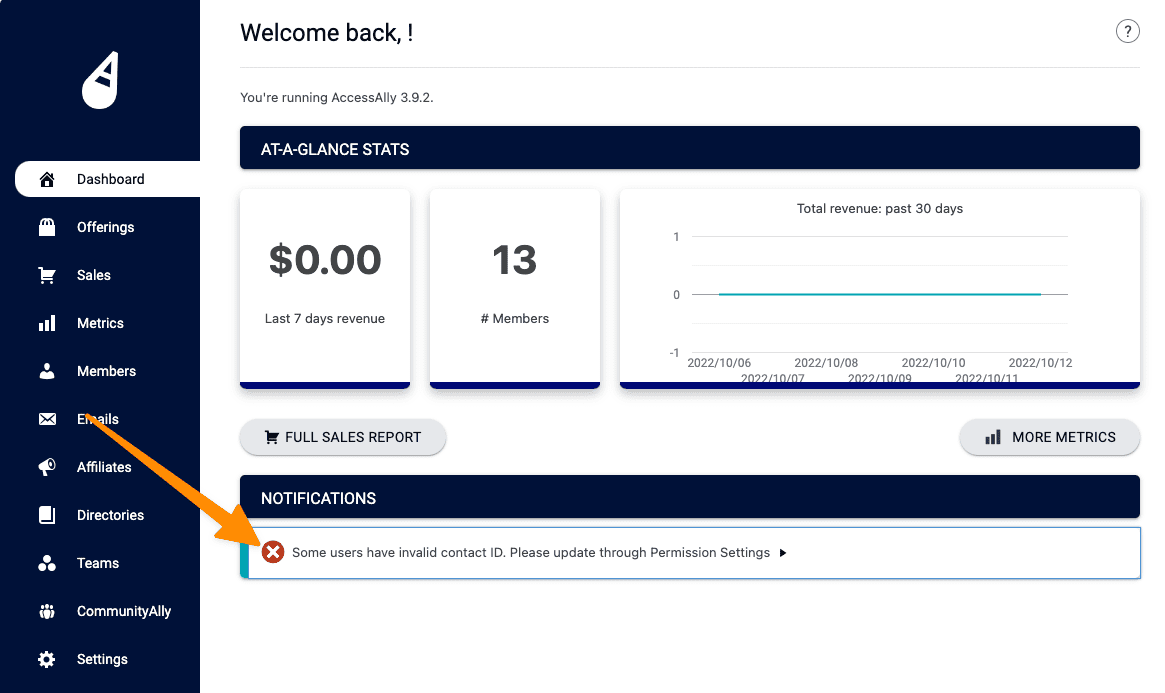
A notification will appear in the Dashboard tab if your site has users with an invalid Contact ID. Click the notification and you’ll land on the Sync Users tab.
This tab ensures that all of your contacts have a valid Contact ID number and shares steps to fix missing or duplicated Contact ID numbers to ensure all users on the site have updated current information.
Click START UPDATE
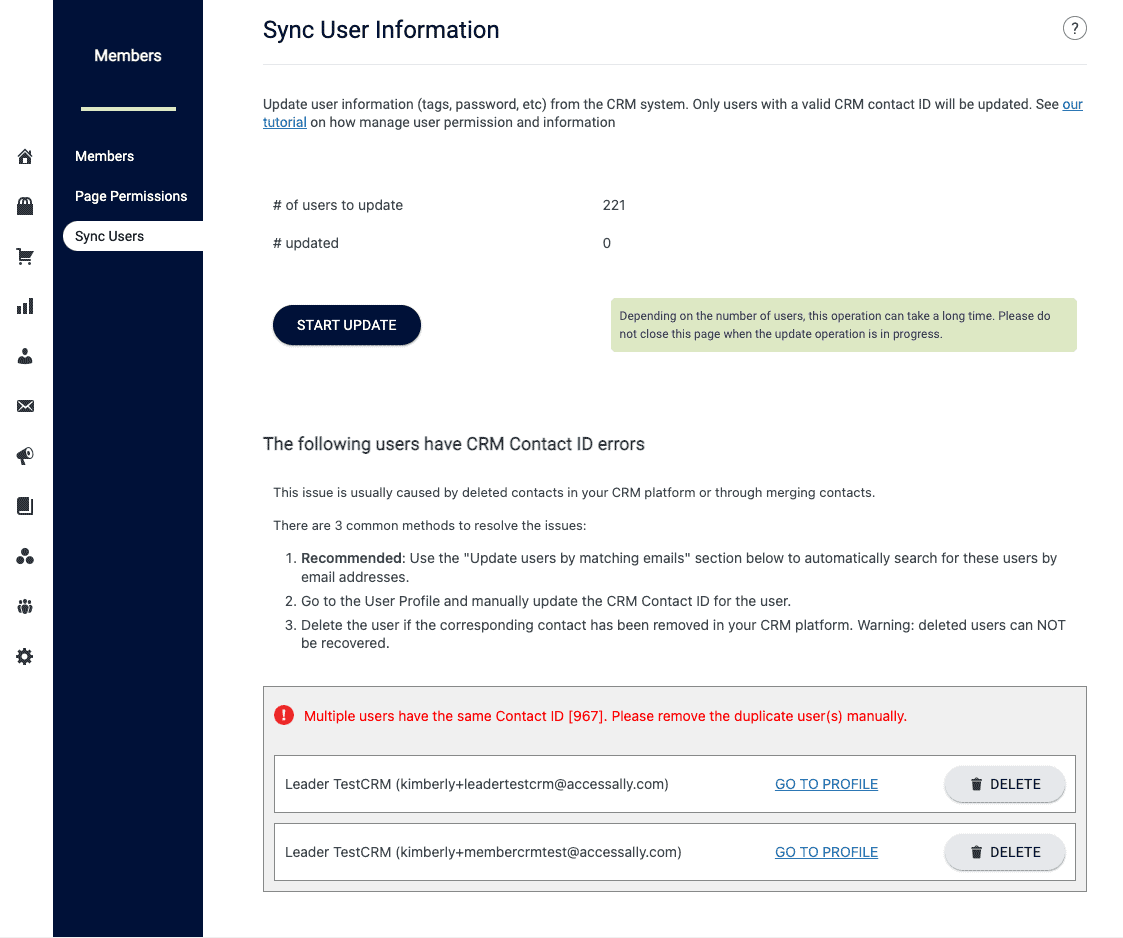
If users appear in red at the bottom of the page you can click GO TO PROFILE to review the contact’s profile to create or add the right Contact ID number, or you can delete the user.
FAQs
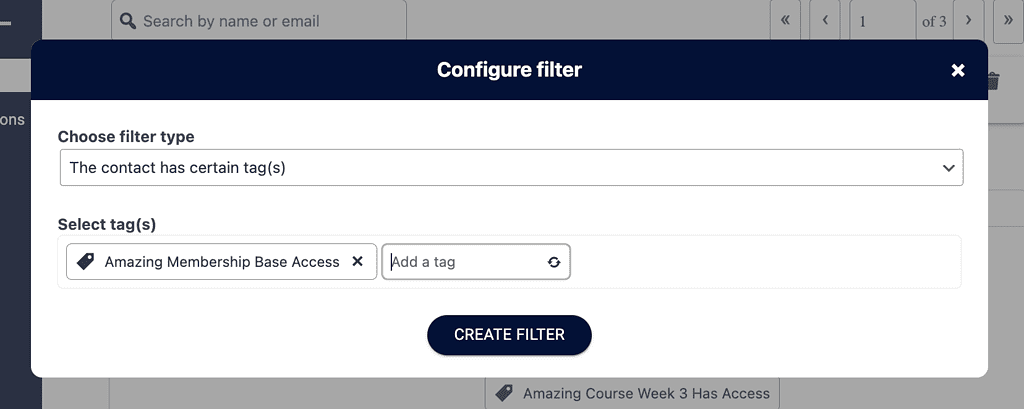
If you have an ongoing monthly subscription you can use the Members tab to apply a filter for all members with the Base Access tag AND All members that do not have the Revoke Access tag.
Filter 1: Member has certain tag(s)
Filter 2: Member is missing certain tag(s)
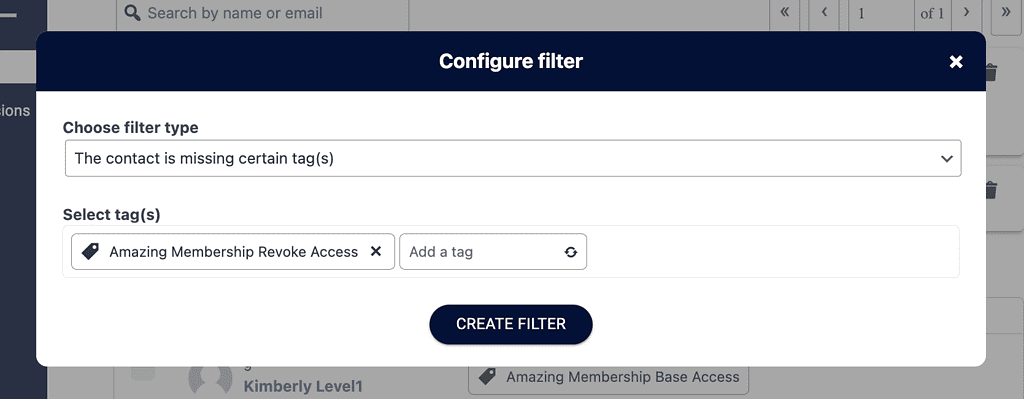
The result all current members!
Once you have the filtered members you can select everyone and run an action for everyone in this group like applying a unique tag or releasing the next month’s content!
Yes, all users on your WordPress site will appear in this tab.
Example of this error.
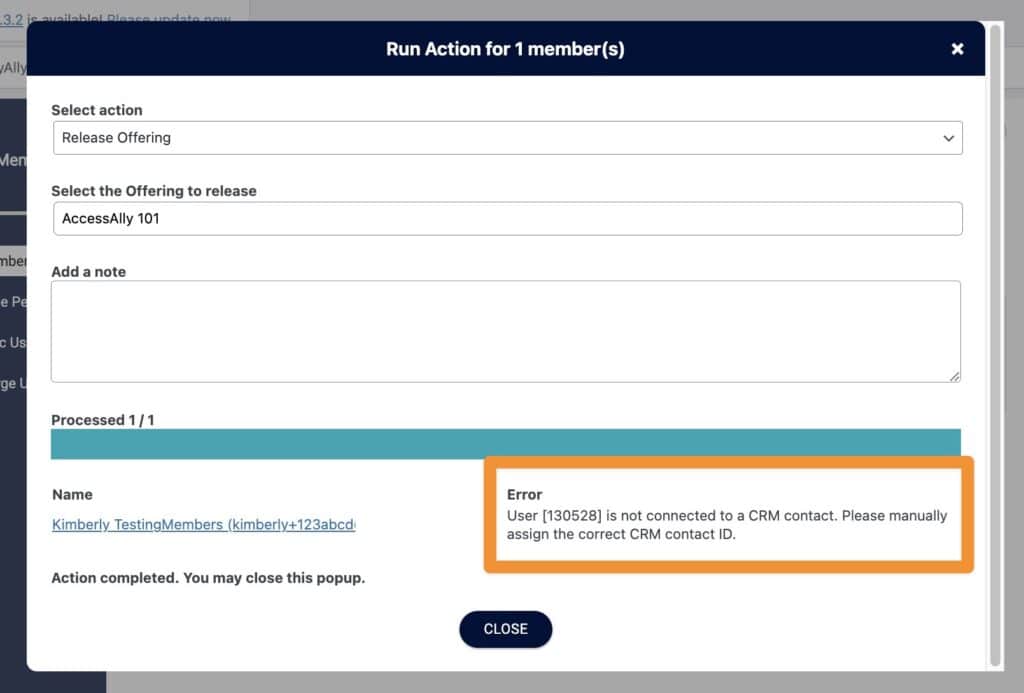
Go to Users → All Users → Search for user by email → Edit User then move to the AccessAlly Tab and add the contact ID number from your CRM.
Not sure where to find the CRM Contact ID number? See this article.
