In this article, we’ll cover how to manually add a users in WordPress on your AccessAlly. This should only be used for one-off situations as needed. This method is not intended for adding large number of users to your site.
ARTICLE CONTENT:
How to Add New WordPress User – AccessAlly Managed Sites
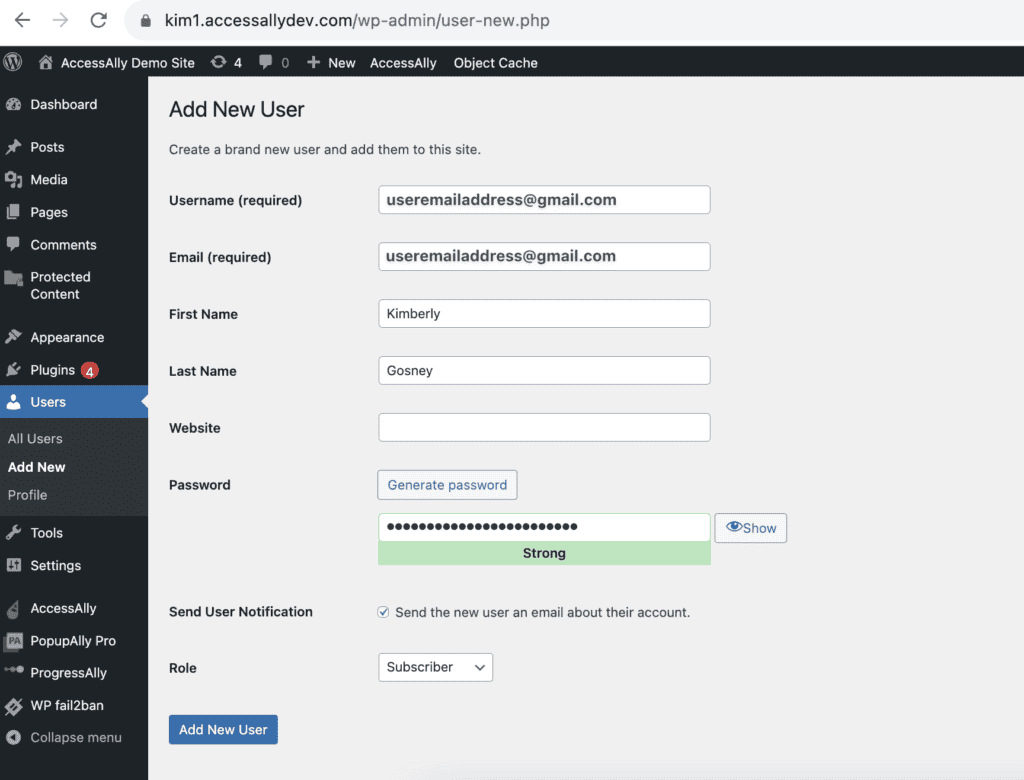
Step 1: Add New WordPress User
WordPress → Users → Add New
- Use the email address for both the username and email (must be a valid email address without a “+” like used for Gmail testing emails.)
- Add First Name
- Last Name
- Send User Notification (optional)
- Select the role (subscriber is default AccessAlly role)
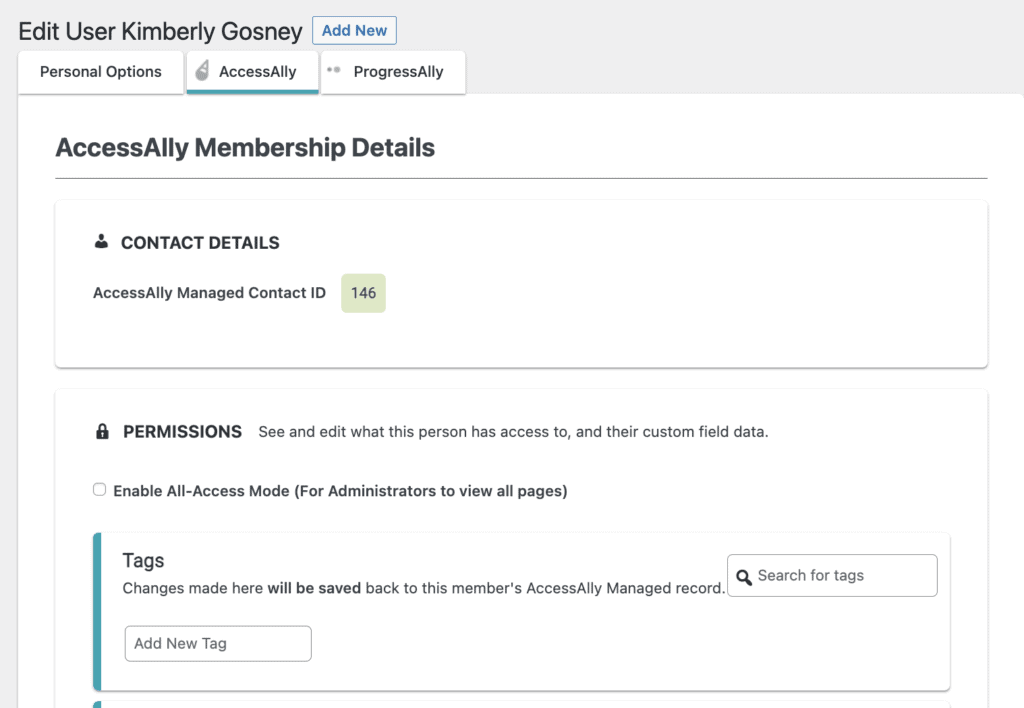
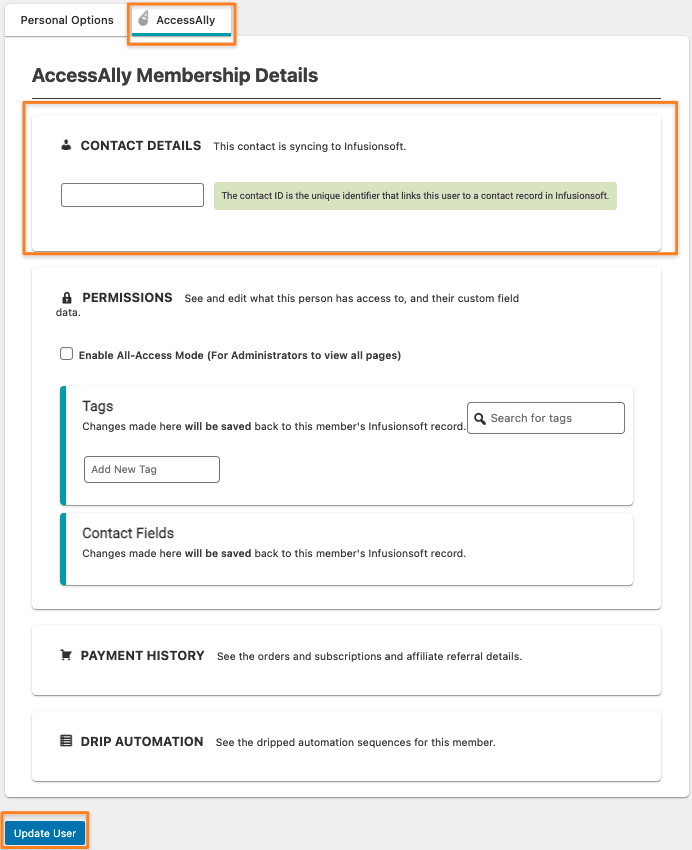
Step 2: AccessAlly Tab
Review the AccessAlly tab to ensure a contact ID number assigned by AccessAlly.
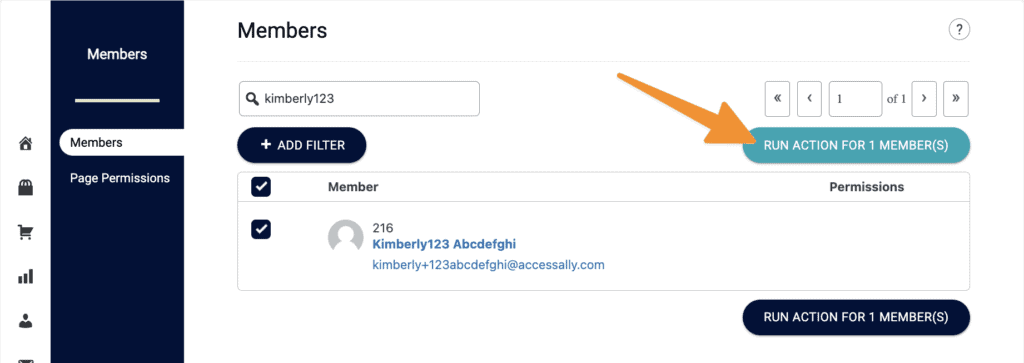
Step 3: Visit the Members Tab
AccessAlly → Members
Visit the Members Tab, add the email address of the new user so you can release offerings, add tags, or run custom operations.
Step 4: Test the user
Use the User Switching plugin to verify the users access.
Step 5: Email User
Now it’s time to email the user to let them know that they can access the site. If you have welcome emails set for when an offering is released your new user will receive an email with details on how to log in.
You may also send the new user an email and ask them to click the lost your password link on your login page.
Once they reset the password they’ll be able to access their courses and content on your site.
How to Add a New WordPress User – CRM Integrated Sites
Follow this workflow if your site is integrated with ActiveCampaign, Keap, Kit, or Ontraport.
Step 1: Find the unique contact ID in your CRM
- Find the contact in your CRM
- Note the unique contact ID – Not sure how? See this article.
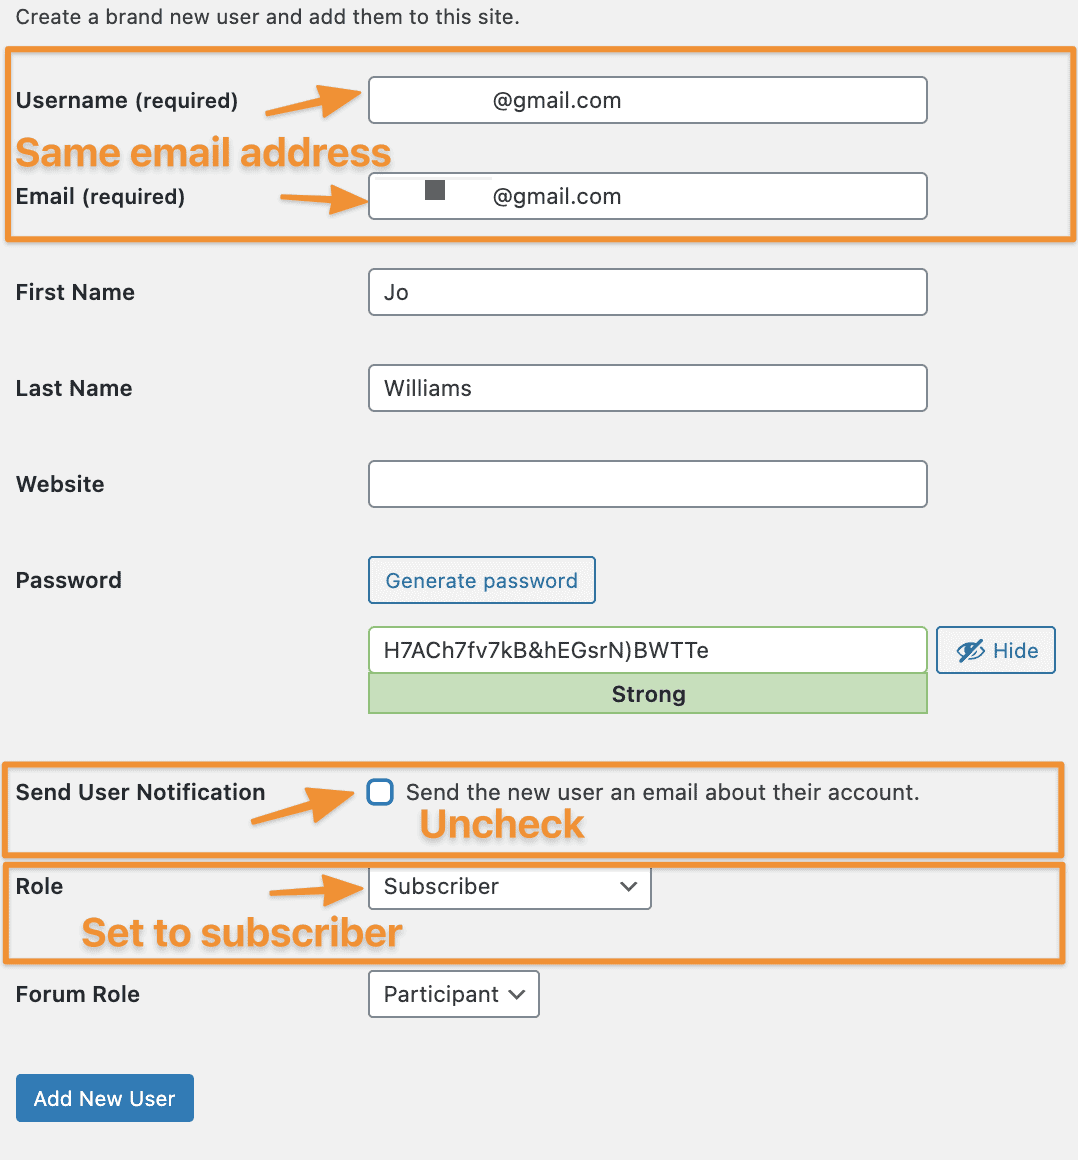
Step 2: Add the user to WordPress
- From your WordPress dashboard > Users.
- Add the new user: use the email address for both the username and email address fields. Uncheck the send user notification box. Make sure the user level is set to subscriber.
%22%20transform%3D%22translate(2.1%202.1)%20scale(4.21094)%22%20fill-opacity%3D%22.5%22%3E%3Cellipse%20fill%3D%22%23fff%22%20rx%3D%221%22%20ry%3D%221%22%20transform%3D%22matrix(-.02411%202.35437%20-74.49095%20-.76291%20196.6%209.8)%22%2F%3E%3Cellipse%20fill%3D%22%23a9a9a9%22%20cy%3D%2224%22%20rx%3D%2219%22%20ry%3D%223%22%2F%3E%3Cpath%20fill%3D%22%23fff%22%20d%3D%22M141%207h81v4h-81z%22%2F%3E%3Cellipse%20fill%3D%22%23dfdfdf%22%20cx%3D%22233%22%20cy%3D%2220%22%20rx%3D%22228%22%20ry%3D%2210%22%2F%3E%3C%2Fg%3E%3C%2Fsvg%3E)
Step 3: Sync the user with the CRM
From your WordPress dashboard, go to: Users → Select the user → Click Edit → Select the AccessAlly tab.
- Add the contact ID in the Contact Details section.
- Once you enter the contact ID, you’ll see a Resync button. This will sync the contact with your CRM.
- Click the update button to update the user.
Step 4: Test the user
Use the User Switching plugin to verify the users access.
Step 5: Notify User
Now it’s time to email the user to let them know that they can access the site. Inside your email, you direct the user to your AccessAlly Login page and ask them to click the Lost Your Password link.
Once they reset the password they’ll be able to access their courses and content on your site.
FAQs About Adding WordPress Users
Yes, all users on your WordPress site will appear in this tab.
Example of this error.
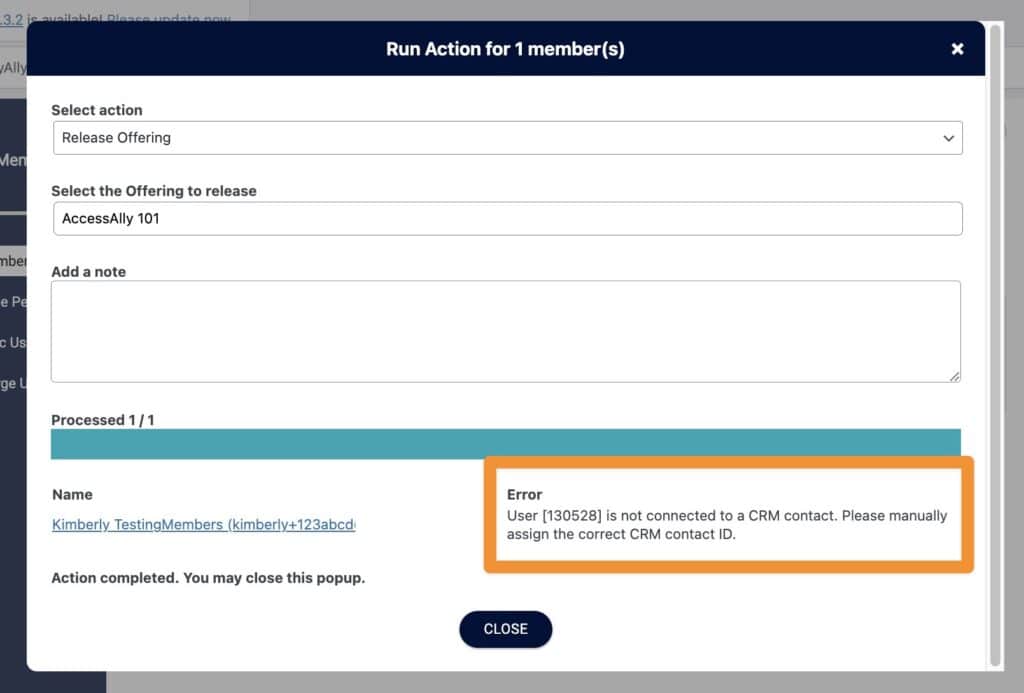
Go to Users → All Users → Search for user by email → Edit User then move to the AccessAlly Tab and add the contact ID number from your CRM.
Not sure where to find the CRM Contact ID number? See this article.
