Before anything on your membership site or course area goes “live”, you’ll want to test (and re-test) everything. This tutorial shows you how to test your order forms, so you know for sure that the products (and subscriptions) you set up will work as planned.
ARTICLE CONTENT:
Enabling Stripe Test Mode
If you are setting up your site for the first time and you want to run multiple test orders, you can set up Stripe in “test mode”.
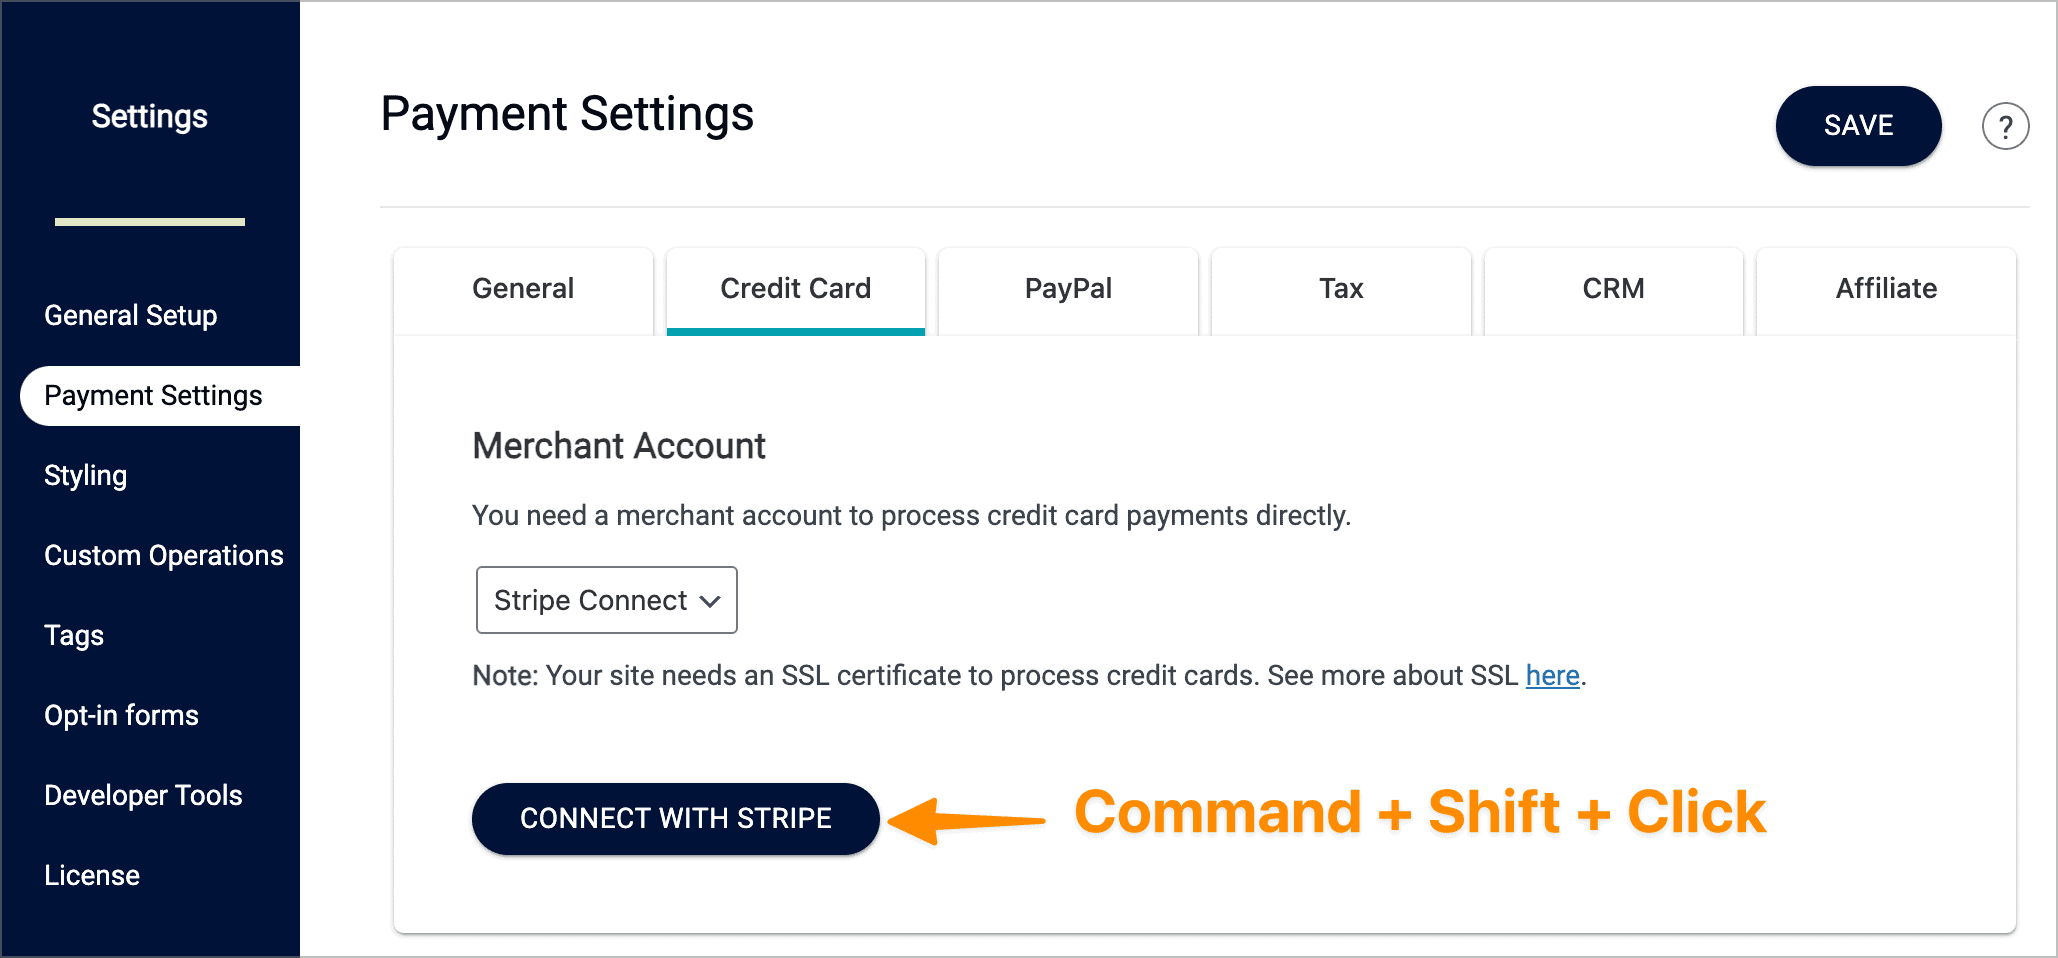
Navigate to AccessAlly Settings -> Payment Settings -> Credit Card. With Stripe Connect selected from the dropdown, you will hold down the following keys on your keyword while you click the “Connect with Stripe” button.
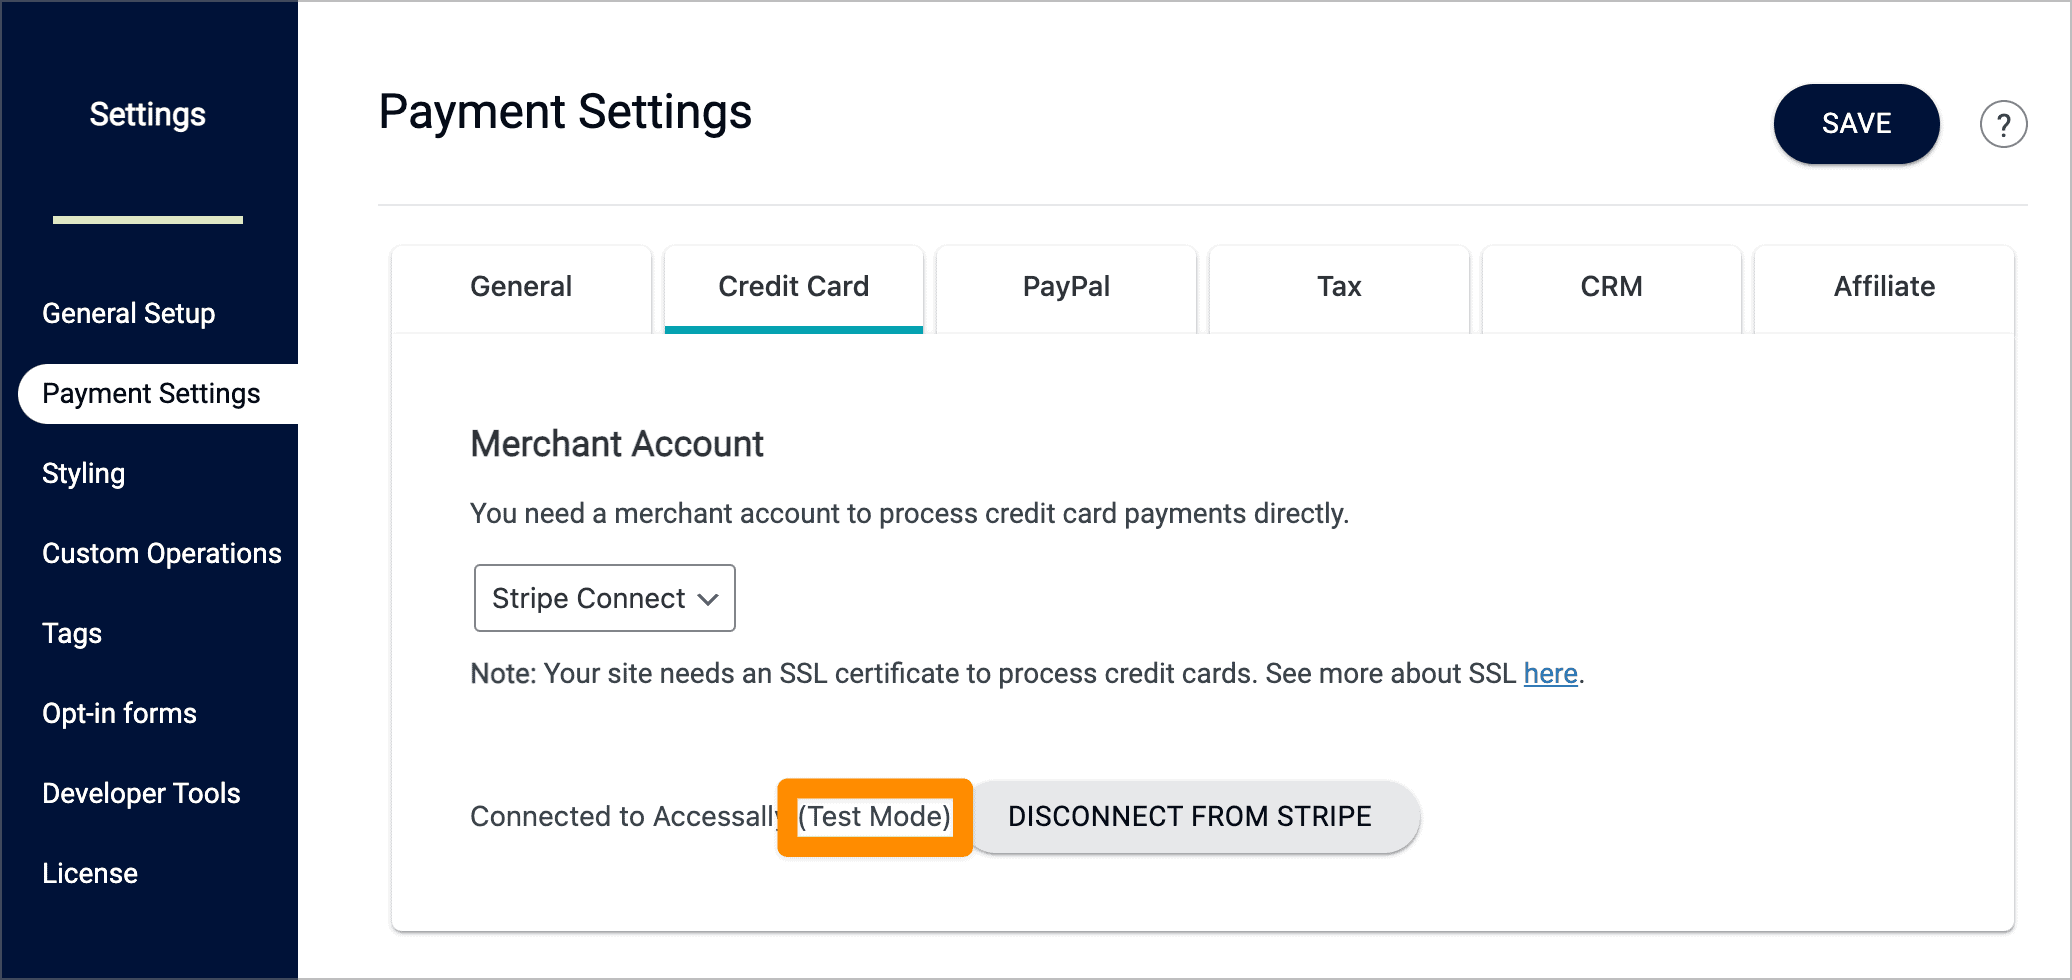
You will then be taken to the Stripe site to complete the connection, and you will know that you’re in test mode by seeing the “test mode” text on this page.

Once you’ve completed all of your testing, you will want to click the “Disconnect From Stripe” button and then go through your Stripe Connect setup again without holding down the testing keys.
That way you’ll be able to connect to your official account and start taking real orders!
Testing with a real Stripe account and real credit cards
The recommended way to test order forms is by testing with real money using your credit card.
Once your order forms are live on a page, you can begin your testing. From start to finish, here’s how the full process looks.
Step 1: Set up your order forms
If you’re unsure how, please review this guide to setting up your products and order forms: Tutorial.
OPTIONAL: Create a coupon to use while testing
If you wish, you can create a coupon to use while testing. This is especially helpful if you’re selling high-priced items and do not wish several large purchases to appear on your card. This coupon should make the price at least $1 versus testing for free so you can also test the refund process.
Step 2: Place an order
Now, place an order on each one of your order forms using a real, valid credit card. If you’ve created ten order forms, plan on putting an order through each one at least once.
If you have multiple payment plans or order bumps, 1-click upsells, and upgrades or downgrades) you’ll test every path!
If you are taking both Stripe and PayPal payments you’ll test buying from each payment processor.
Note for Facebook Browser Users
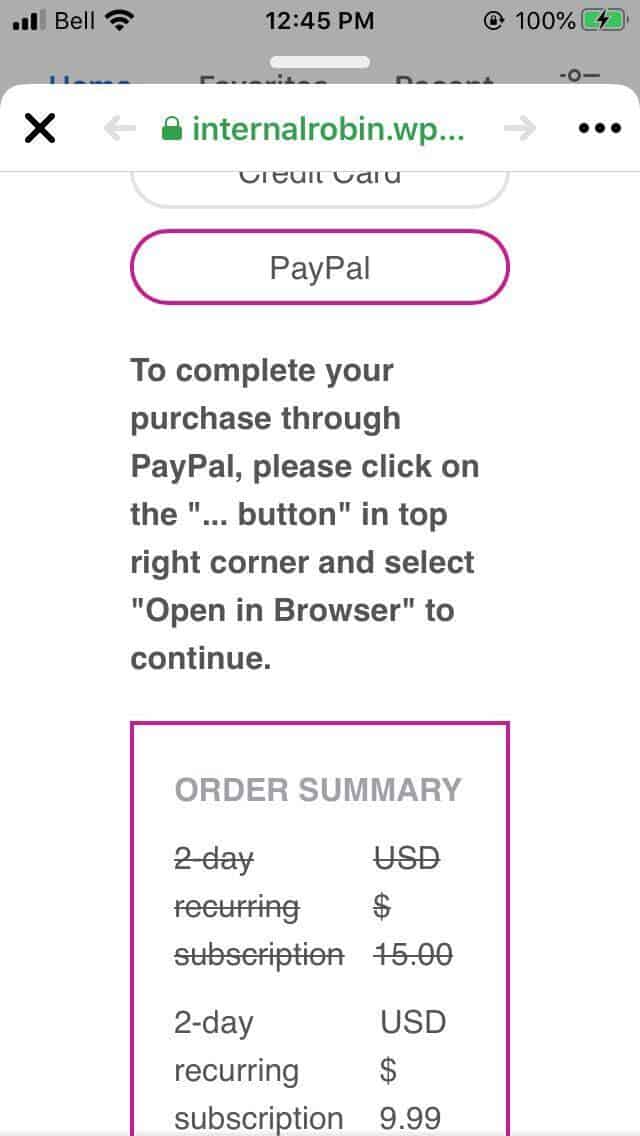
Please be aware that making a purchase via PayPal is currently not possible within the Facebook browser. If a user does attempt an order form purchase with PayPal when using the Facebook browser, they will see this message:
Step 3: Review Stripe / PayPal information
After your order has gone through, go into Stripe (or PayPal) to confirm that the order has taken place. Do not refund the order yet.
Step 4: Review Information in Your CRM
Check your CRM to make sure all permission tags have been added and that the email you used for the purchase has been added to any automated sequence you’ve set up.
Step 5: Refund The Money
Once you’ve ensured that your tagging and follow-up automations are working properly, you can safely assume that the setup has been done properly. Now it is time to refund the money you’ve received.
Step 6: If Applicable Stop Future Payment Plans
Step 7: Remove Access
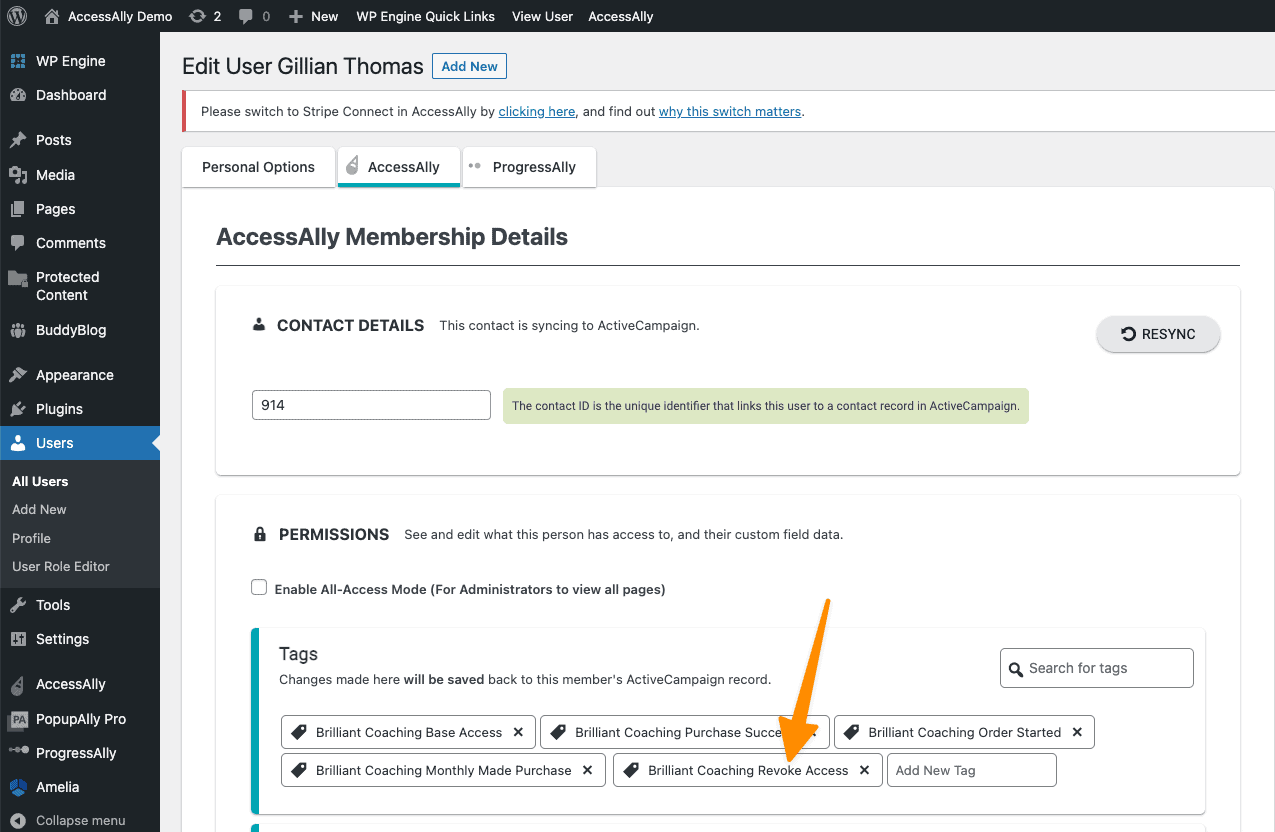
Now that you have issued the refund it is time to remove access to the offering This can be done manually by going to:
AccessAlly > Sales > Orders > Find the order > Click the Success button by the user > Click the Member Details button
Add the revoke access tag as shown in the image below for the desired offering to immediately remove access for your test user.