It is easy and straightforward to create an Affiliate leaderboard with AccessAlly – and a great way to run contests and competitions for your business Affiliates.
NOTE FOR ONTRAPORT USERS:
If you choose to build a leaderboard while using Ontraport’s partner program (instead of AccessAlly’s built in affiliate setup), please be aware that APPROVED commissions will be counted. (Pending commissions will not appear).
Here’s how to set one up:
ARTICLE CONTENT:
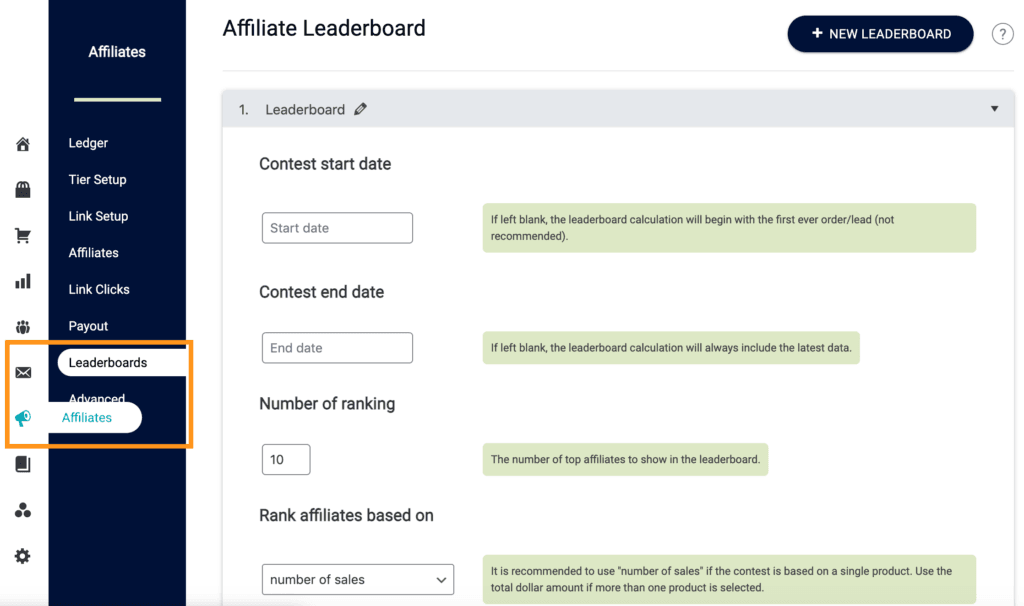
Step 1: Go to AccessAlly > Leaderboard
After logging into your website, go to AccessAlly > Leaderboards.
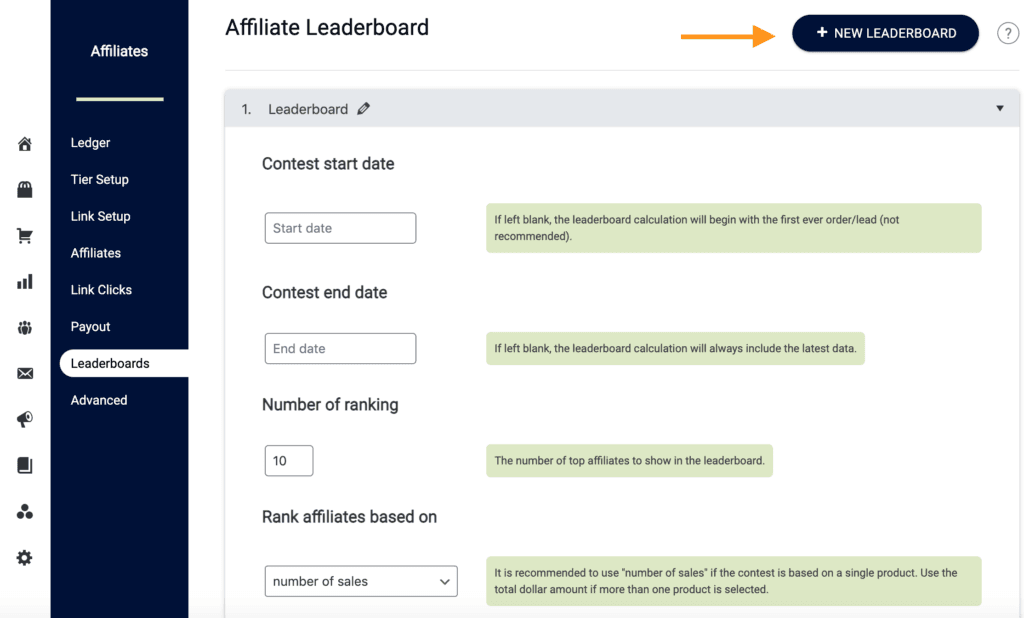
Step 2: Add New Leaderboard
Select the Add New Leaderboard button to create a new leaderboard.
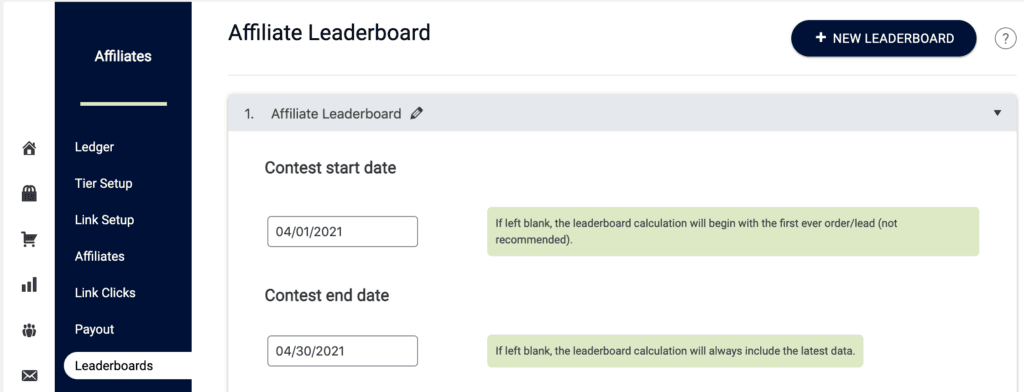
Step 3: Name Leaderboard & Select Date Range
Here, you can edit the name of your leaderboard. Since you can create more than one, be sure to pick a name that will help you to identify what it is being used for.
Determine the start and end date for your leaderboard. If you are running a contest, these dates would reflect the contest timeline.
Step 4: Determine Number of Ranking Slots
By default, the AccessAlly Leaderboard is set to show the top 10 affiliates. If you only wish to show the top “5” or top “3,” for example, simply change the number in this box.

Step 5: Quantity Calculation
Here you can decide how you want to rank your affiliates by choosing one of the three pre-set options:
- Number of Sales
- Total Dollar Amount of Sales
- Number of Leads

Note: If you select Number of Leads, you can skip Step 6.
Step 6: Product Selection
Selecting either Number of Sales or Total Dollar Amount of Sales in Step 5 will reveal additional options.
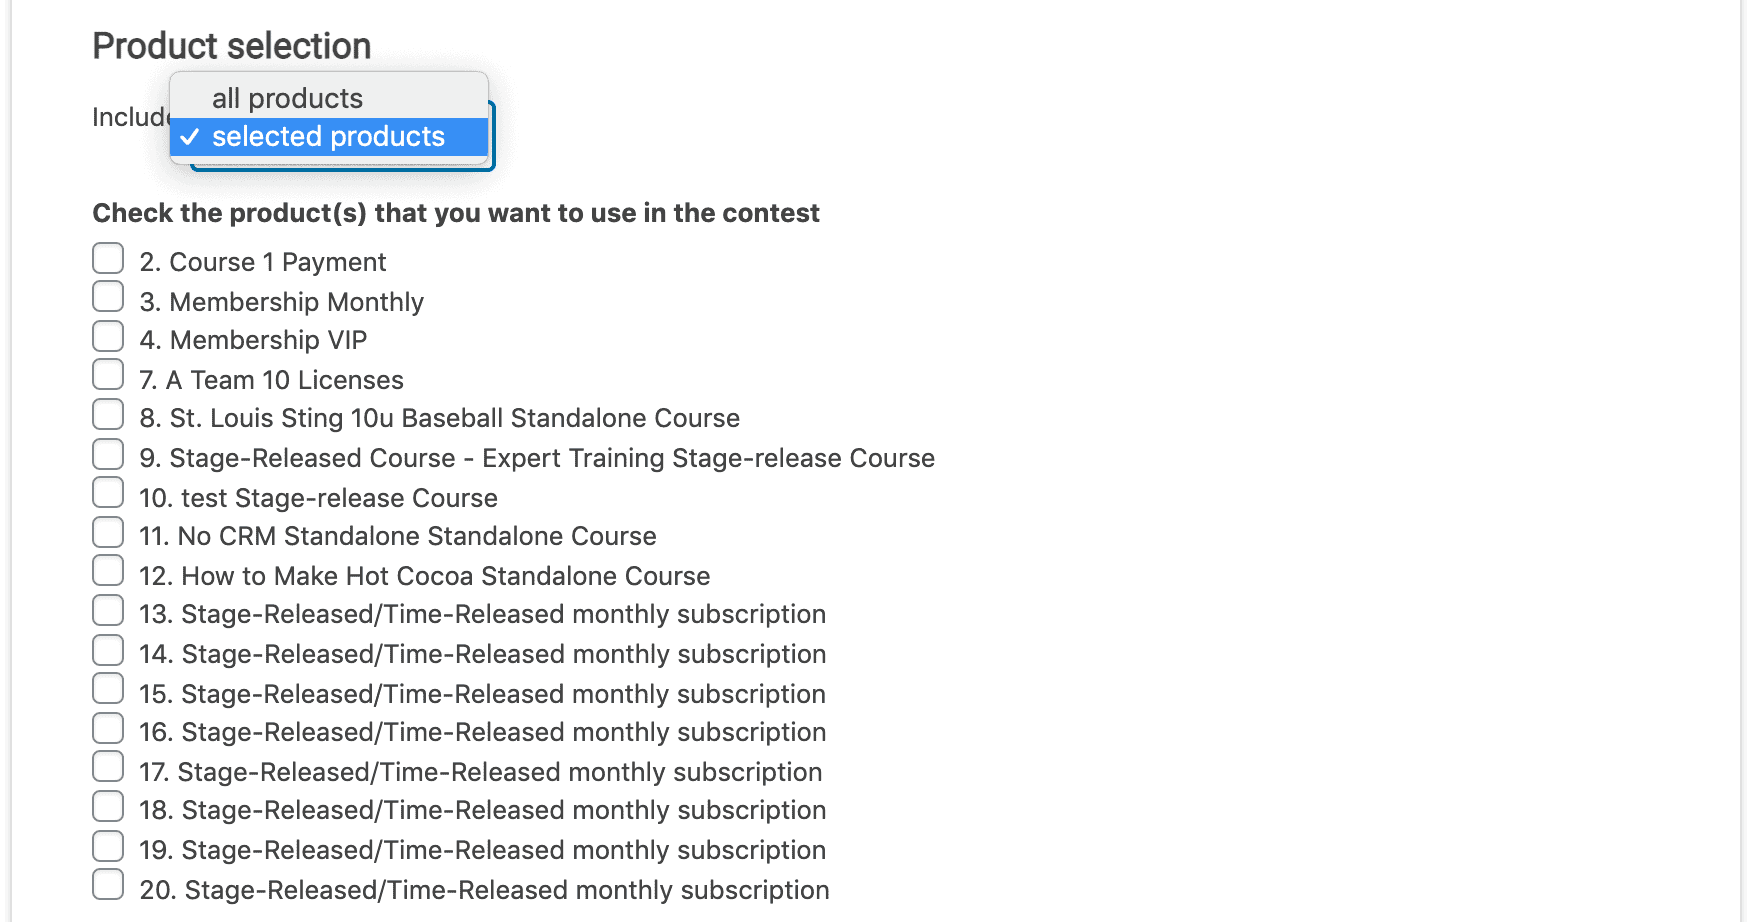
First, you will choose whether you want this leaderboard to take into account sales from ALL products (these are the products that are set up already through your Ontraport or Infusionsoft account if you are using your CRM for your affiliate system, or your AccessAlly offerings), or if you’d only like to track a selected number of products.
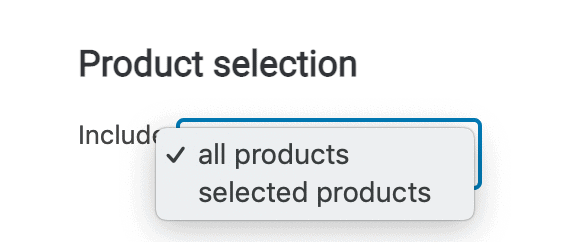
If you don’t want to track all products, clicking the Selected Number of Products will reveal a checklist of all available products.
Simply check the boxes next to any of the products you’d like to have calculated in this leaderboard.
Step 7: Save Leaderboard Settings
Click the Save button to save the settings in this new leaderboard.
Step 8: Create a Page And Add The Shortcode
Once your new leaderboard has been set up and saved, you’re ready to add it to your site.
Option #1: Add the leaderboard page through Offerings.
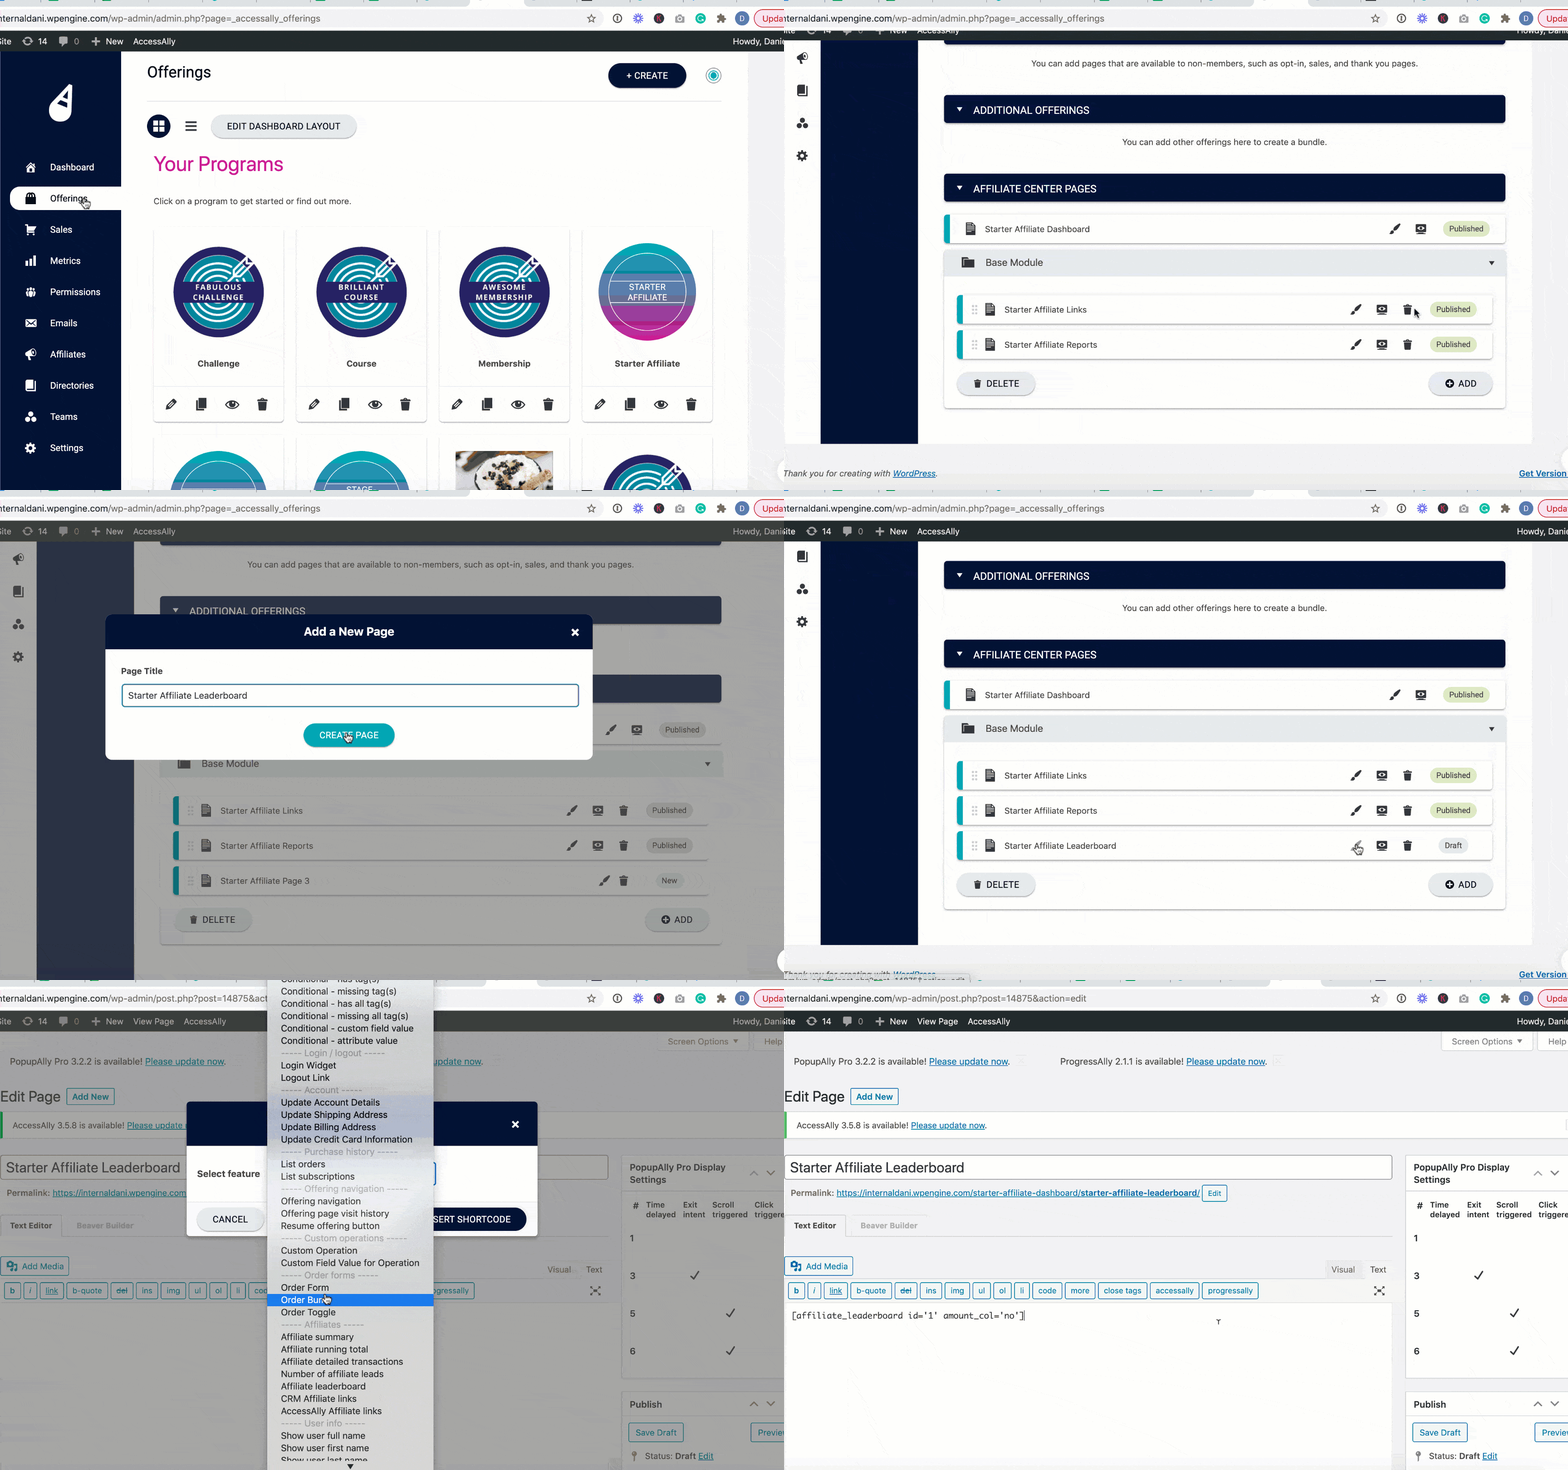
- Go to AccessAlly > Offerings.
- Click on the affiliate program you set up.
- Add a new page, rename it and click the navy blue “Save” button at the top.
- Click the paintbrush to edit the Leaderboard page you just created.
- Select the affiliate leaderboard shortcode from the AccessAlly shortcode adder.
- Insert and publish the page.
Option #2: Go to: Pages > Add New

Name your page and click on the AccessAlly button in the page edit toolbar to reveal a popup with the available shortcodes.

Select Leaderboard.
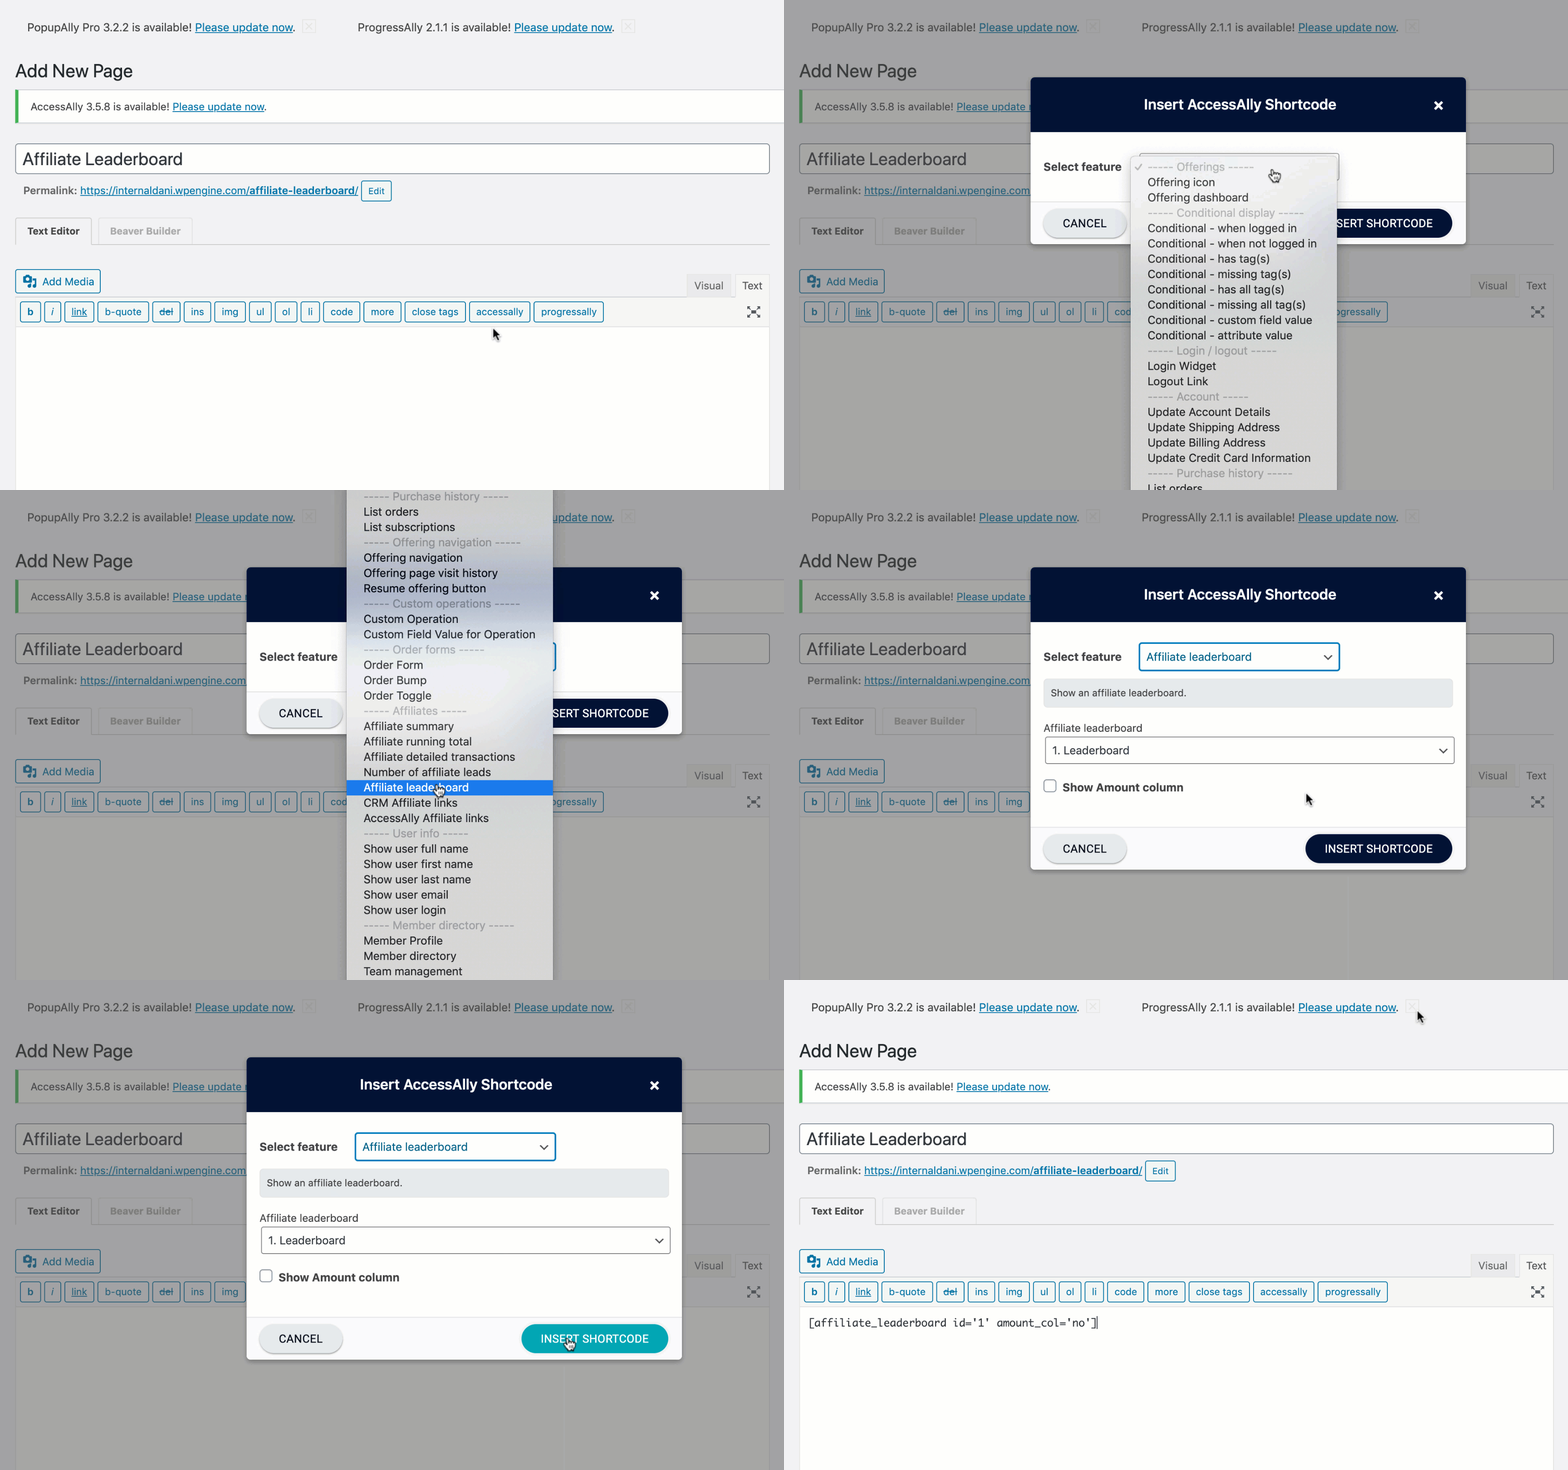
If you have created multiple leaderboards, select the appropriate one from the dropdown.
By default, the leaderboard will show two columns: the ranking number (1st, 2nd, 3rd, etc.) and the corresponding names of the affiliates on the leaderboard.
However, you can also choose to display a third column that reveals the corresponding value of each affiliate. If the leaderboard is tracking leads, this number will reflect the number of leads. If you are tracking the dollar amount of sales, then the value will show the monetary value of the total sales made by each affiliate.
Then, select Insert Shortcode to add the shortcode to your page.
Now, your leaderboard is ready to go!
The Leaderboard Will Update Automatically On A Daily Basis
Once you have the leaderboard set up and added to a regular page via the AccessAlly shortcode (shown in Step 8), the leaderboard will automatically update on a daily basis.
If you’d like to force a refresh sooner, hit the “SAVE” button on the Leaderboard settings page and it will refresh the stats.

