1. Home
  2. AccessAlly
  3. Basic Setup in AccessAlly
  4. How to Install the AccessAlly Plugin .Zip File On Your WordPress Website

How to Install the AccessAlly Plugin .Zip File On Your WordPress Website

Once you purchase AccessAlly (Essentials or Pro), you need to install the AccessAlly plugin on your WordPress website.

Step 1: Download the plugin .zip file to your computer

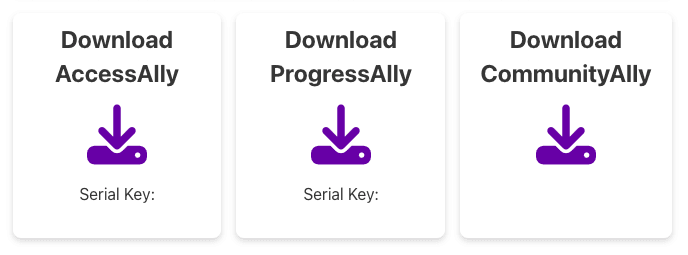
To locate the file, log into your AccessAlly account and go to AccessAlly > Download License.

Download the .zip file of AccessAlly and save it to your computer. Make sure to save it to an easily-accessed location, such as your Downloads folder or desktop.

If you have AccessAlly Pro, you will also want to install the ProgressAlly .zip file. Follow the same steps for both plugin zip files.

Step 2: Log into your WordPress site & install the plugin

The AccessAlly plugin can be installed the same way as any other WordPress plugin:

Log into your WordPress site: YOUR-SITE-URL/wp-admin

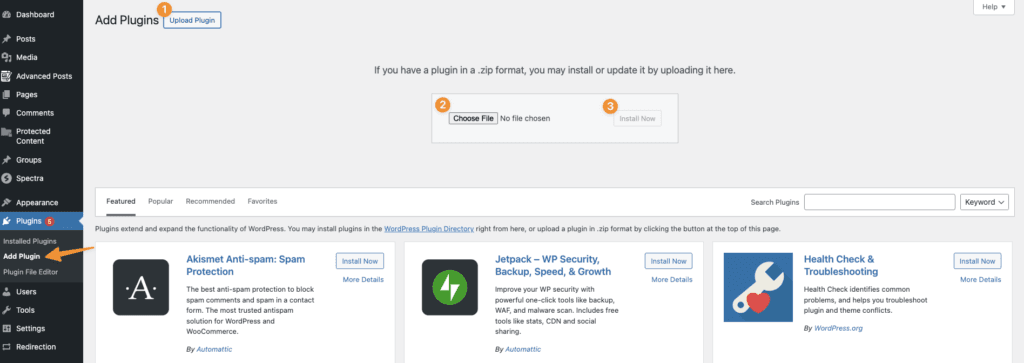
After the login is complete, go to Plugins > Add New > Upload Plugin
Screen Shot 2016-02-22 at 10.46.15 AM

Browse for the AccessAlly .zip file that was downloaded to your computer, then click the Install Now button. After the file has been uploaded to your WordPress site, activate the plugin.

Updated on November 16, 2023
Was this article helpful?

Related Articles

NO QUESTION GOES UNANSWERED

Live Weekly Q&A

Join us for live Q&A. Learn the basics, discover what's possible, and connect with AccessAlly users.

Need Support?

Have questions? Get in touch. Our inbox support hours are 9am-5pm EST, Monday - Friday.

Laptop with the AccessAlly demo site

AccessAlly is the most flexible way to sell and elegantly deliver digital offerings. All in one place.

WATCH THE DEMO

You'll get follow-up emails about AccessAlly and new features. Opt out anytime. Full privacy policy here.