If you have an AccessAlly site set up, but plan to switch CRMs or automation marketing platforms, this guide will walk you through the process.
AccessAlly integrates with many CRMs and allows you to migrate to a different CRM without having to change your membership site plugin or set up.
This tutorial includes details for a smooth migration from one CRM to another.
For AccessAlly 4.0 users that are integrated with a CRM system and want to move to AccessAlly
💡 Common Question: Do I Need to Separately Migrate AccessAlly?
Short Answer: No! AccessAlly stays exactly where it is.
When you switch CRMs, you’re only changing the email marketing platform that AccessAlly connects to. AccessAlly itself (your courses, pages, membership structure) doesn’t move anywhere.
What Actually Changes:
- ✅ CRM Connection: You’ll point AccessAlly to your new CRM (ActiveCampaign, ConvertKit, etc.)
- ✅ Tags in New CRM: You’ll recreate your tags in the new system
- ✅ Email Sequences: You’ll rebuild automations in your new CRM
What Stays The Same:
- ✅ AccessAlly Plugin: No reinstallation needed
- ✅ Course Content: All your pages and content stay put
- ✅ Member Data: WordPress user accounts remain unchanged
- ✅ Site Structure: Your membership structure is preserved
Think of it this way: Switching CRMs is like changing your car’s engine, not buying a new car. The frame (AccessAlly/WordPress) stays the same; you’re just swapping out one component.
ARTICLE CONTENT:
⚠️ Critical: Tags Must Match Exactly
When switching CRMs, the #1 cause of broken site access is tag mismatch. Your new CRM tags must be EXACTLY identical to your old CRM tags – including capitalization, spacing, and special characters.
Why This Matters
AccessAlly controls page access using CRM tags. If tags don’t match perfectly:
- ❌ Members lose access to content they purchased
- ❌ Course pages show “insufficient permissions” errors
- ❌ Order forms fail to grant correct access
- ❌ Automations don’t trigger properly
Tag Matching Rules
These are different tags:
Premium-Member≠premium-member(case sensitive)VIP Access≠VIP-Access(different spacing/hyphen)Level1≠Level 1(spacing matters)
Before switching CRMs:
- Export your complete tag list from your old CRM
- Document exact spelling and capitalization for every tag
- Create tags in new CRM with EXACT same names
- Double-check every tag – one typo breaks access for that content
💡 Pro Tip: Use a spreadsheet to track tag names during recreation. Copy-paste tag names rather than retyping them to avoid typos.
Step 1: Re-Create Your CRM Tags
Recreate all the tags in the new CRM to match the old ones. Ideally, all the tag names should be identical, include upper and lower case.
Step 2: Import Email Contacts
Move your contact list from one CRM to the other. Be sure to preserve all custom field values and tags associated with each contact.
For more detailed instructions on exporting and importing contacts, take a look at the CRM you’re moving away from and the one you’re importing into.
Some of these CRMs offer free migrations. Check with your new CRM to see if it’s available.
Note: Consider your migration timeline. If you start the migration but continue to accept new opt-ins to your original CRM, you’ll need to do a final ‘sweep’ migration to catch those new opt-ins.
Step 3: Re-Create Your Emails & Automations
Re-create automated campaigns in your new CRM. You will likely need to set these up manually since there isn’t an automated method to transfer campaigns from one CRM to the other. If your new CRM offers free migrations, they may take care of this for you.
This task can be very complex, and if you are not comfortable with the new CRM, you might want to hire a developer to help with this.
The Webhook URLs that you use for AccessAlly will stay the exact same no matter which CRM you use. When you’re creating your automation in your new CRM, copy your Webhook URLs directly as they are from your original CRM.
NOTE: Pay special attention to active contacts when creating your automations. Contacts who are mid-way through the campaigns in one CRM will not be pleased if they start receiving duplicate emails as soon as you set up your automations on the next CRM!
Step 4: Clone Your AccessAlly Site
Clone your current AccessAlly site to a staging site.
Note: This step is optional, but highly recommended. We do NOT recommend doing the migration on your live site.
When you use a staging site, you can perform the migration without affecting your existing clients. Please email us the staging site URL, as the AccessAlly license is site-specific, and we need to update our system to allow the 2-site exception.
Step 5: AccessAlly Settings
1. Switch AccessAlly Integration Settings
On your staging site, change the CRM System inside AccessAlly and update the CRM API keys.
Go to AccessAlly > Settings > General Setup > CRM Integration
Change the CRM to your new CRM. Add your Account Settings.
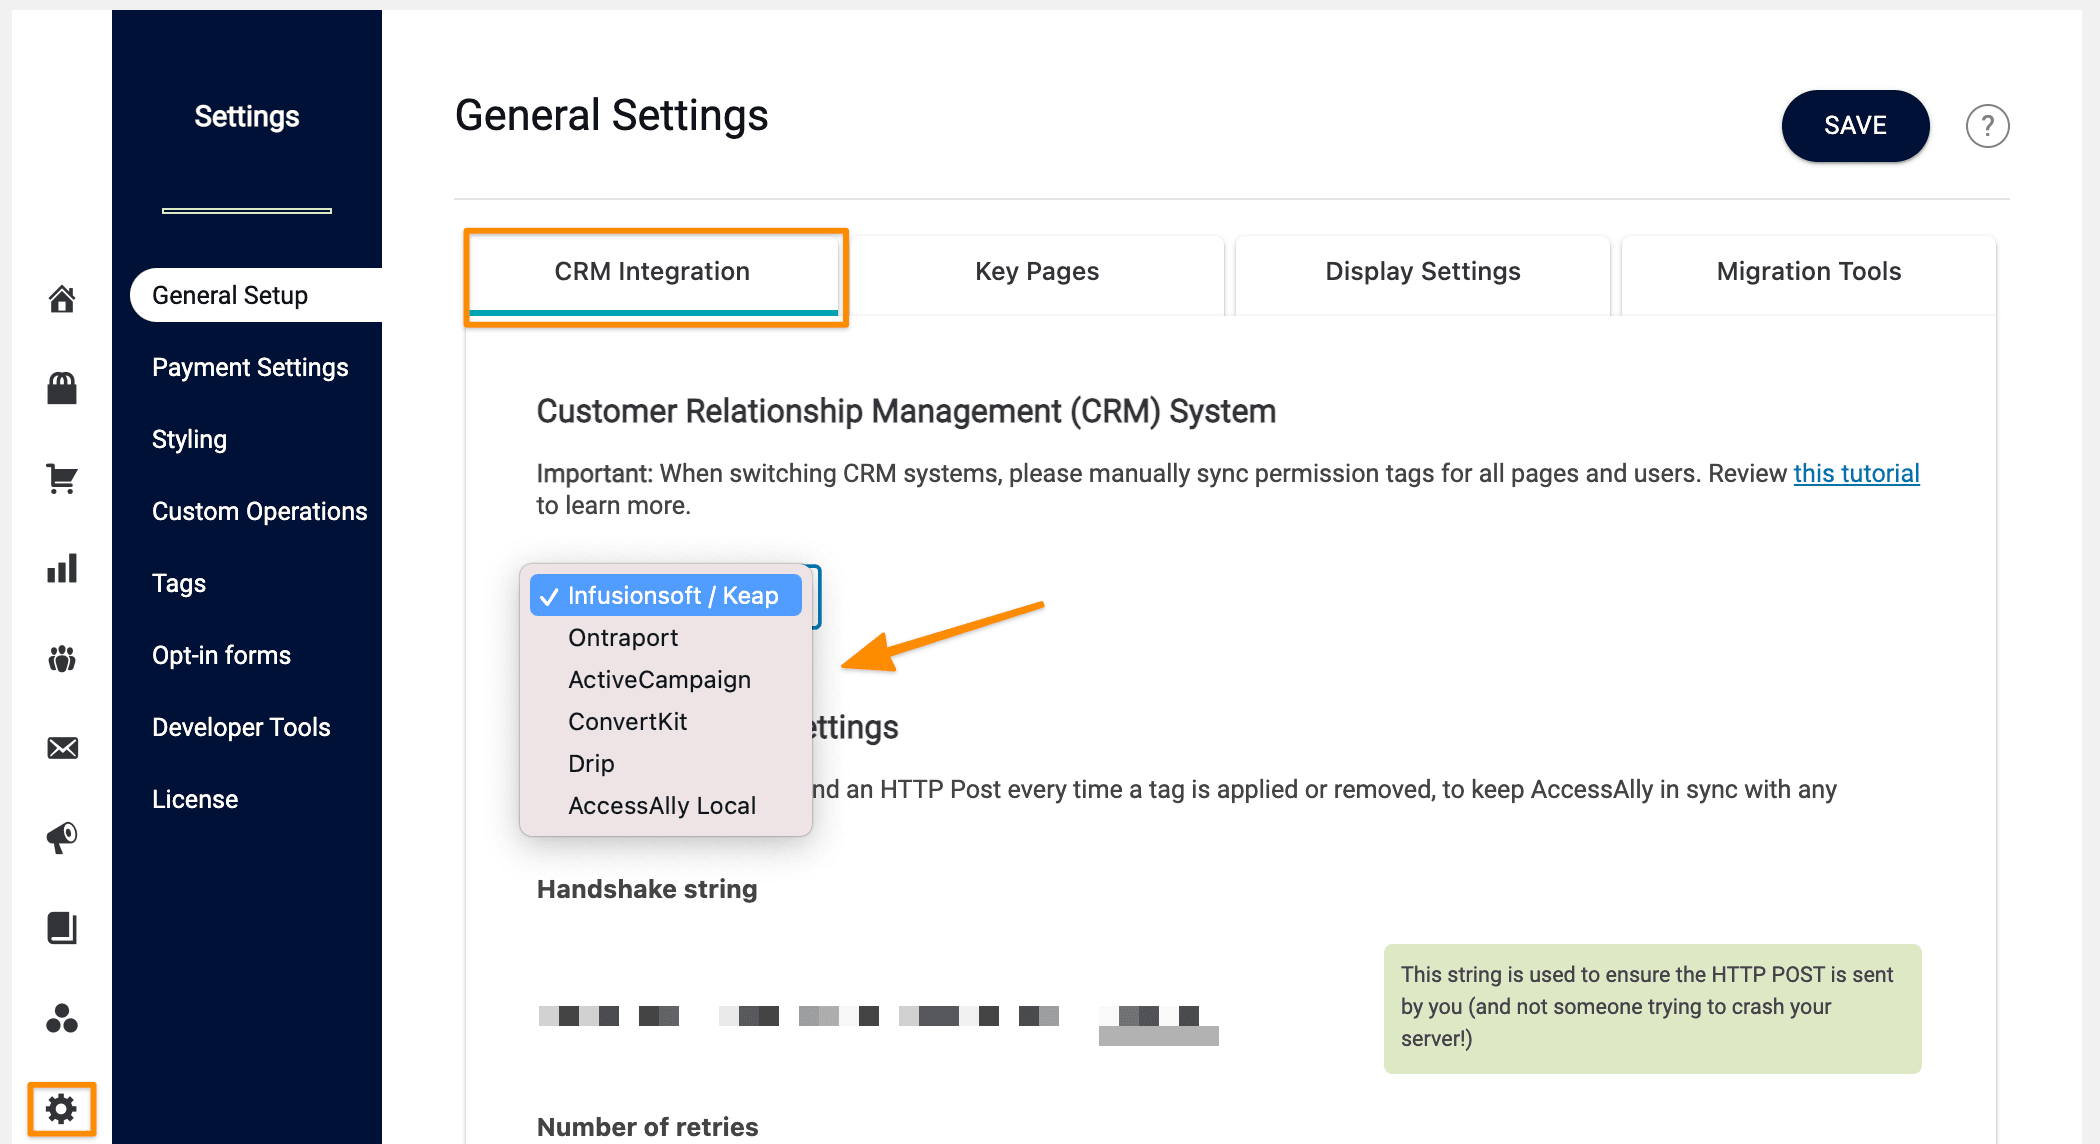
Find a step-by-step setup guide here.
2. Verify Page Permissions
Click Sync CRM Info located in the top navigation bar of your WordPress dashboard under AccessAlly.
![]()
Once synced, go to AccessAlly > Permissions > Double check the permission on each page.
As long as the tags were copied to your new CRM exactly, these should match up perfectly. Any errors will appear in red.
![]()
3. Migrate Users With the AccessAlly Migration Wizard
Use AccessAlly’s Migration Wizard to sync your membership site contacts with your new CRM.
![]()
This will refresh Member IDs and make sure all your contacts have logins and the proper permissions in AccessAlly – and are totally synced with your new CRM.
4. Review Tags & Custom Fields
Go to: AccessAlly > Settings > Tags
Review all the tags here to make sure they match up with your new CRM.
5. Update Purchase Data
Purchase data. If you have clients with active subscriptions, you will need to manually update their contact ID to the new one.
This can be time-consuming if you have a lot of active orders.
Here is the AccessAlly add-on to help you modify the internal AccessAlly data: https://access.accessally.com/accessally/accessally-add-ons/modify-contact-id-for-existing-order-subscription/
Once you’ve run the Migration Wizard, make sure to send them a welcome email with new login details, if necessary.
Step 6: (Optional) E-Commerce & Order Form Setup
If you already use AccessAlly’s order form system, you won’t need to make any changes here to migrate.
However, if you were using the CRM’s built-in order forms or another system and you’d like to transition over to AccessAlly order forms, you can find the full tutorial here.
Step 7: Test
Test, test, and then test again.
Migrating is a massive endeavor. There will always be unexpected issues, and the more you test, the less “bumps” you’ll hit when you go live.
Troubleshooting: Page Access Issues After CRM Switch
Members Can’t Access Content They Should Have Access To
If members are seeing “insufficient permissions” or being redirected to login pages after your CRM switch, the most common cause is tag mismatch.
How to Diagnose Tag Mismatch
- Check tag names in new CRM – Look up one affected member in your new CRM and note their exact tags
- Check AccessAlly page protection – Go to the page they can’t access and check which tags grant access
- Compare tag names character-by-character – Case, spacing, and special characters must match exactly
Common Tag Mismatch Patterns
| Old CRM Tag | New CRM Tag (Wrong) | Problem |
|---|---|---|
Premium-Access |
premium-access |
Wrong case |
VIP Member |
VIP-Member |
Space vs hyphen |
Level 1 Access |
Level1Access |
Missing spaces |
How to Fix Tag Mismatch
Option 1: Rename tags in new CRM (Recommended)
- Go to your new CRM’s tag management
- Rename tags to match your old CRM exactly
- Click “Sync CRM Info” in AccessAlly Settings
- Test member access
Option 2: Update AccessAlly page protection
- Go to each protected page in WordPress
- Update the AccessAlly page protection settings
- Select the new tag names from your new CRM
- Save and test access
⚠️ Important: Option 1 is much faster if you have many pages – fix the tags once in your CRM rather than updating hundreds of pages individually.
Testing After Fix
After correcting tag names:
- Log in as a test member (or use incognito mode)
- Try accessing protected content at each membership level
- Verify order forms grant the correct tags when purchased
- Check automation triggers still fire on tag application
💡 Pro Tip: Create a “test member” account in your new CRM with all tags applied, then use that account to systematically test every protected page before announcing the switch to real members.
