You can use AccessAlly to add a VAT number to invoices for your clients or customers based in Europe. AccessAlly’s built-in email invoices let you do that with just a few set up steps.
ARTICLE CONTENT:
Step 1: Set Up a VAT Custom Field
The first step is to set up a Custom Field in your CRM to store your clients’ VAT number. You can see the tutorials for setting up custom fields here.
Step 2: Add the Editable Field to a Profile Page or Order Form
Next, you’ll want to add the custom field to either:
- Your order forms, on purchase
- An update profile page
- Or both
You can add the field on order forms by following this more in-depth tutorial.
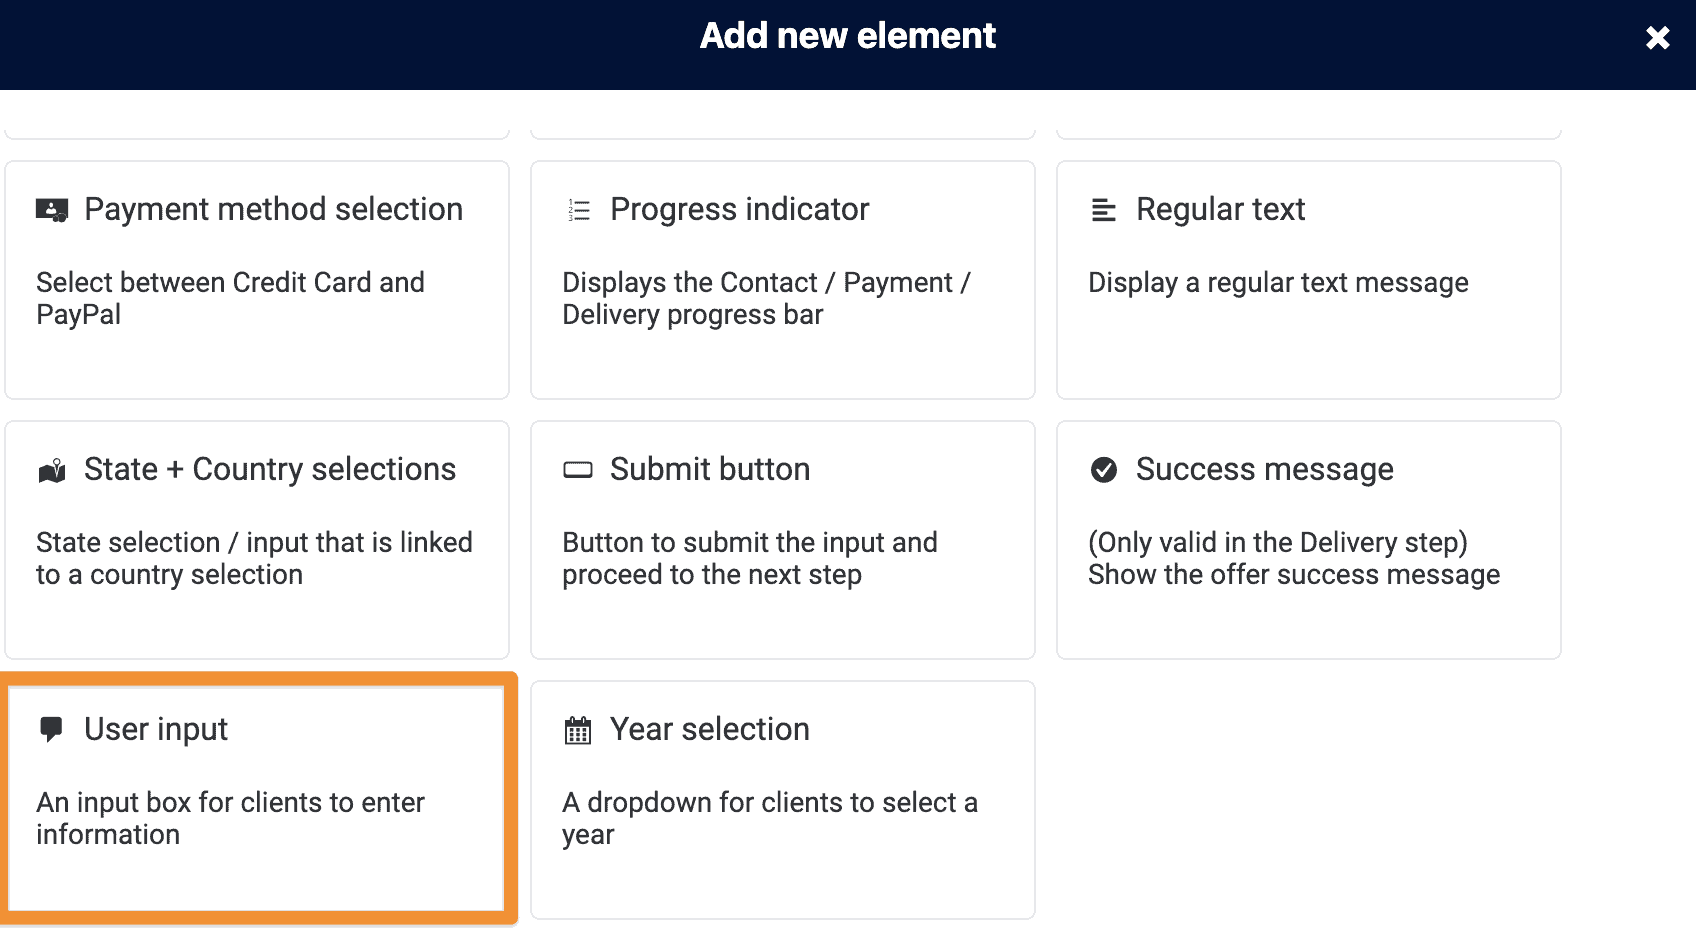
On your Order Form design, select the “User Input” type of block to add to your order forms, like this:
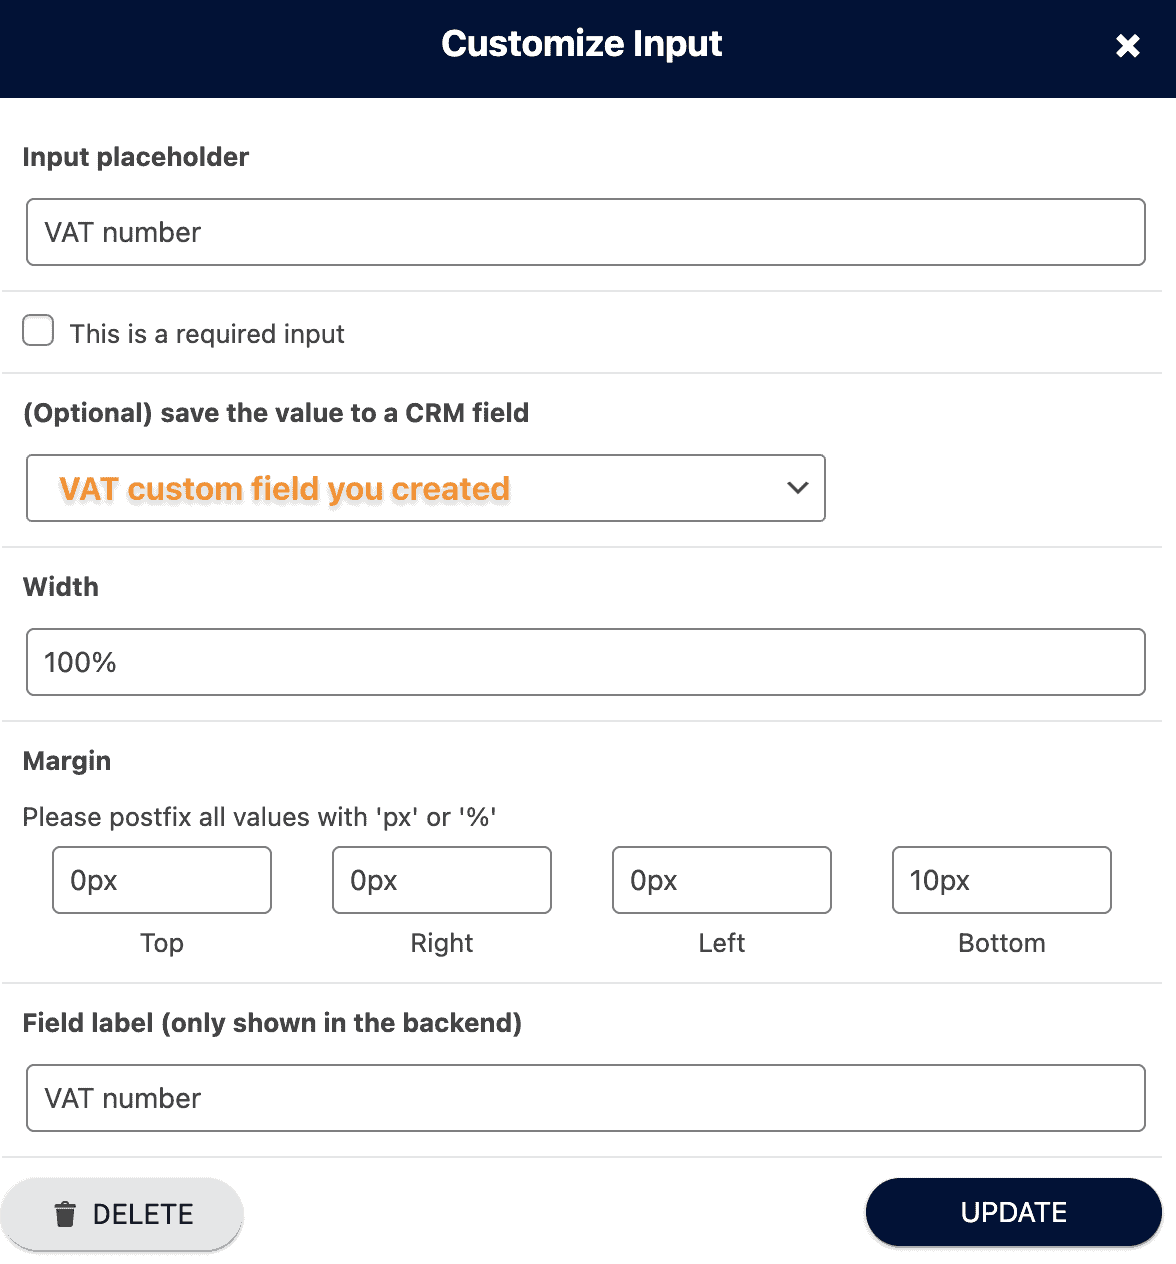
Now choose “Save to Custom Field” and choose the custom field for your VAT number that you created in the previous step.
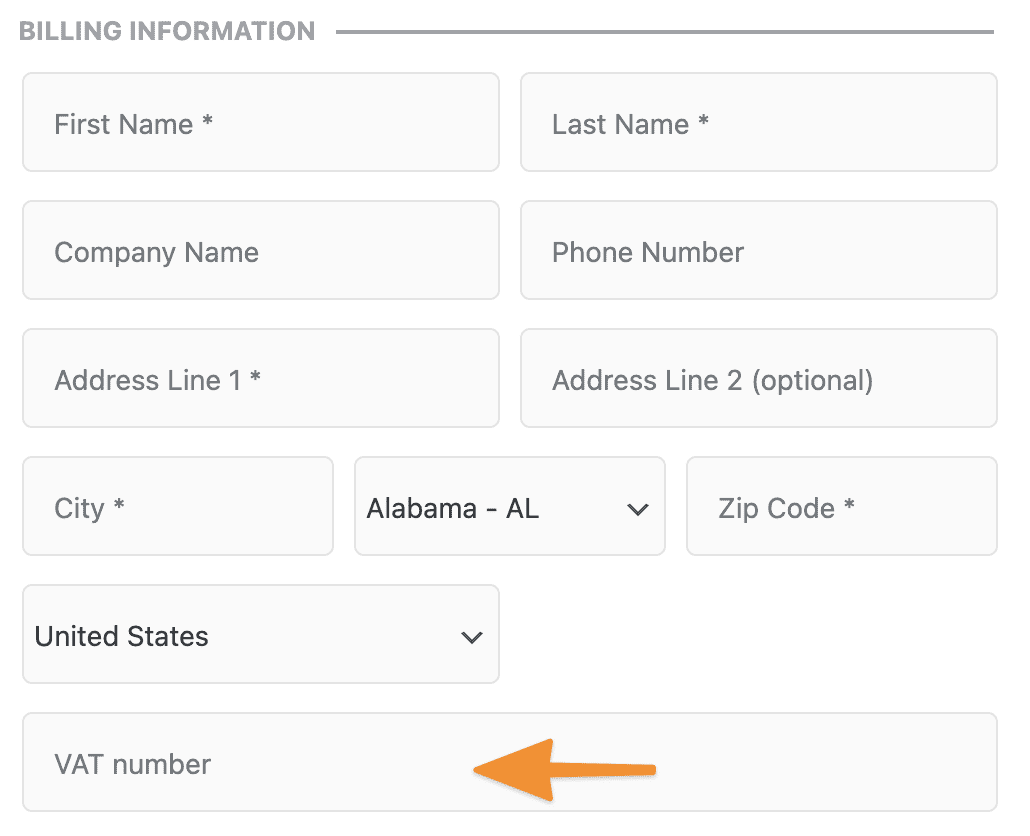
You’ll end up with an order form similar to this, where people can optionally enter their VAT number.
You can also add the custom field to be edited to a profile page, using the Profiles in the User Directory (don’t worry, you won’t display this anywhere else publicly).
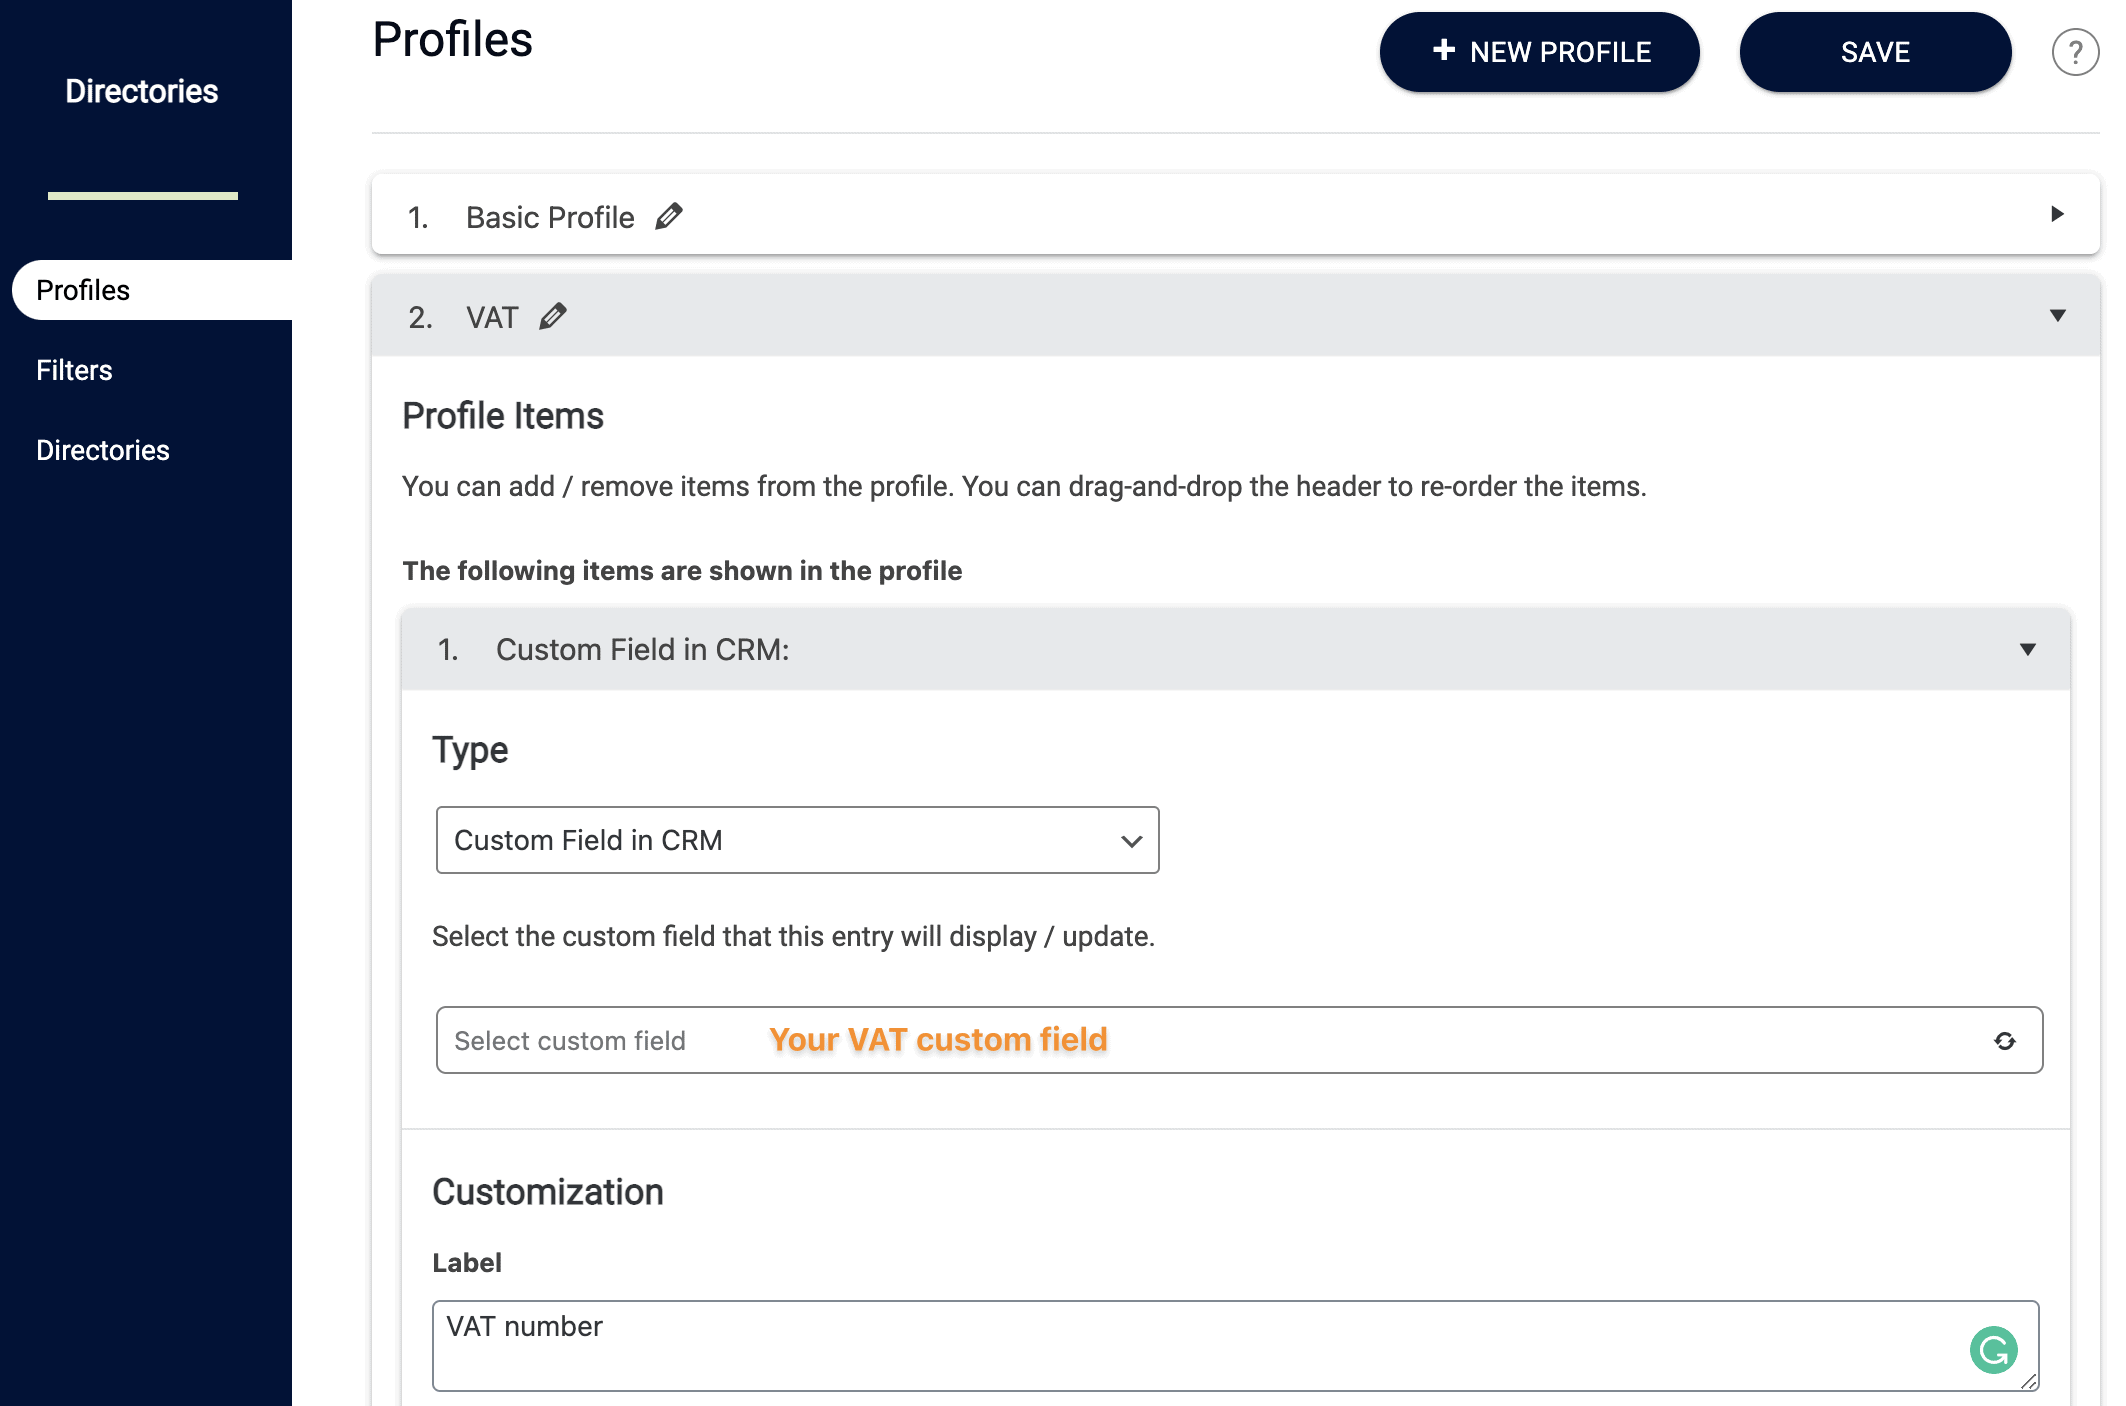
To add this to a profile page, you’ll first create or update a profile under Directories -> Profiles. If you’re only wanting to display VAT, then remove all of the existing items from the profile. Then create a new item, and choose Custom Field in CRM as the type. Name it and select the custom field you created to save the data there.
Now to display the editable VAT field on the front end, you’ll use the shortcode to display the profile you created like this:
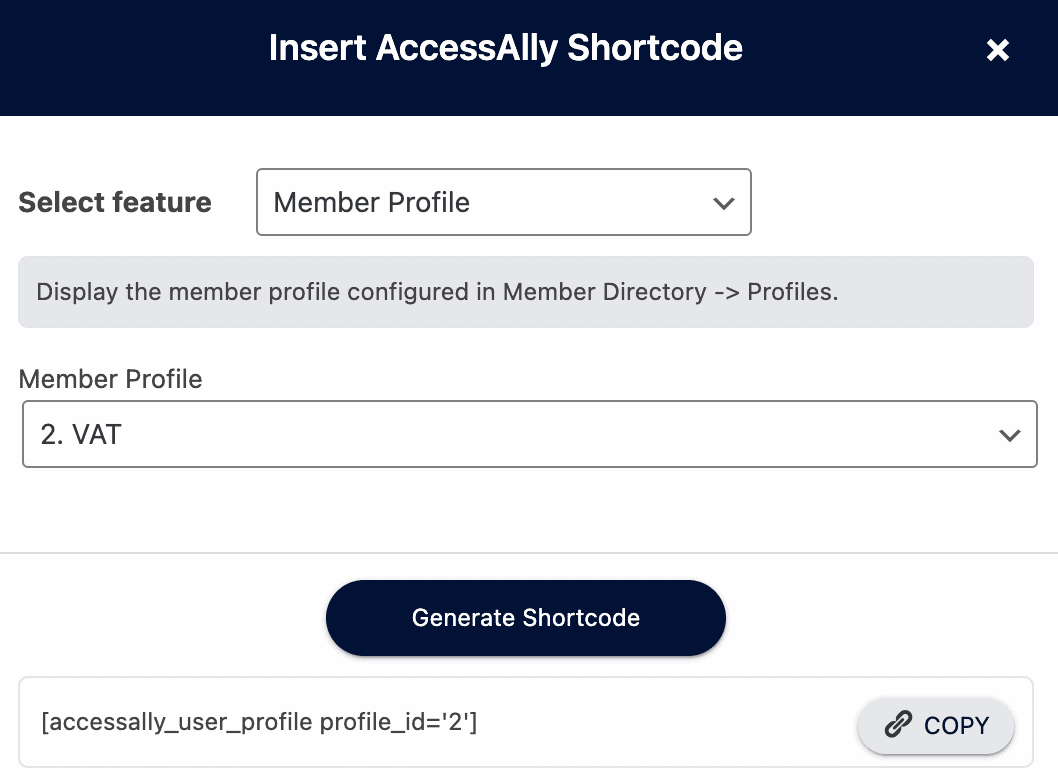
You’ll end up with a shortcode like this:
[accessally_user_profile profile_id=’4′]
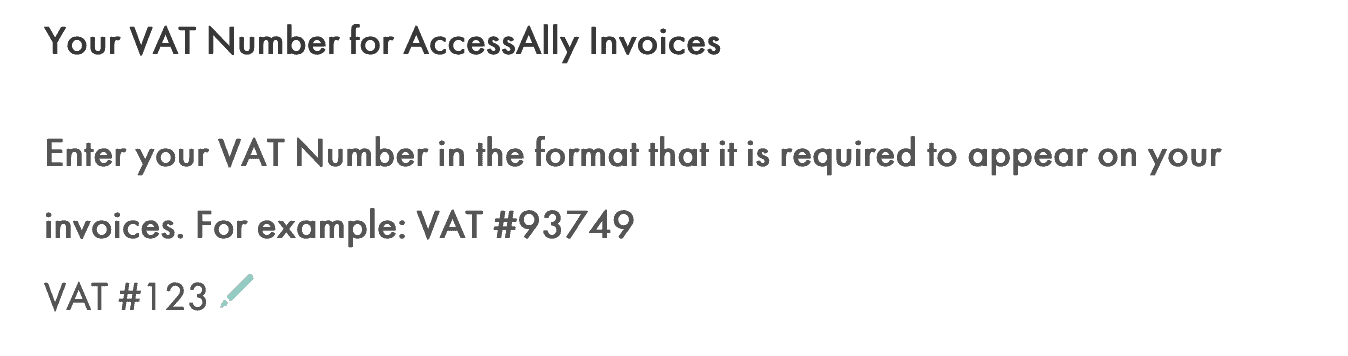
Your Profile ID will change based on the profile you just created. On the front end your clients will see an editable VAT area like this:
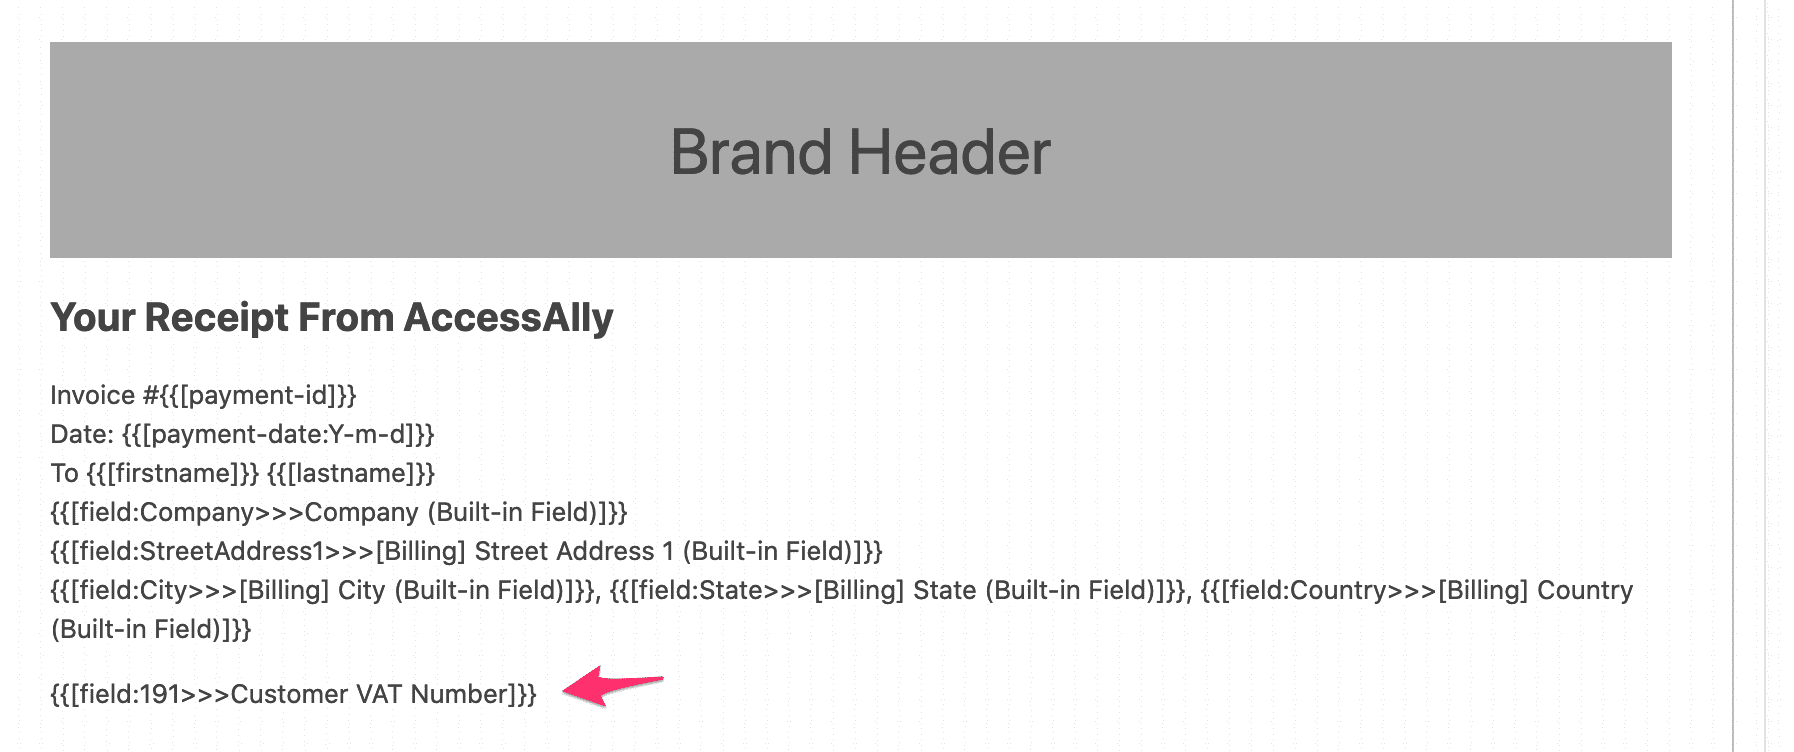
Step 3: Insert the VAT field into the Invoice Template
Now navigate to the Emails area in AccessAlly, and select Invoices. In an existing or a new Text block, you’ll be able to add your new custom field so it shows up like this.
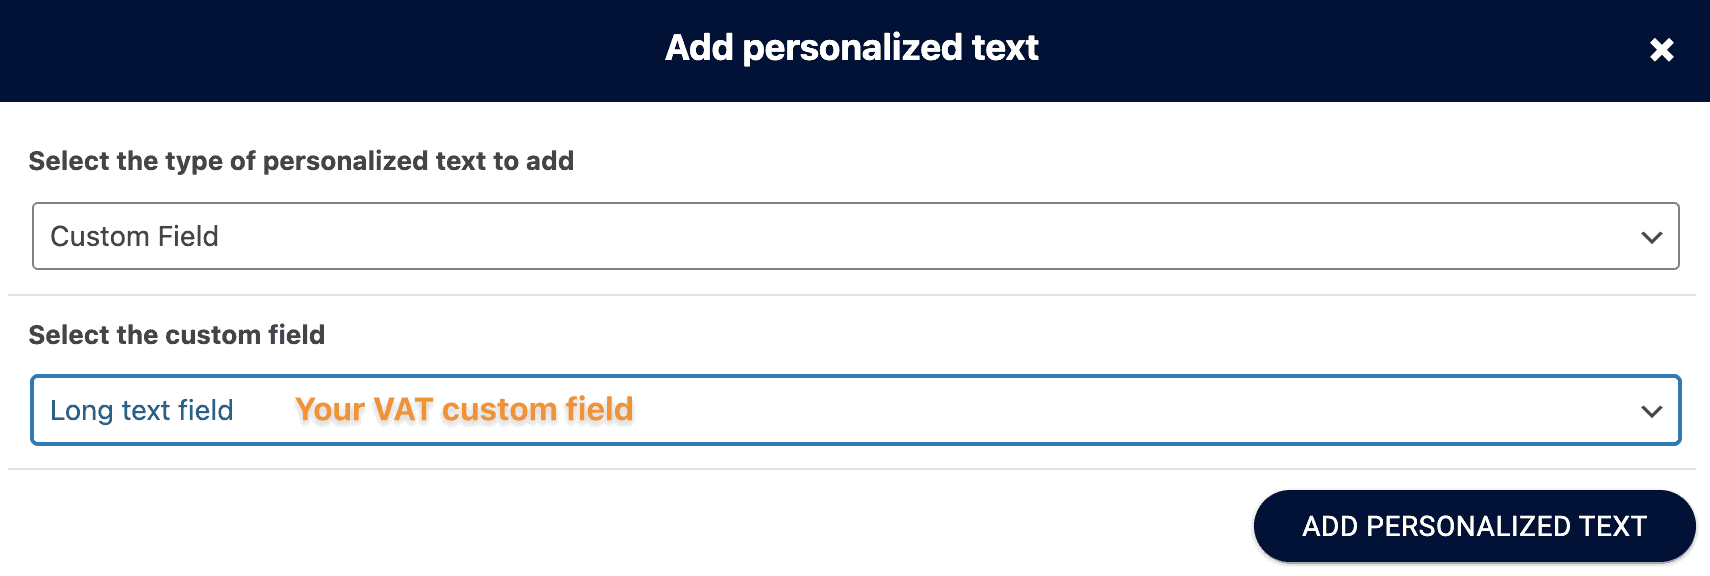
Choose the “Personalize” button to insert the Custom Field into your invoice template.
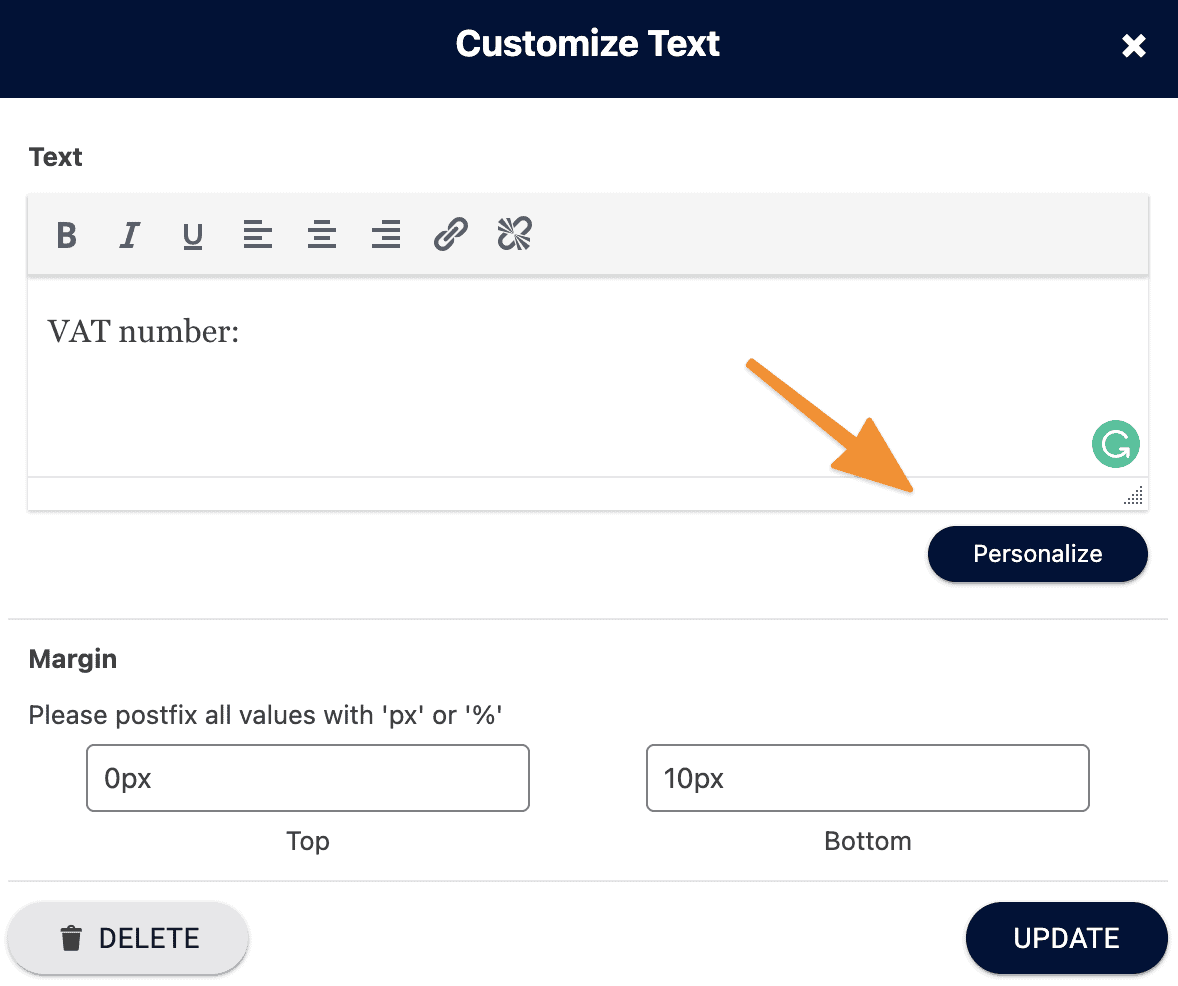
Now select the Custom Field you’ve been creating and editing.
You can change how it appears by adding text in front of it or after it. Make sure to test your VAT number to make sure it’s pulling and inserting it properly!
