In this article, you’ll explore ways to engage longer with your members by creating an Accountability Partner Program. AccessAlly is a robust tool with many different ways you could create your Accountability Partner Program. Use this article as a guide and season this to taste.
Need help with anything covered in this article? Hop on a free Tune Up Call to ask questions about your Accountability Partner Program setup.
ARTICLE CONTENT:
AccessAlly Features Used
- Offerings – you’ll need a welcome page and a directory page this could be a new or existing offering.
- Directory – a great way to show members who need an accountability partner at a quick glance while allowing users to connect with each other via a link.
- Custom Operations – a powerful way to determine who needs an accountability partner, who has one, and allows users to opt-out of participating if they do not want to participate.
- Objective Lists with Tagging – *AccessAlly Pro feature that gives you the flexibility to apply tags when a member completes items on a checklist. This is a helpful addition to enhance the member experience by hiding incomplete profiles.
Quick Tip: If you are not using AccessAlly Pro you can log in and upgrade to get these additional features.
Pages Needed for This Setup
There are two pages that are must-haves these can be new pages or existing pages. It’s important that these pages use different access tags as the welcome page objective list will tag a member into the directory page.
1. The Member Welcome Profile Page
This page is the first page a new member sees. This page guides the member on important details about your Accountability Partner Program, holds the member profile and allows them to choose options for participation. This page once completed will add the new member to the directory via an AccessAlly Pro objective checklist.
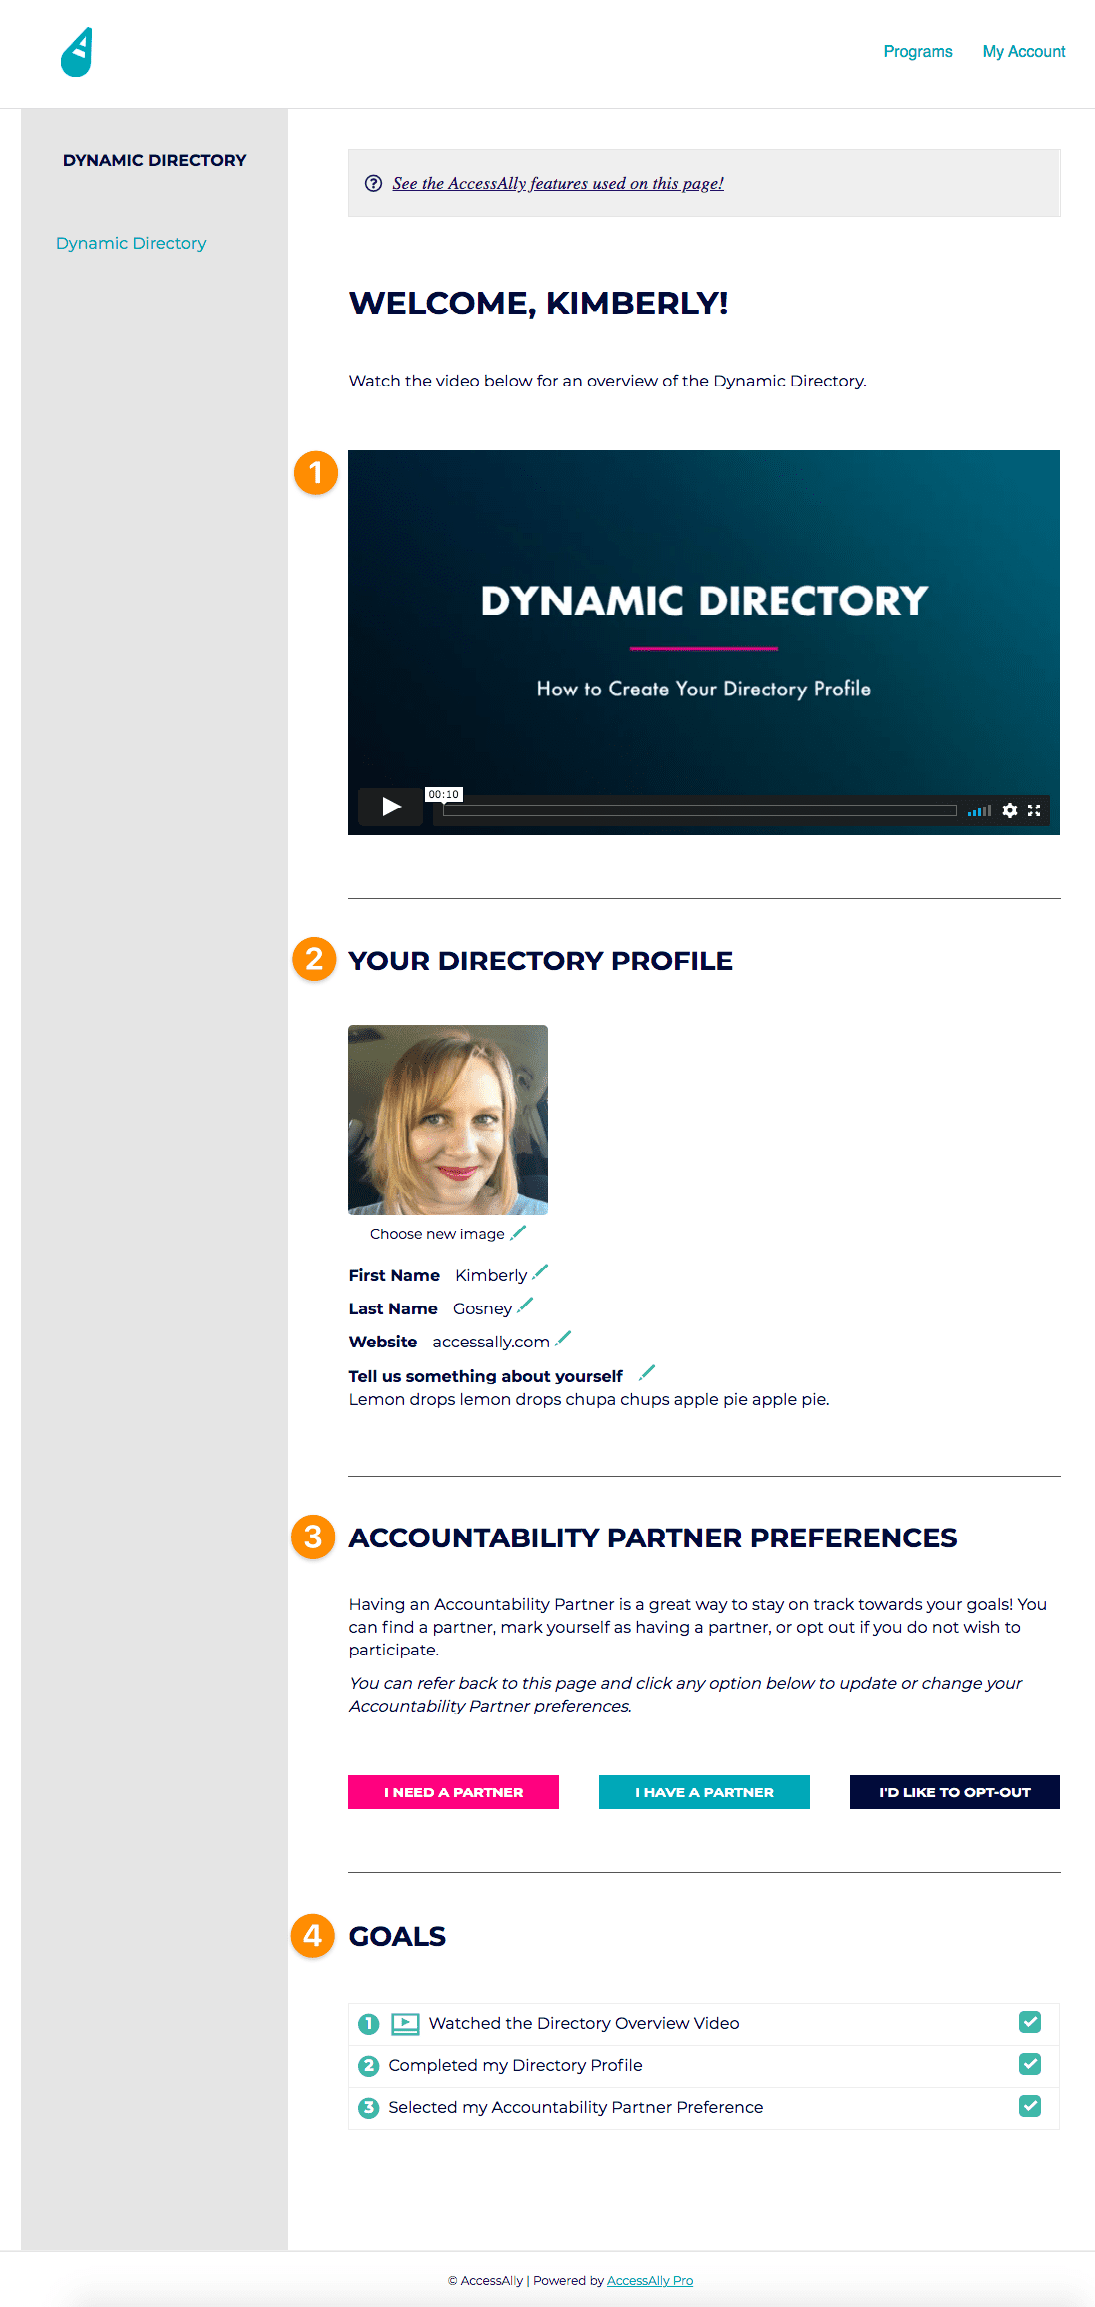
- Welcome Video – share important details about your Accountability Partner Program. You might outline how the program works, how a new member completes the profile, and any guidelines you’d like members to know.
- Member Profile – this is an AccessAlly shortcode that is added to the page. A new member fills out their profile and adds an image.
- Custom Operations – these are clickable buttons that apply a tag(s) to a member. These can be used to display members that are looking for an accountability partner on the directory.
- Objective Checklist – this powerful feature allows goals to be displayed. When the member completes all of the goals on the checklist they are tagged with the tag for the directory page which displays their completed profile!
The Member Welcome Profile Page Setup
Member Welcome Video Display
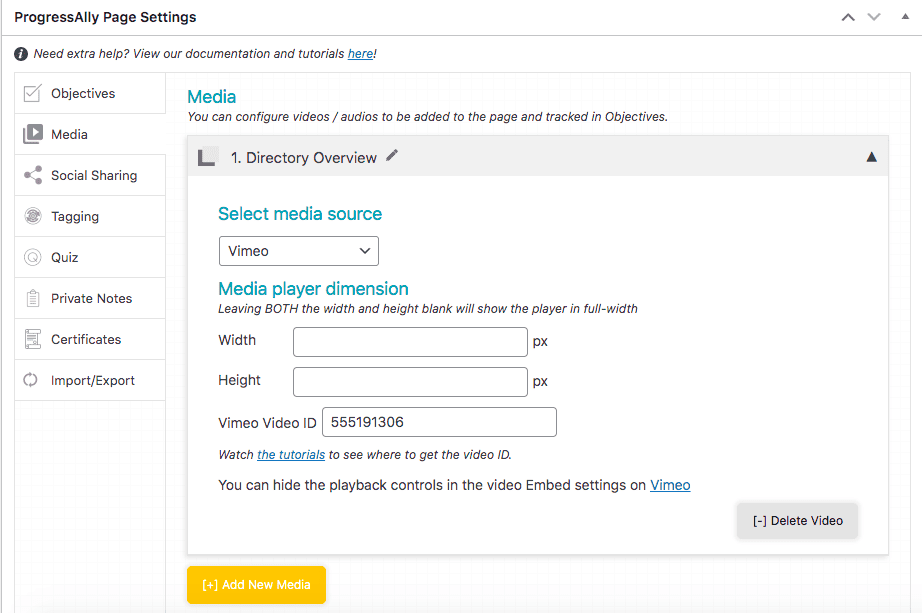
If you’re using AccessAlly Pro you can use the media player to add a welcome video to your profile page.
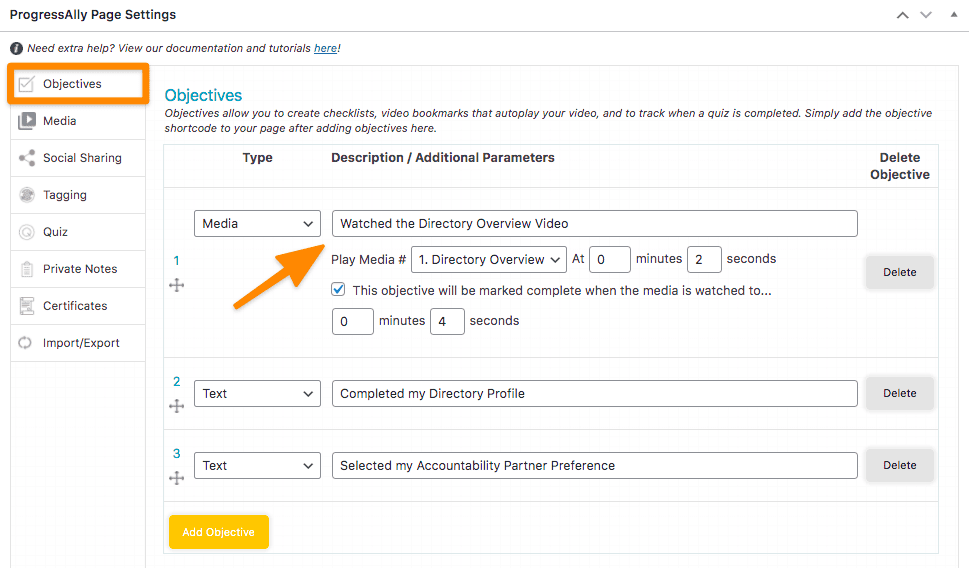
Create an Objectives List
This powerful feature can track when a member watches the video. The objectives list holds goals that you have for your members like completing their profile and selecting their Accountability Partner preferences.
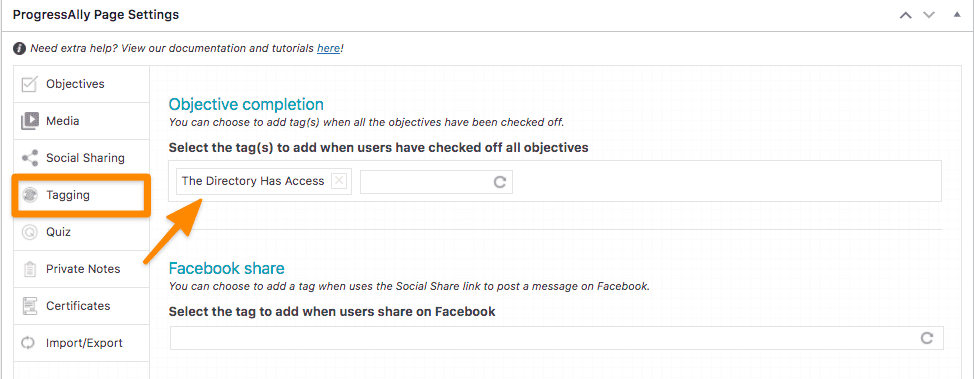
Tagging
After a member completes the items on the checklist, the tagging feature is used to tag the member for access to the directory page. This allows their completed listing to appear on the directory.
Member Profile Shortcode
When you add the Member Profile shortcode to the page your members can complete their profile. You can add this using the AccessAlly shortcode generator.
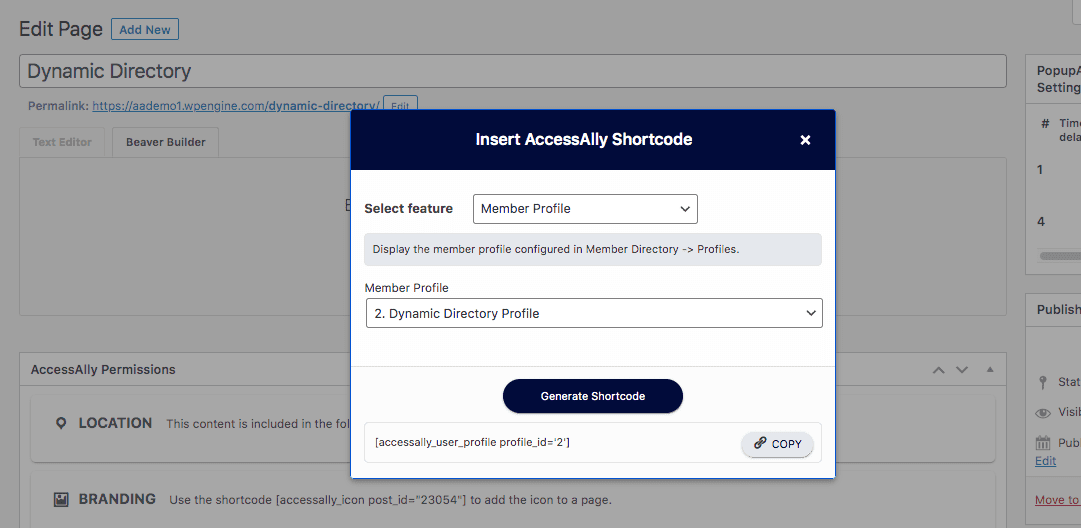
Add Custom Operations for Accountability Preferences
In the example member welcome profile page there are three custom operations in use.
- I need a partner
- I have a partner
- I’d like to opt-out
You’ll need three custom operations if you’d like to mirror this setup.
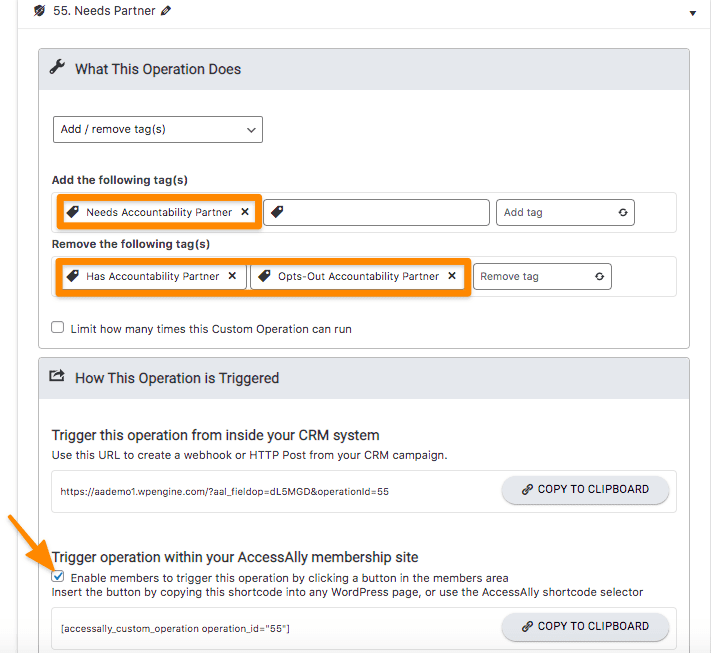
Go to AccessAlly > Settings > Custom Operations and create a new operation. For each different type, you’ll add the tags the user needs and remove the other tags. This way a member has only one of these custom operation tags in use at a time.
Below is the Needs a Partner example that you can use to model yours.
Important! Check the box by trigger this operation from inside your membership site and use the copy to clipboard button to grab the shortcode so you can add it to your Member Welcome Profile page.
Add the Objectives Shortcode
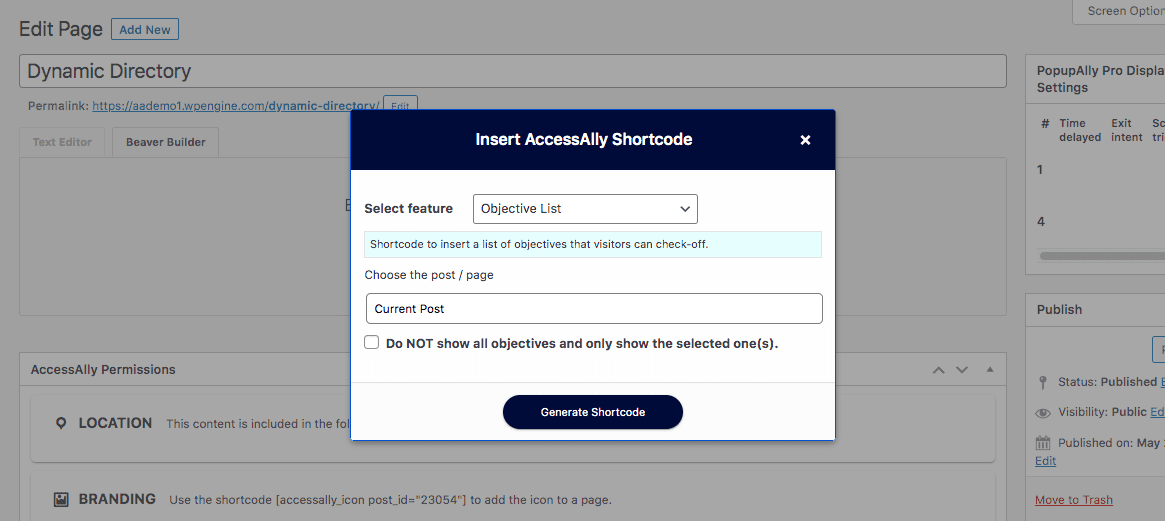
Use the AccessAlly shortcode generator to grab the objectives shortcode and add it to your Welcome Profile page. This will allow you to display your goals checklist section.
2. The Member Directory Page
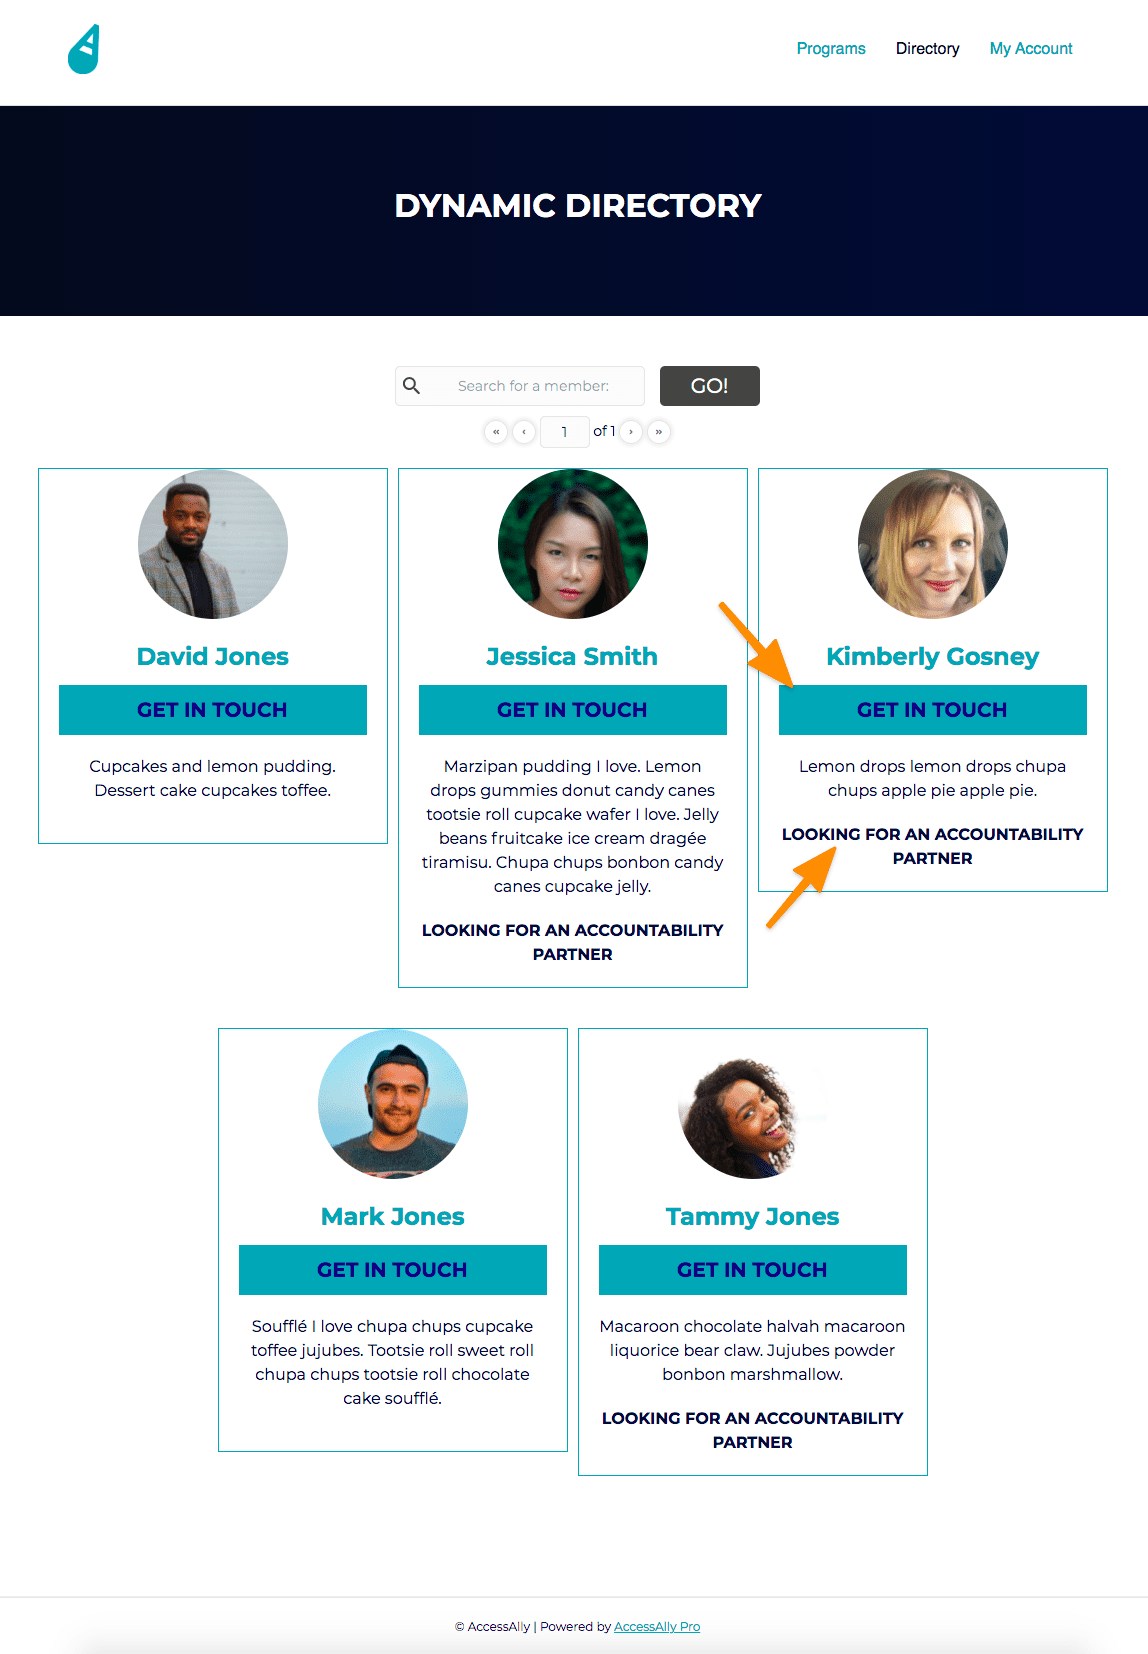
This page uses an AccessAlly Directory shortcode to display all of the members on the directory. You can customize the display using CSS (if desired) and create the options you would like members to have or see listed on the directory.
In the example image below there’s a clickable link and a custom field showing if the member is looking for an accountability partner. Once the member has found an accountability partner the wording is removed from the directory.
Directory Profile Setup
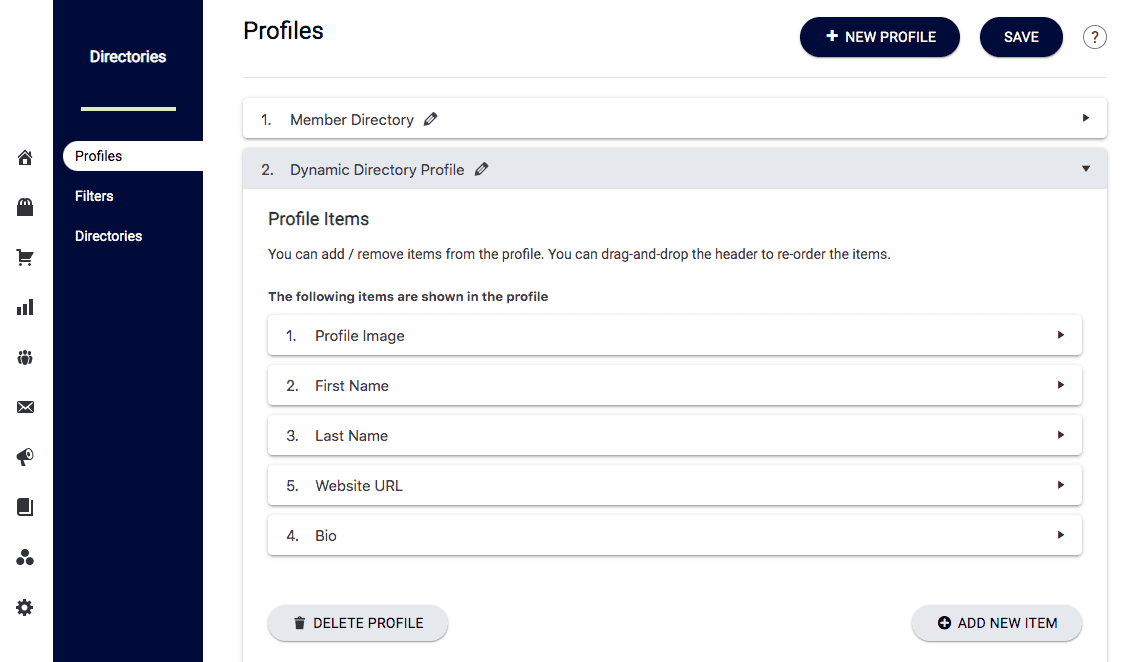
Go to AccessAlly > Directories > Profiles and create a new profile or tweak an existing one. Add items that you would like a member to complete on the profile like their website link and bio.
Directory Filters
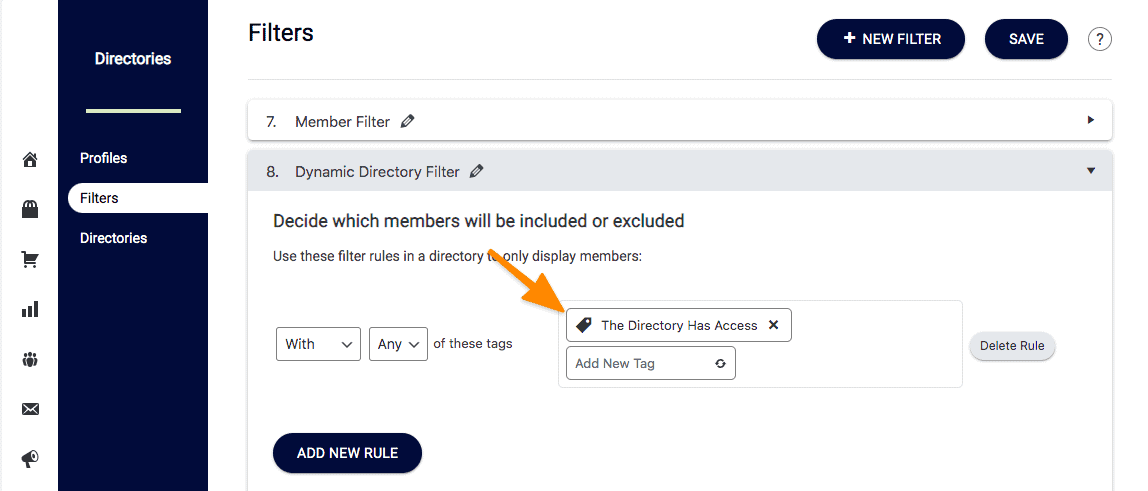
AccessAlly > Directories > Filters create a new filter or tweak an existing one. The most important part of the filter is the tag that is used to display a member on the directory. This tag should be the same tag on your Directory Page and should be different from the tag on the Welcome Profile page.
Directories
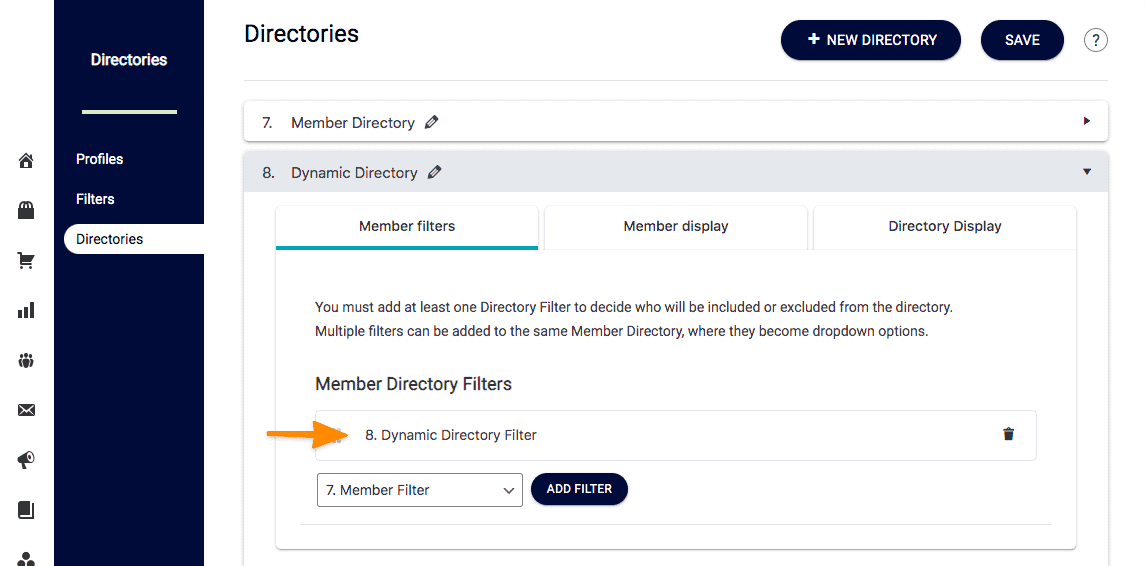
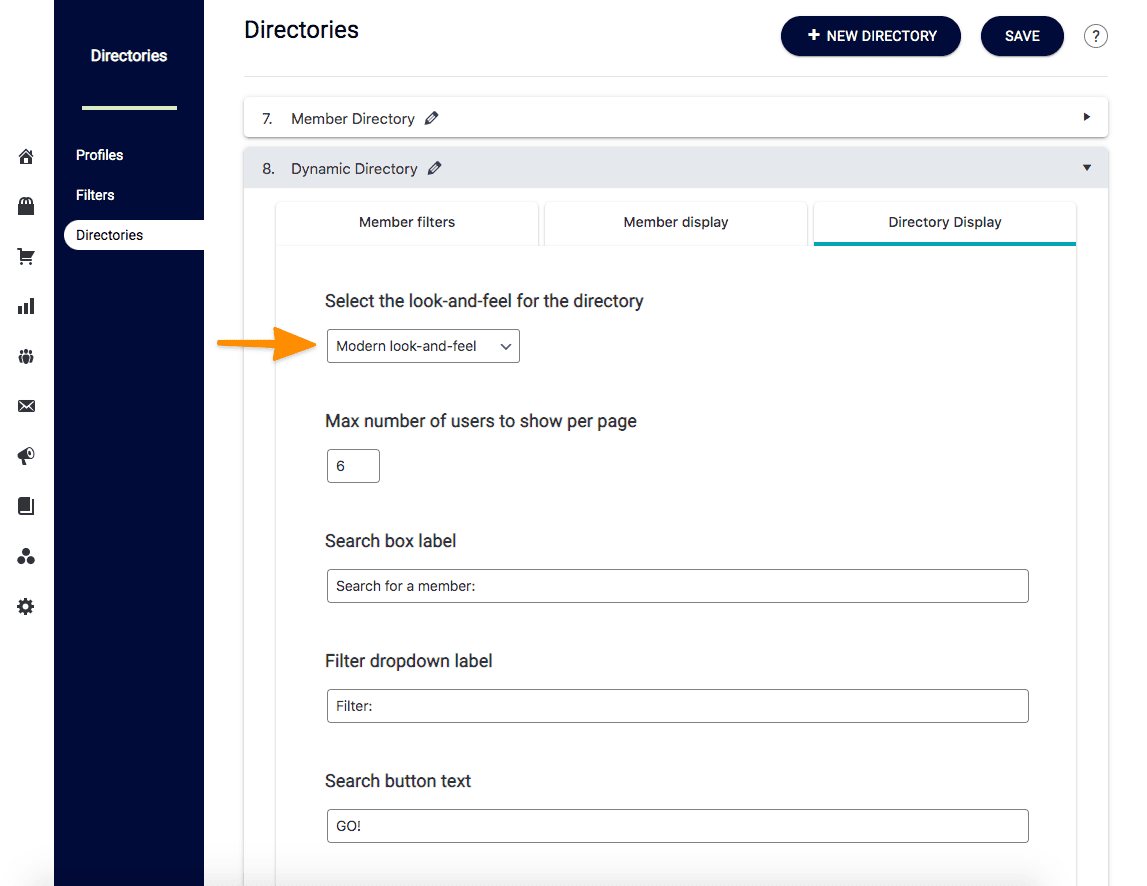
This section has three parts. The Member Filter, Member Display, and Directory Display sections. Screenshots of each are below.
Member Filters
Member Display
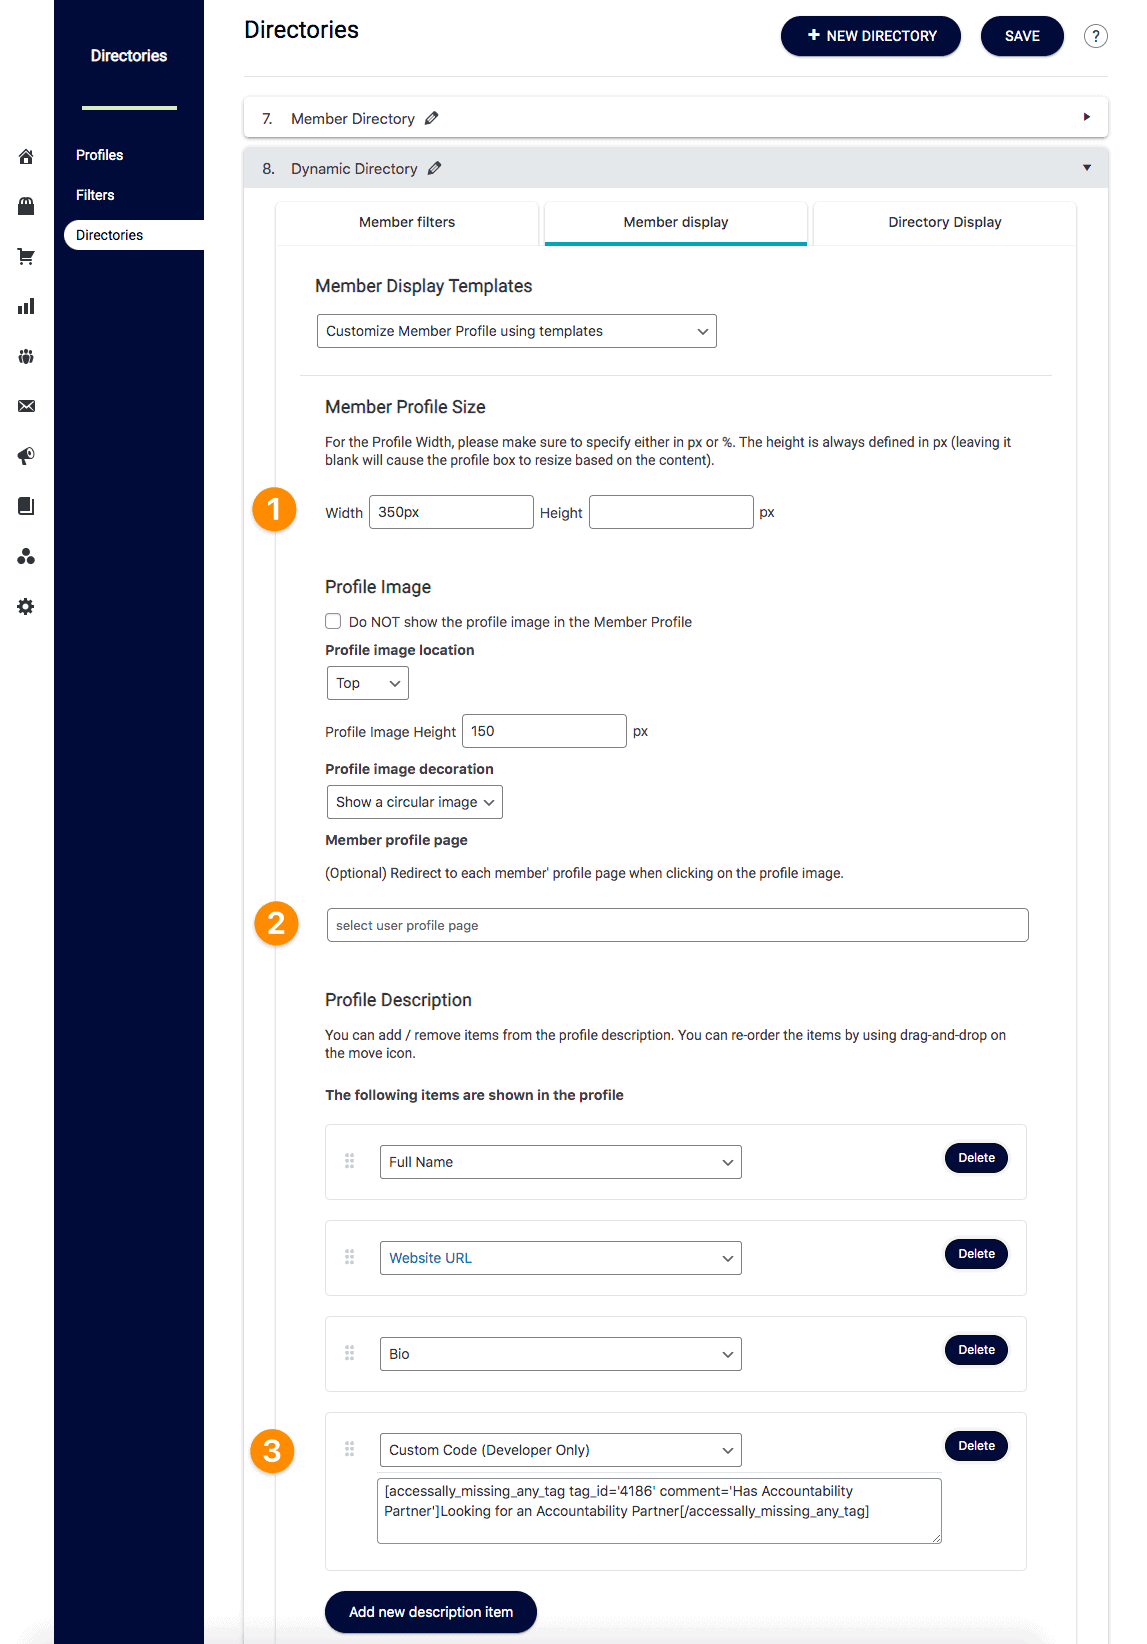
This section is important! Everything in the Member Display is shown to members viewing the directory.
- Member Profile size – if you leave the height blank it will show the full bio. This is helpful because some members will write more than others do.
- Member Profile page – if you leave this blank the user will stay on the directory when viewing a profile.
- Profile Description – add the items you would like members to see. You can add a custom operation to show members with the Need a Partner tag using conditional tagging. The has any tag section of this article will show you how.
Directory Display
Choose the style you’d like for your directory display.
Add the Directory Shortcode to Your Site
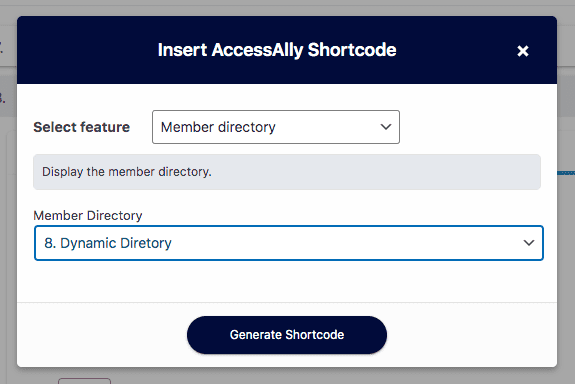
The last step in creating your directory is to go to the page on your site and add the directory shortcode.
3. Optional Pages
You can add additional pages as needed to enhance the member experience. Examples of optional pages might be:
- Accountability Program details page outlining terms and conditions for being in the program
- A Private Notes page to ask members questions about their experience in your Accountability Program, get member feedback, or for capturing member testimonials.
4. Test Your Setup
The easiest way to test the setup is to make a test purchase for the offering that gives access to the Member Directory. A successful test of this setup would show the Welcome Member Profile page, the profile can be filled out, the member can select an Accountability preference, and upon completion of all goals on the page, and they can see the Member Directory with their listing on it.
See our AccessAlly Testing Guide

