When you create a staging site, you duplicate all the existing functionality from the main site. While this makes it a perfect environment to work on development behind the scenes, there is some risk of error involved.
For example, AccessAlly has no way of knowing whether it’s on a “live” site or a “staging” site. It will simply function as directed.
So if AccessAlly is currently collecting subscription payments on the live site, the duplicated version will also collect the same payments, which causes duplicate charges on your client accounts.
You can use the developer tools inside AccessAlly to prevent purchases and subscriptions made through your AccessAlly order forms from being lost or accidentally duplicated.
ARTICLE CONTENT:
Why Do Duplicate Charges Happen With a Staging Site?
When you copy your live site to staging, all of the information is transferred over – including the payment charge info on AccessAlly.
So essentially, there are then TWO copies of the plugin, both with the exact same instructions to collect payments.
This can (and will) result in chaos, unless you tell one of the plugin versions that it is in staging mode – which is possible through the developer tools.
IMPORTANT!
Please note that the instructions in this article are only a small piece of the “staging site” puzzle.
We recommend that you do not make any changes to already-existing products, offers, and subscriptions themselves inside the staging site.
If you do change the products and offers themselves, it may result in chaos when the staging site turns live, since the purchase data may not be able to sync properly with the new information, leading to lost (or duplicate) orders and subscriptions… and very unhappy customers.
How to Prevent Multiple Charges
This tutorial will walk you through the process of migrating new users and ongoing orders from a live site to a staging site, and back to live.
IMPORTANT:
This is not a way to copy one AccessAlly site’s user and order data to a new “blank” AccessAlly installation… because it does not carry over all of the settings, only the payments and users.
This feature is intended for identical copies of an AccessAlly site, with minor edits like to your theme or content – not to products.
Setup BEFORE Creating a Staging Site
1. Specify which URL belongs to the “Live” site
You can find the settings mentioned in this article by going to: AccessAlly > Settings > Migration Tools
This first option inside the AccessAlly Migration tools will ensure that your AccessAlly plugin will only charge auto subscription payments if the site URL it’s installed on matches the URL you specify in the settings.
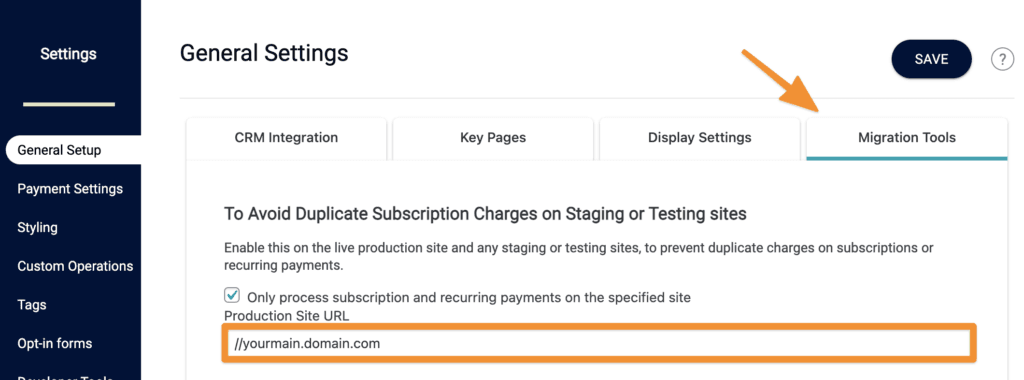
It is recommended that you enable this box on any site that AccessAlly is installed on. This can prevent errors further down the road.
The Production Site URL should be the URL to your live membership site built with AccessAlly.
Please note that it is advised to type in the URL without the http: or https:, so a site with a URL of https://membership.yoursite.com would be typed in as: //membership.yoursite.com.
2. Create a Backup of Your Main Site
As always, please create a backup of your main site, in case something goes awry.
3. Create Your staging site
At this point, you can create your staging site by copying your production site. You can now make changes on your staging site.
Please keep in mind that your production site may still be getting new customers and sales, while your staging site is getting updated. We’ll cover how to make sure we don’t lose any of these new members or orders in the next section.
How to Safely Make Your Staging Site Live
When first created, a staging or testing site is an exact clone of the “live site”. However, when made live, the staging site will overwrite all the information on your original live site.
This means that any new information that came into your live site during the staging process (like new orders or subscriptions) will be overwritten by the “outdated” information inside your staging site.
To help you keep your membership site open for business throughout the staging development process, AccessAlly includes a feature that allows you to transfer all of the most up-to-date e-commerce information to the new live version of your membership site.
When your membership staging site is ready to be deployed and replace the “production” version, please follow these steps to ensure that your sales and subscriptions are not lost or accidentally duplicated.
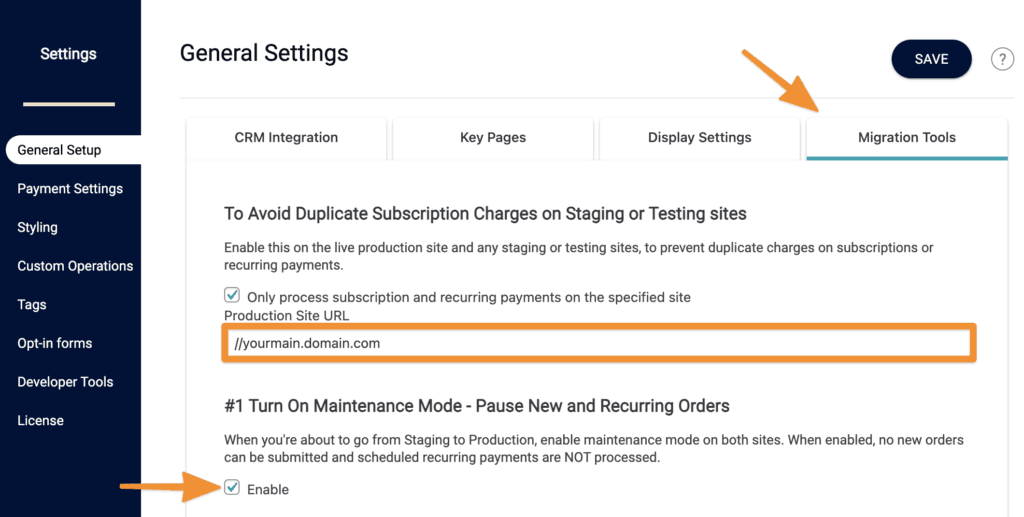
1. Turn on Maintenance Mode In BOTH Sites
Before making your staging site live, maintenance mode MUST be turned on in the “live” site AND the “staging” site. This will prevent any orders from being accepted during the transition on either site.
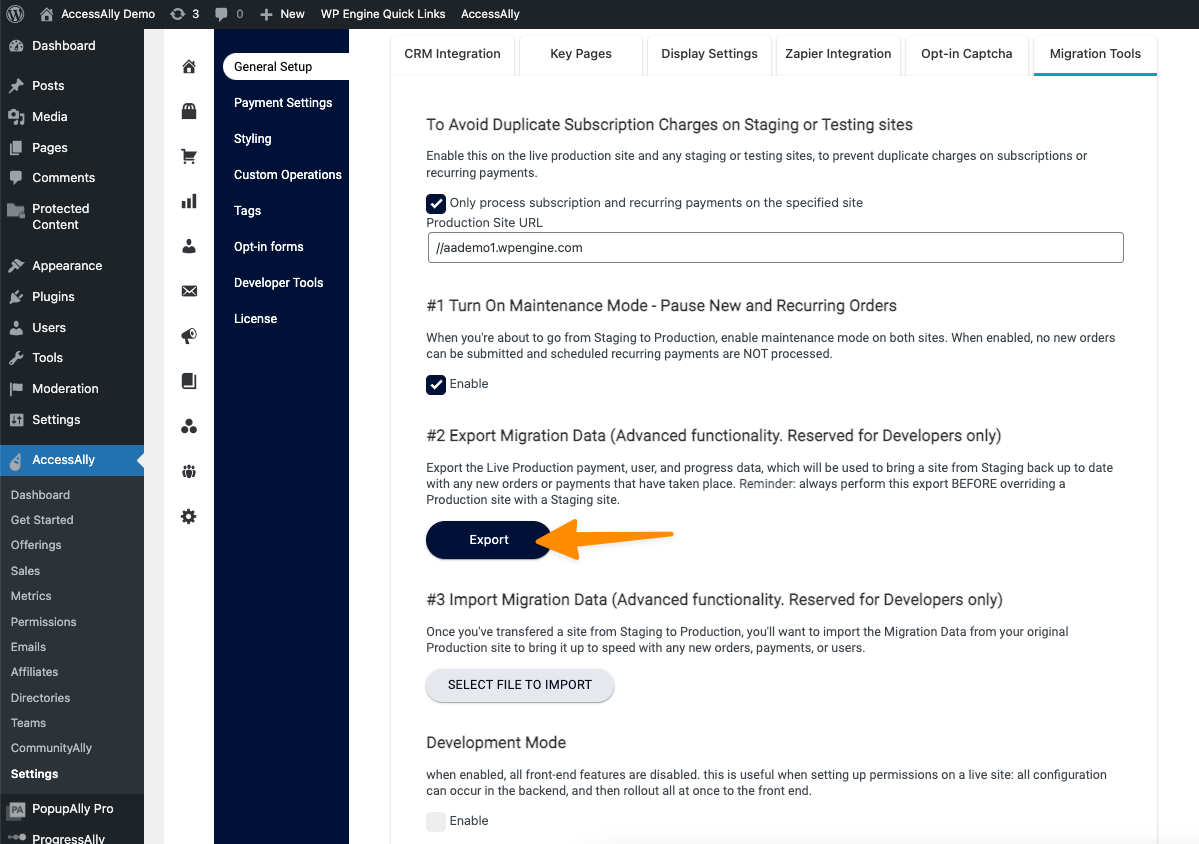
2. Export Migration Data
On the LIVE site, click on the “export migration data” button. This will create a snapshot of all orders and subscriptions that have been purchased on your membership site. If you are using AccessAlly Pro it will also create a backup of all progress based data for your users.
IMPORTANT: This setting ONLY pertains to the progress information, orders, and subscriptions purchased through AccessAlly. It will NOT export any products, offers, or subscription settings.
3. Create (another) backup of live site
Now please create a backup of your production site at this point. This will only be used in case of issues.
4. Deploy your staging site
At this point, you may deploy your staging site to production.
Once the transition is complete and you have tested to make sure everything is working properly, you may choose to continue the steps to begin taking orders again.
5. Import Migration Data
With the staging site now active as your “live” membership site, you can click on the “import” option to important the purchase history saved in Step 2.
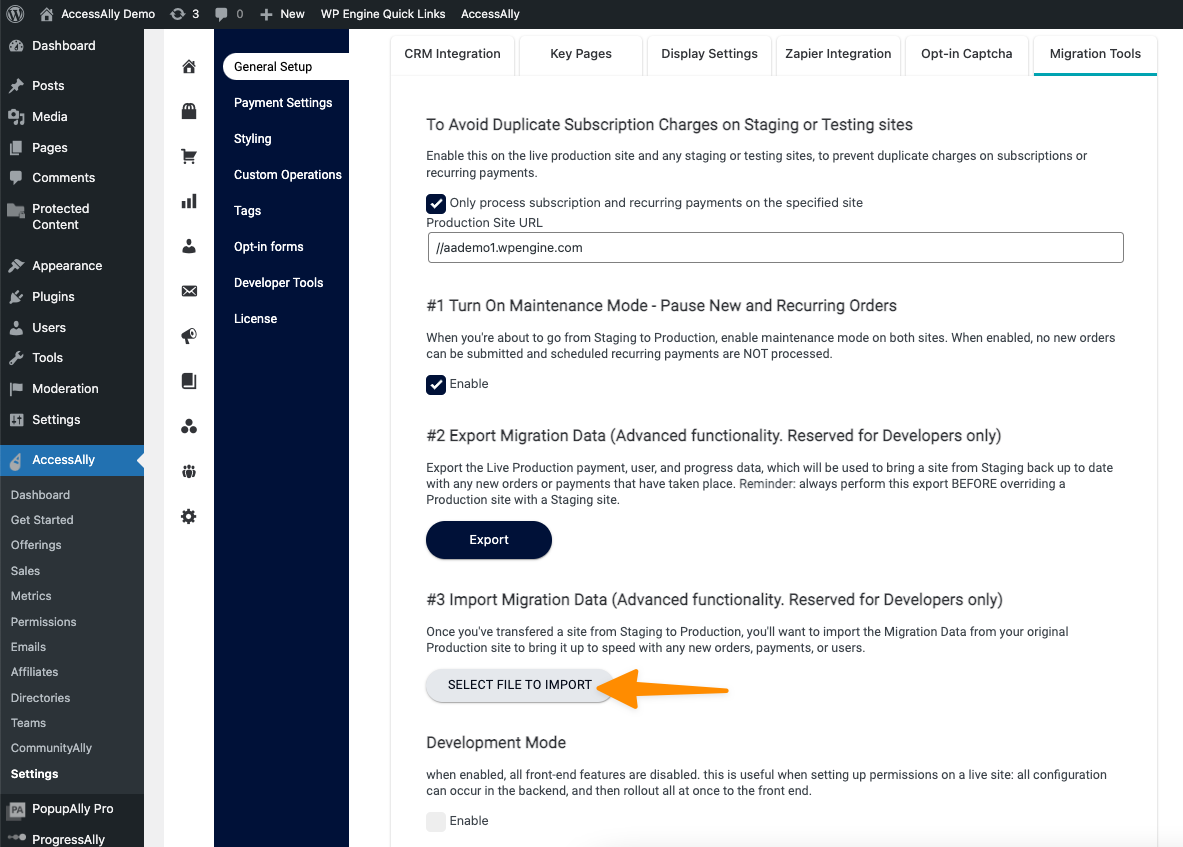
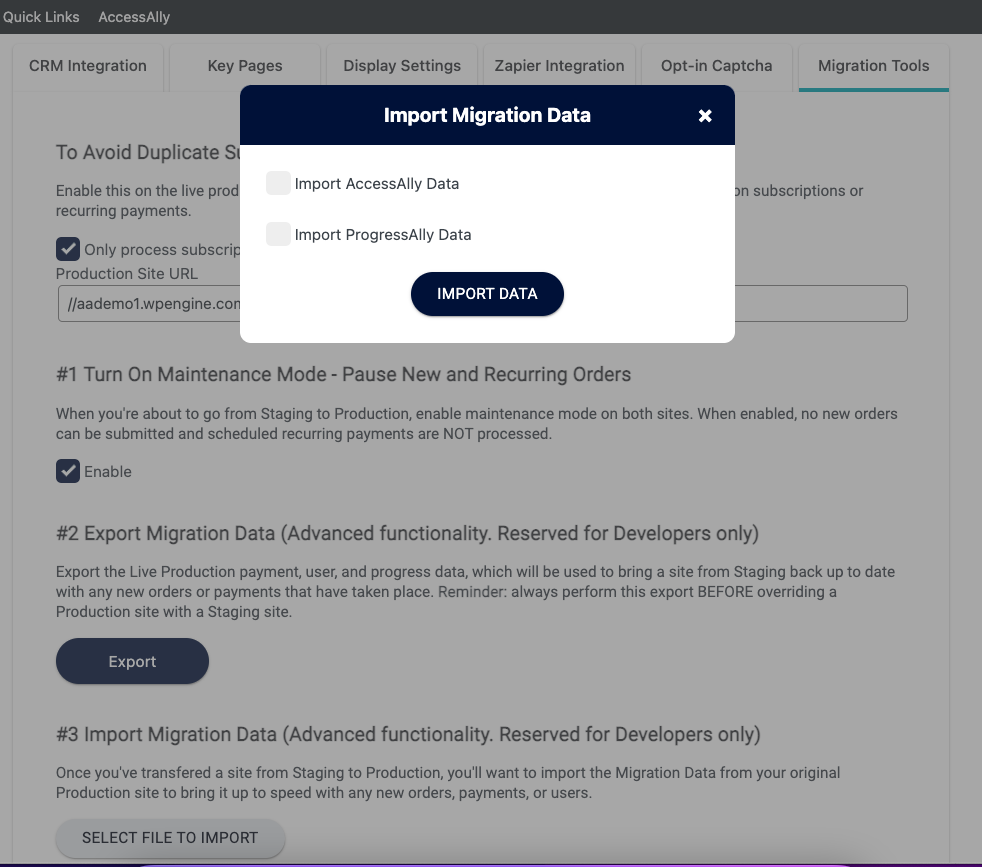
You will see the following options:
- Import AccessAlly Data – includes the purchase history on your AccessAlly site
- Import ProgressAlly Data – progress information for your members
Check mark each option that you would like to import and click the Import Data button.
Once again, please note that this data ONLY includes progress data for your members and purchase history on your AccessAlly site. All products, offers, and subscriptions must be identical to their previous settings in order for this data to sync properly inside your “new” membership site.
If you have any questions about this process, please reach out to AccessAlly support before beginning work on your staging site.
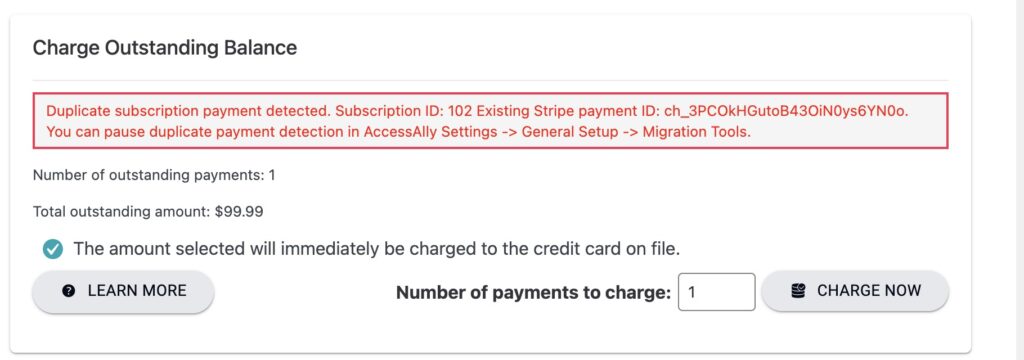
Double-Charging Prevention
This feature is designed to protect your live and staging sites from making double-charges if the live site has not been specified as the one taking payments on both your live and staging sites.
An error message will appear when a duplicate charge is detected. You will also receive an email notification. The charge will not be made when this error message appears.
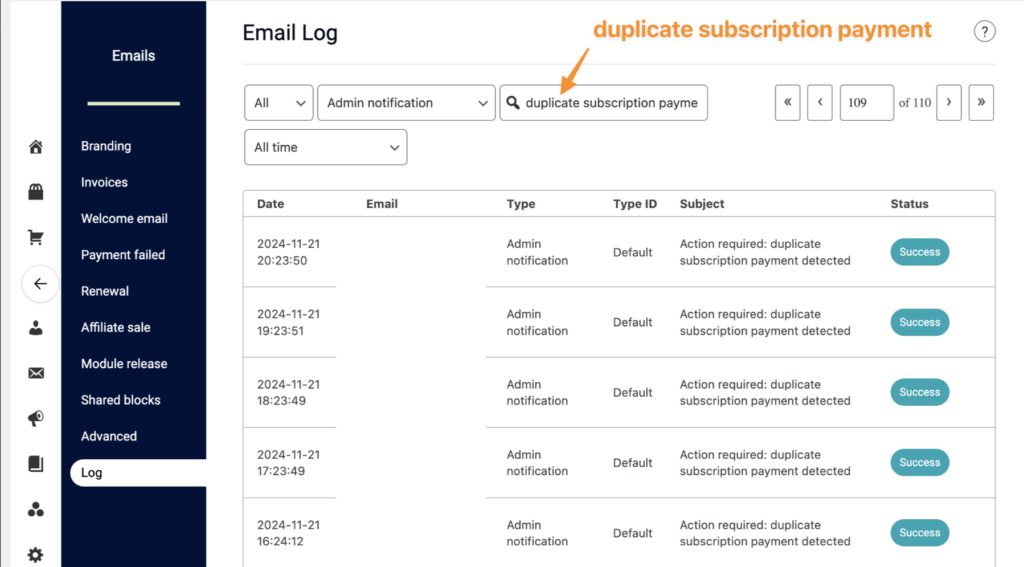
How to Find Duplicate Subscription Payments
You can see a log of all duplicate payments by going to AccessAlly > Emails > Log > Search for duplicate subscription payment.