In this article we’ll explore delivering a paid workshop with AccessAlly. Our scenario articles show everything needed from start to finish and are designed to help you see what’s possible with AccessAlly.
You can watch the workshop and make tweaks or changes to fit your needs!
Version needed: AccessAlly Pro or CommunityAlly
ARTICLE CONTENT:
Scenario Overview
You would like to deliver a one-time live workshop and host the replay after. The live workshop can be held in your favorite tool like Zoom or Whereby.
You’d like to create a seamless experience pre and post live workshop!
Step 1: Start from Scratch Offering Template
If you’re new to this template style it is covered in our AccessAlly 101 training in the Offerings Module.
Here is the flow for each tab within this offering template.
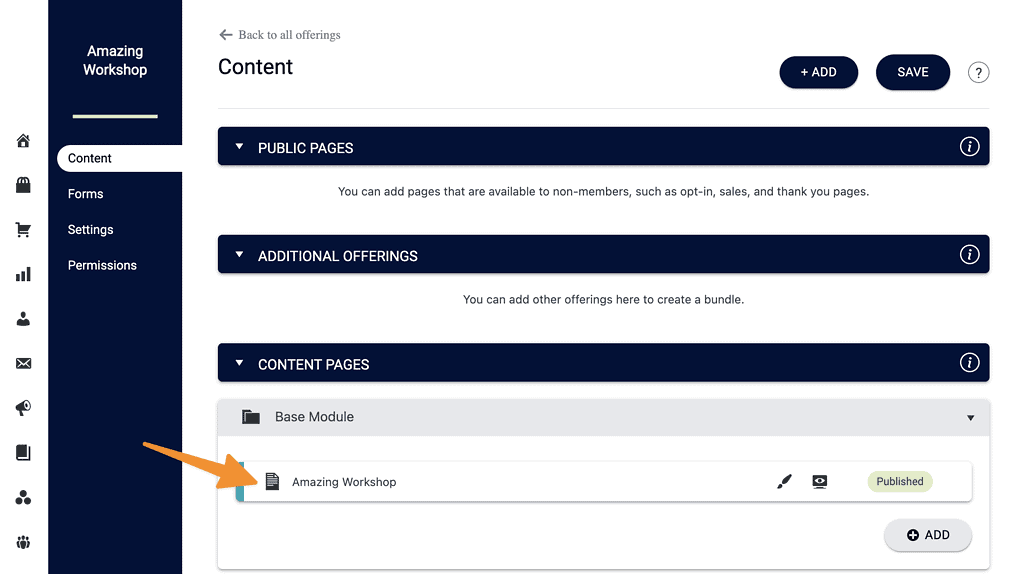
Content Tab
A single base page to hold both the pre-live event info and post-live event replay.
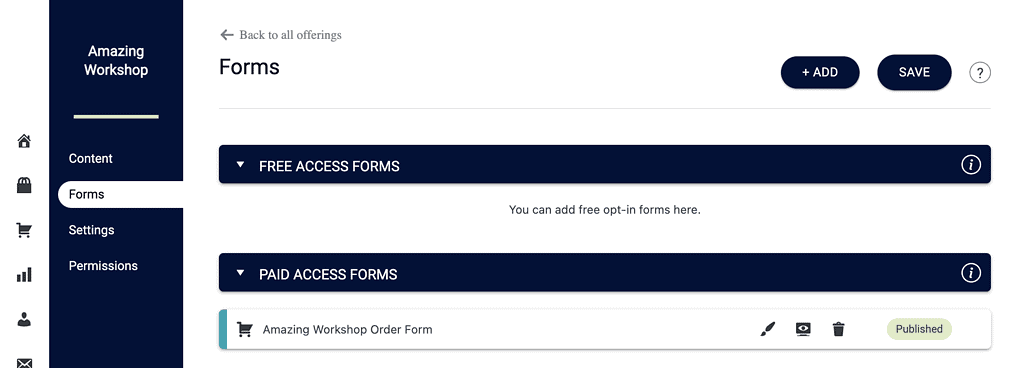
Forms Tab
One paid order form set to the price of your workshop.
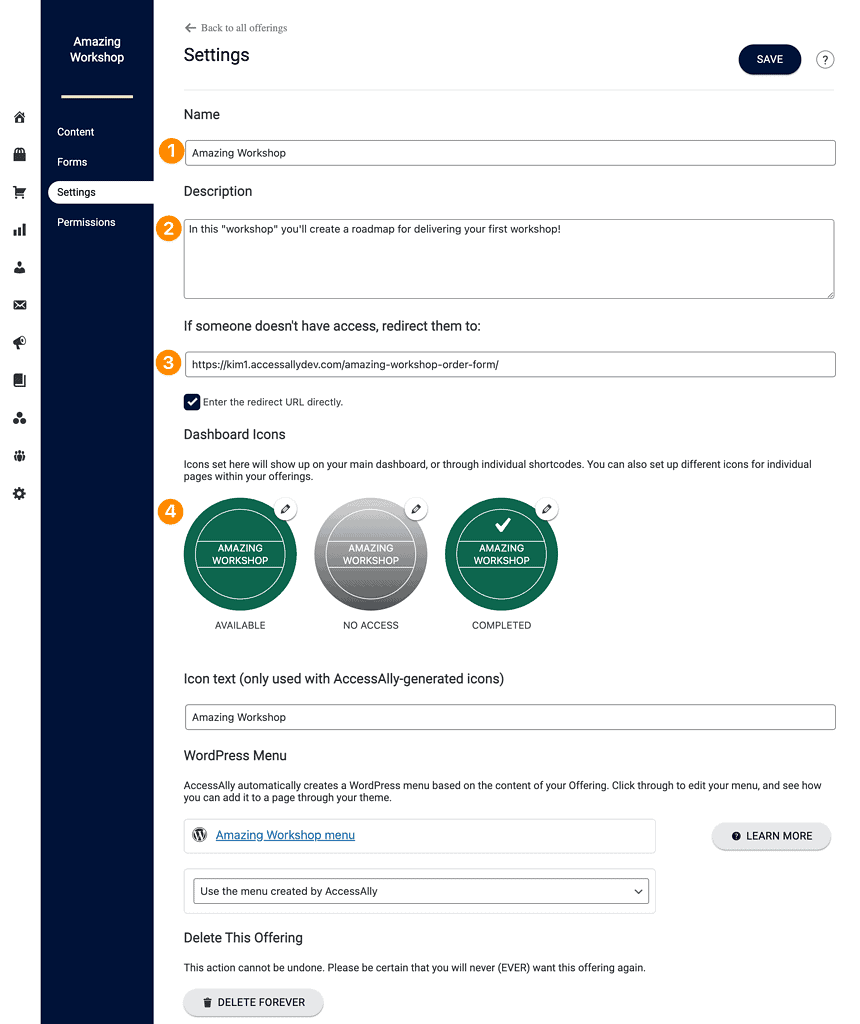
Settings Tab
- Workshop name (customer will see this on order form)
- Description – additional details about your workshop
- Redirect – link to a sales page or your AccessAlly order form for workshop
- Workshop Icons – use AccessAlly generated ones or add your own images!
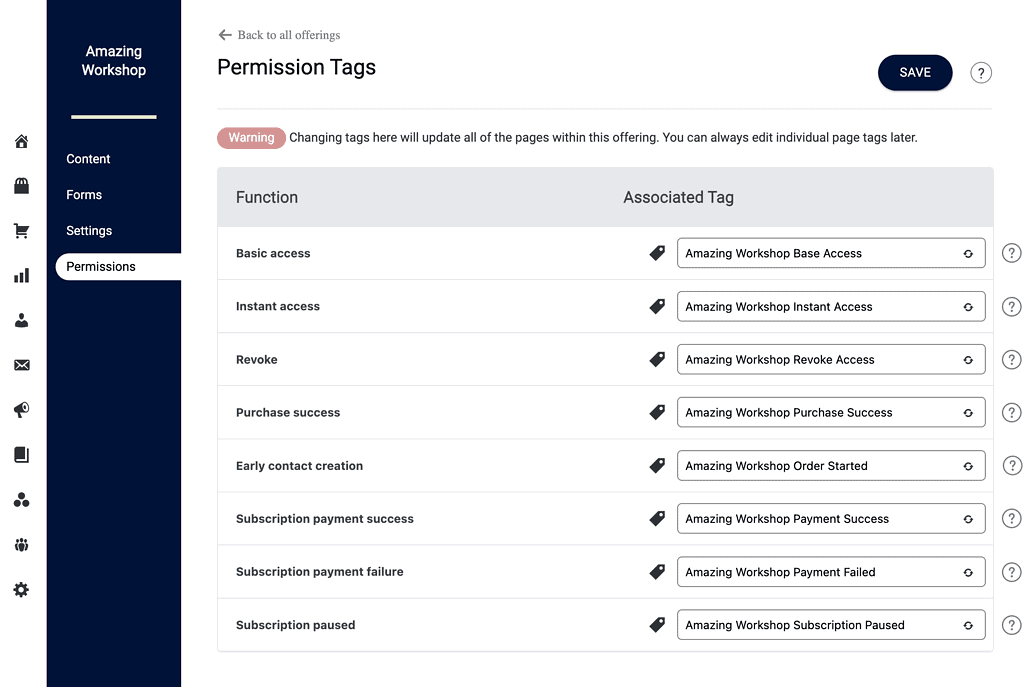
Permissions Tab
Shows the default tags used for this workshop. You can click the “?” to find out more about each tag.
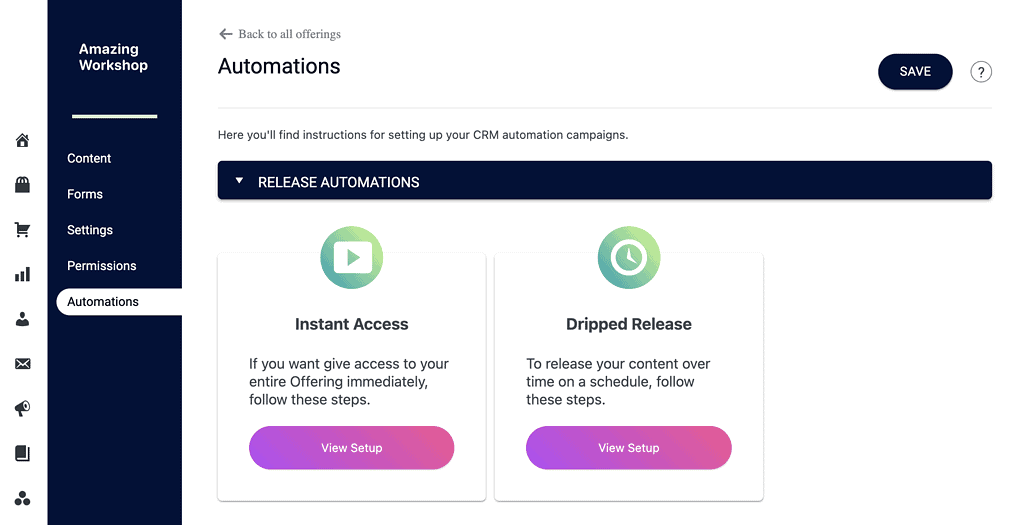
Automations Tab
* If your AccessAlly site is integrated with ActiveCampaign, Kit, Drip, Keap, or Ontraport this tab shows you how to set up CRM automations to deliver your paid workshop.
This article works without using CRM automations if you’d like to keep everything in AccessAlly.
Step 2: Add Identification Tags
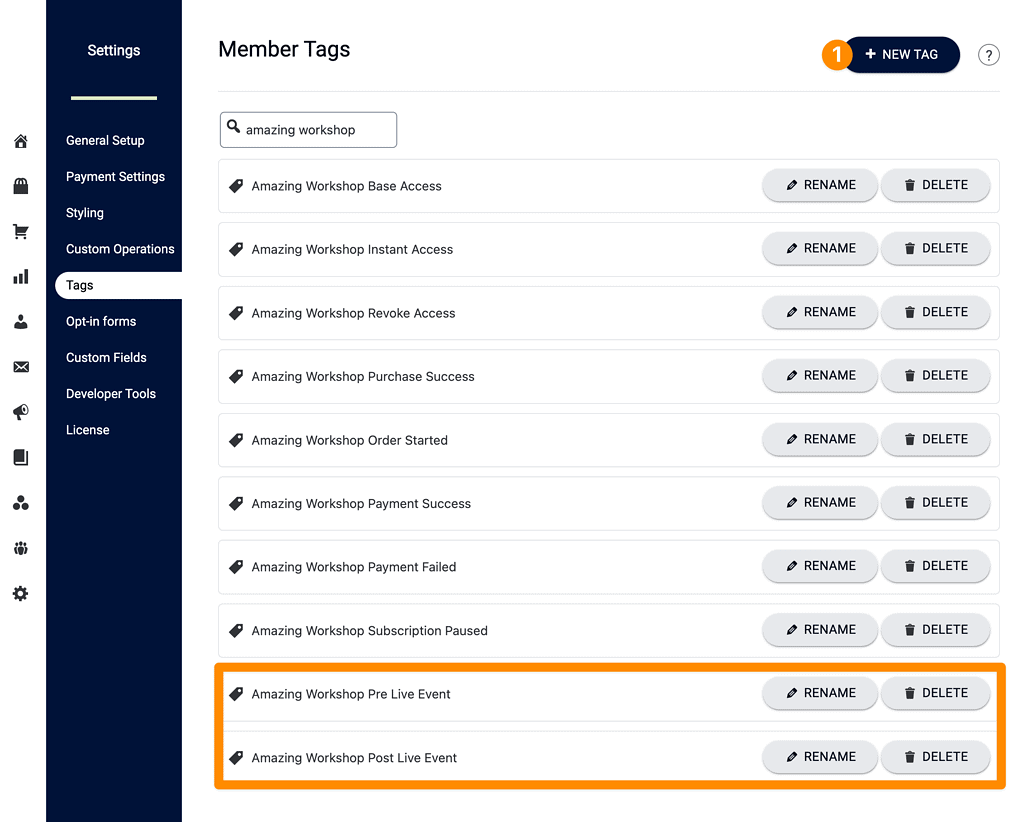
Identification tags are used to help you identify members within an offering, but they fall outside of the default tags created in the Permissions Tab.
To create these tags go to AccessAlly > Settings > Tags to add two tags. These tags will identify members that are in the pre-live event and post-live event stages for your workshop.
Step 3: Add Custom Operation
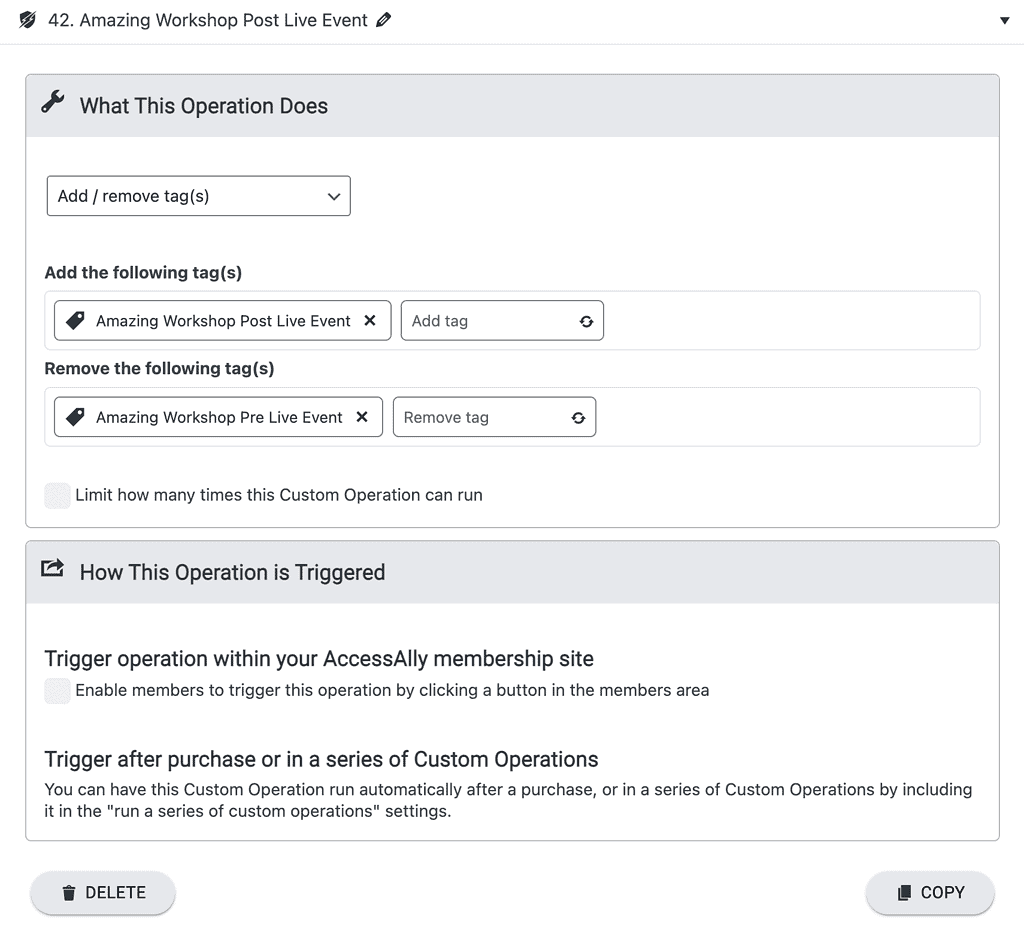
This step allows you to change identification tags once your workshop replay is ready.
Go to AccessAlly > Settings > Custom Operations and add a new custom operation. The settings for this are shown below.
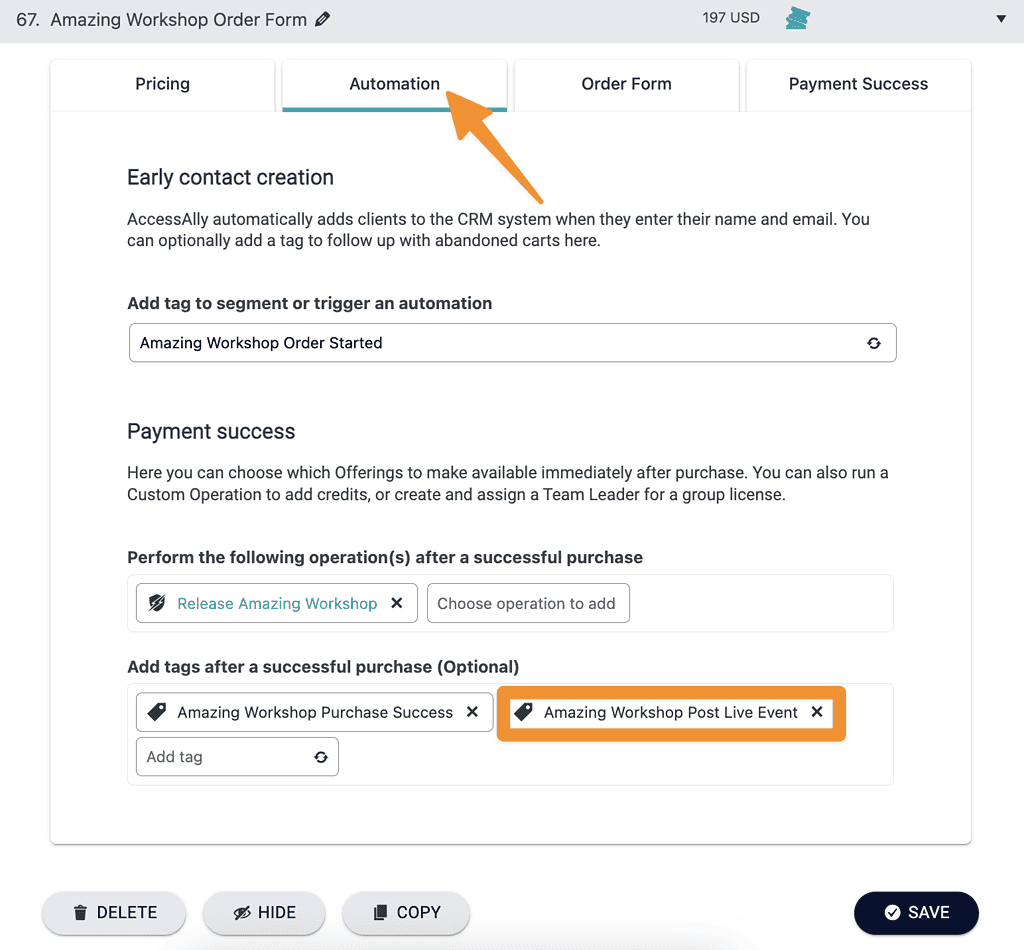
Step 4: Adjust Order Form
In this step you’ll view the order form setup for your workshop. Go to AccessAlly > Sales > Order Form Setup and open your workshop order form.
Pricing tab (not shown) – if you would like to change the price of the workshop
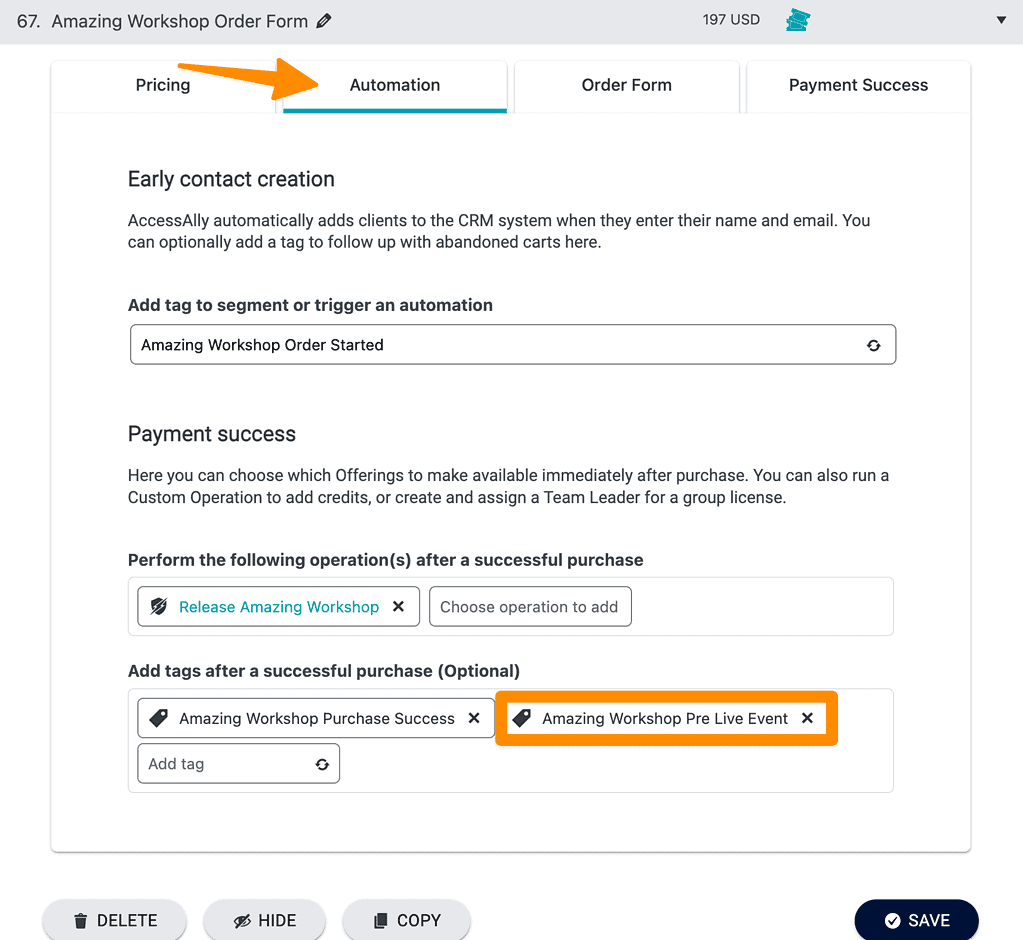
Automation tab (shown below) – add your pre live event tag this step is important!!
Order Form tab (not shown) – default settings were used
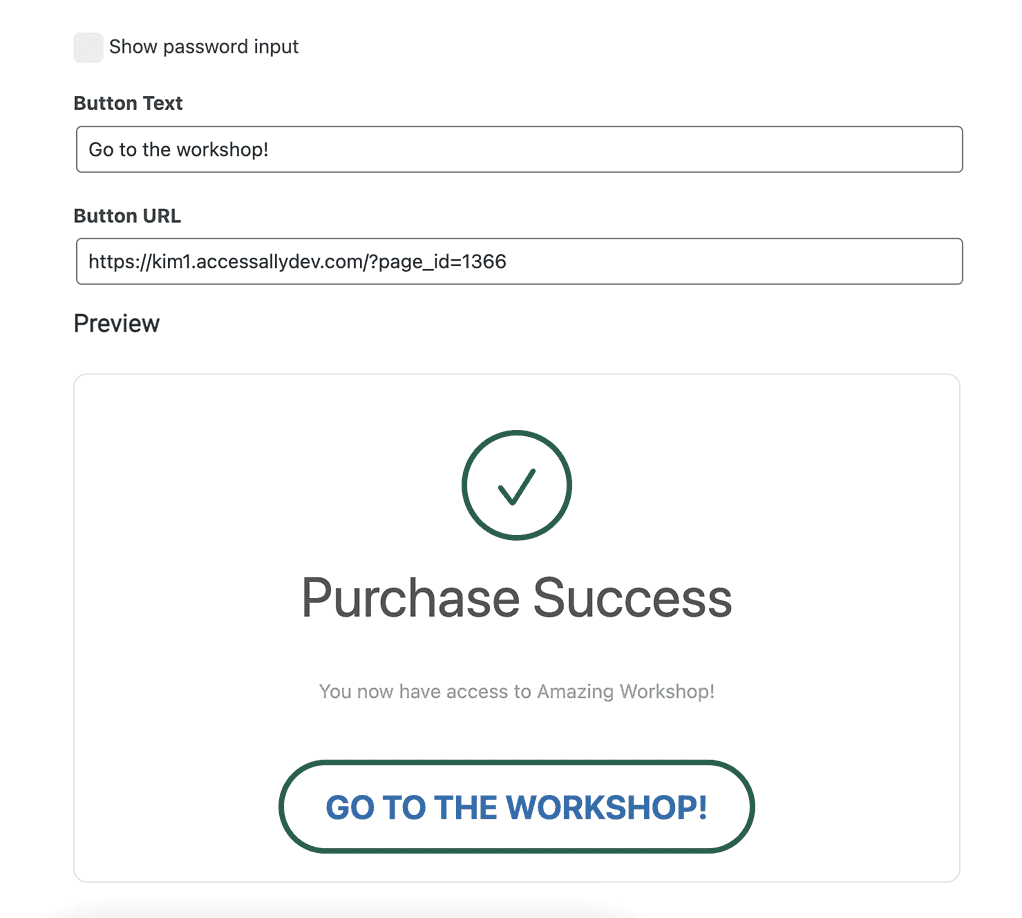
Payment Success tab (shown below) – templated success message taking participant to the workshop base page.
Step 5: Workshop Base Page
Now it’s time to create your workshop page. You can build this page any way you like using your WordPress theme and page builder.
It’s easier to add the progress based items first so they’ll be available to add to the page content later!! So we’re starting at the bottom and building up.
ProgressAlly Settings
In this section we’ll cover the ProgressAlly items used for the workshop page.
Media Tab
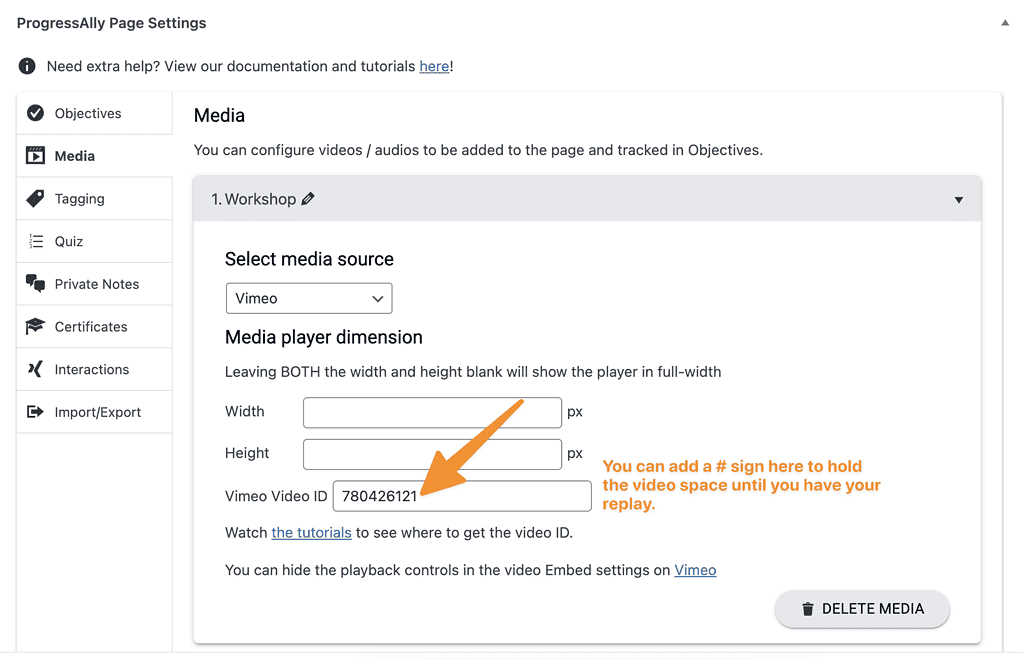
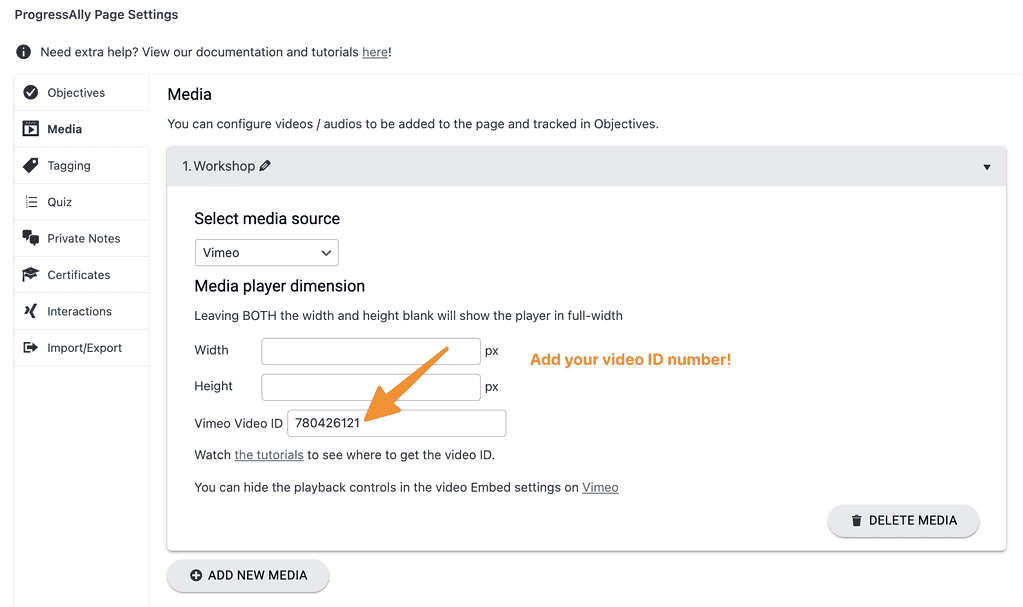
Used the ProgressAlly media tab to hold the replay video. You can build this section before your live event and use a # to hold the replay spot and add the real video ID number after your workshop.
ProgressAlly Private Notes Tab
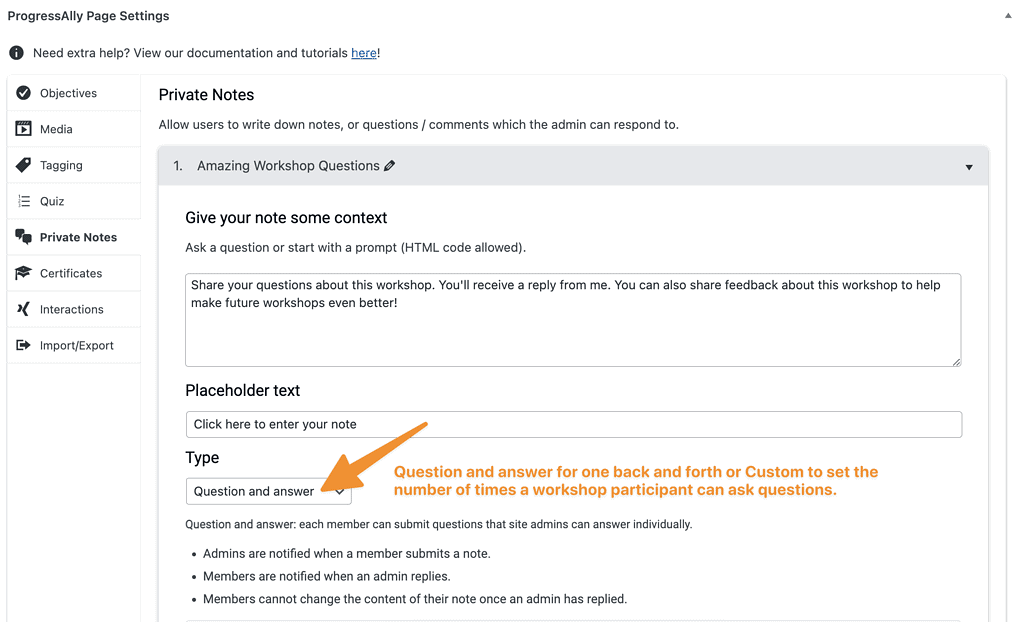
If you would like workshop participants to ask questions if watching the replay or to gather feedback about the workshop. Add a private note!
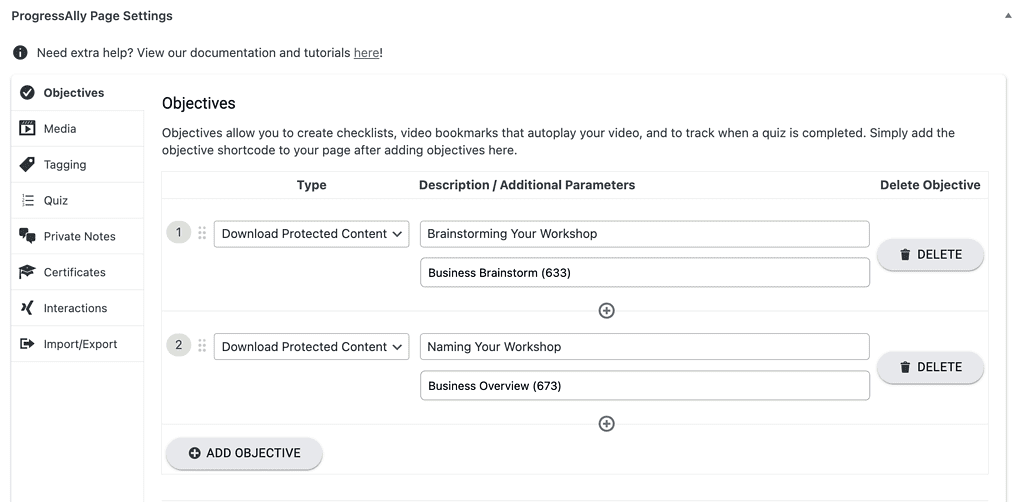
ProgressAlly Objectives
If you have PDFs or other checklist items you’d like to include in your workshop you can add them here. The protected content feature is great for your workshop downloads!
Workshop Content Pre Event
Admin tags!
This part is very important. If you want to “see” the pre and post event sections while building them you will need to add the Pre and Post tags to your admin user in the Users tab > AccessAlly Tab. Without the tags these sections will appear blank on your WordPress page.
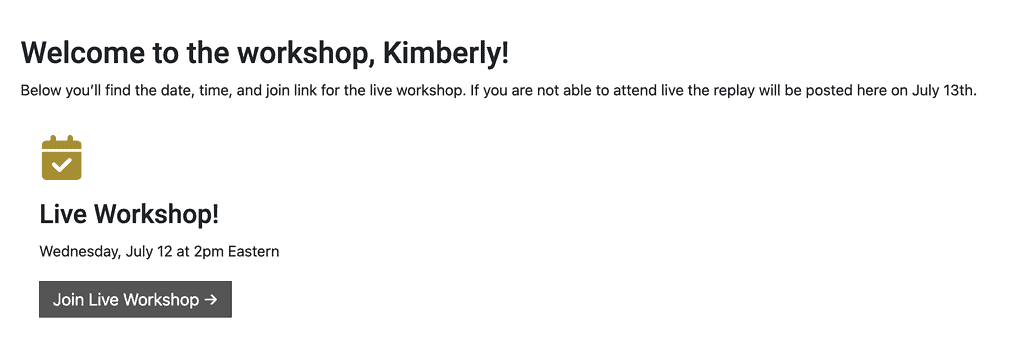
We’ll start with the first section your Pre Live Event section. This holds the details about when the live event will take place and uses the Pre Live Event Identification tag you created in Step 2 of this workshop.
What your participant sees in this section
- Welcome message
- Workshop details
- Date, time, and link to join live workshop
AccessAlly Shortcode Generator
Create a shortcode to use for the pre event info.
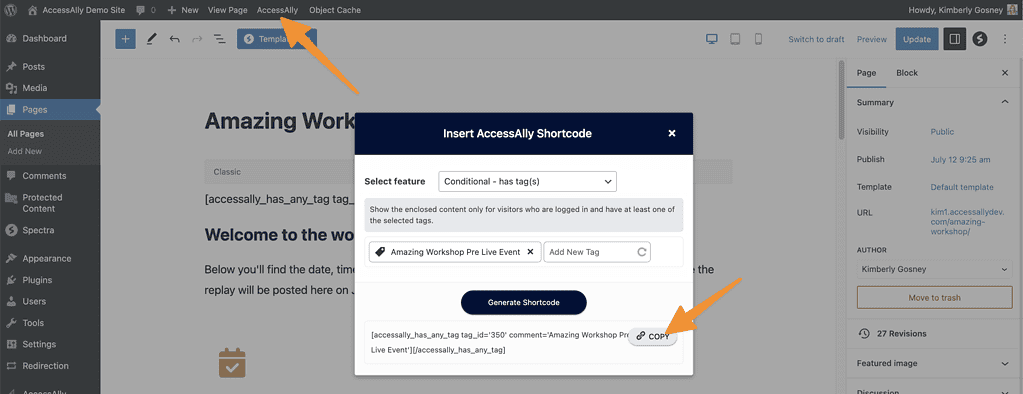
The shortcode will be split into two different parts. You will use WordPress to build this section.
[accessally_has_any_tag tag_id='350' comment='Amazing Workshop Pre Live Event']
Your welcome message, date, time, and link to join go here in the middle.
[/accessally_has_any_tag]
Workshop Content Post Event
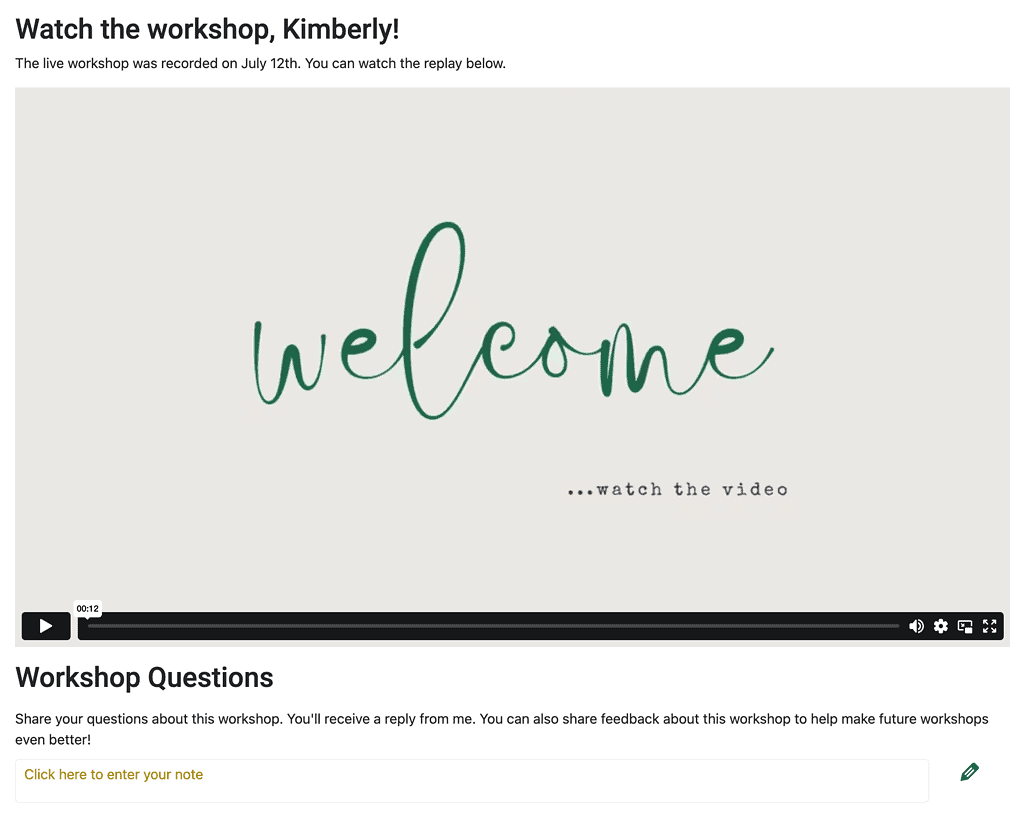
This section holds your replay and the private note box for questions.
AccessAlly Shortcode Generator
Create a shortcode to use for the post event info.
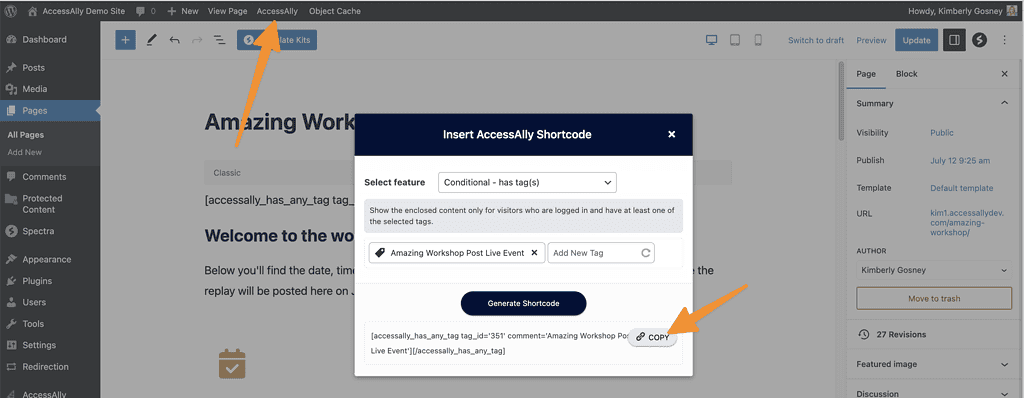
The shortcode will be split into two different parts. You will use WordPress to build this section.
[accessally_has_any_tag tag_id='351' comment='Amazing Workshop Post Live Event']
Add your replay welcome, media shortcode for ProgressAlly video, and Private Note shortcode to this section.
[/accessally_has_any_tag]
Workshop Objective Checklist
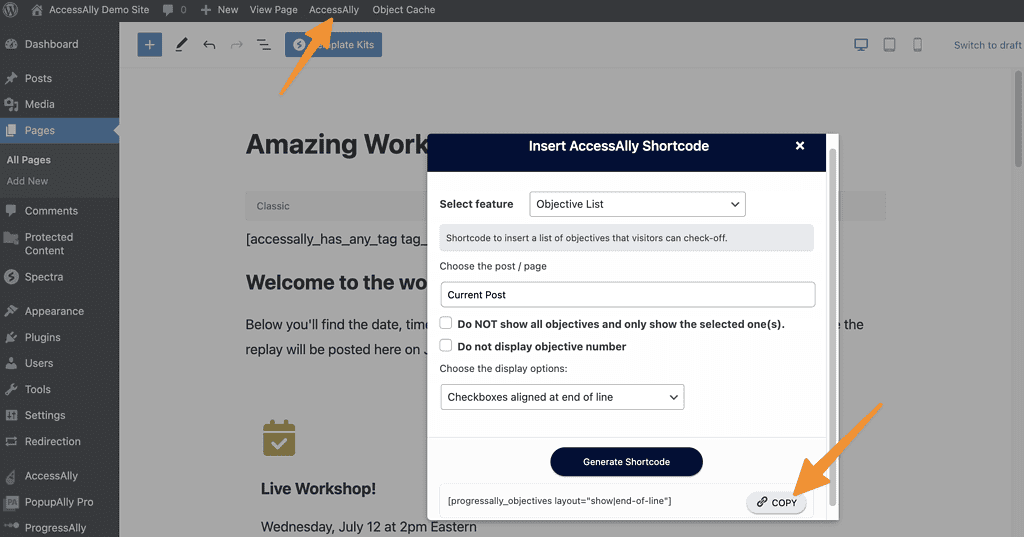
In this section you’ll add the ProgressAlly Objective list so that both pre and post event participants can see these items!

You can use the AccessAlly Shortcode Generator to get the shortcode for this list.
Step 6: AccessAlly Welcome Email
Review your settings under AccessAlly > Emails to ensure you have a welcome email set to deliver for the workshop.
Visit the AccessAlly Emails Guide to see how.
Step 7: Test Purchase
Make a test purchase of your workshop to ensure that your participants can get into the workshop and see the pre event details.
Step 8: Promote and Sell Your Workshop
This is the fun part! Promote and sell your workshop. You can even create a sales page to share all the workshop details if you like.
Step 9: Live Workshop Day
Have fun and enjoy your live workshop!
Step 10: Upload Workshop Replay
After holding your live workshop add the replay to your video hosting company. Change the video ID number for your video on the base page to ensure the replay is visible.
Step 11: AccessAlly Members Tab
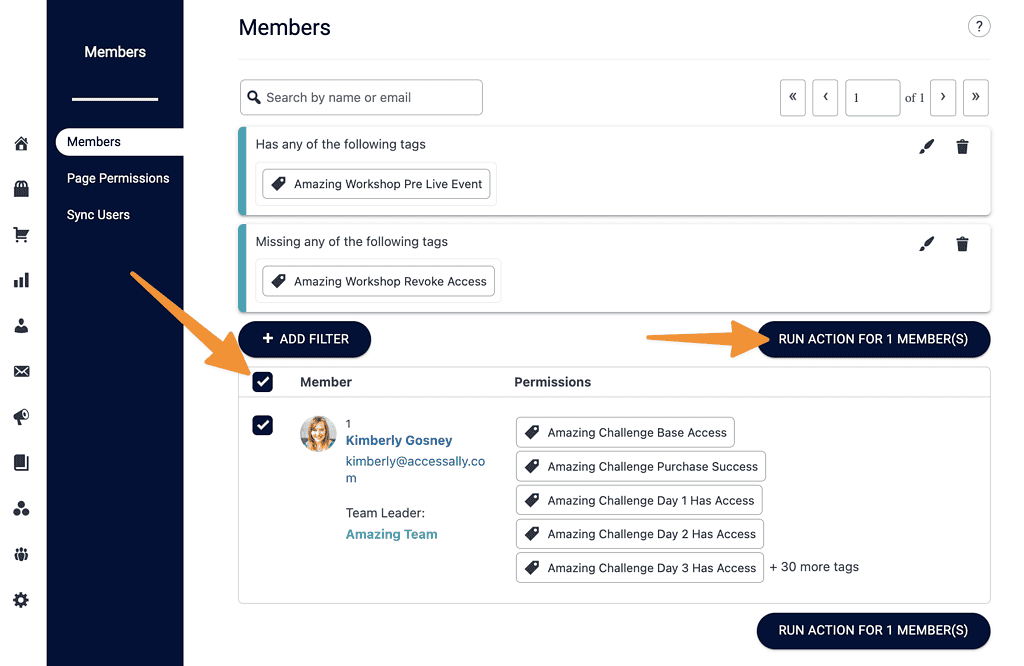
Now it’s time to find all of your pre event participants and move them to post event so they can see the replay!
Filter Members
Go to AccessAlly > Members you’ll filter using two filters.
- Filter for all contacts with the Pre Event Tag
- Filter for all contacts that are missing the Workshop Revoke Tag
Run Action
- Select the Custom Operation
- Add custom operation you created in Step 3 of this article
- Run the action and wait for the blue progress bar to complete. Then close.
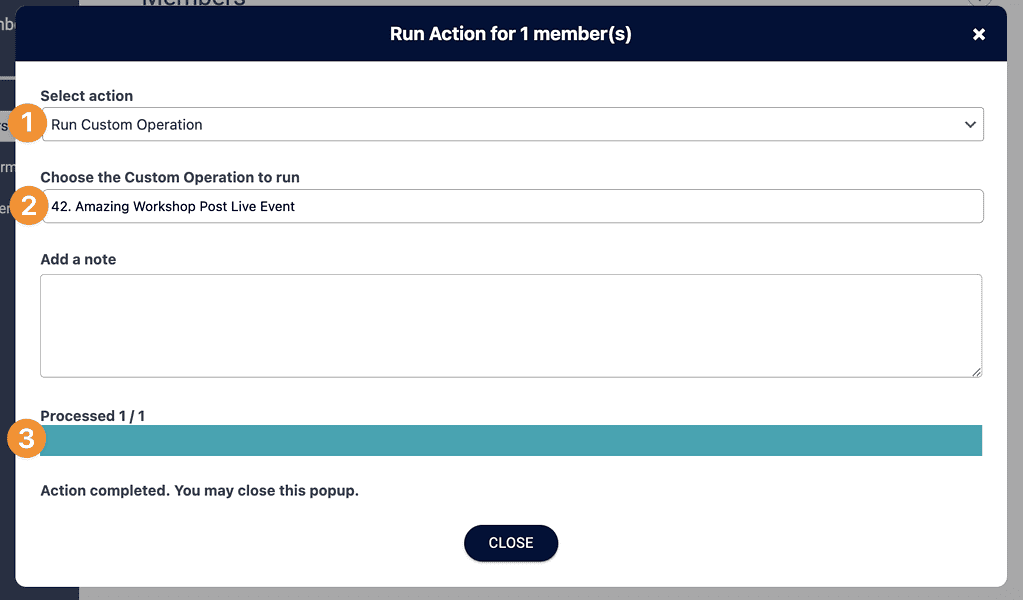
Yay!! Now all of your participants have moved to seeing only the replay on your workshop base page.
Step 12: Adjust Order Form
Now that your workshop replay is available it’s time to switch the tag used on your order for to the Post Workshop Identification tag. The goal of this step is to make it easy to continue to sell the workshop replay without the “pre” tags being used to show all contacts that buy after the live event the replay automatically.
Go to AccessAlly > Sales > Order Form Setup and open your workshop order form. Under the Automation tab > Payment Success settings remove your Pre Event Workshop tag and replace it with the Post Event Workshop tag.
