ARTICLE CONTENT:
Types of Failed Payment Emails
It’s important to review both types of failed payment emails to see which one is right for you!
- Default payment failed email: once enabled this option uses the same default payment failed email for all offerings on your site.
- Offering specific payment failed email: once enabled this option allows you to send a unique payment failed email for a specific offering.
Recommendations for Failed Payment Emails
- Install and activate the Amazon SES plugin to ensure payment failed emails land in the inbox and not the SPAM folder.
- Create shared blocks for styling your emails.
Setup Payment Failed Emails
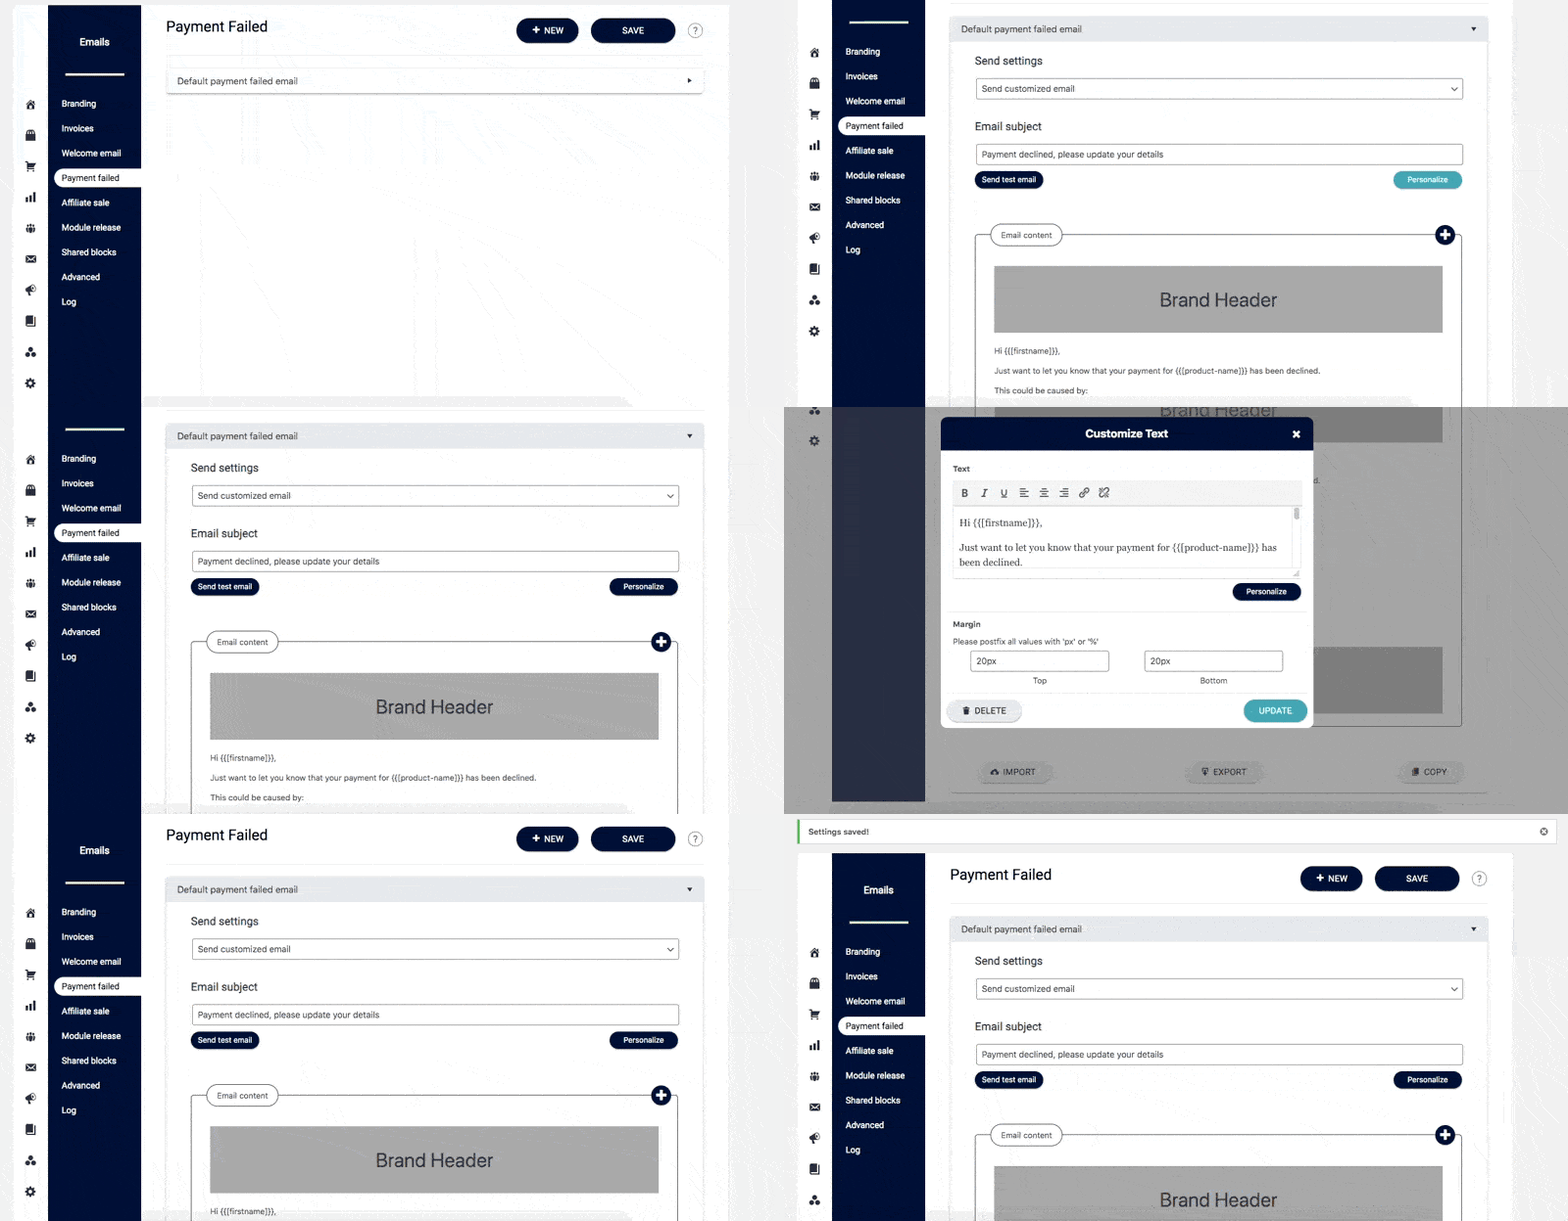
Option 1: Use the default payment failed email for all offerings on your site.
- Go to AccessAlly > Dashboard > Emails > Payment failed
- In the Default payment failed email section click the dropdown and choose Send customized email
- After choosing this option you may personalize the payment failed email using the editor
- Below the Email subject section click the send test email button which sends you a test email to review.
- Click the SAVE button on the top right to save your changes.

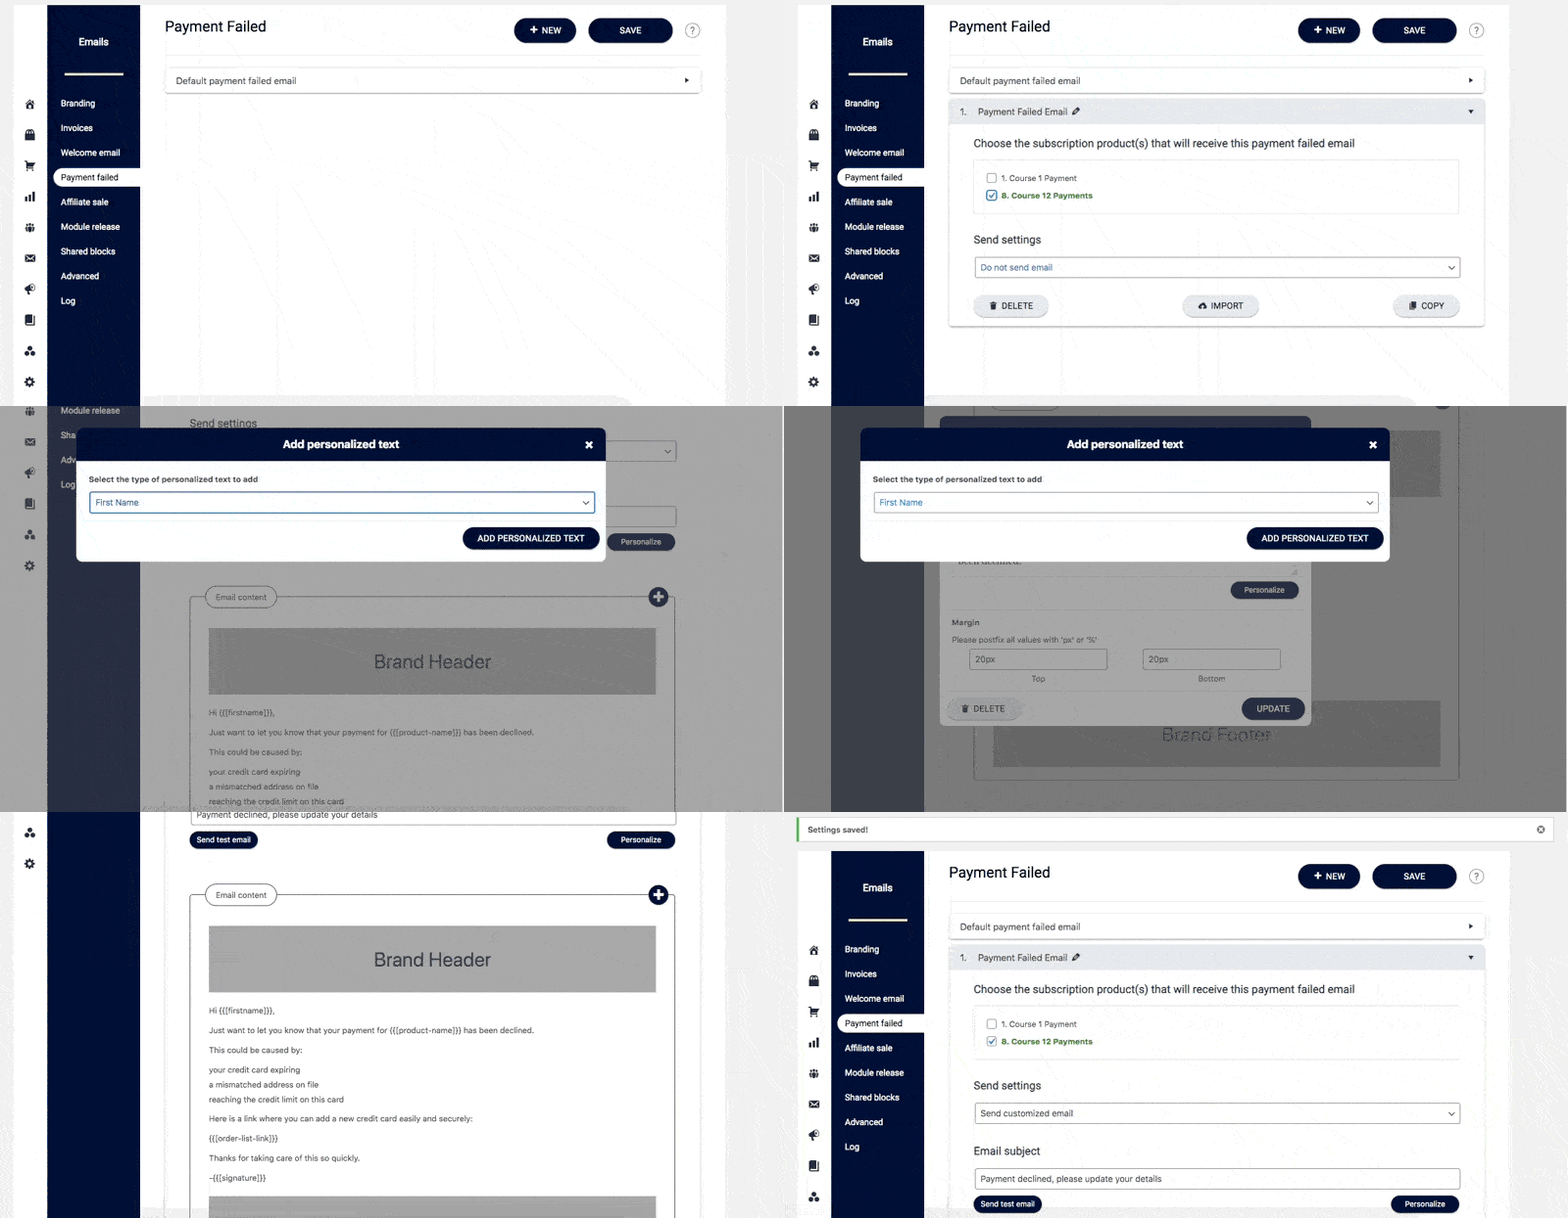
Option 2: Create offering specific payment failed emails
Send a unique or personalized payment failed email for a specific offering on your site.
- Go to AccessAlly > Dashboard > Emails > Payment failed
- Click the + NEW button at the top right of the screen
- Checkmark the subscription product for this payment failed email
- In the Send settings dropdown choose Send customized email
- Customize the payment failed email using the editor
- Below the Email subject section click the send test email button which sends you a test email to review.
- Click the SAVE button on the top right to save your changes.

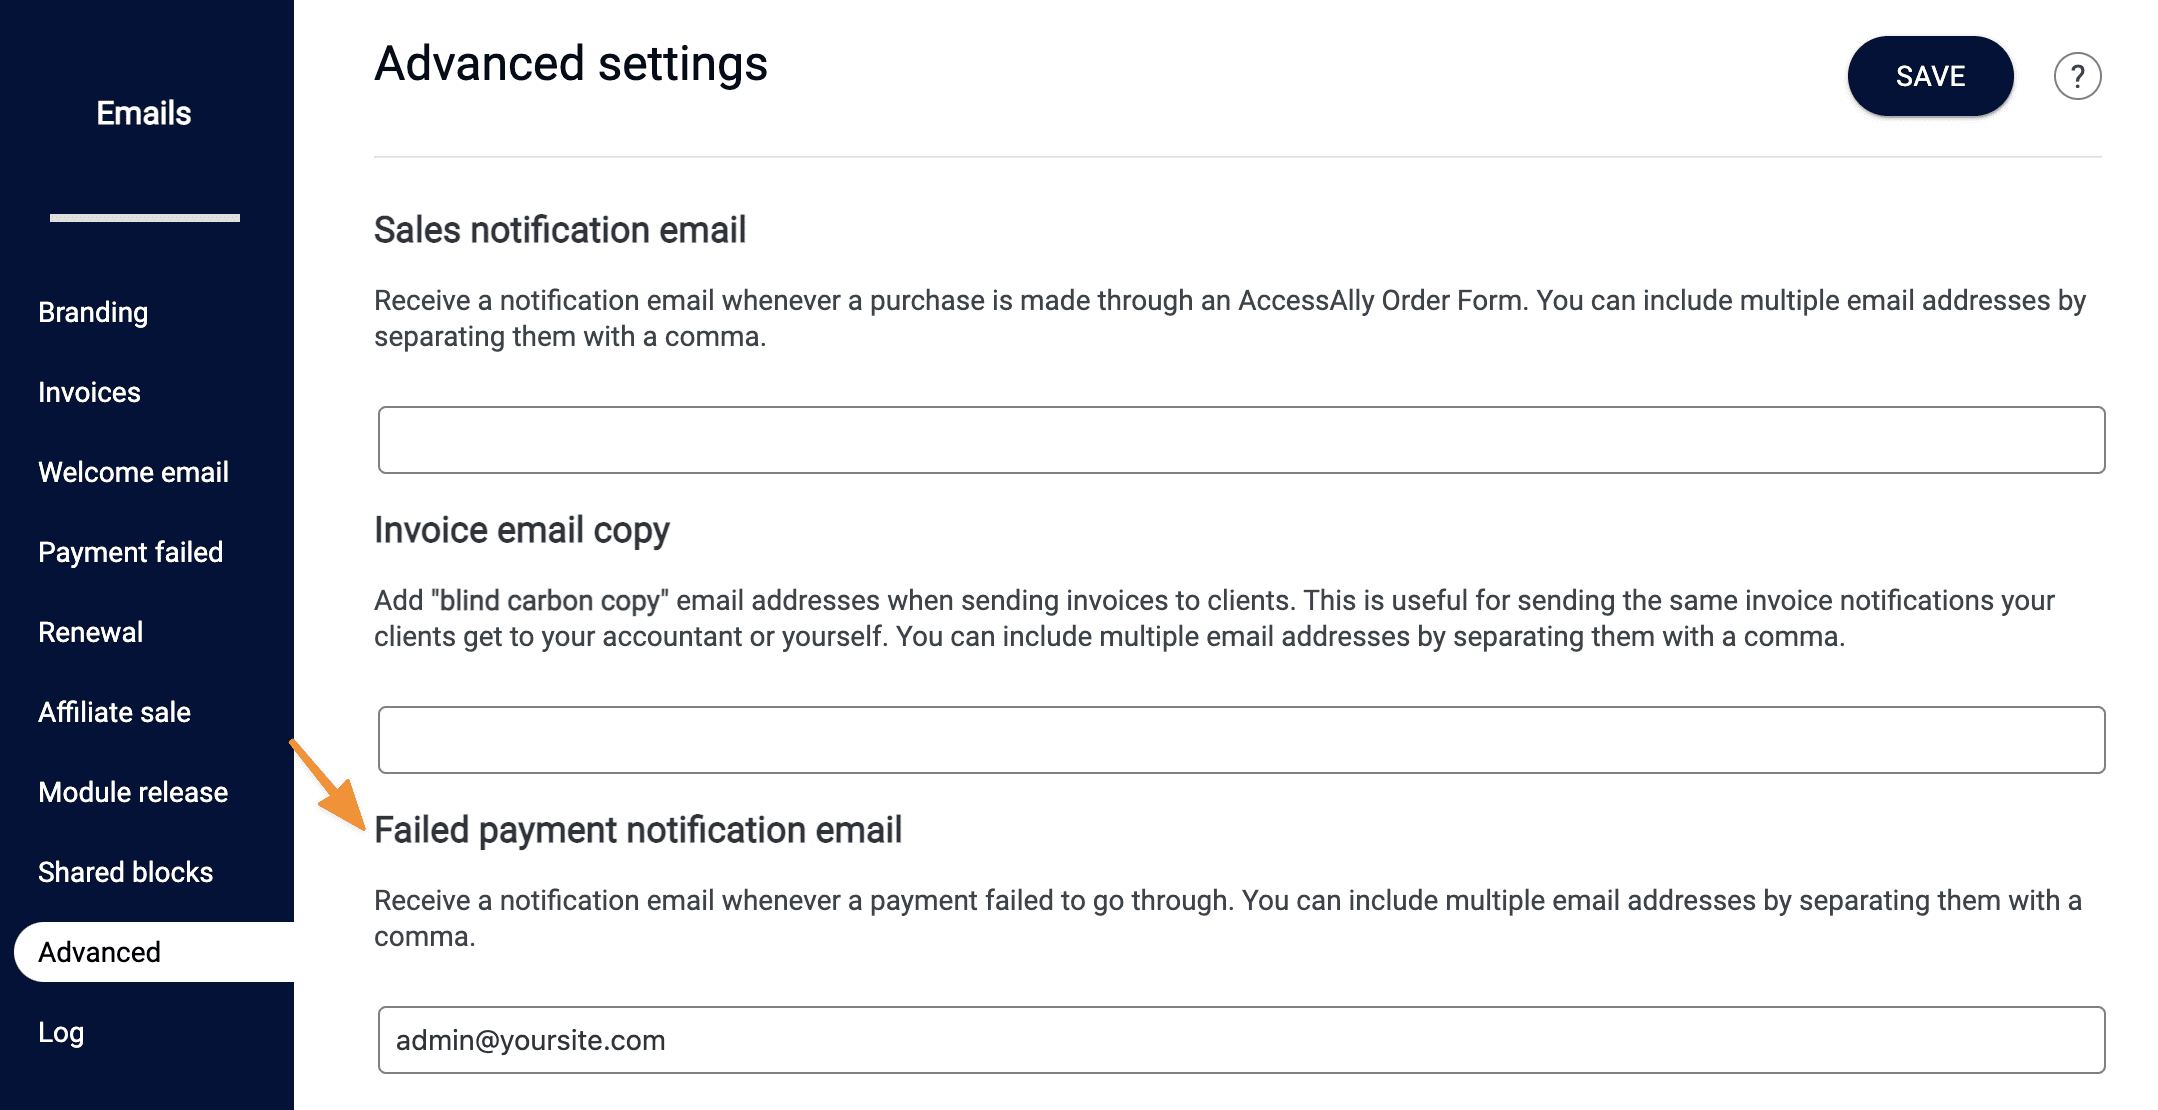
Admin notification for failed payments
If you’d like to get an email every time a payment fails, so you can follow-up manually or just keep an eye on things, you can set that up here. Go to AccessAlly -> Emails -> Advanced, and enter your email or the email of someone on your team:


