When you create a User Directory with AccessAlly, you can choose to make each profile “clickable”. In other words: clicking on a result in the user directory takes you to a page with more information on that particular user.
This user page can contain a large variety of elements; you can choose whether you want your users to be able to edit and update the various elements, giving you the ultimate flexibility in terms of what information is displayed.
NOTE: The user profile pages use a different shortcode than the one you use to create a private “My Account” page for your clients / site users.
ARTICLE CONTENT:
When You Need to Create Profile Pages In Conjunction With Your User Directory
Creating a User Profile Page (different than the private “My Account” profile page) allows you to accomplish two things:
- To give users control over their profile’s appearance inside the directory (like uploading a profile photo, editing a bio, etc.)
- To allow people to click on a user directory search result and be taken to a profile page with more information on that user
NOTE: User profiles are not a necessary part of a directory, but they do increase the accuracy of information. A user profile page will help you provide a better experience to users who would like to control how their profile appears in the directory (headshot photo, bio, etc.)
The settings for linking (or not linking) the profile pages can be found in the User Directory settings.
How To Set Up A User Profile Page (Use in Conjunction With A User Directory)
The first step in setting up your custom user profile pages (to appear in your user directories) happens in the backend of your website:
Step 1: Create a New User Profile
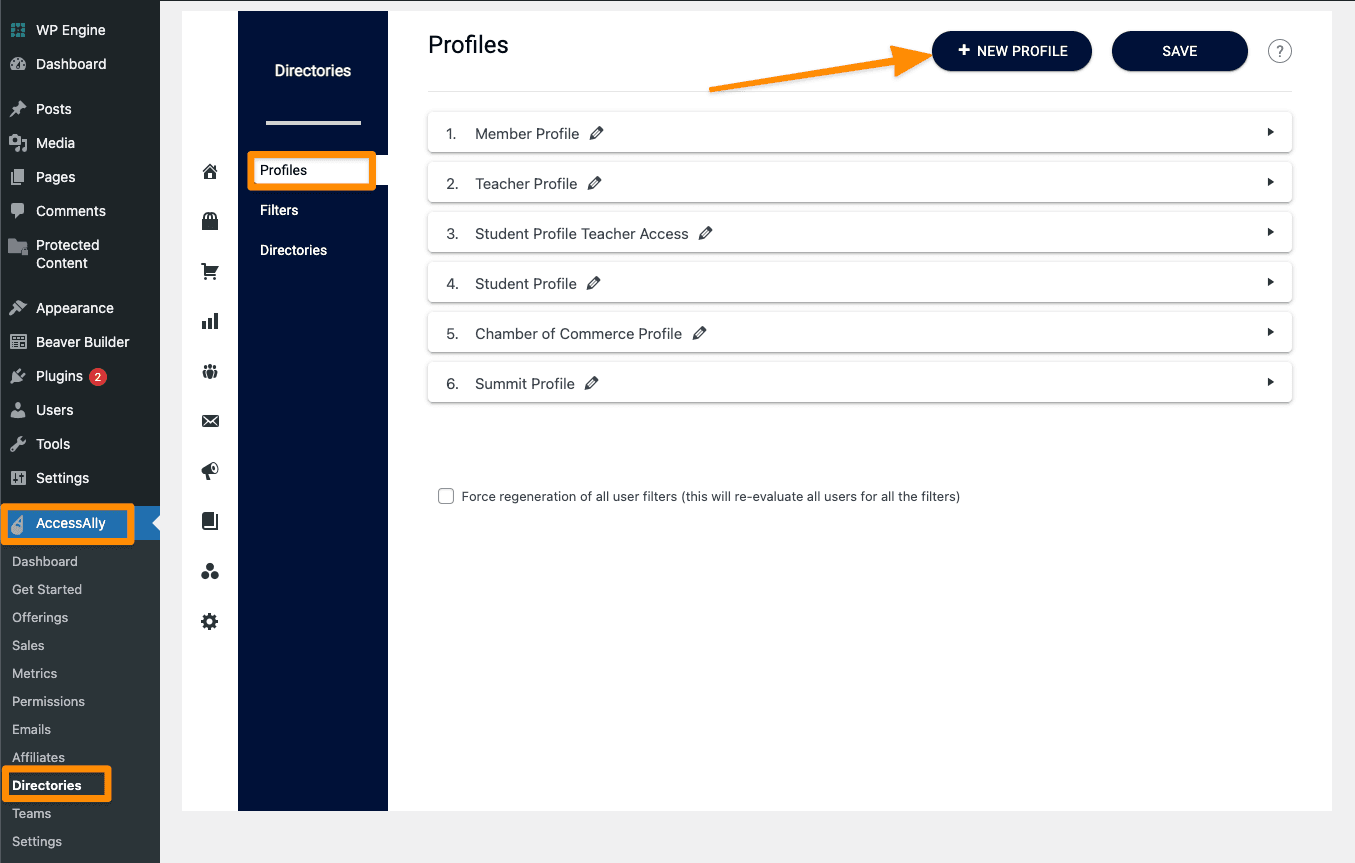
In the backend of your WordPress membership site, go to: AccessAlly > Directories > Profiles
Then, click on “+ New Profile”.
Step 2: Customize the Profile Information
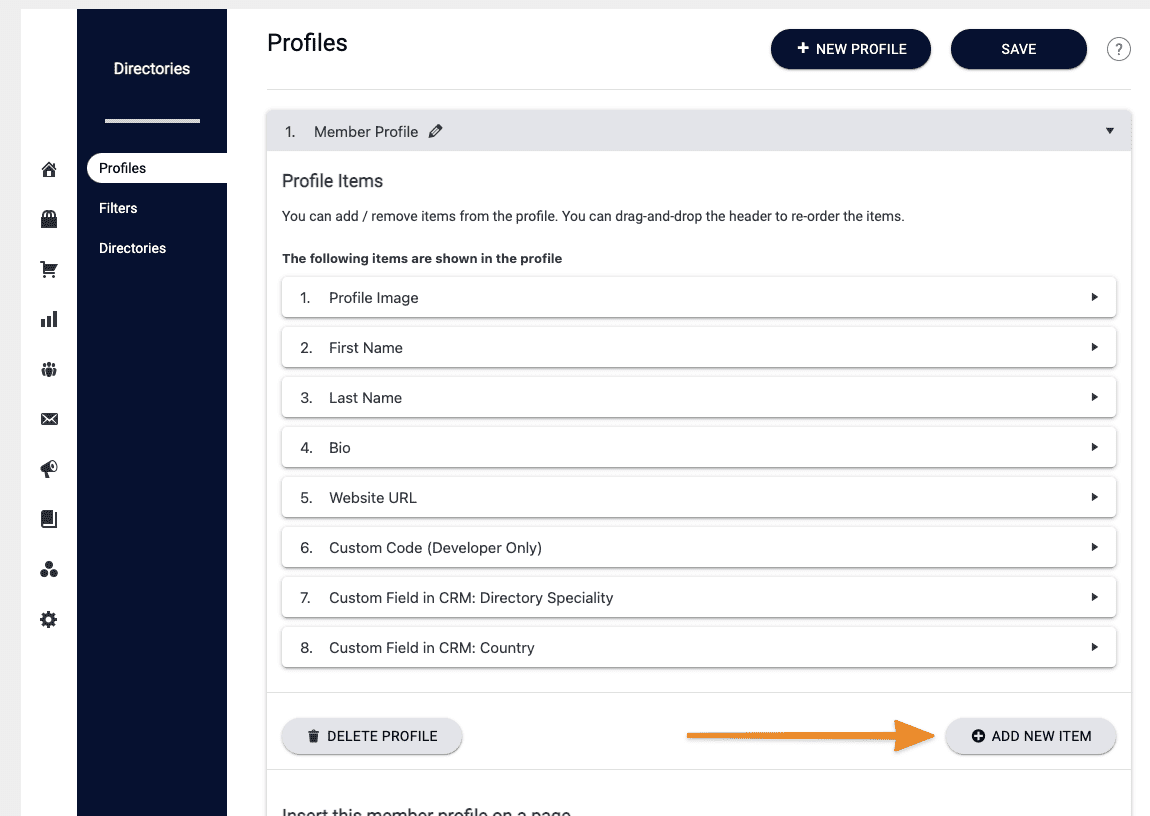
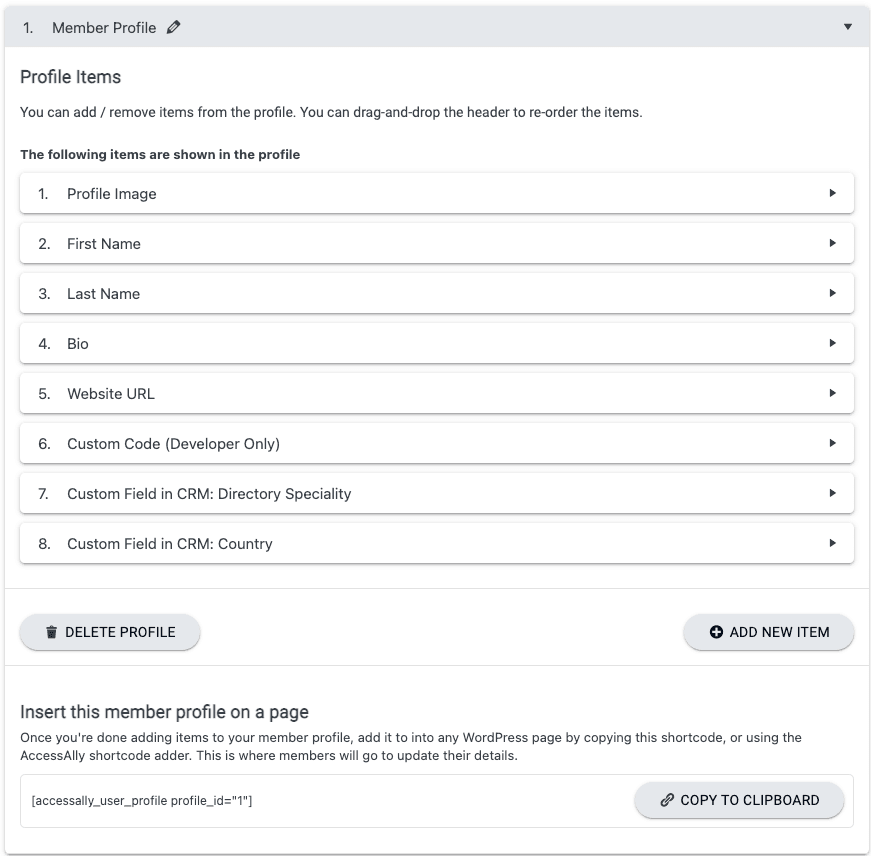
After you’ve created a new profile, you can add or delete any number of items to customize what information your users can display on their own profile pages.
To add a new item of information, click on the ADD NEW ITEM button.
You can choose from any of the following options:
Here, the user can edit how their first name appears. Please note that this will also update the corresponding record in your CRM, if one exists.

Here, the user can edit how their last name appears. Please note that this will also update the corresponding record in your CRM, if one exists.

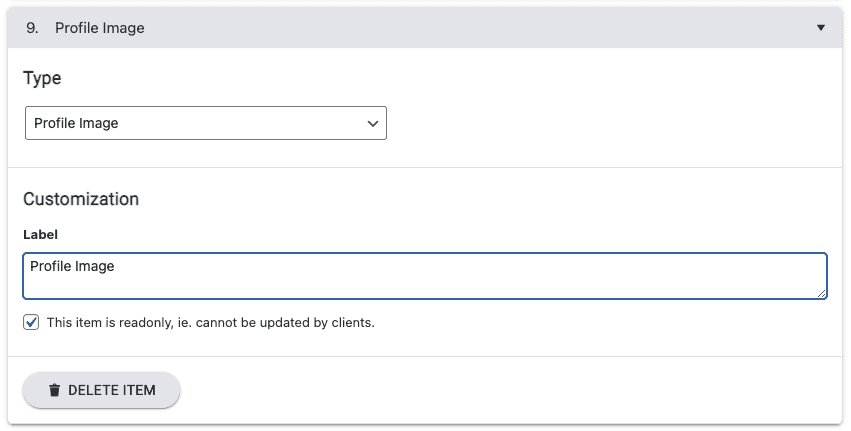
The user can update the profile image that is shown on their profile page (and in the user directory they appear in, if one exists.
This option does NOT change anything in the corresponding CRM contact for this user.
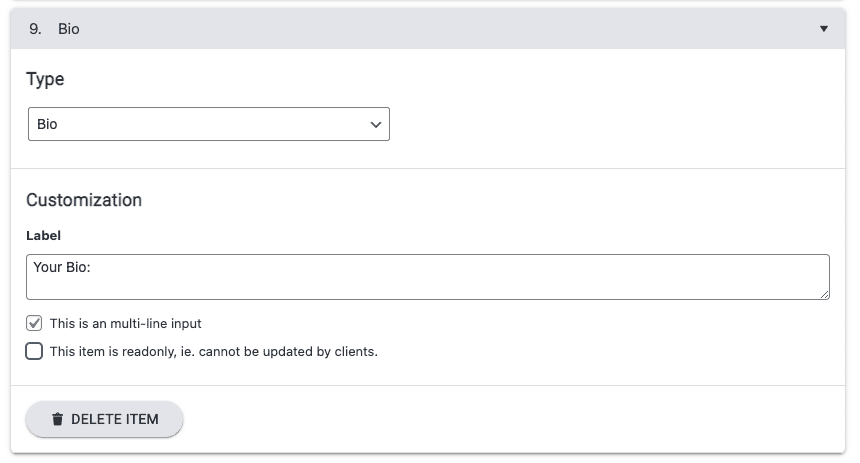
Here, the user can write a unique bio for their profile. It’s recommended to check the “multi-line input” option if adding this to a profile.
This option does NOT change anything in the corresponding CRM contact for this user.
Here, the user can write the website URL that they would like to have appear on their profile page.
This option does NOT change anything in the corresponding CRM contact for this user.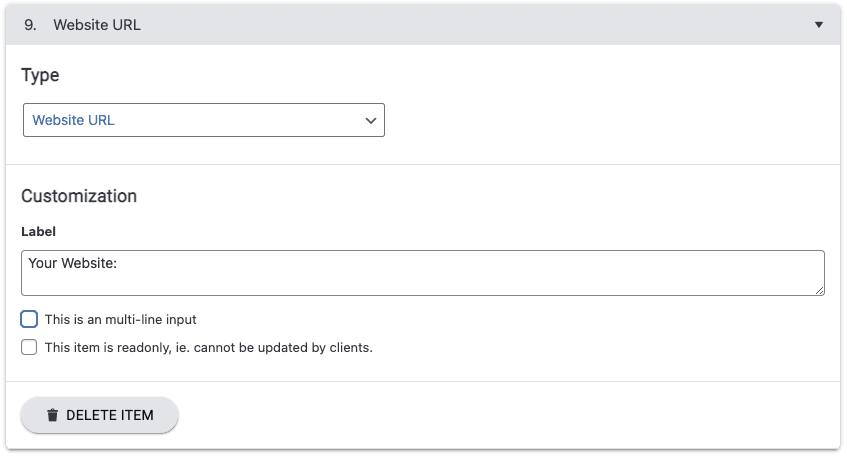
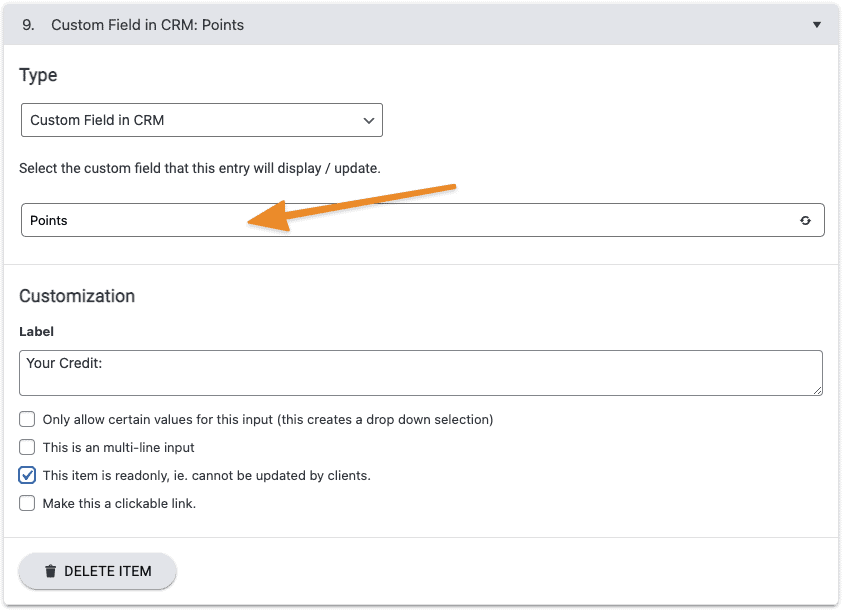
Here, you can display content from a specific custom field set up in your CRM.
Please note that, if you allow users to edit this field, any changes they make WILL be updated in the CRM. Because of this, it is advised to check the “readonly” option when displaying a custom field.
Also, be aware that this information will also be shown to other users who view the profile, so private information (like passwords) should not be included.
The previous options are preset to cover the most common information types that are typically shown in a user profile. The Custom Attribute gives you ultimate flexibility in customization.
This option does NOT change anything in the corresponding CRM contact for this user.

To give people the ability to display a clickable email address, select the “Make this a clickable link” option. Then if an email address is entered, there will be a “mailto” prefix added, which will make the link open an email window to send a message.
When you’re satisfied with your user profile, click on “save”.
At this point, you’ve set up the fields that will be shown on the user profile page. Now, it’s time to set up the page itself so that your logged-in users can access their own pages to update the information.
Step 3: Create a New WordPress Page & Designate Access Tags
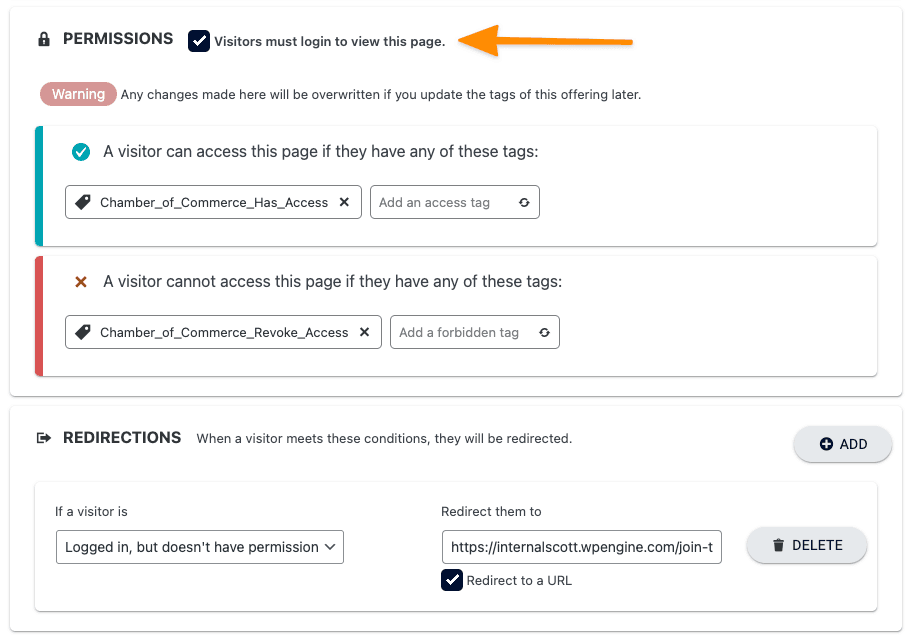
Create a new WordPress page. In the “AccessAlly Member Permission” section, you have three options:
- Require users to log in to view page – if you check the “Visitors must login to view this page.” box, any logged-in visitor access and view this page.
- Require log in and specific tags to view page – if you check the “Visitors must login to view this page.” box AND designate permission tags, only logged-in users who have those tags on their account will be able to access this page. (One reason why you might choose to use this setup is if you charge extra for membership site users to appear in your directory.)
- Do nothing – if you do not check the “Visitors must login to view this page.” box, any website visitor can view this page. Use this option if you have a public-facing membership directory. (One example use case for this option would be a realtor’s association, who wishes the directory and profiles to be searchable by the general public.)
Step 4: Add the shortcode to the page
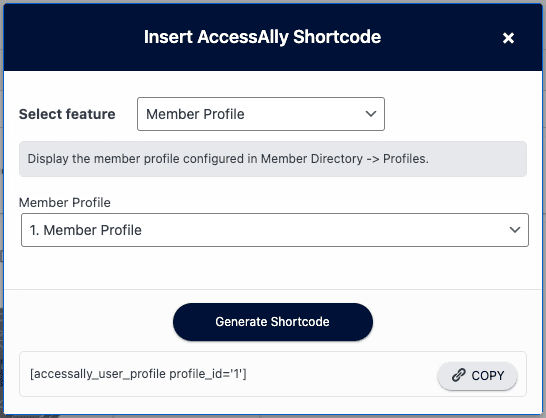
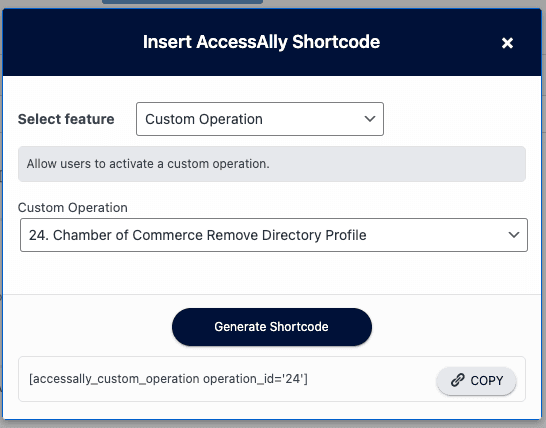
Using the AccessAlly shortcode adder, select the “Member Profile” option.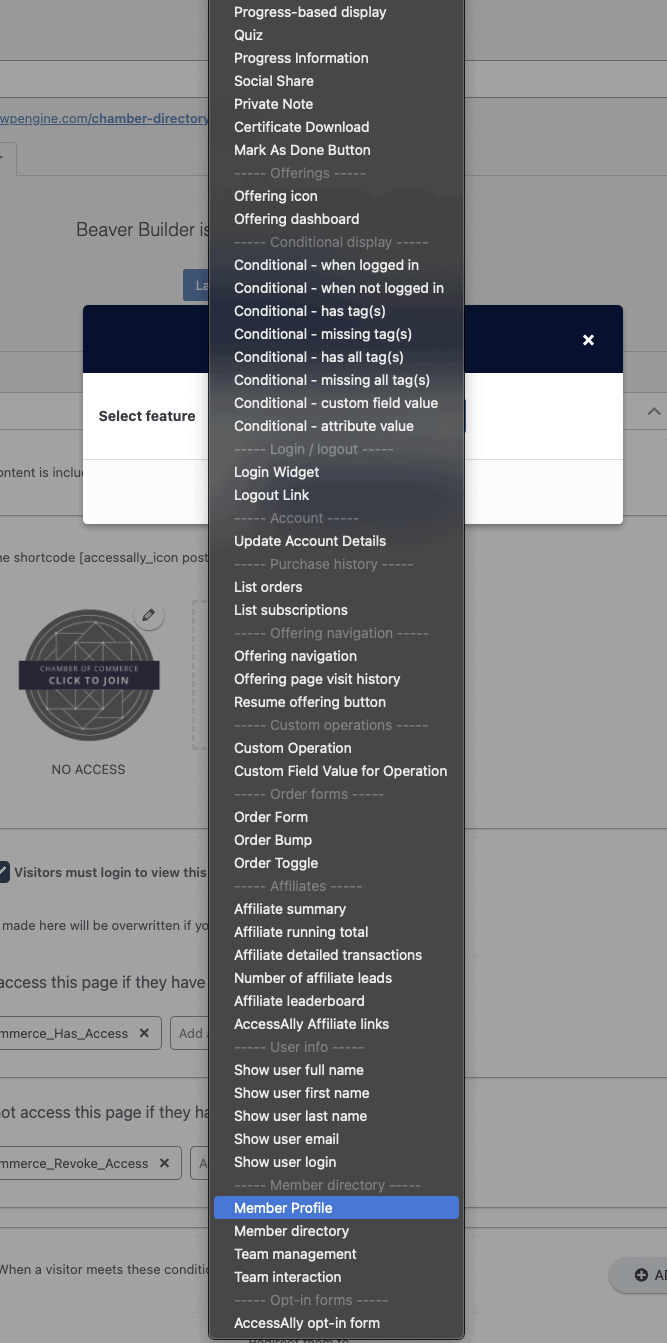
If you’ve created multiple profiles, select the one you’d like to add from the second dropdown. Then, click “Generate Shortcode”. You can then copy the shortcode and put it on the page where you want it.
Step 5: Publish page
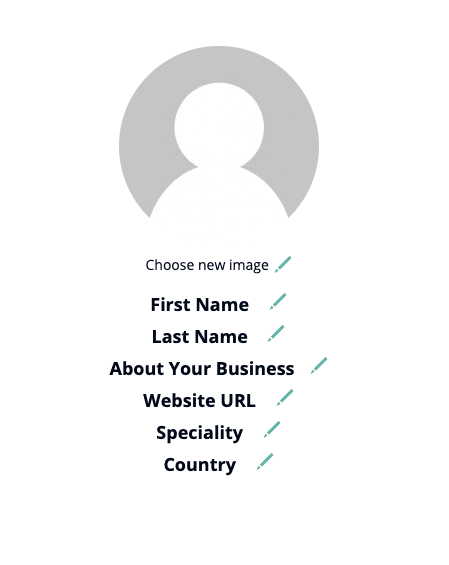
Now, you’re ready to publish the page. Although you might add more content and styling to this page, a user profile that is set up like this in the backend (Part I of this tutorial):
Will appear like this on the profile page:
Optional: Have Members Add and Remove Tags to Add Themselves to Different Filters (or Opt Out of the Directory)
This is an optional addition, where you could have members tag themselves in or out of different filters or the entire directory. This is done using AccessAlly’s Custom Operations.
We want to add a “Custom Operation” to your user profile so members can click a button to automatically apply a tag to their own profiles.
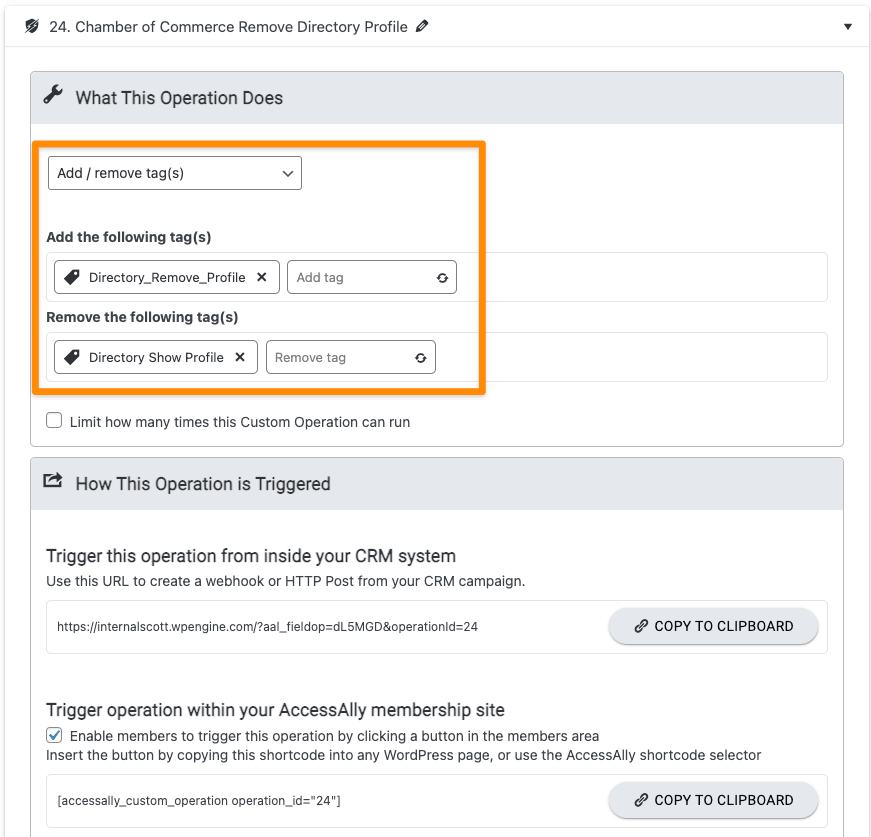
A) Set Up a Custom Operation to “Add / remove tag(s)” (or multiple if you want a user to add multiple tags associated with your filters) and select the tag(s) that you want associated with that custom operation (you’ll need to create these tags in your automation marketing platform first.)
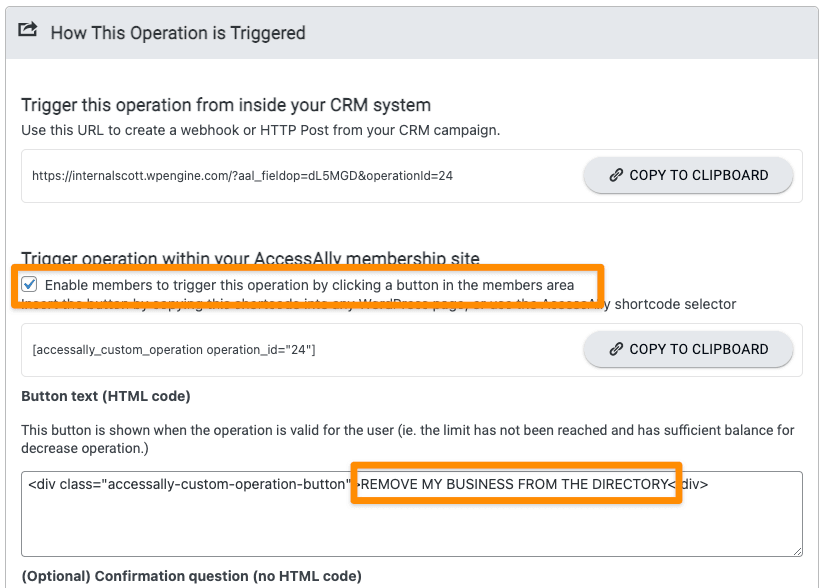
B) Within the Custom Operation set up you must select the “Enable” checkbox to “Trigger Operation within Membership Site”.
This is the button(s) that will be added directly to the user profile for a member to add their own tags to be filtered accordingly.
C) The custom operation(s) need to be inserted directly into your user profile page, so navigate to that newly created user profile page.
Now we want to use the “short code adder” to insert the shortcode for your custom operation to “Trigger the Operation within a Membership Site” button. It should look like this: [accessally_custom_operation operation_id=’#’] In the example below # is 24.
Next we want to make that button conditional – in other words only available to that user who is updating their profile. For this, wrap your custom operation shortcode with the following: [accessally_self] the custom operation shortcode [/accessally_self] so it should look like this: [accessally_self] [accessally_custom_operation operation_id='#'][/accessally_self]
Now you have inserted a “custom operation” within the user profile so folks can update their own profile and add the appropriate filter tags.
Next Steps
There are three parts to creating a directory. You have completed the first part, which is the member profile.
Now it’s time to create a filter for your directory.
