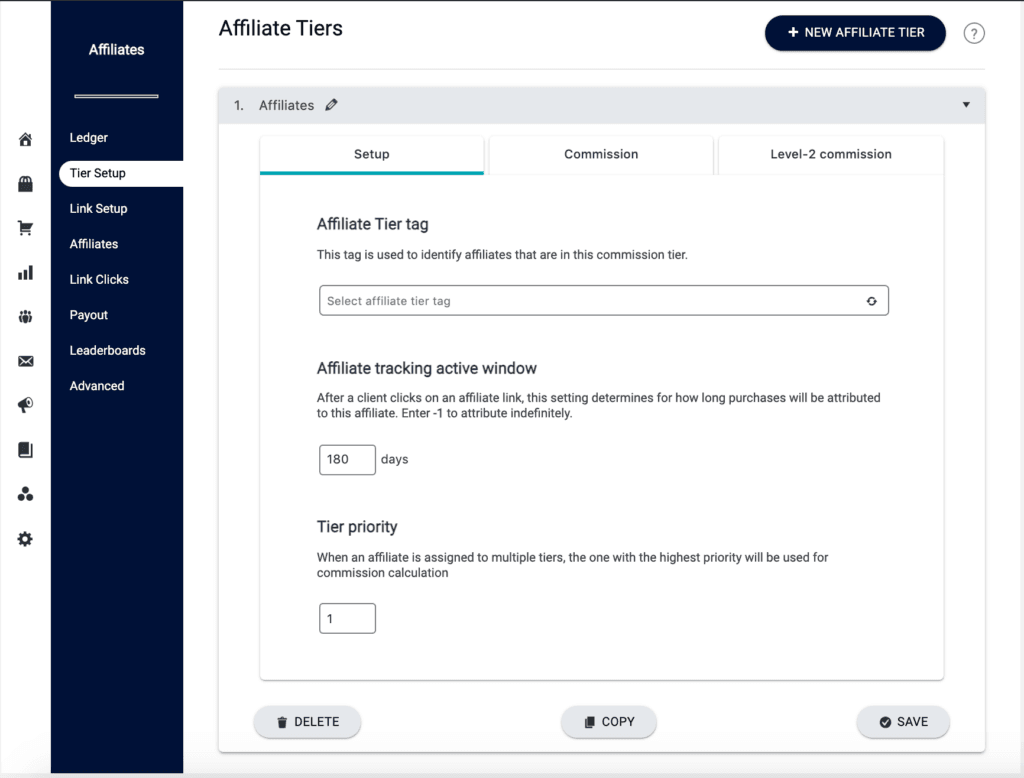
Your AccessAlly affiliate program can be made of one tier or many, depending on how you would like to determine the amount of commission your affiliates receive.
For example, you might create one tier with a 30% commission, and a second tier with a 50% commission.
ARTICLE CONTENT:
How to Use the Affiliate Tiers
For a basic affiliate program, you will likely only need one tier that all affiliates belong to. When all affiliates belong to the same tier, they receive the same commission percentage across the board.
If you are offering partnerships or specialized ambassador opportunities to partner companies, you may wish to create multiple tiers, with varying commission rates.
In this case, you might create two tiers:
- 30% “Basic” Tier – this tier would consist of the “standard” 30% commission rate that you want the majority of your affiliates to receive.
- 50% “Special” Affiliate Tier – this tier offers a higher commission rate, and is only offered to an affiliate who you want to work with on a partnership level.
How to Set Up An Affiliate Tier
Step 1: Create a New Tag In Your CRM
Each affiliate tier will need to have its own unique tag inside your CRM. This tag must be manually created before you begin the setup process inside AccessAlly.
Example affiliate tag name: affiliate_30_percentStep 2: Create a New Affiliate Tier
Log into your membership site and go to: AccessAlly > Affiliates > Tier Setup
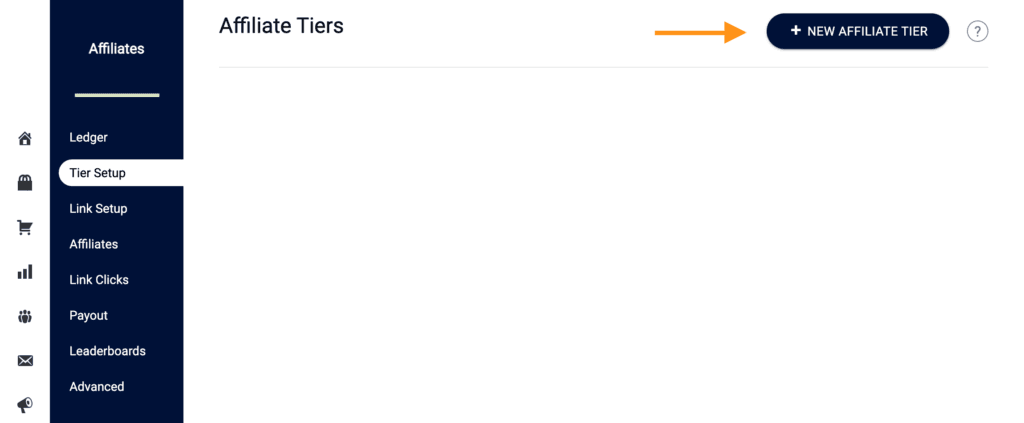
Then, click the navy blue New Affiliate Tier button.
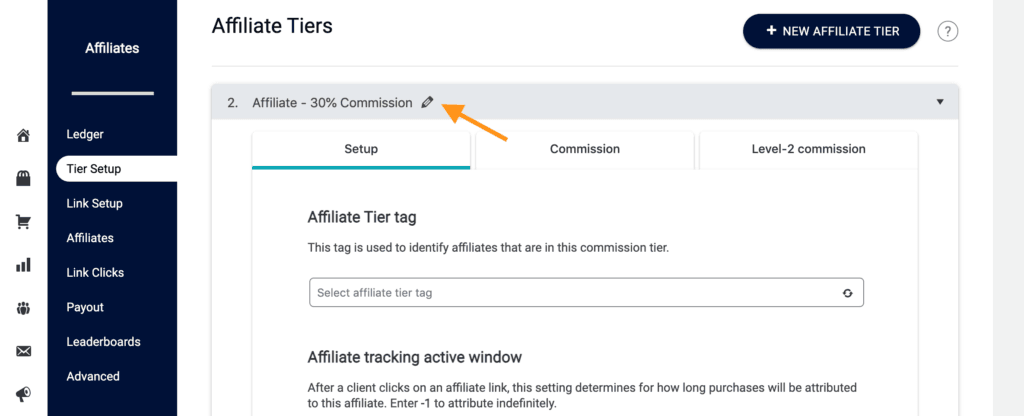
Make sure to name your new tier something descriptive.
Step 3: Select Your New Affiliate Tag
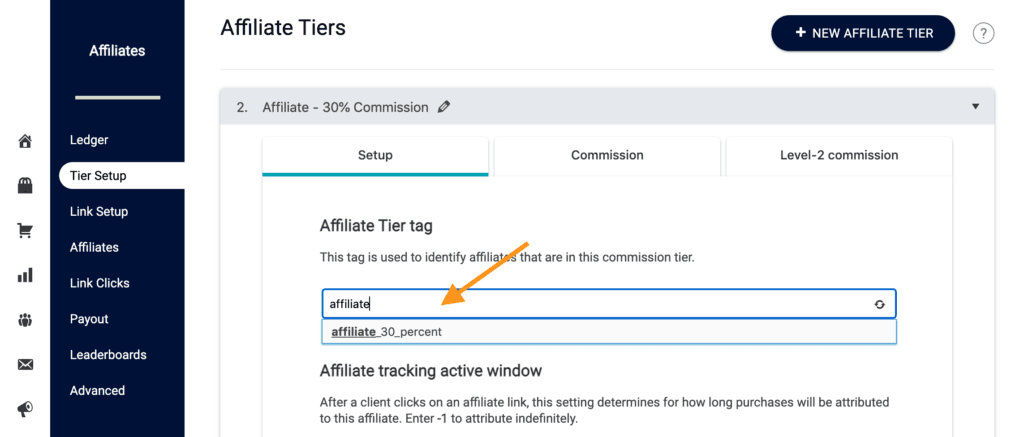
There are two possible ways to configure this part of the setup:
Option 1: No tag designationLeaving the tag area empty is NOT recommended, as it can be extremely difficult to manage your affiliate system.
If you leave the affiliate tag area empty, all logged-in members of your site will automatically become affiliates under this tier.
OPTION 2: Add Tag Designation If you want to control who belongs to this affiliate tier, you can do so by selecting the tag you created in step 1 of this tutorial. (If you are creating multiple tiers, please use a different, unique tag for each tier.)
Step 4: Set Your Tracking Window
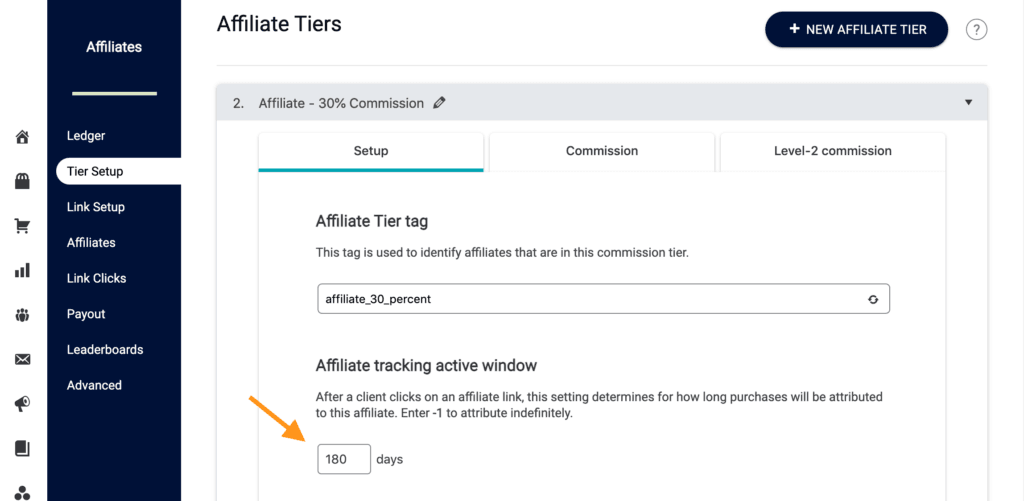
After a client clicks on an affiliate link, this setting determines for how long purchases will be attributed to this affiliate. If you want it to track indefinitely, simply enter -1.
Step 5: Set Your Tier Priority
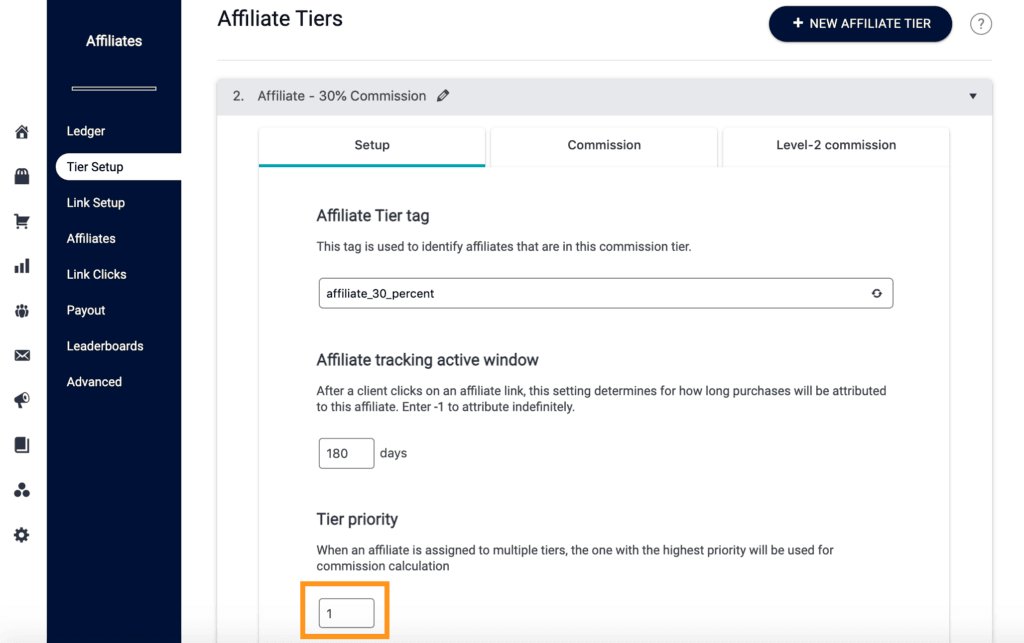
When an affiliate is assigned to multiple tiers, the one with the highest priority will be used for commission calculation.
Step 6: Set Your Commission Settings
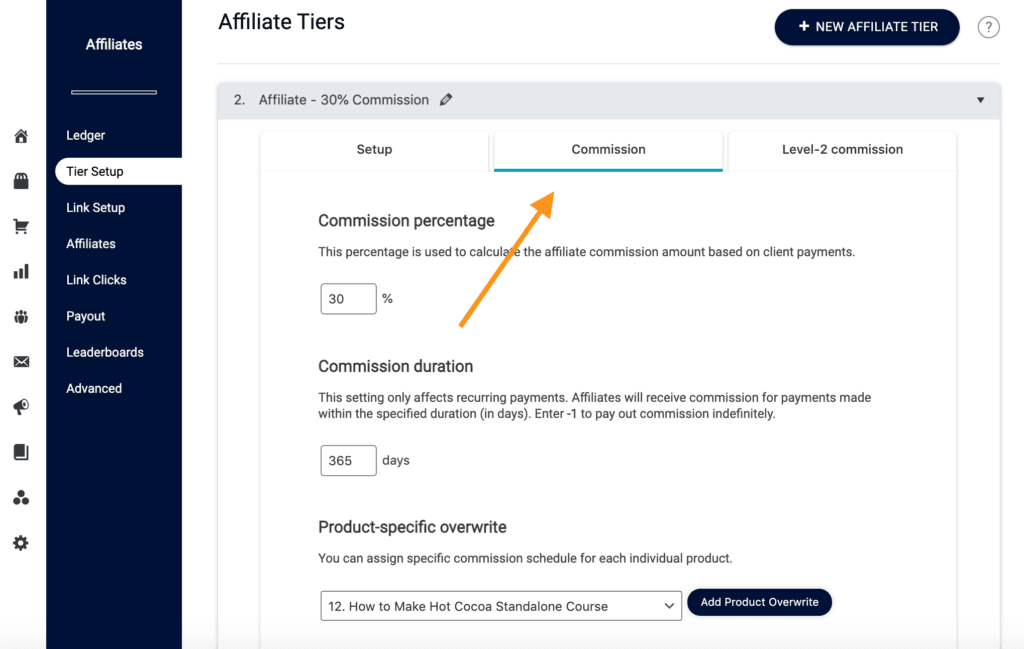
Next, click on the Commission tab to set up the following:
- Commission Percentage – This is used to calculate the affiliate commission amount.
- Commission Duration – This setting only affects recurring payments. Affiliates will receive a commission for payments made within the specified duration (in days). Enter -1 to pay out commission indefinitely.
There are two additional options in this area that you may wish to use when setting up your affiliate tier:
- Product-Specific Overwrite – You can assign specific commission schedule for each individual product. Please see this tutorial to understand how to use this option: How To Add A Product Overwrite To An Affiliate Tier.
- Level 2 Commission – Advanced feature: A Level-2 commission is calculated for the affiliate of an affiliate.
You can change the commission percentage on an existing tier down the line. Affiliate commissions are calculated using the current percentage, so changes will ONLY affect future calculations.
- Update the existing commission on the tier – this will update how much affiliates earn for all future sales (not past ones)
- Or, create a new tier if you want to keep existing affiliates on the current level, and then add the tag for the new tier if you want to upgrade them to that tier
Additional Options
If you offer a variety of products on your site, but will not pay out affiliate commissions on all products…
You can set the default commission for your affiliate program to 0%.
Then add specific product overrides at the percentage that each one pays out.
Testing & Troubleshooting
As always, PLEASE test (& re-test!) your setup before making it live. We recommend testing using the following steps:
- Once your affiliate links are set up, create a test user on your membership site.
- Add the affiliate tier tag (created in step 1 of this tutorial) to the new test user’s contact.
- Enter the contact ID in AccessAlly Affiliate > Affiliate details. Because it is a new contact and the user doesn’t yet exist in AccessAlly, you will have a chance to create the user by clicking a button.
- Now, the test user should show up under the Affiliates tab.
- In an incognito window, use one of the links to make a purchase on your membership site with the new affiliate link. The test purchase should be made with a different email, as self-purchasing is not allowed.
- Once the purchase has gone through, check the affiliate ledger to make sure the order is associated with the correct affiliate and is in the correct amount.

