This article covers the setup steps for sending Affiliate Sale Notification Emails using AccessAlly Emails. There are two types of emails you can send out; Default Affiliate Sale Emails and Offer-Specific Affiliate Sales Emails.
ARTICLE CONTENT:
1. Before You Begin
Make sure your site is set up to send emails reliably. WordPress on its own does not guarantee delivery of password resets, notifications, or reminders.
You’ll need:
- An SMTP plugin such as WPMail SMTP
- An email sending service such as SendLayer
👉 Learn more about WPMail SMTP and SendLayer
2. Types of Affiliate Notification Emails
See your options for sending Affiliate Notification Emails below.
- Default Affiliate Sale Email: Sent when an affiliate makes a sale of any offer in your system.
- Offer-Specific Affiliate Sale Email: Only sent when an affiliate makes a sale on a specific order form/offer. Allows more targeted messaging.
3. Enable Affiliate Notification Emails
Option A: Default Affiliate Sale Email
This option will send the same default Affiliate Sale Notification Email template each time.
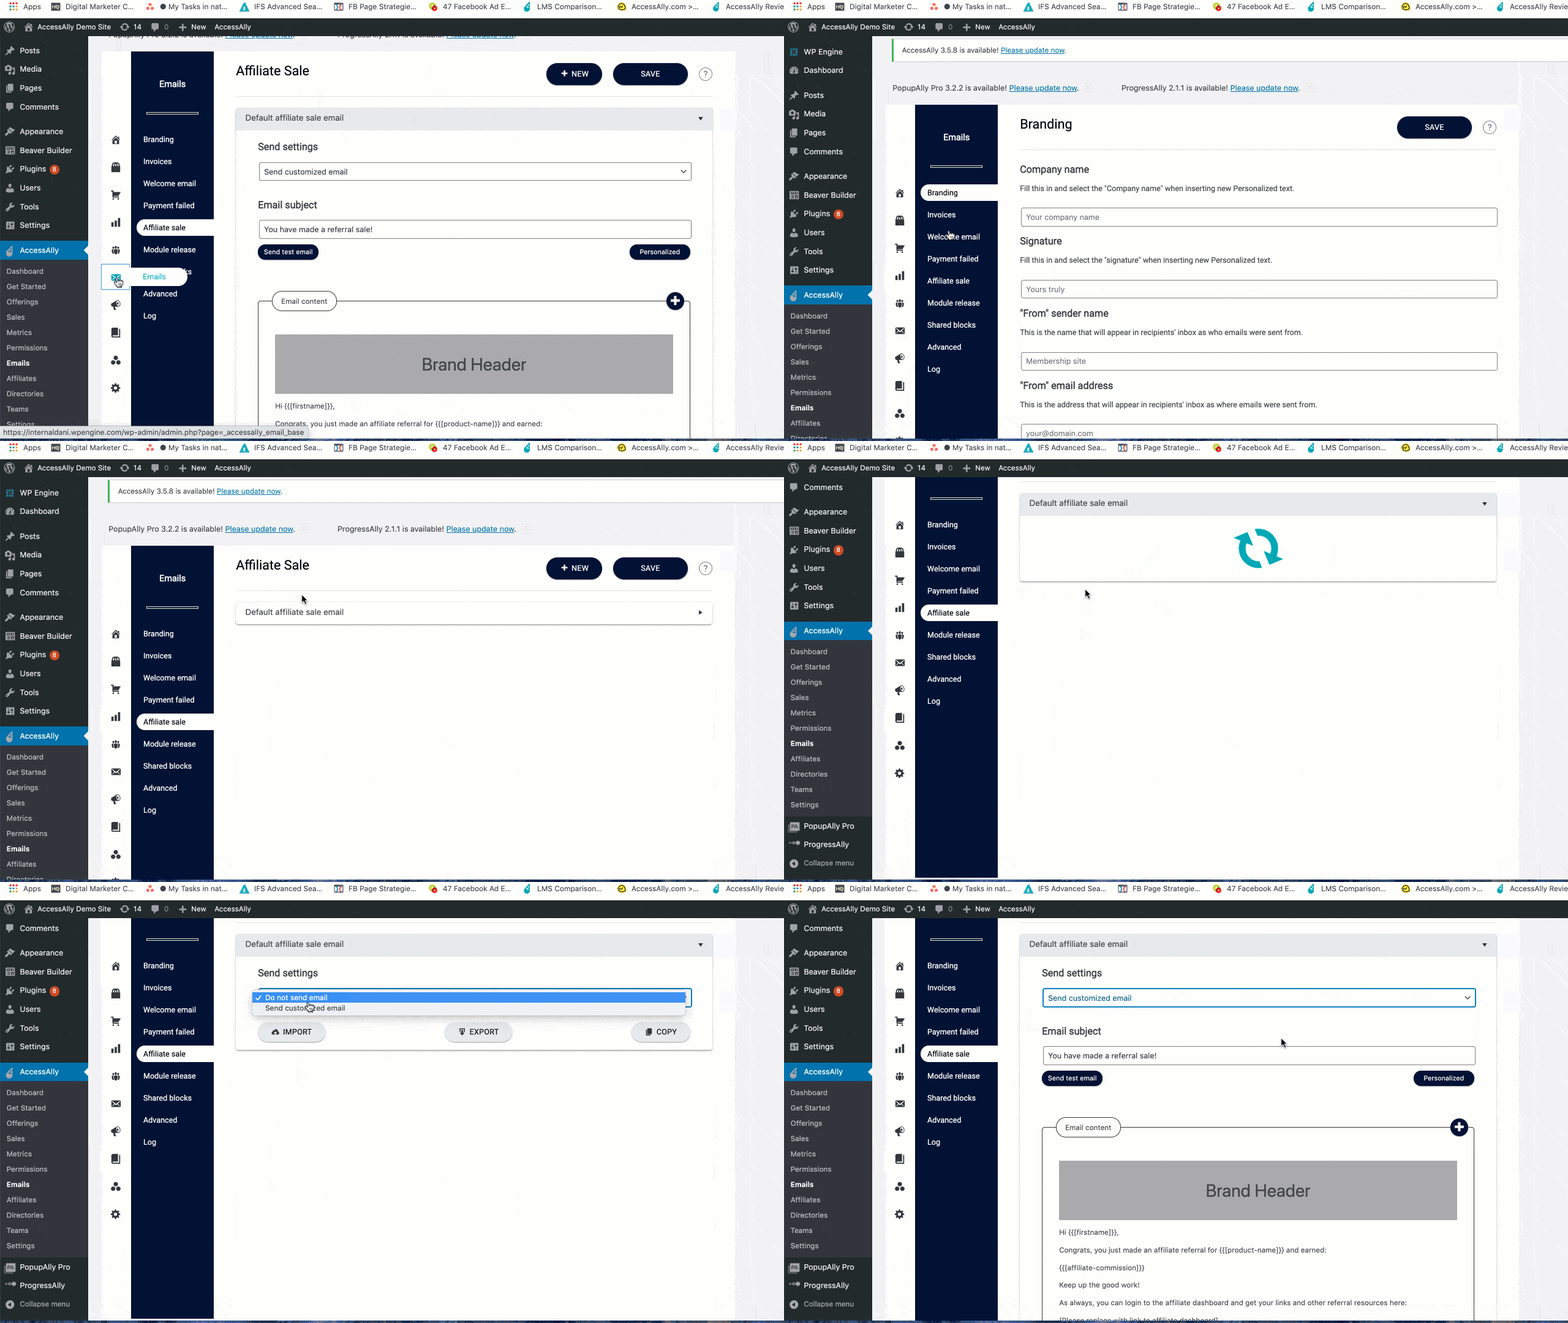
- Go to AccessAlly → Emails → Affiliate Sale.
- Open the “Default Affiliate Sale Email” settings.
- Select “Send Customized Email” from the dropdown.
- “Save” your changes.

Option B: Offer-Specific Affiliate Sale Email
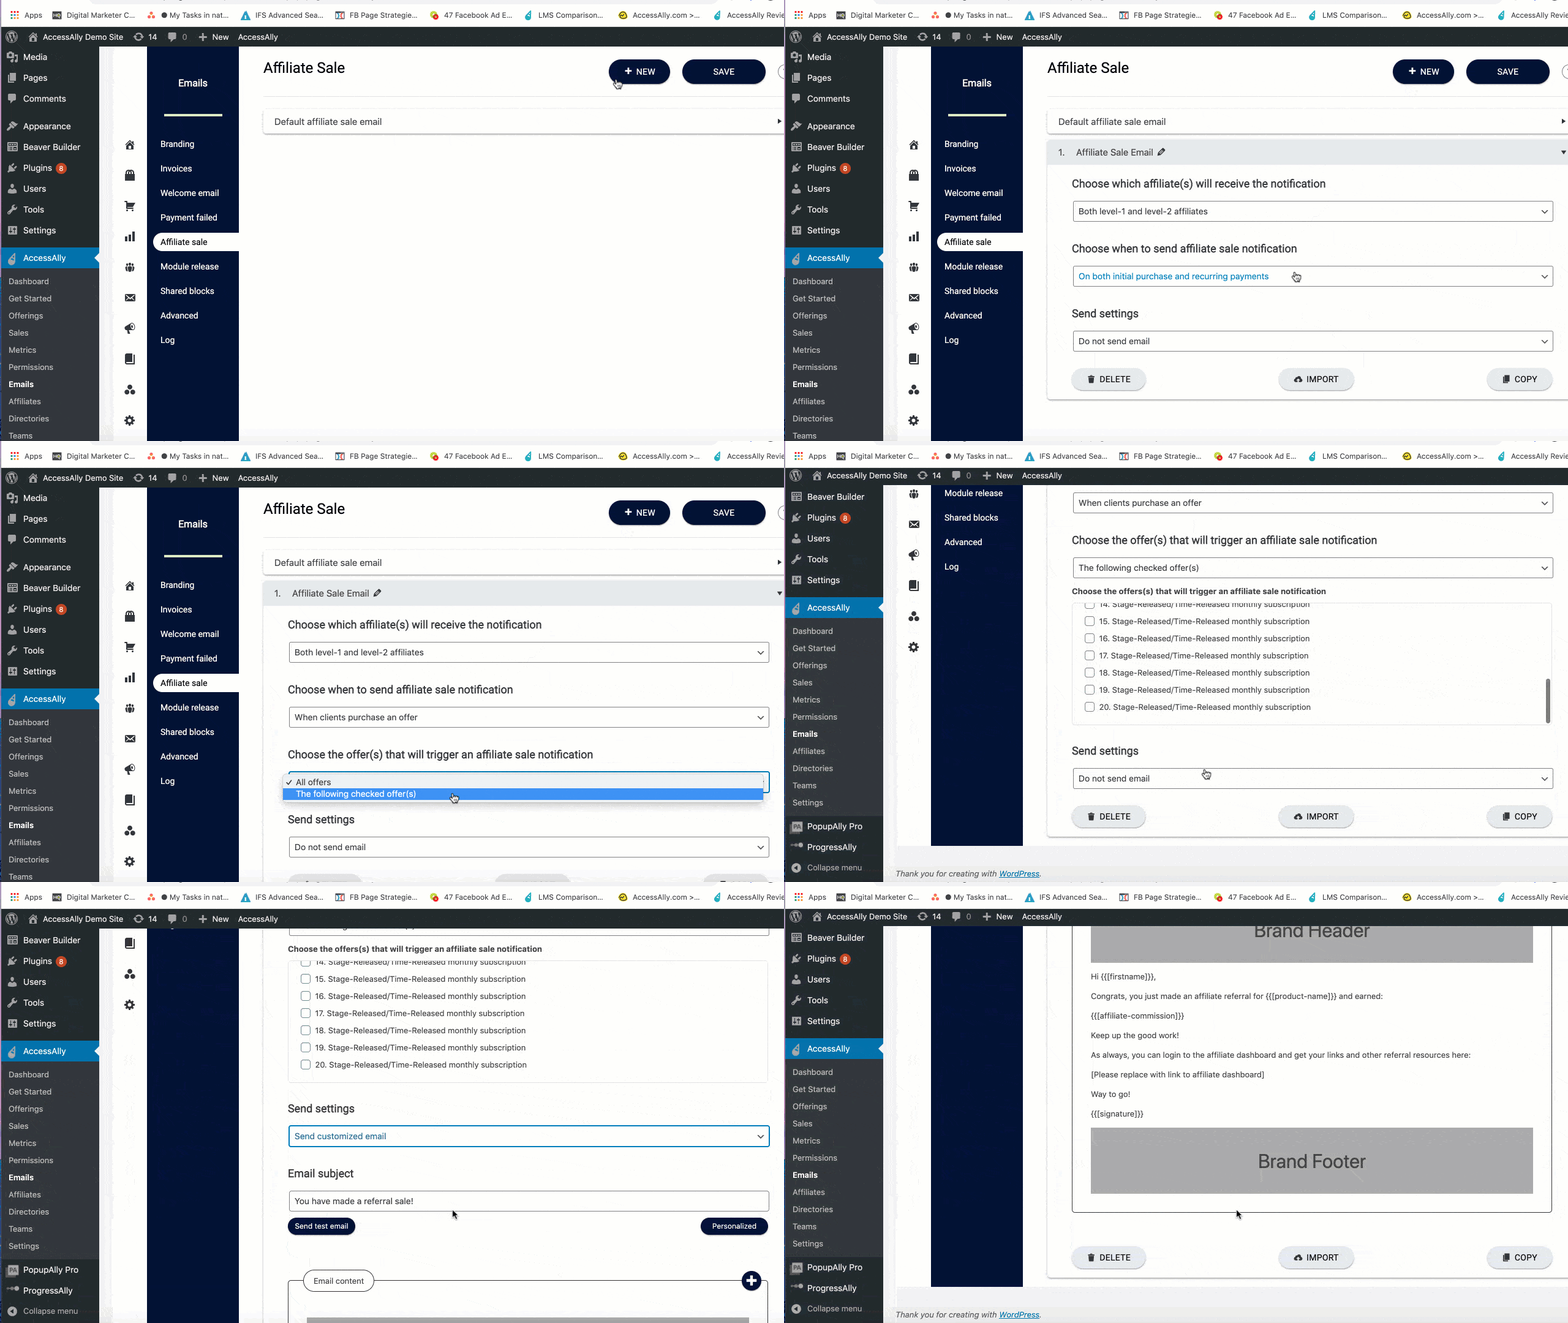
This option will send a custom Affiliate Sale Notification Email for each Offering on your site. When using this option, you’ll turn the default template to “do not send.”
- Click the +NEW button.
- Define which specific offer(s) or order form(s) this email should be tied to.
- “Save” your changes.

4. Customize Affiliate Notification Emails
Go back to your Affiliate sale tab and continue customizing your email.
- Modify existing elements by clicking on them
- Add new content via the “+” icon
- Reorder sections by dragging and dropping as needed.
- “Save” your changes
5. Send a Test Email
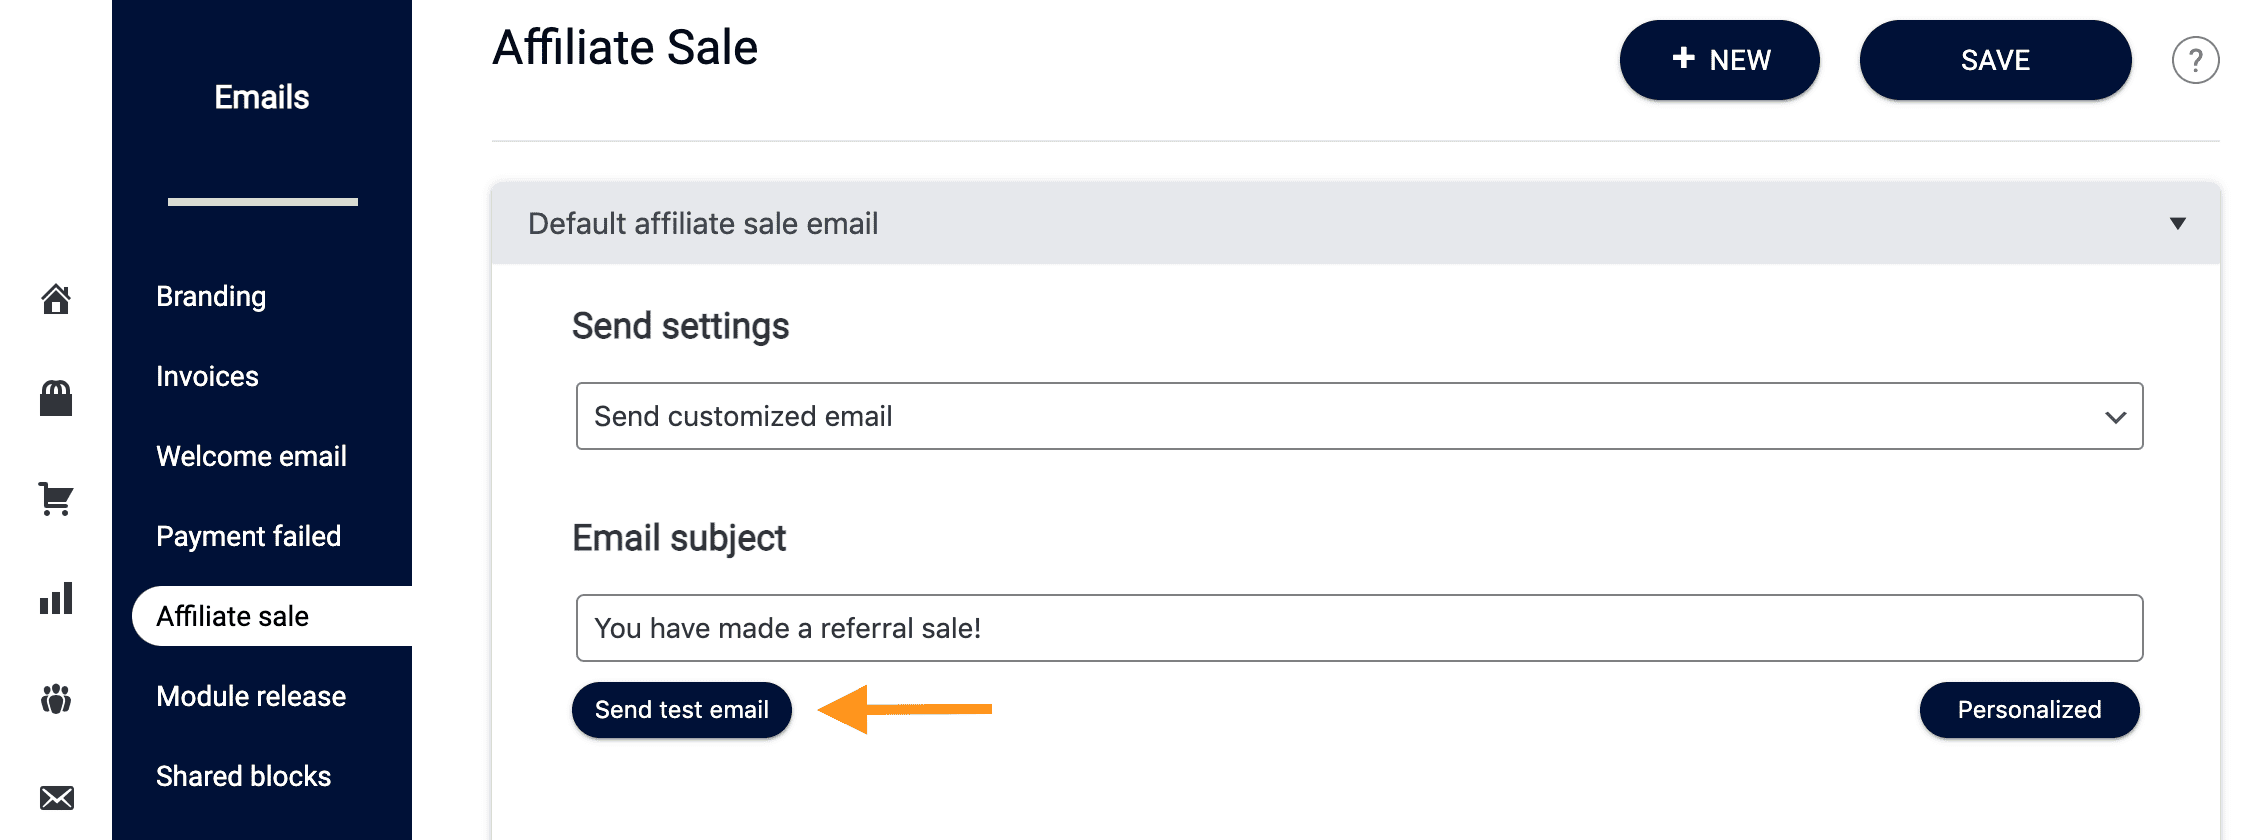
Before going live, send the email to yourself to ensure formatting, branding, and content look correct within the inbox.

6. Make a Test Purchase
- Opt-in for your Affiliate Program
- Use your Affiliate link, to make a purchase, in an incognito window.
- Verify that the affiliate notification email arrives.
Repeat this with each order form you want to test.

