ARTICLE CONTENT:
What Is The Product Launch Formula (PLF)
Jeff Walker’s Product Launch Formula is a system for launching a product that drips 3-4 videos over a course of a few days, then leads to a sales offer.
Step 1: Create a Free Online Course
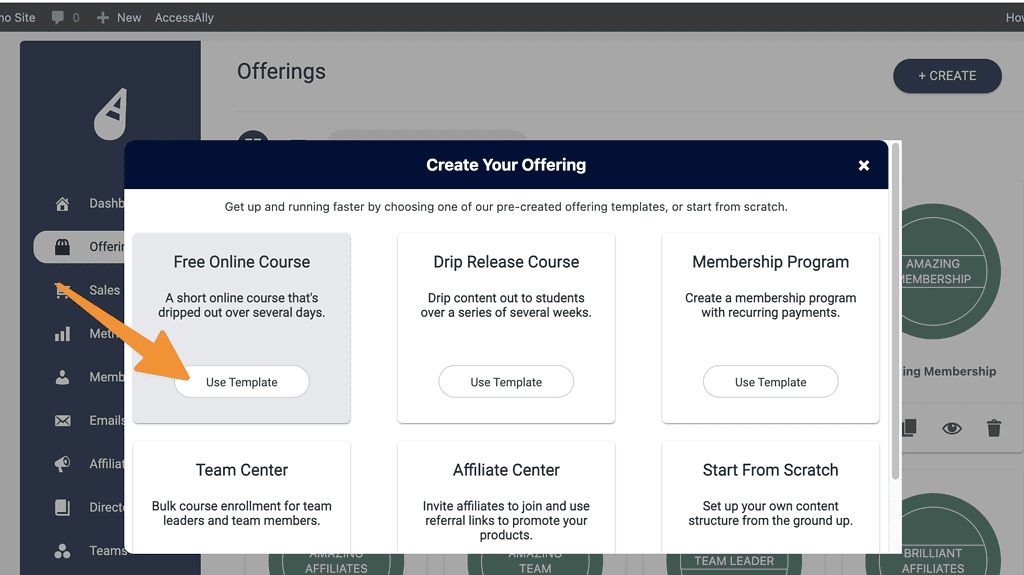
Go to AccessAlly > Offerings > + Create > Use the free online course offering template.
Content Tab > Content Section
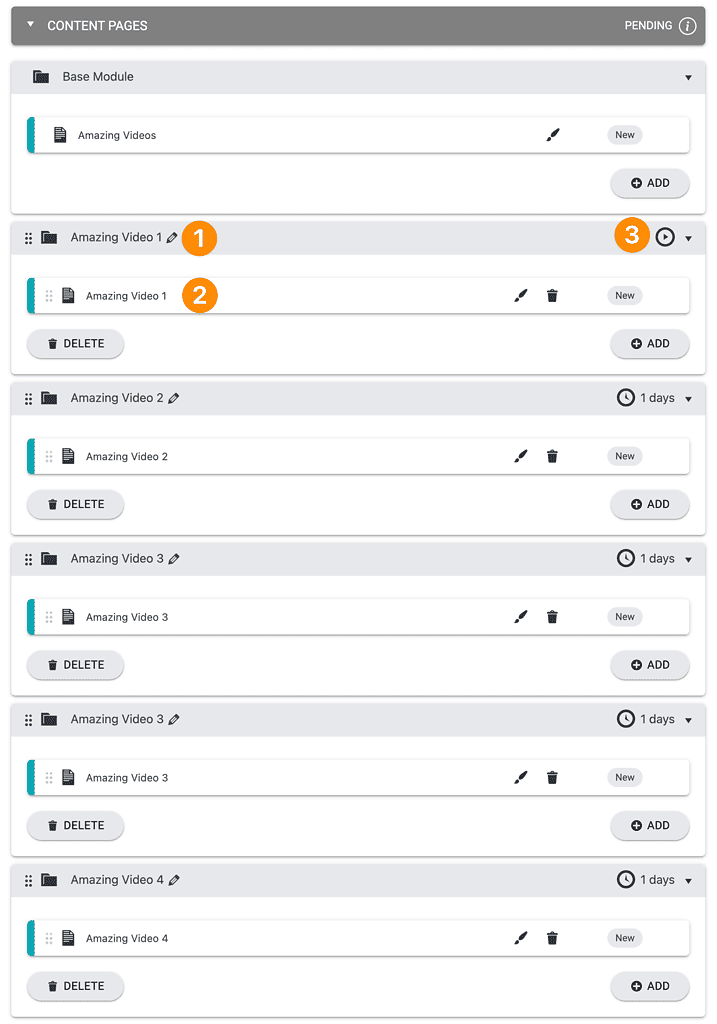
Review the modules and pages in this section. The screenshot below is based on a four part video series. Upon signup the participant gets access to the Amazing Videos welcome page and Amazing Video 1 (first video in the series).
- Module name – change the wording if desired
- Page name – change the name if desired
- Release timer – adjust to change when each module is released
Forms Tab > Free Opt-in Form
You can edit the default name of the opt-in form. This will become the URL in the browser for the link to join the free video series.
Back end view
After saving your offering template you can make changes to the fields and items on the opt-in form by clicking the edit pencil.

Front end view (default shown)
You can make changes to the design of the page using WordPress.

Permissions Tab > Tags Used in Video Series
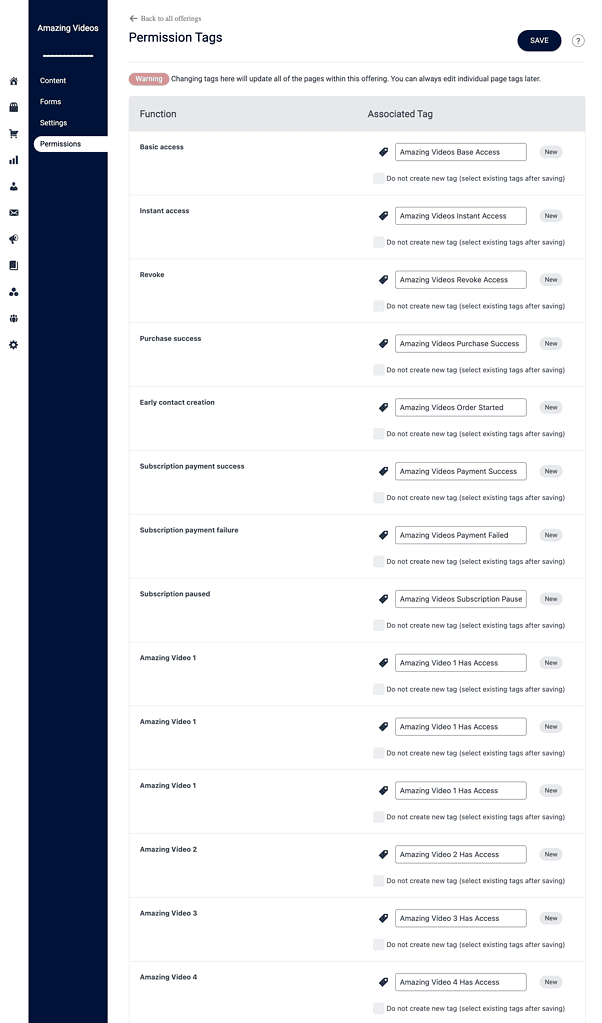
The offering template will automatically create all the tags you need for delivering the video series. These tags are used to release drip content and send emails to participants.
Step 2: AccessAlly Custom Operations
One optional piece to consider is how to “expire” or “hide” videos from view. In some cases your PLF style video launch may only show the video for a single day. Moving to the next day… expires the previous video.
While optional this creates an engaging workflow.
AccessAlly > Settings > Custom Operations
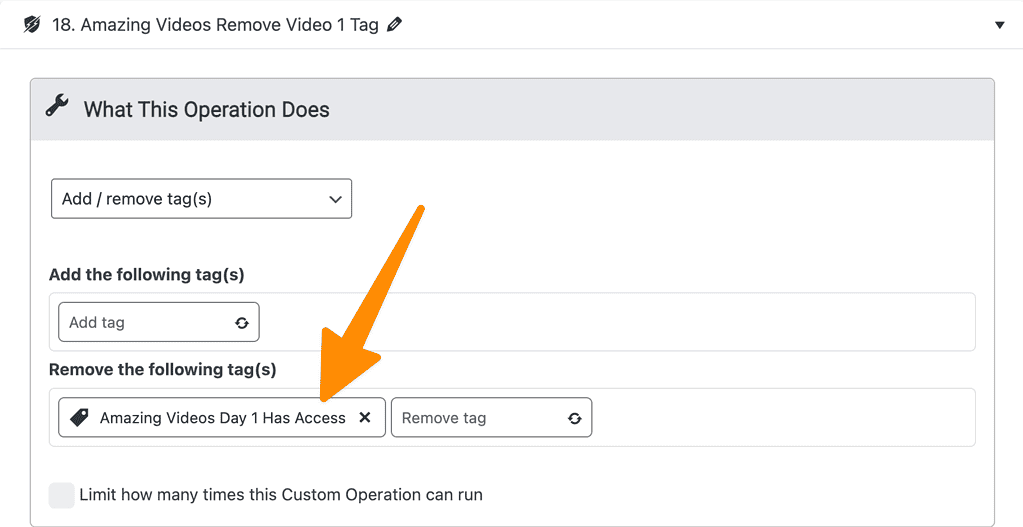
Rinse and repeat the custom operations below until you have one for each video.

Step 3: ProgressAlly Events
Now you’ll use ProgressAlly Events to track when the participant views each video day. Viewing Day 2 will expire Day 1, viewing Day 3 expires Day 2, and so on.
Go to ProgressAlly Events > Create new event
- Set to when user visits a page
- Select the page (example Day 2 visit expires Day 1)
- Each time event happens – if you repeat this video series in the future!
- Select (AccessAlly) Custom Operation
- Add the operation for the video that expires
- Save your changes!
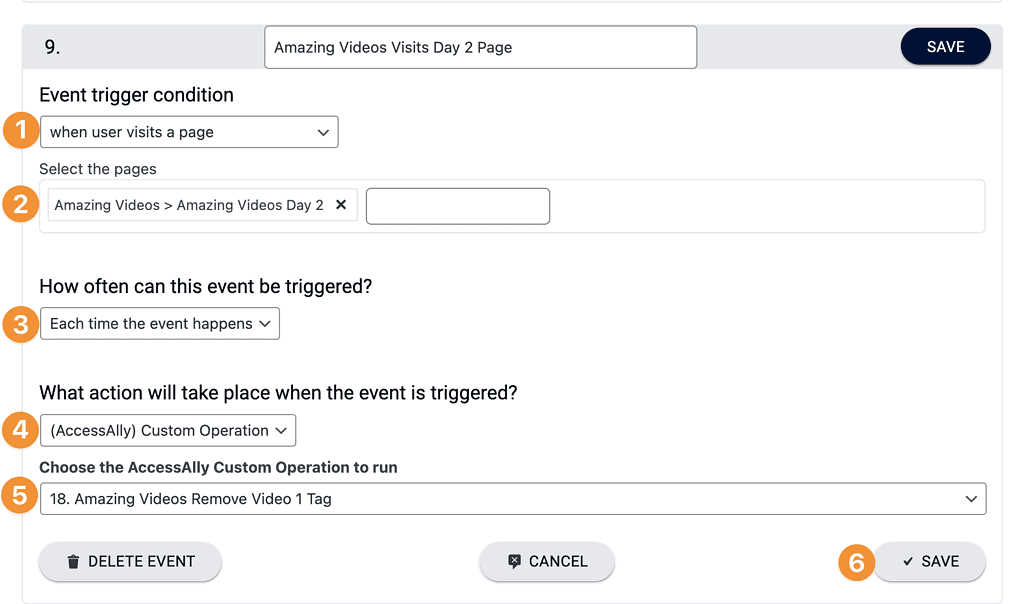
Repeat this step for each page.
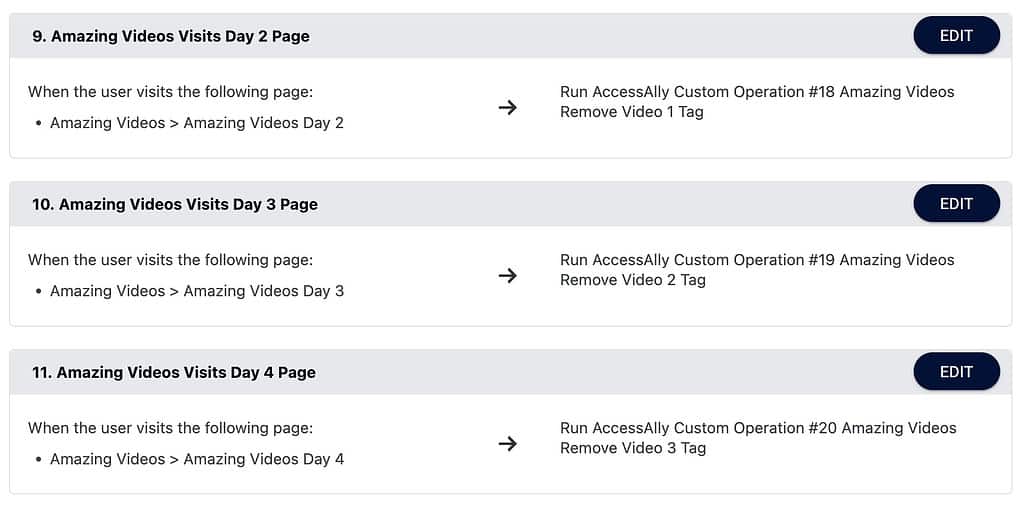
Step 4: Release Content
The opt-in form you created with this offering (Forms Tab) will release the content based on the release timers you’ve added.
Now it’s time to decide where the emails they receive will come from!
Option 1: AccessAlly Emails
If you’re using AccessAlly Managed Contacts or want the flow of emails going out to be seamless and simple use the Module Release emails inside AccessAlly. The participant will get an email with each video release.
Option 2: CRM Emails
If you’re using AccessAlly integrated with a CRM system you can send emails by creating a new email automation or delivery sequence. Tagging is controlled inside AccessAlly so no additional webhooks or tag adds/removals are needed… just sending out the daily dripped emails!)
Step 5: Promote Your Next Step
Now it’s time to promote the offering you’re selling at the end of your free video series. This offering can be created inside AccessAlly so both options are shown side by side on the dashboard page of your site.
Tips for this part!
You can promote from within your video series by creating a Next Steps page. Add a new module to your video offering called Next Steps.

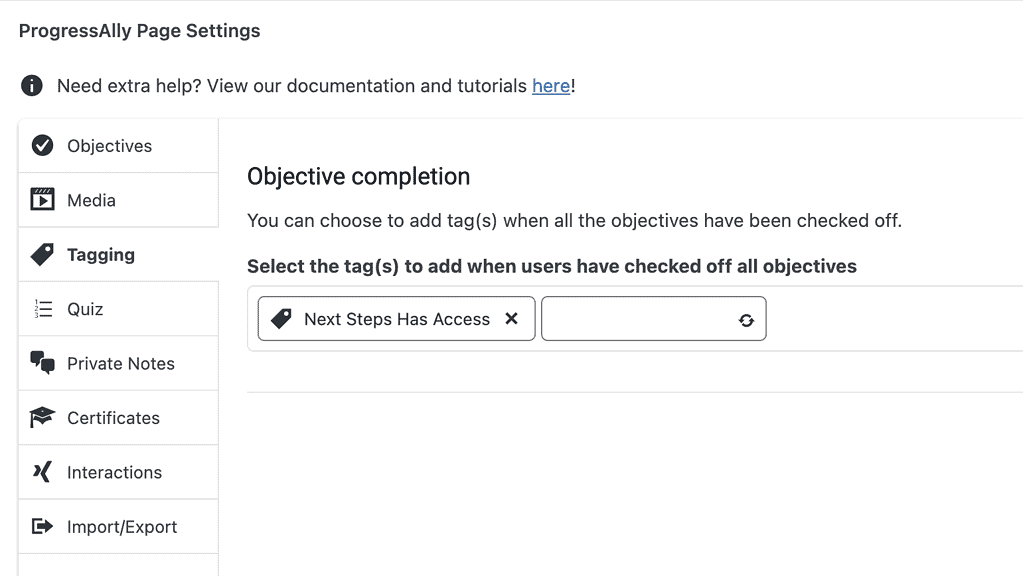
You can even set progress on the base page for the Next Steps to be released when all days of the video series have been completed.
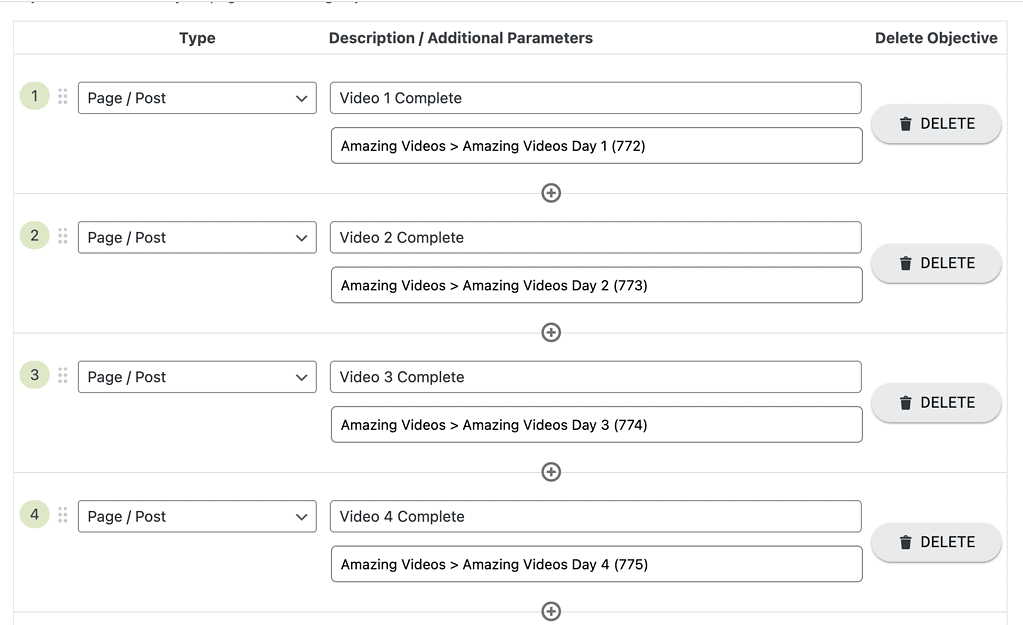
Adding a tag upon completion of all videos in the series can unlock your next steps page!
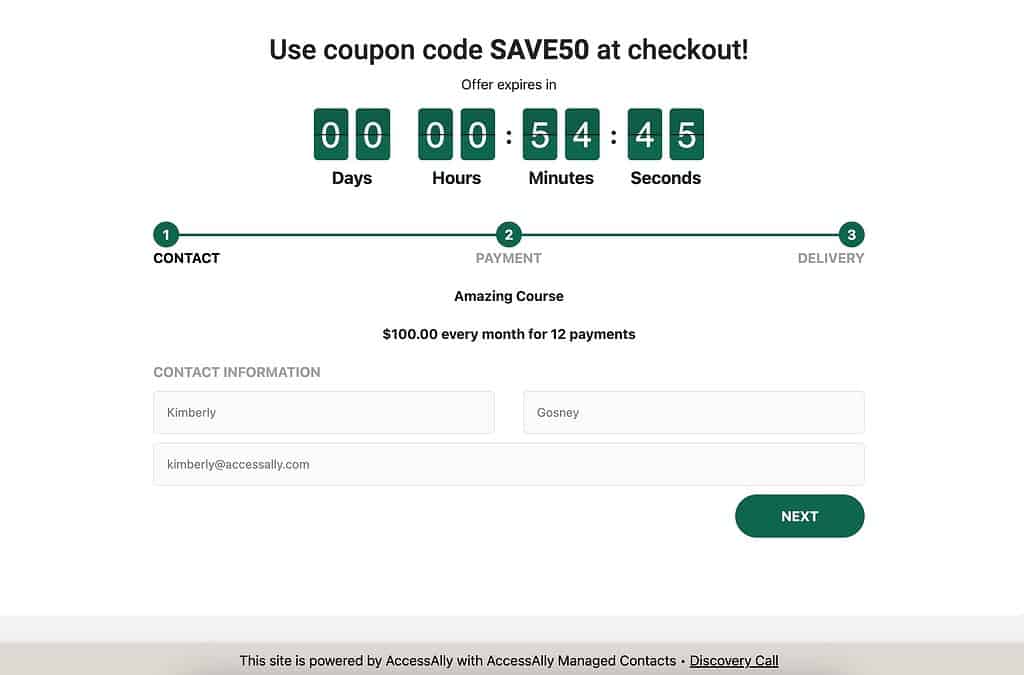
This page allows you to expire the last video in your series and even create a timer for how long they have to purchase the next step with a discount coupon code. This page used as a sales page.
Part 1: Add a ProgressAlly Event
Create a step to expire the last video in your series once someone views your sales page.

Part 2: Add a Countdown Timer and Order Form
If you’d like to promote a limited time offer you can add a countdown timer and AccessAlly order form to your next steps sales page.
