AccessAlly’s order forms are flexible in design and content, and include a long list of customization elements. If you want a video walkthrough, click here.
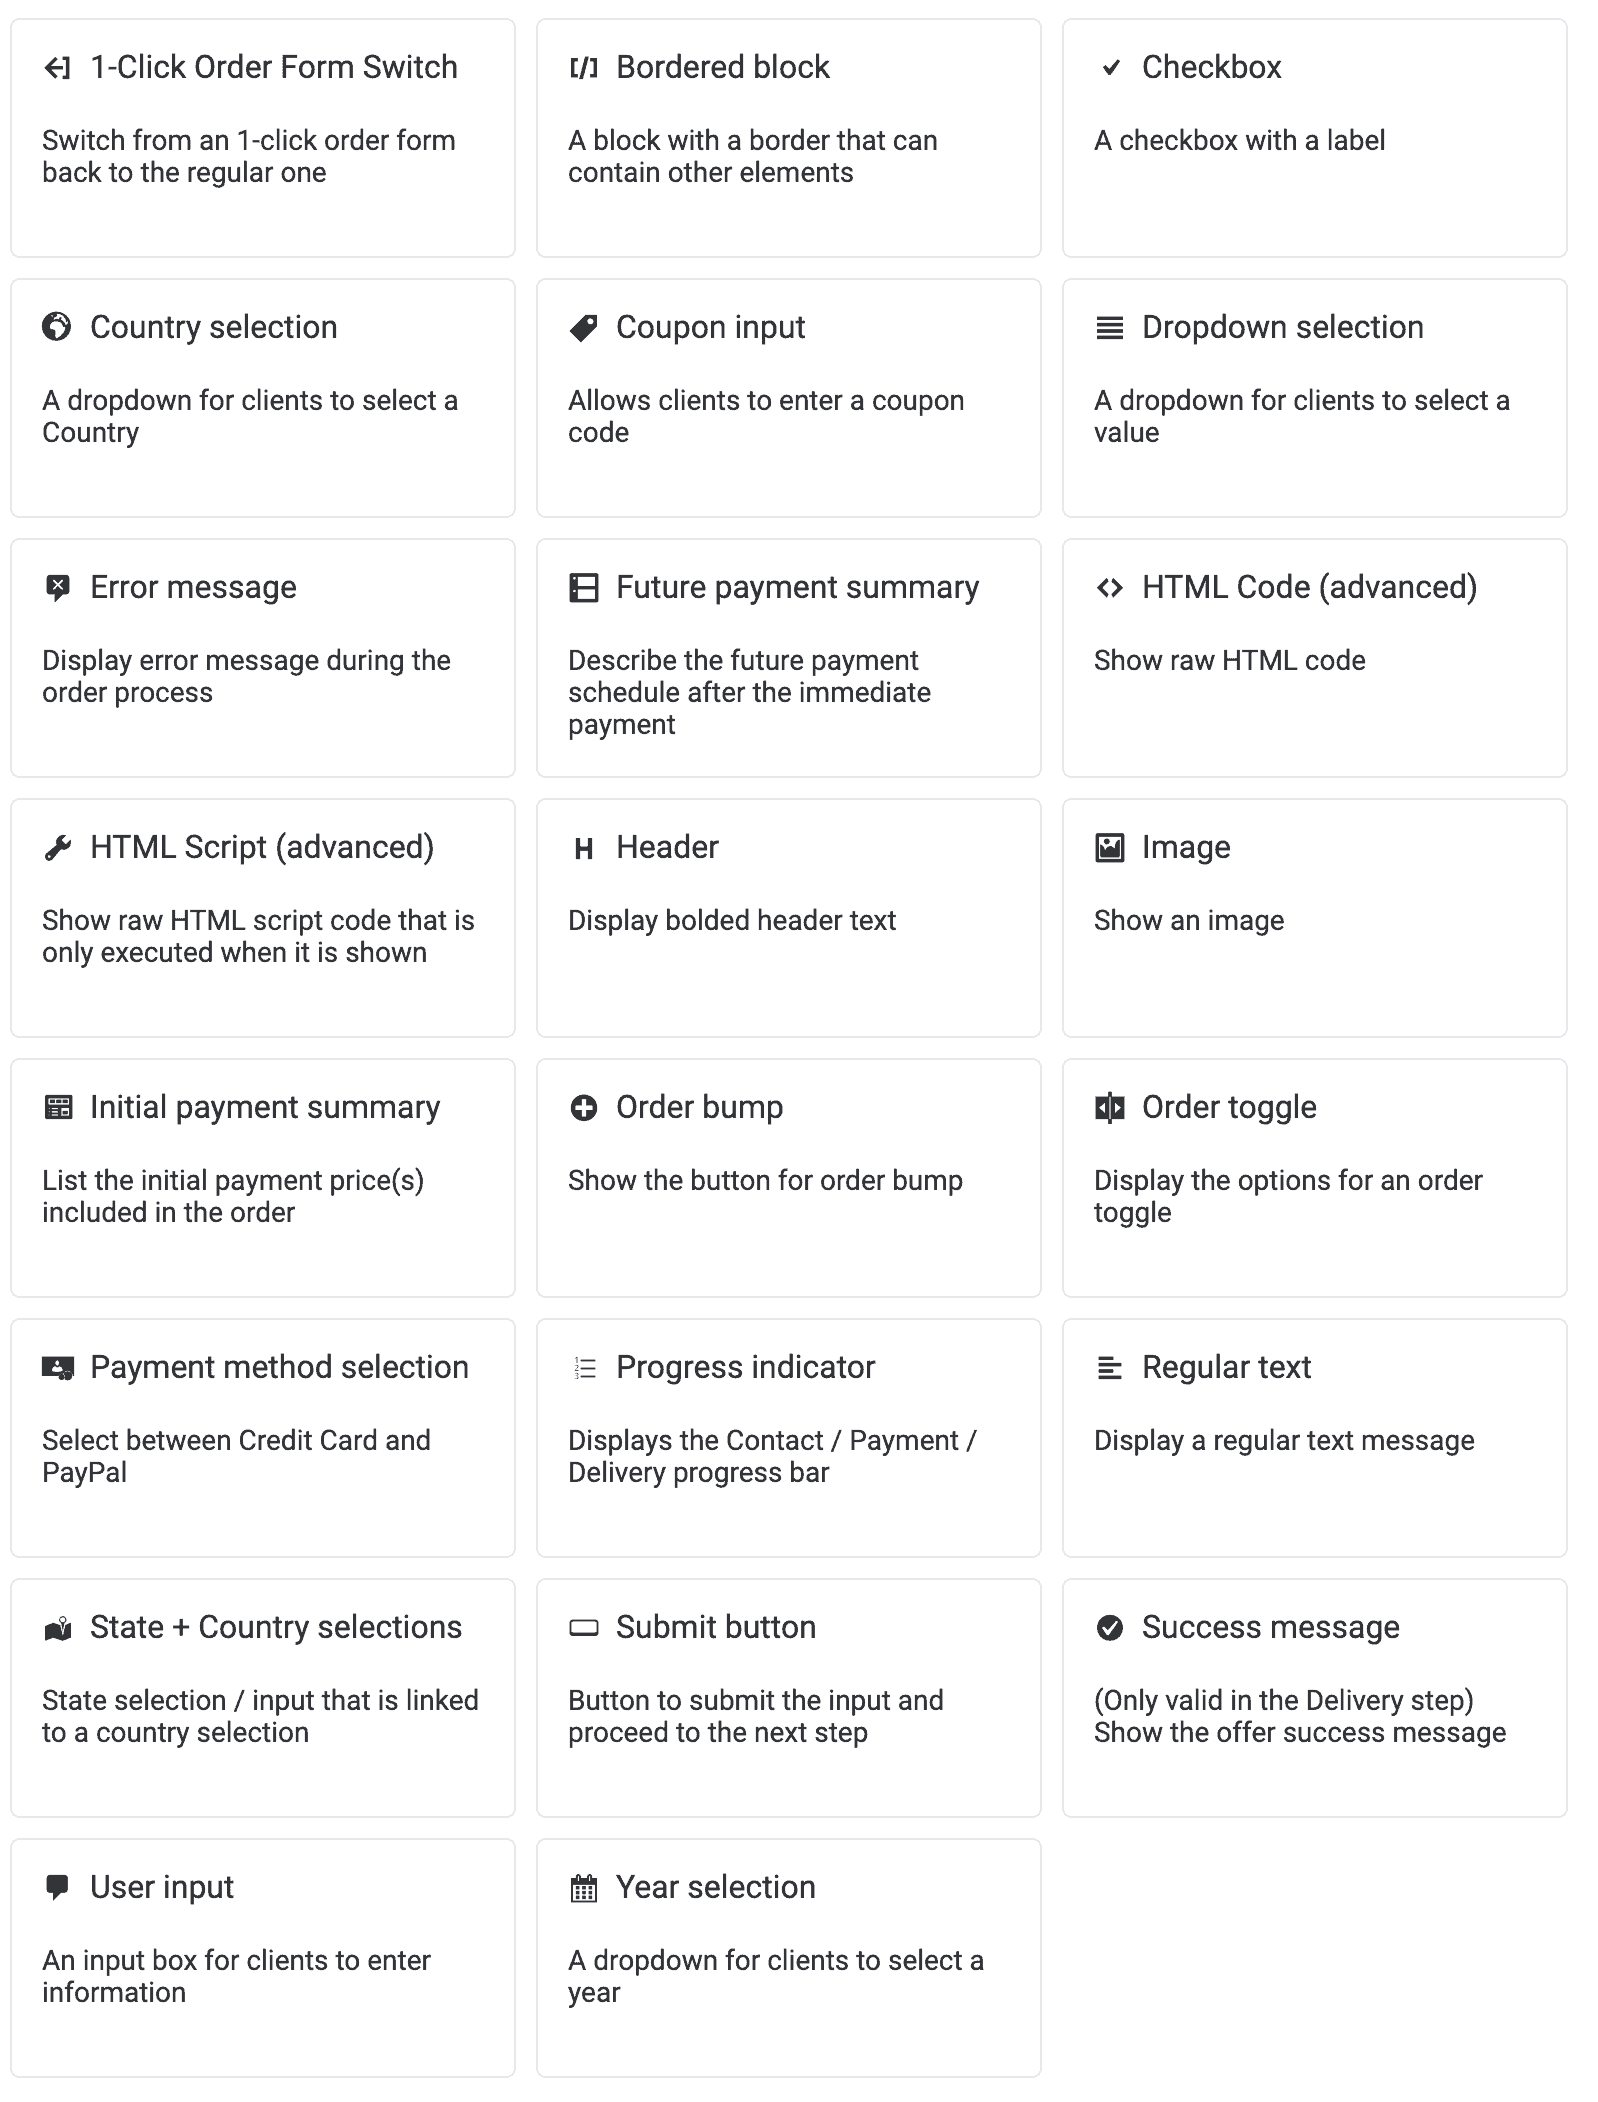
There are many different order form customization elements that you can add to the default order form style for design, clarity, and functionality purposes:

Note: Click here to learn the difference between a toggle, bump, upsell & more!
ARTICLE CONTENT:
How to Add An Element To Your Order Form
When you are in the AccessAlly > Products > Order Form Design screen, simply click into the order form you’d like to add an element to (or create a new one).
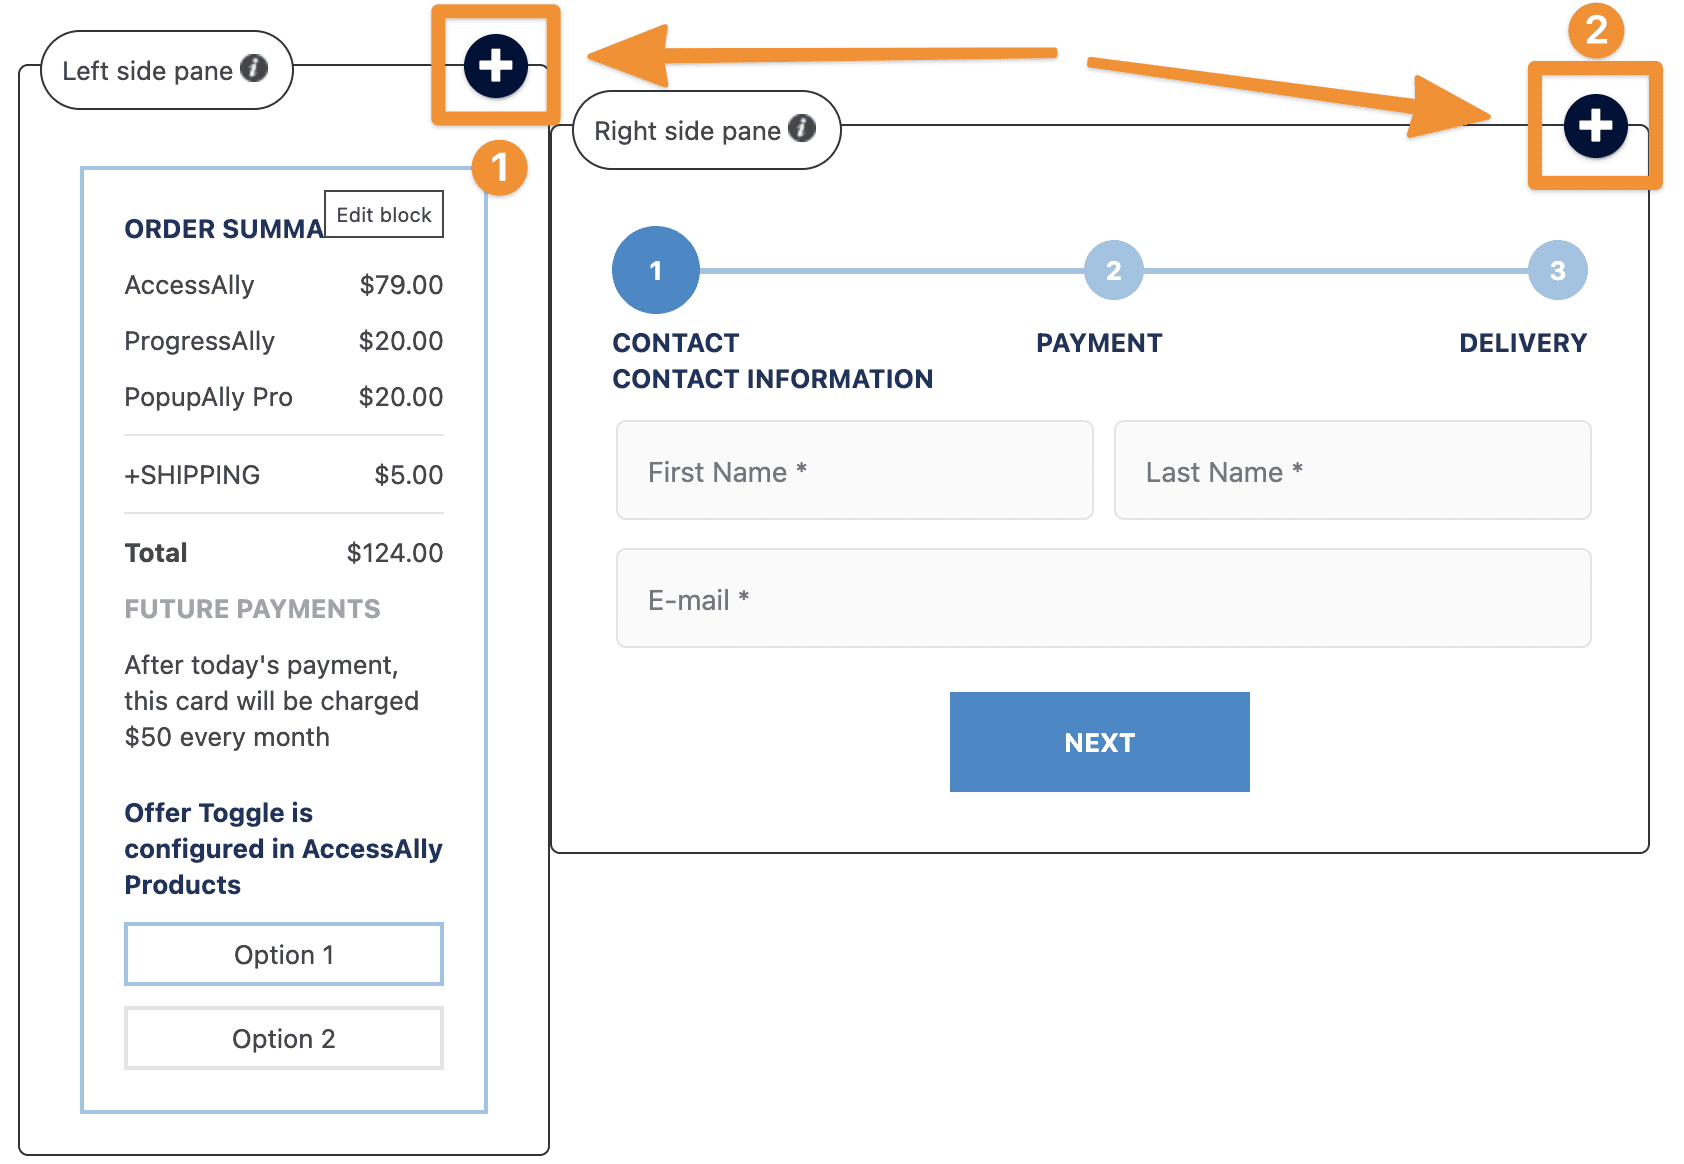
Inside the template, locate the + buttons attached to each section. Click on the one associated with the section where you would like to add the element.

How to Further Customize Each Element
Once the new element is added to the correct section (and moved to the exact location where you wish it to appear), there are some further customization options available.
To access these order form customization options, click on the element and a new popup box will appear.
NOTE: This feature gives ultimate flexibility for your order form design, but may take some “outside the box” thinking to figure out the best way to obtain the information you need from your clients.
A common use case, for example, is the need to add a shipping address to your order form. In this case, you would want to add multiple input fields that link to custom fields in your CRM.
Auto Fill Functionality
Please note that autofill functionality for your order forms is very client and browser dependent.
However, the credit card info can NOT be auto-filled. This is a security measure required by Stripe.

