A webhook is one method that allows communication between web applications. It allows you to send data from your CRM to AccessAlly when certain events occur.
This allows your two systems to stay synchronized with each other.
Webhooks are not used with AccessAlly Managed Contacts. Instead, you can use Zapier to send contact info to your email platform.
ARTICLE CONTENT:
Why use a webhook?
A webhook can be used when there is no other way of accomplishing what you are trying to accomplish.
For example, if there is no direct integration between two applications, then a webhook may be the best way to get them to talk to each other.
With AccessAlly, webhooks are commonly used in your CRM automations.
One common use case would be creating a password on your AccessAlly site for a user when the CRM adds a tag to their profile.
Webhooks are very complex, as they allow you to accomplish many things. Understanding how they work can help you troubleshoot WHEN (not if) an issue comes up.
When webhooks are created it is done so by an application, it must then travel through the server hosting the application, into the internet, through many routers, to the server hosting the application it is being sent to, down to the application itself. This second application will then do what is requested (such as generate a password), and then send a response back through the same system. Application, server, internet full of routers, server, application.
Webhooks Log
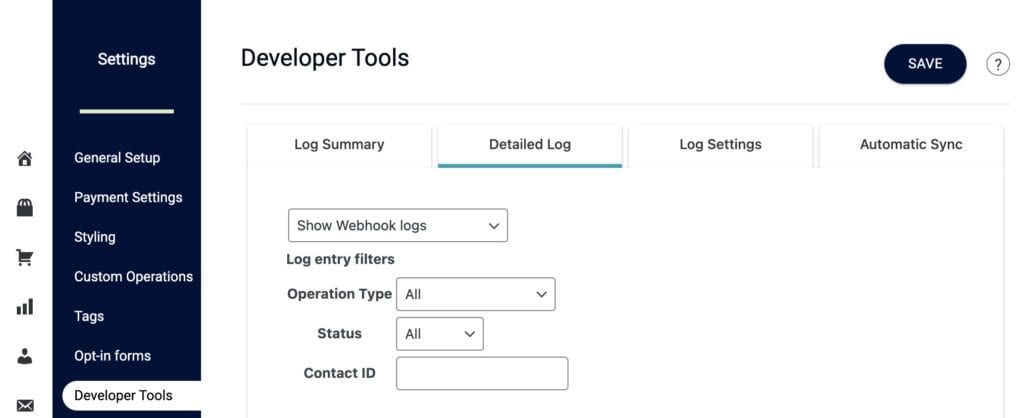
You'll find a detailed list of all webhooks being used on your site in the Webhooks Log. Go to AccessAlly > Settings > Developer Tools > Detailed Log
Common Reasons Why Webhooks Fail
Your webhook can break at any point along this path.
This is why it is so important to troubleshoot each webhook as its own unique problem. This is also why it is important to involve other parties in the troubleshooting process.
Usually, you will have access to the application on each end, but you may not be able to see anything in between. This is why we ask for the CRM to look at their logs to determine what they show. It’s also why we ask to have logs looked at by your website host, as usually only they can see them.
The combination of getting everyone involved will usually lead to figuring out where the disconnect is. For example, if the CRM shows that no reply was received, but your website logs show it received the webhook from the CRM, then it means the return path was broken somewhere.
It may have been at the website host level, perhaps they blocked it for some reason, perhaps it left the webhost, but was not received at the CRM in the CRM’s allocated time. Each CRM listens for a response for a different amount of time. ActiveCampaign for example only listens for 5 seconds.
Perhaps the server received so many webhooks at one time that it did not have enough resources to process them all at once, this can also cause errors. Errors that can only be seen from the web host logs, not from AccessAlly.
This is especially true of shared hosting, as the server resources are shared amongst a number of websites. Some web hosts even make it a habit of regularly putting 400+ sites on a single server. When this occurs, webhooks will fail more often. This is why AccessAlly offers different webhooks for different purposes.
Only once all the information has been collected and the actual failure point has been established can it be corrected.
The correction may involve using a different webhook that is not as server resource intensive, it may be getting your web site host to change a setting, or increase server resources, it may be fixing a typo in the webhook, it may be that the CRM made a change and blocked it, it may have been blocked at a router (very uncommon, but could happen), it could be ANYTHING.
When possible, use another solution
Whenever possible we recommend not using webhooks at all, and instead using built-in AccessAlly functionality. This will help ensure a much smoother process.
How can you do that?
Take orders using AccessAlly order forms, and make sure the Offer is set to create an account for the user (this eliminates the need for a genpass webhook).
This will generate their password and send it back to the CRM immediately, so you can still send the password in an email if you want to.
This option also allows you to display their newly created password on the screen after successful purchase and then send users directly to the course. This is a fantastic onboarding experience. Note: This will not generate a new password when an existing user makes a new purchase.
If using optin forms for free access, use the On-Demand Login feature of AccessAlly as part of the thank you process. This will again generate a password for a first-time user and send it back to the CRM.
Note: The On-Demand Login will not work for existing users, due to security reasons, they will need to login with their existing credentials.
Finally, if migrating from a different solution, or adding a bunch of users at once manually, do not run them through a webhook. Use the AccessAlly Migration plugin to create their accounts.
This creates the accounts on WordPress and pushes them to the CRM, which is less intensive than webhooks.
Note: if you have an email address for an existing user in the migration upload, it will not generate a new password for them.
Quick video showing you the Webhook Generator
How to Create a Webhook in Your CRM
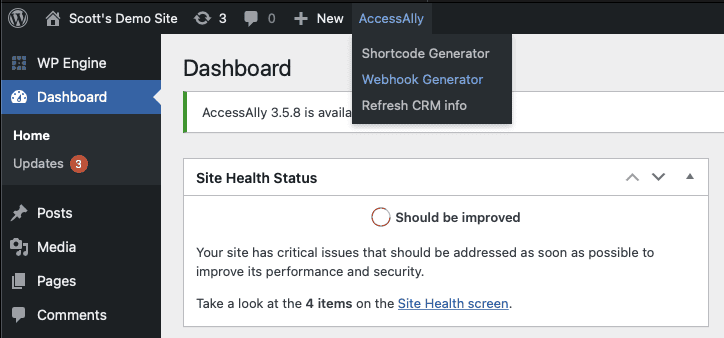
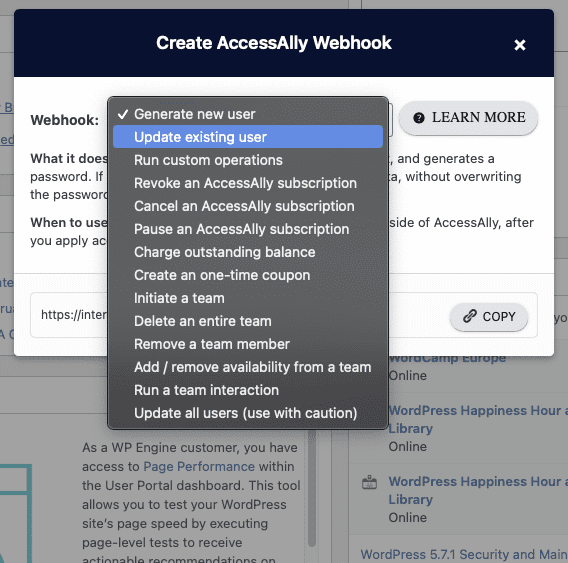
You can use the webhook generator in the admin bar on the back end of wordpress to generate any needed webhook.
You then select the webhook you want to generate and click on COPY. You can then paste it where needed.
Special Notes for Individual CRMS:
When adding an HTTP post to your automation, the Contact ID is already included in the Infusionsoft settings.
All you need to do is copy/paste your Webhook URL as outlined in this article.

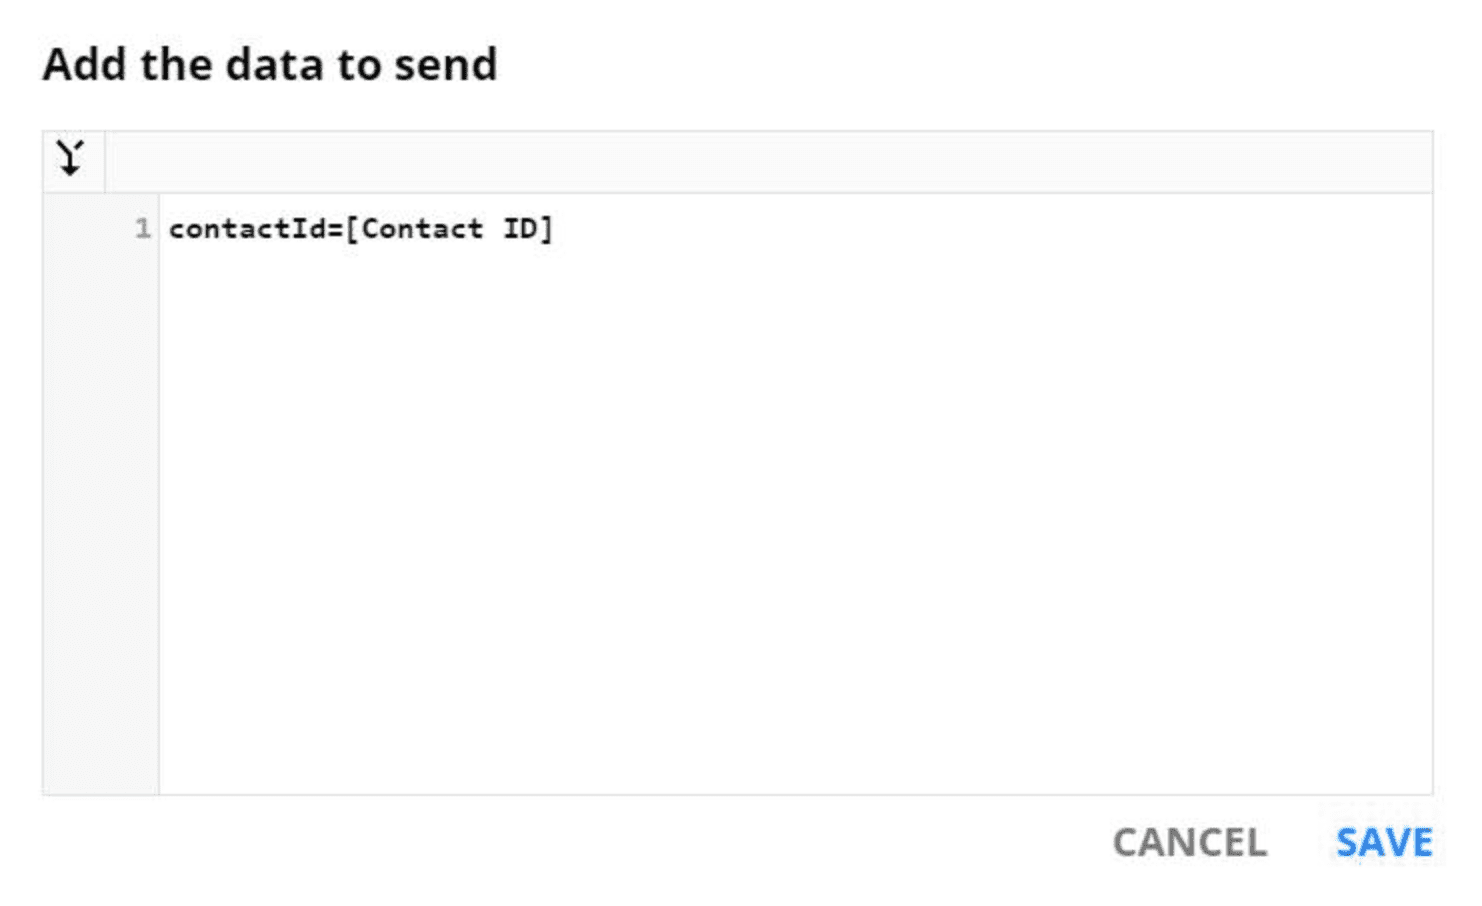
When adding a webhook to your Ontraport automations, you will have to add the Contact ID for the webhook to work:
The post data is contactId=[Contact ID]
Please note: there must NOT be a new line at the end, or it won't work.
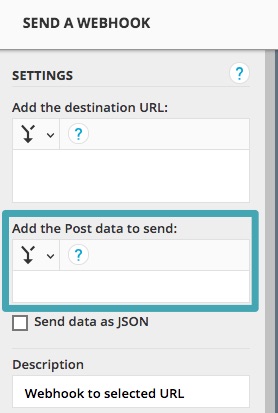
This is what it will look like in Ontraport:
Because of limitations in the Kit system, it is currently not possible to create a webhook directly. Please see this article for in-depth instructions: How to Create Kit Webhooks.
List of Webhook Commands:
The bracketed [operation] portion of the URL is replaced by any ONE of the following commands:
aal_genpass: Generate new user
What it does: Creates a new WordPress user if it does not yet exist, and generates a password. If user already exists, it will update all the data, without overwriting the password.
When to use it: When there’s a purchase or opt-in from outside of AccessAlly, after you apply access tags. Only use this webhook when there's a chance this contact does not exist yet in AccessAlly.
To update a contact's information, use the next webhook (aal_updateuser) instead because it is a lighter operation and will not slow down your campaigns.
aal_updateuser: Update existing user
What it does: Tells AccessAlly to pull all of the latest information about this contact, including tags and custom fields.
When to use it: Run this webhook whenever you apply or remove a tag, or update a custom field in your CRM. This is the most commonly used webhook!
aal_fieldop: Run custom operations
What it does: Triggers the custom operation that you’ve set up in AccessAlly.
When to use it: As part of an automation campaign, for example when implementing a gamification points system.
Parameters: operationId: the ID for the custom operation you want to trigger.
aal_initiateteam: Initiate a team
What it does: Creates a new team with this contact as the team leader, for the specific team program.
When to use it: If you want to initiate teams through your CRM because payment is being made outside of AccessAlly.
Parameters: teamId: the ID for the team program.
aal_deleteteam: Delete an entire team
What it does: Removes the team leader and all team members from the team program, and revokes access by applying revoke tags. It does not delete the contacts themselves.
When to use it: If a team is not renewing, or asks for a refund and you want to remove the members from the team and access to the content.
Parameters: teamId: the ID for the team program.
aal_removeteam: Remove a team member
What it does: Takes a team member off a team, so that seat can be returned to the pool of available seats. This member will no longer have access to the content associated with the team.
When to use it: When a team member is no longer a part of the company, or needs to be replaced.
Parameters: teamId: the ID for the team program.
aal_updateteam: Increase or decrease team size
What it does: A positive number increases the team size, and a negative number decreases available seats on a team.
When to use it: If someone purchases additional seats, or you want to expand or contract the capacity of a team based on other criteria.
Parameters: teamId: the ID for the team program. change: the amount you want to increase or decrease the team size by.
aal_teamops: Run a team interaction
What it does: Team interactions are set up for each team program, and can be used to apply tags or run custom operations on individual team members.
When to use it: To give members gamification points, grant access to more content, or run any other type automation.
Parameters: teamId: the ID for the team program. opId: the ID for the operation you want to run.
AccessAlly Payment Webhooks
If you are using AccessAlly's built-in payments, then you will also be able to use the following webhooks to manage subscriptions and create fancy coupons.
aal_createcoupon: Create a one-time coupon
What it does: Creates a member-specific coupon that is stored in a custom field, and expires after use or a given timeframe.
When to use it: Once you’ve created the placeholder coupon settings under Sales -> Promo Setup, you might run this and include the coupon in an abandoned cart campaign or a sales promotion.
Parameters: promoId: the ID for the promotion you set up.
aal_revokesubscription: Revoke an AccessAlly subscription
What it does: This immediately stops an AccessAlly subscription, and applies all of the revoke tags to remove access for this contact.
When to use it: When someone asks for a refund, or if set up an automation to remove access after a failed payment has not been recouped within a certain timeframe.
Parameters: productId: the ID for the subscription product in question.
aal_cancelsubscription: Cancel an AccessAlly subscription
What it does: This stops future payments from being charged, and will remove access at the end of the current payment period.
When to use it: When someone wants to cancel, but keep access for the amount of time they have already paid.
Parameters: productId: the ID for the subscription product in question.
aal_adminstopsubscription: Pause an AccessAlly subscription
What it does: This pauses a subscription so no future payments are charged, and it does not affect access.
When to use it: If you want to give people access without charging them on their current schedule.
Not compatible with PayPal subscriptions.
Parameters: productId: the ID for the subscription product in question.
aal_chargesubscription: Charge outstanding balance on an AccessAlly subscription
What it does: Attempt to collect payment on an outstanding balance, which might accumulate after a failed payment.
When to use it: As part of a failed payment campaign where you ask members to update their payment information first.
Not compatible with PayPal subscriptions.
Parameters: productId: the ID for the subscription product in question.
(Deprecated) aal_batchsync: Batch Sync Users
The Batch Sync webhook has been deprecated. That means it will continue to work if you already have it running. However, we recommend using the aal_updateuser webhook instead in all cases going forward.
If you are experiencing slow batchsyncs, please switch to the aal_updateuser instead.

