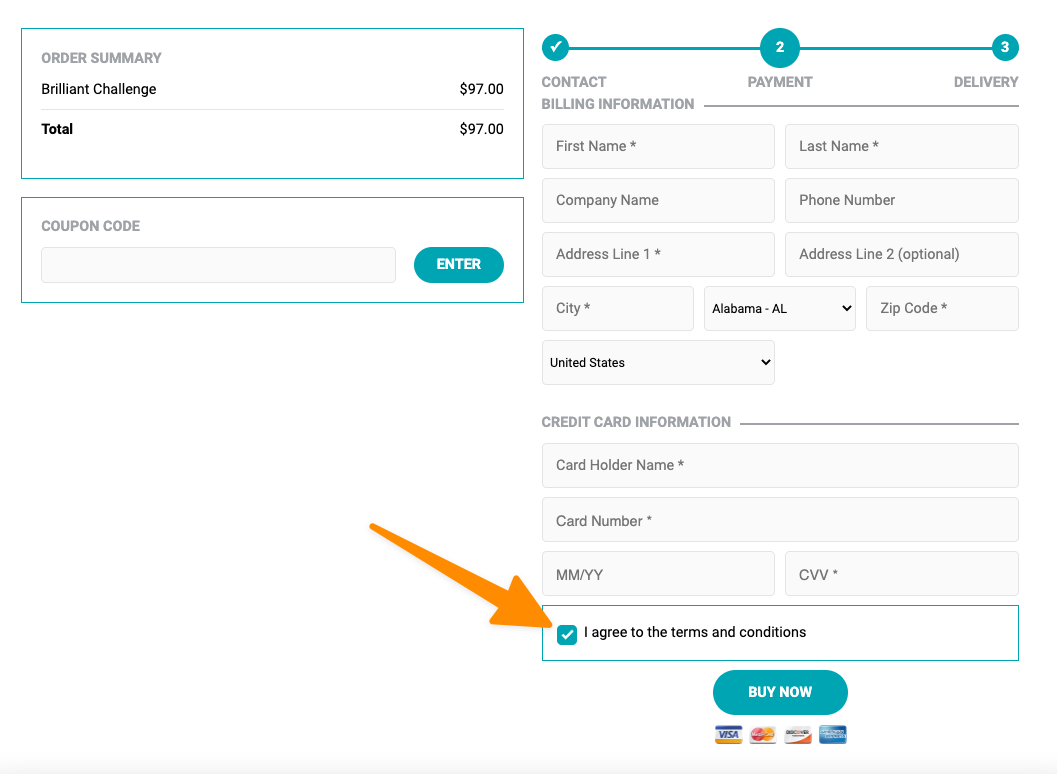
The Mandatory Purchase Condition checkbox must be checked manually before payment is processed. This allows you to comply with any “explicit action” requirements, such as for the EU General Data Protection Regulation (GDPR) compliance.
ARTICLE CONTENT:
Resource
We have an in-depth article on GDPR Compliance for Online Businesses Selling Courses & Memberships to guide you.
Option 1: Default: Tried and True Order Form Design
If you’re using the Default: Order form design > Tried and True option follow the steps below to enable this feature. Go to AccessAlly -> Sales -> Design Setup to confirm which design you’re using.
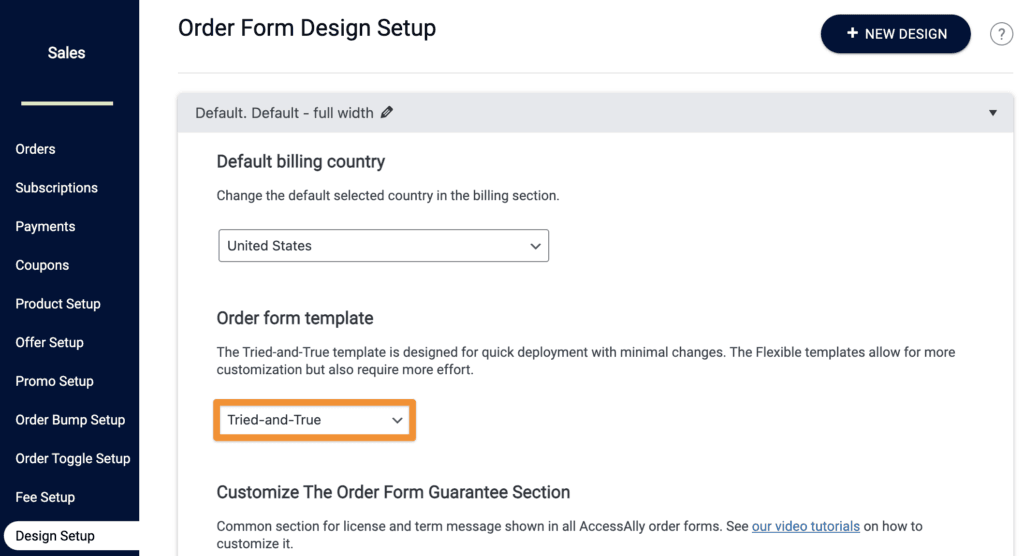
Go to AccessAlly -> Sales -> Design Setup select your Tried-and-true order form design. Add your condition text and include links to any terms and conditions.

Click “Save Changes” to save these settings. Once saved, the checkbox will appear on all of your order forms that use the Tried and True Order Form Design.
Example order form checkbox.
Option 2: All Other Order Form Design Options
If you’re using the custom order form design templates you will be editing this section inside your order form template(s) found in AccessAlly -> AccessAlly -> Sales -> Design Setup. This applies to the following order form design templates
- Flex: two-columns (right)
- Flex: two-columns (left)
- Flex: full-width
- Flex: one-page accordion
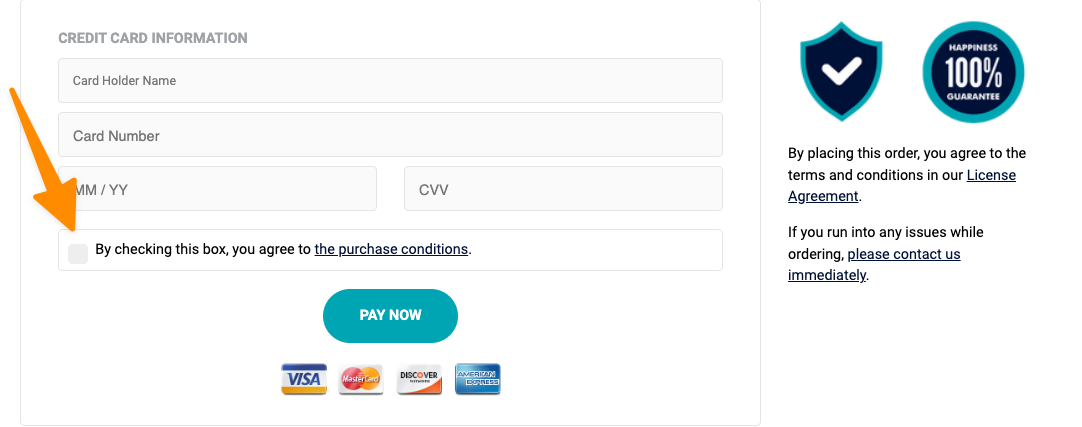
Step 1: Credit Card Section (Stripe Users)
Scroll down to the Credit Card section of your order form design template. Click on the words > I agree to the terms and conditions.
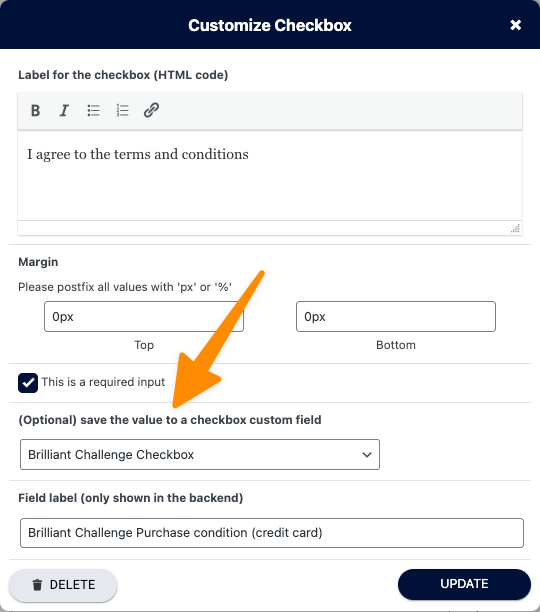
Step 2: Customize Checkbox Text
Next, customize the text that you want to appear next to the checkbox in the “Label for the checkbox (HTML code)” section. Make sure to include a link to any legal or disclaimer information that you’re required to include for compliance with the EU GDPR, etc.
Resource: How to Create Custom Fields
Step 3: Save Changes
Click “Save Changes” to save your order form changes.
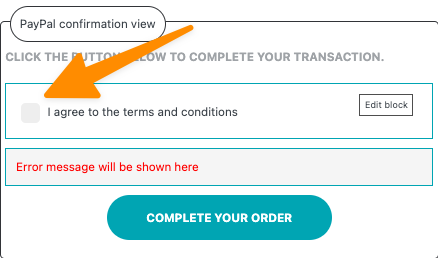
Step 4: PayPal Section (PayPal users)
Scroll down to the PayPal section of your order form design template. Click on the words > I agree to the terms and conditions.
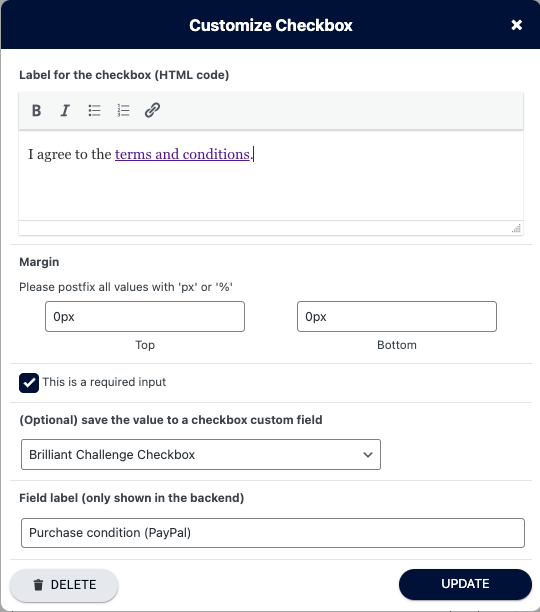
Step 5: Customize PayPal Checkbox Text
Next, customize the text that you want to appear next to the checkbox. Make sure to include a link to any legal or disclaimer information that you’re required to include for compliance with the EU GDPR, etc.
If you would like to map the checkbox to a custom field select the desired field from the dropdown.
Resource: How to Create Custom Fields
Step 6: Save Changes
Click “Save Changes” to save your order form changes.
