Scenario: You’ve got something that you’d like to show (or hide) on a page of your AccessAlly site. Being able to show or hide something for logged in members can be valuable if you have requirements for making a purchase or redeeming points within a membership.
In this article we’ll explore how to show and hide content on your site based on tags a user has. There are many ways that you can use AccessAlly to show or hide content. This ideas in this article are to help show you examples of what’s possible.
If you have questions about anything in this article join our next Tune Up Call or Contact Support.
Skill Level: All
ARTICLE CONTENT:
How to Show or Hide Something Based on Tags
If you would like to show something on your site based on tags (or hide it) you can do this using Conditional displays that you create inside the AccessAlly Shortcode Generator.
In this example we’ll cover text, a custom operation button, and an order form to give you a few examples of what’s possible.
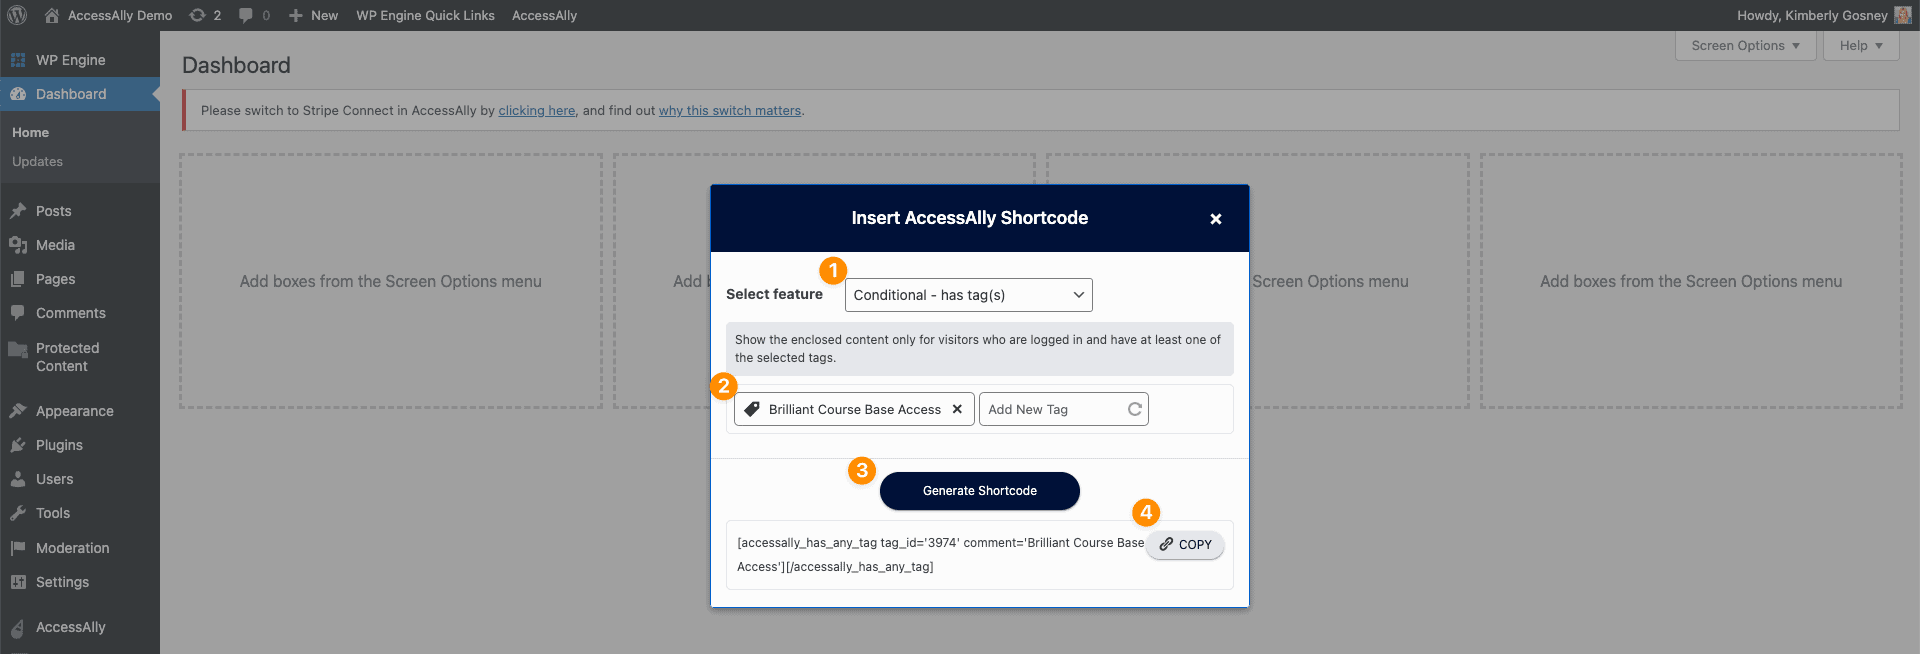
Step 1: Open the AccessAlly Shortcode Generator
The AccessAlly Shortcode Generator is found on the /wp-admin page of your site. You can type https://nameofyoursite.com/wp-admin to find it.

Step 2: Make your selections
- Choose Conditional – has tag(s) selection from the Dropdown.
- Type the name of the tag a user has to have to see this content.
- Click Generate Shortcode.
- Copy the code – you can place it in Notepad on a PC or TextEdit on a Mac.

Step 3: Create what you want to show.
There are lots of choices for what you would like to show to a user that has this tag. Examples are:
- Text – you could type a message you would like shown.
- Custom Operations – you could go back to the AccessAlly Shortcode Generator and grab the code for a custom operation button (like unlocking something with points.)
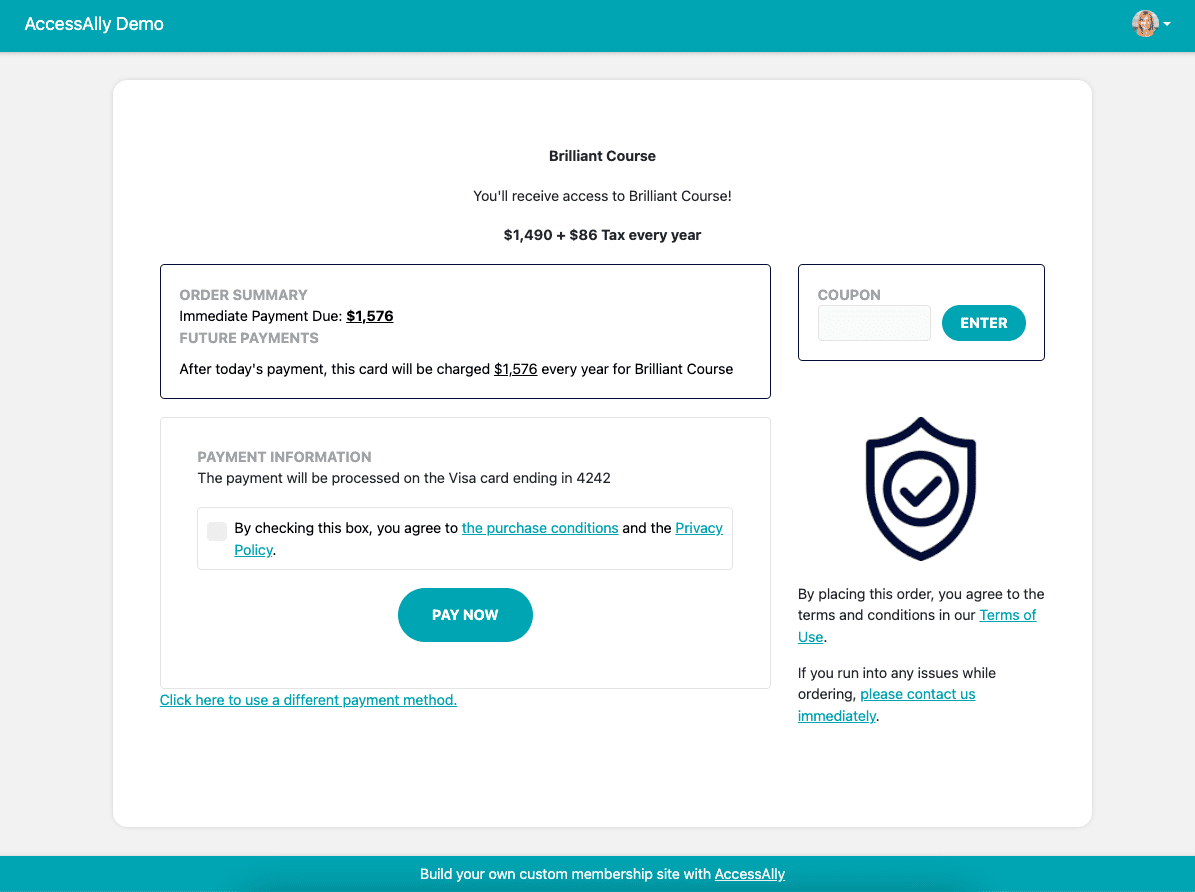
- An order form – you could go back to the AccessAlly Shortcode Generator and select an order form you would like to display.
What’s important is… the user will only see what you want to show if they have the tag you’ve added.
Step 4: Combine the AccessAlly Shortcode with what you’d like a user to see.
Open Notepad on your PC or Text Edit on your Mac and nest what you want to show in between the conditional – has tag(s) you created in Step 1. Use the examples below as a guide.
Example showing text: [accessally_has_any_tag tag_id=’3974′ comment=’Brilliant Course Base Access’]Text I want shown here[/accessally_has_any_tag]
Example showing a custom operation: [accessally_has_any_tag tag_id=’3974′ comment=’Brilliant Course Base Access’][accessally_custom_operation operation_id=’53’][/accessally_has_any_tag]
Example showing an order form: [accessally_has_any_tag tag_id=’3974′ comment=’Brilliant Course Base Access’][accessally_order_form offer_id=’171′ allow_coupon=’yes’][/accessally_has_any_tag]
Step 5: Add the code to a WordPress page.
Place the entire code into the page you’d like the content displayed when a user has that tag. This can be any page on your site in any location you’d like.
The process for this step varies based on your WordPress Theme and/or Page Builder.
Step 6: Examples of The Final Result
Your content is only shown when a member has that tag. If they do not have the tag this item is hidden from view.
Example of showing text when a member has the tag.

Example of the hidden text when a member does not have the tag.

Example of showing the custom operation button to a member that has the tag.

Example of the hidden custom operation button when a member does not have the tag.

Example of showing the order form to a member that has the tag.

Example of the hidden order form when a member does not have the tag.

Frequently Asked Questions about this Article
Great question! You can do just that by nesting conditional shortcodes.
Example: I’m selling a course called Brilliant Course, but only to members that participated in another paid offering on my site called Fabulous Challenge. I’d like to show a 1-click upsell button to participants of the Fabulous Challenge so they can purchase Brilliant Course, but also hide the button after the purchase has been made.
To create this example you’ll use the AccessAlly Shortcode Generator to create three different types of shortcodes.
- AccessAlly Shortcode Generator with the Conditional – has tag(s) to add the tag for the challenge.
- AccessAlly Shortcode Generator to create the Conditional – missing tag(s) and you’ll use the tag for your course.
- AccessAlly Shortcode Generator to grab the shortcode for your 1-click upsell order form.
The resulting code will look like this. Don’t forget to place the two ending “[/” parts of your code after the custom operation button you would like to display.
[accessally_has_any_tag tag_id=’3924′ comment=’Fabulous Base Access’][accessally_missing_any_tag tag_id=’3974′ comment=’Brilliant Course Base Access’][accessally_order_form offer_id=’58’ allow_coupon=’yes’][/accessally_missing_any_tag][/accessally_has_any_tag]

