This is the first article in this series and it covers Creating a Team Center Offering.
Article 1: You are here!
Article 2: Leader Content
Article 3: Member Content
Article 4: Customize Team
Article 5: Add Team Members
ARTICLE CONTENT:
Setup Options
This article covers two ways you can build a team.
- Recommended! Create a Team Center Offering (when using AccessAlly order forms)
- Advanced! Create Your Own Team (when using 3rd party order forms)
Option 1: Create a Team Center Offering
This option is recommended when using AccessAlly order forms to process payments.
Video Walkthrough
Watch the video to see the steps in this article.
Written Steps
Scroll through the steps below to create a Team Center Offering.
Scroll through the steps to add your Leader Content pages. Right now, you’ll create an outline draft of these pages.
You’ll design them (add videos, progress and more) in a later step.
Scroll through the steps to add your Member Content pages. Right now, you’ll create an outline draft of these pages.
You’ll design them (add videos, progress and more) in a later step.
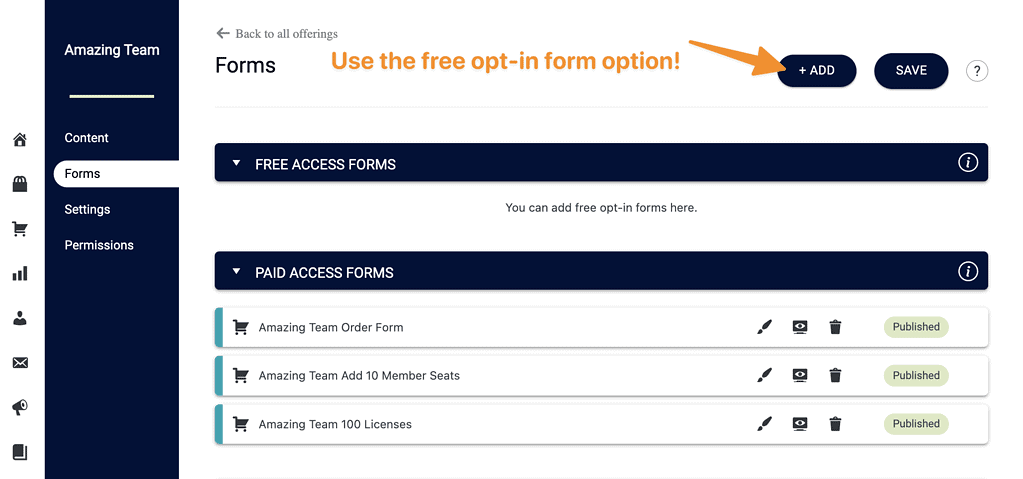
Scroll through the steps below to add Forms to your Team Center Offering.
Scroll through the steps below.
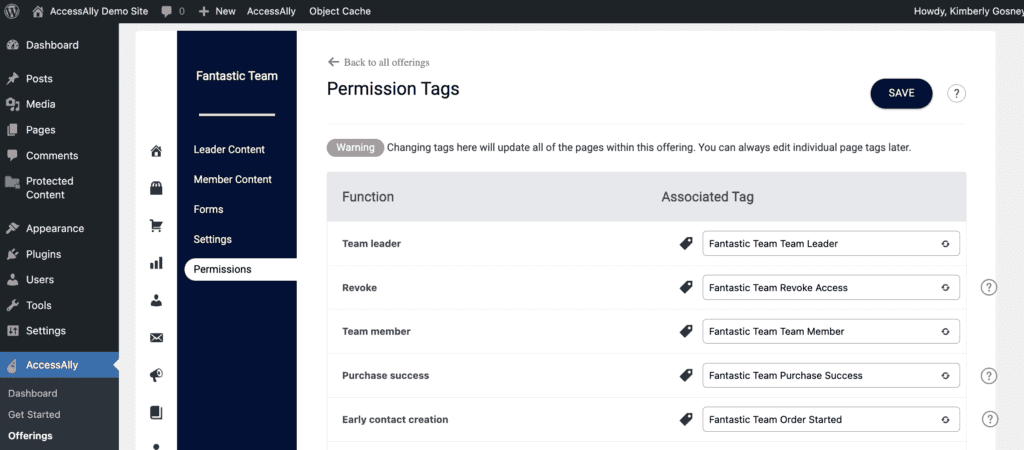
In the Permissions tab you will see the tags that go with each part of your Team Center Offering. Tags are helpful when delivering email automations via a CRM system that is integrated with AccessAlly.
The order form you created in Step 4 of this article will automatically release the Team Leader and Team Member content, and apply the appropriate tags – they are shown here for reference.
Now that you’ve created a Team Center Offering your next step is to design the look and feel of your Leader Content pages, add your course content, and progress tracking.
Option 2: Create Your Own Team
If you’re using a 3rd party tool to take payments on your site, you can create your own team from scratch.
This option is not available when using AccessAlly Managed Contacts.
Step 1: Create a New Team Program
Go to: AccessAlly → Teams → Programs. Click on the +New Team Program button in the top corner.
Click the pencil icon to rename your team.
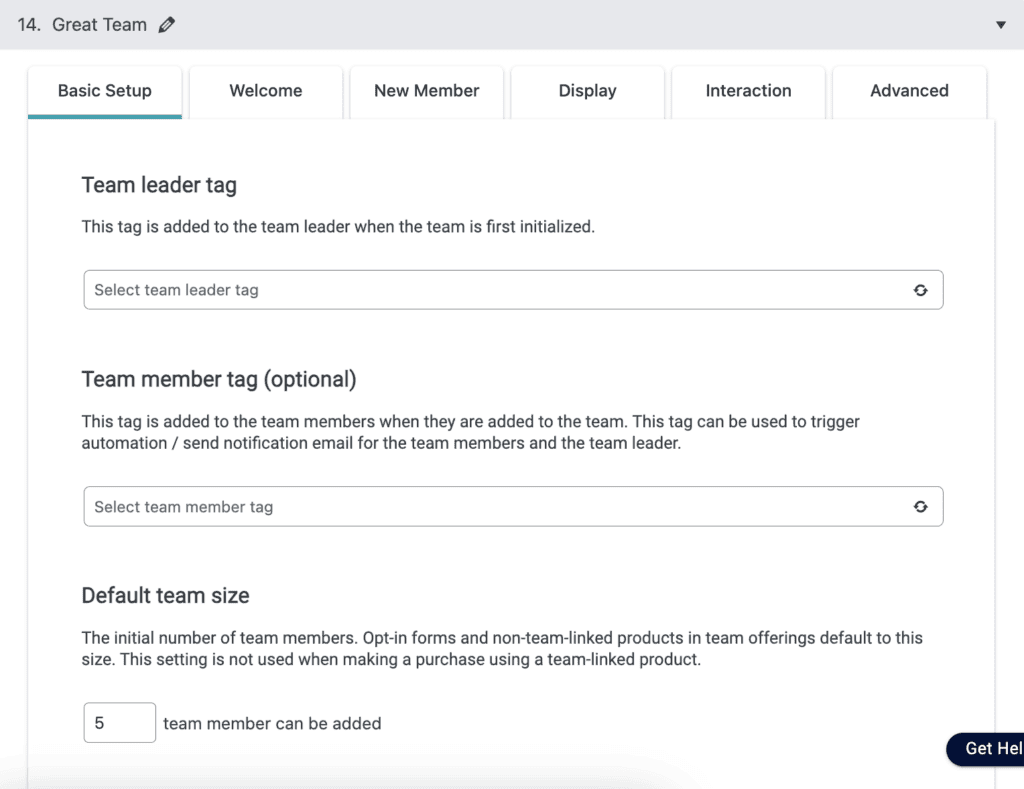
Step 2: Configure Basic Setup Tab
Team leader tag: Select a tag from your CRM.
Team member tag: Select a tag from your CRM.
Note: This tag is ONLY added to the team members when they are added to the team. This tag can be used to trigger automation / send notification emails for ONLY the team members and not the team leader.
Initial team size: select the number of team members that a team leader can add. This number does not include the team leader.
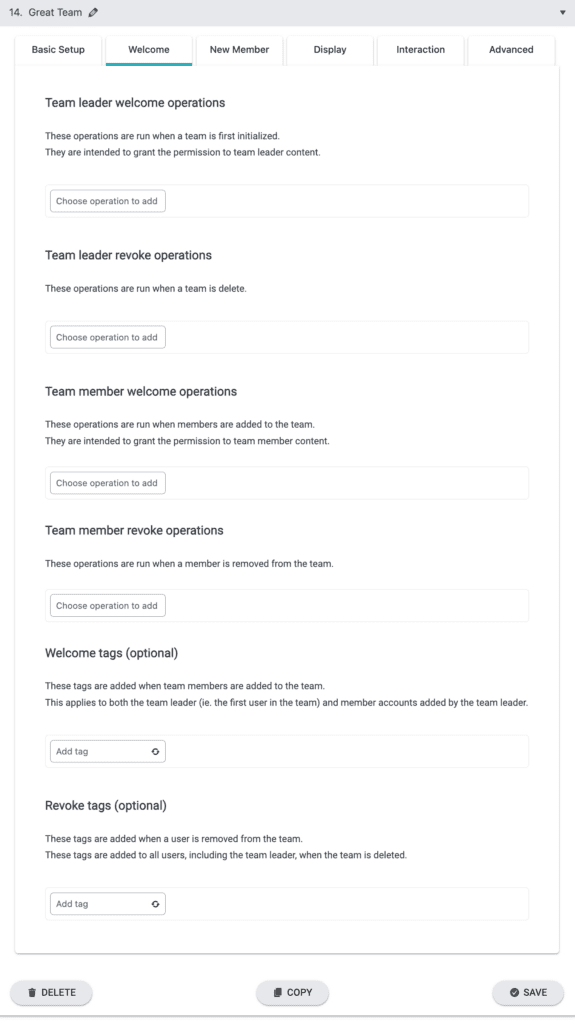
Step 3: Configure Welcome Tab
In the welcome tab you can add custom operations to deliver content to your Team Leaders/Team Members, revoke content forTeam Leaders/Team Members, or add tags to run automations in your CRM system.
Step 4: Configure additional settings
Additional settings are available under the New Member, Display, Interaction, Advanced, and Webhook URL tabs.
Creating a team is covered in our AccessAlly 101 video on Advanced Offerings. Click here to watch.
Yes, they can! If you’d like to give the team leader free access so they can add in their team members (or send self-registration links) you can add a free access form by going to AccessAlly > Offerings > Forms tab. In the top corner click “+ ADD” to create a free opt-in form for the team leader.