In this article you’ll customize the team program settings which are displayed on the Leader Administration Dashboard. The settings created here allow the Leader to add, remove, promote Members, track progress and more!
Article 1: Team Center Offering
Article 2: Leader Content
Article 3: Member Content
Article 4: You are here!
Article 5: Add Team Members
In this article we’ll cover customizing the team display so the Team Leader sees everything you’d like for them to see on the Team Leader Administration Dashboard page.
ARTICLE CONTENT:
Basic Setup
Scroll through the items in the Basic Setup Tab below. This tab shows the Team Leader and Team Member tags used for this team.
Welcome
Scroll through the items you’ll find in the Welcome tab below.
The items created here give access to the Team Center Offering and/or Additional Offerings for the Team Leader and Team Members.
New Member
Scroll through the options below to customize allow Site Admins and Team Leaders to add, remove, or allow Team Members to Self-Register to your Team.
Display
Under the Display tab, you select the items you would displayed for the Team Leader on their administration dashboard page. This is where you’ll add options that are shown to the Team Leader about their Team Members (like Progress or Certificates.)
- Check display team member in accordion style which is helpful for large teams
- Check allow team leaders to download team member progress which creates a CSV file
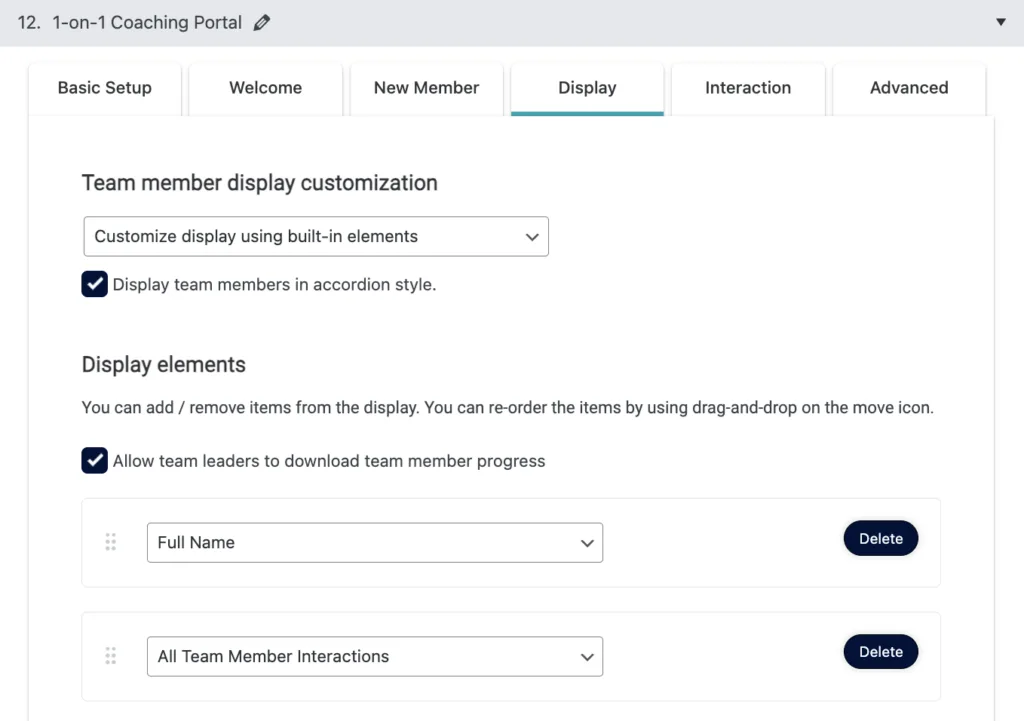
- Full Name
- First Name
- Last Name
- Bio
- Website URL
- Custom Attribute
- Custom Field
- Custom Code
- Custom Text
- All Team Member Interactions
- Add as Team Leader
- Remove Member
- Login as Member – see how here.
- Display Team Member Email-less Login Link – see how here.
- Team Interaction
- (ProgressAlly) Show quiz result
- (ProgressAlly) Progress percentage for post/page
- (ProgressAlly) Date of completion for a page – see more here.
- (ProgressAlly) Progress bar for post/page
- (ProgressAlly) Progress pie chart for post/page
- (ProgressAlly) Show Private Note
- (ProgressAlly) Interaction – certificate, reset progress
Interactions
You can add custom operation buttons to trigger interactions from the Team Leader to a selected Team Member, All Team Members, or even have a Team Member interact with a Team Leader.
See this article to find out more about Interactions.
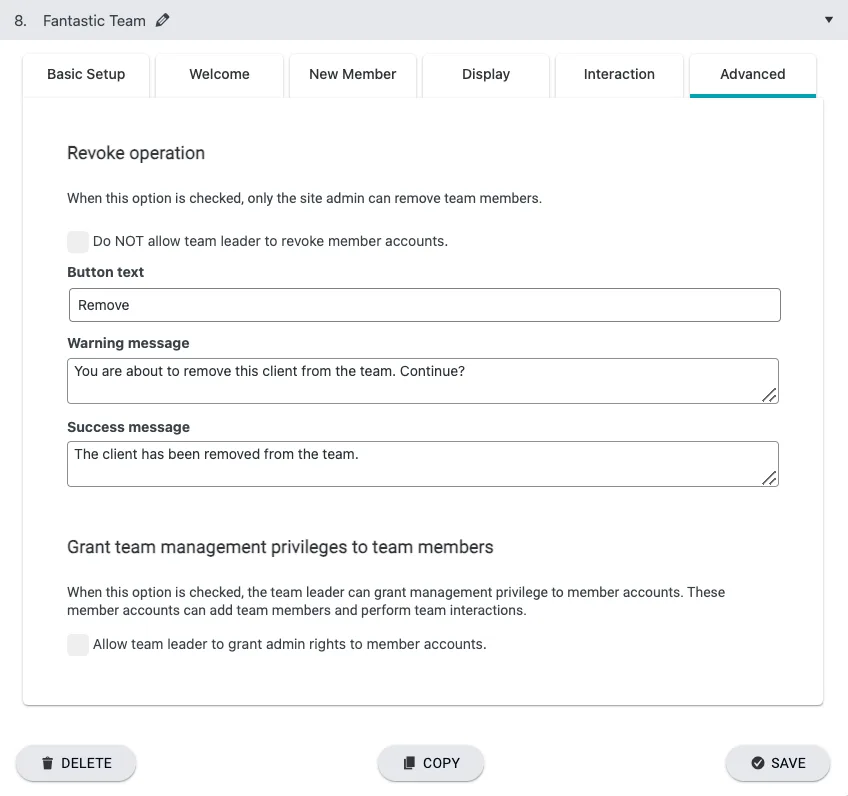
Advanced
In the advanced tab you can select if a Team Leader is able to remove team members or promote Team Members by granting team admin rights.
Next Steps
How to add Leaders & Members
This article covers the items shown on the Team Leader Administration Dashboard. Now it’s time to see how Team Members are added to the Team.
