If you’re looking for a way to track affiliates promoting your free challenges or free webinars that lead into your paid programs, with AccessAlly there are two ways to track affiliate links from your free opt-ins!
- Using an AccessAlly Form – click here to see how
- Using the On Demand Login custom operation linked to a form in your CRM – details shown below
In this article, we’ll cover the second option from the list above. How to use the On Demand Login custom operation to track affiliate referrals via forms in your CRM.
Using the On-Demand Login link custom operation allows you to affiliate opt-ins from forms in your CRM system. AccessAlly will assign the affiliate’s ID to the newly opted-in subscriber to track any sales down the line.
As a side benefit, you also get the option to automatically log people in after they are opted-in. This is great if you’ve got affiliates sending people to a free course, and you want to track their opt-in leads.
Important Note: Please make sure to use the webform (opt-in form) provided by your CRM. The on-demand account creation will not complete correctly if using a third-party form tool (like the forms provided by your favorite WordPress themes and page builders.)
ARTICLE CONTENT:
Using the On Demand Login With Affiliate Opt In Referrals
When using the On Demand Login on your site, it will track AccessAlly affiliate data and save it to the contact’s CRM record. If the new contact makes a purchase within the affiliate referral period it will count toward that affiliate’s commissions.
With that in mind, you need to set up an On Demand login link for any opt-in form that an affiliate might be sending people to. You decide which page people go to after they are opted-in, but this “intermediary step” gives AccessAlly the information it needs to track the affiliate who made the opt-in referral.
How the On Demand Tracking Link Works
AccessAlly generates a special link known as an On Demand Login, which you will use as your opt-in Thank You page URL.
From there, one of three things can happen:
- You can send them to any public-facing page on the web, and everyone will see it
- If you send them to a protected page on your AccessAlly site, and they’re a brand new subscriber they’ll be automatically logged in and start seeing the content or courses that they got access to
- If you send them to a protected page, but they are an existing user with the same address… they’ll be forwarded to the key page on your site called Please login here first before accessing the site (this is a security feature designed to verify existing user login credentials) to enter their existing password before they access the site
Create Your Opt-in Form Following Your CRM’s Instructions
Create a regular opt-in form following the instructions from your email marketing platform:
- Kit Opt-in Form Set Up
- ActiveCampaign Opt-in Form Set Up
- Drip Opt-in Form Set Up
- Infusionsoft/Keap Opt-in Form Set Up
- Ontraport Opt-in Form Set Up
Let’s Set Up an On Demand Affiliate Tracking Link
Now we’ll go ahead and configure the On Demand affiliate tracking link on the AccessAlly site, before we add it as our thank you page URL in your CRM.
Please Note: The On Demand Login takes care of creating the new user and generating a password in AccessAlly. Do not use webhooks in your CRM automations, campaigns, or sequences linked to the form for this important first step as the CRM may generate this info faster than the On Demand which will result in log-in issues for your users and more support tickets for you!
Step 1: Choose Your Redirect URL
What page do you want users to be sent to when they submit the opt-in form?
It can be any page: a course page or module, your main dashboard, or any other AccessAlly page. (You can also use any other page on the open web!)
Choose your URL and get it ready for the next step.
Step 2: Create an On-Demand Login Link
Go to: AccessAlly > Settings > Custom Operations > click the + NEW OPERATION button
- Name your custom operation something descriptive and choose On demand login creation from the dropdown.
- In The URL that a new member will see section, Add the link to the page the new user will be redirected to upon signing up.
- Click the blue SAVE button on the top right to save your changes.
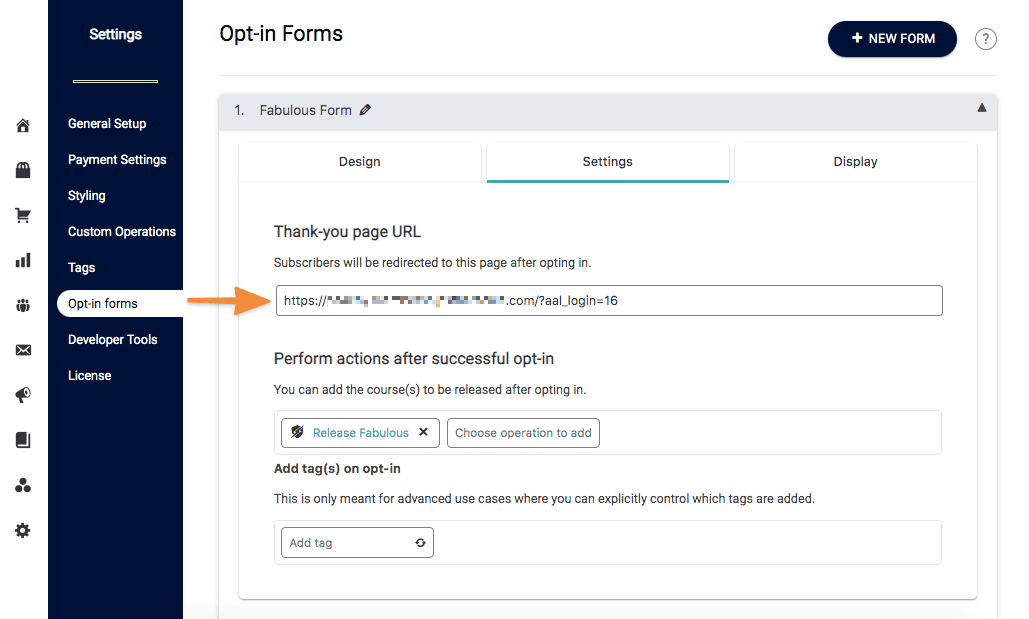
Step 3: Add the Thank-You Page URL link
In the How This Operation is Triggered section marked 1. Opt-in Trigger: Use the following URL as your opt-in form’s Thank You URL click COPY TO CLIPBOARD.

Next, go to your CRM to access the opt-in form’s settings, so you can paste what you copied from the previous step in your form’s Thank-You page URL. See the steps outlined for your CRM below.
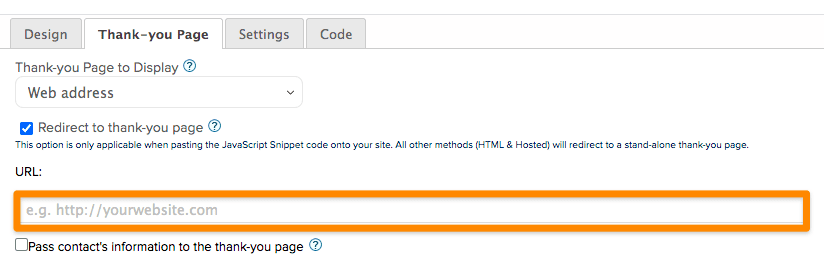
When editing your Infusionsoft/Keap form, go to Thank-You Page. Here, make sure the Thank You page is set to display a Web Address. Paste the Opt-in Trigger URL you copied from the custom operation into the field and save.
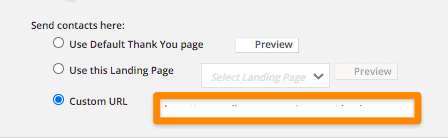
When setting up your opt-in form, go to SETTINGS and make sure the “Custom URL” is selected. Paste the URL you copied from the previous step into the field and save.
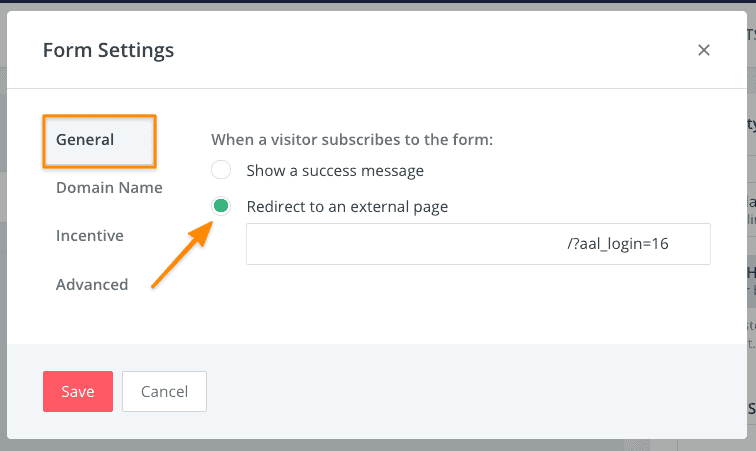
When setting up your opt-in form, go to SETTINGS > General and select Redirect to and an external page. Paste the URL you copied from the step above into the field and save.
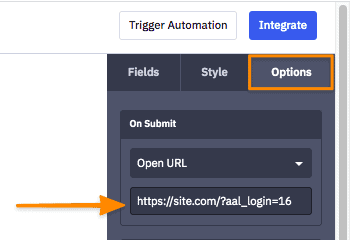
When editing your ActiveCampaign form, go to Options. In the “On Submit” section, make sure it’s set to Open URL. Paste the URL into the field and save.
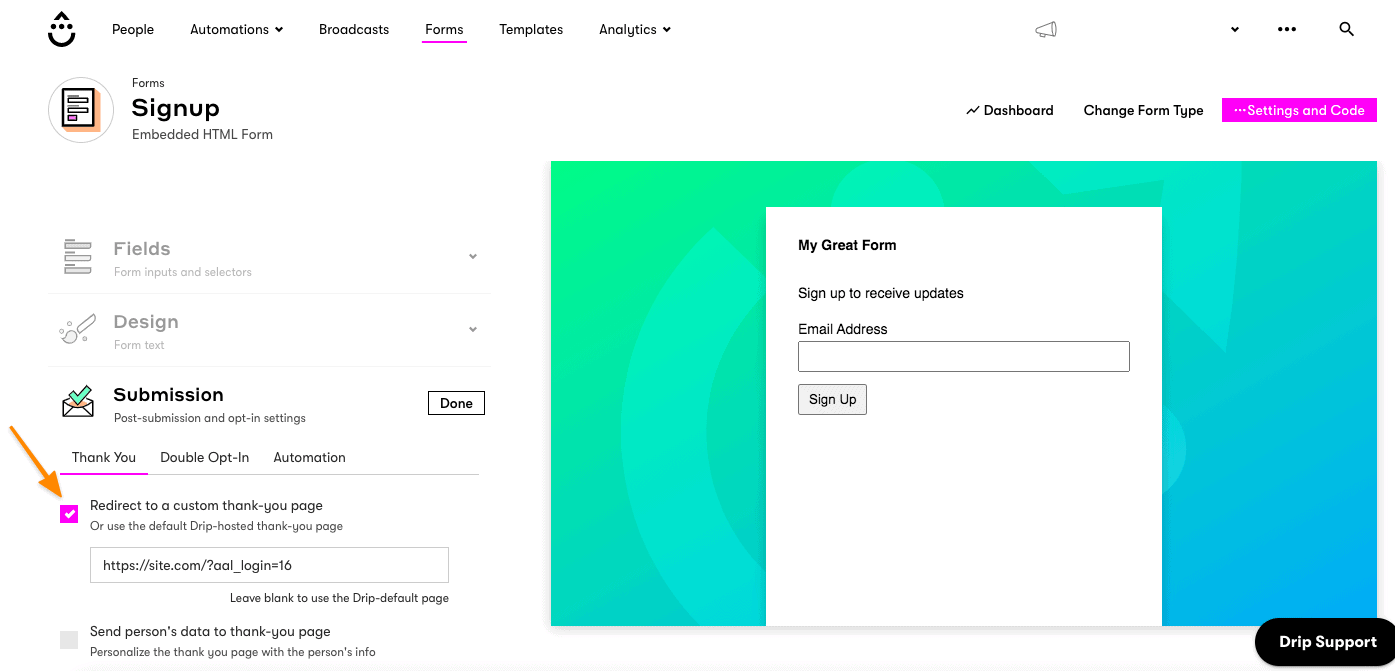
When editing your Drip form, go to Submission. In the Thank You section, check the redirect box option, paste the URL you copied in the step above into the Redirect to a custom thank-you page, click Save.
Step 4: TEST
As always, please test your setup before making it live. A good workflow to test this feature is:
- Create an affiliate link to the page with your opt-in form, if you haven’t already.
- Get the affiliate link for an existing “test” affiliate.
- Access your new opt-in form page in an incognito window.
- Fill out the opt-in form using an email address that does not belong to a current membership site user. Pro Tip: if you have a “gmail” or Google Apps account, you can create any number of new test emails by appending the “plus sign” and any text, and you’ll receive the emails in your existing inbox. For example: [email protected] could use [email protected], [email protected], etc.
- After submitting the form, you should be automatically logged-into the membership site and redirected to the designated URL.
- You can also check that the user you just signed up with has the right tags, by going to Users > All Users and searching for the email address of your test user. Click the AccessAlly tab and scroll down to PAYMENT HISTORY and check that this is filled in with the Referring affiliate’s details.
%27%20fill-opacity%3D%27.5%27%3E%3Cpath%20stroke%3D%22%23fff%22%20stroke-opacity%3D%22.5%22%20fill%3D%22none%22%20d%3D%22M47.2%2038.8Q39.4%2033.6-49.6-43%22%20stroke-width%3D%221.6%22%2F%3E%3Cpath%20fill%3D%22%23fff%22%20fill-opacity%3D%22.5%22%20d%3D%22M811%2046.4L865.4-24%20843%2046.4zM324.6-46.4l-22.3%2096.7-3-.7%2022.2-96.7zM699%2043.2l-96-22.4%2067.2%2048z%22%2F%3E%3C%2Fg%3E%3C%2Fsvg%3E)
- Repeat the testing steps if anything is amiss. Testing multiple times is a good practice, too.

