This guide shows how to brand your AccessAlly Emails to maintain consistency across all automated emails.
ARTICLE CONTENT:
1. Before You Begin
You’ll need:
- An SMTP plugin (such as WP Mail SMTP)
- An email delivery service (such as SendLayer)
- AccessAlly plugin activated and configured
⚠️ Important: WordPress alone does not guarantee email delivery for password resets, notifications, or reminders.
👉 Learn more: Improve Email deliverability with WP Mail SMTP and SendLayer
2. Template Components
AccessAlly provides two main template tools:
Shared Blocks
Reusable elements like headers and footers that can be added to any email. When you change a shared block, it automatically updates every email using it.
Import/Export
Transfer complete emails or header/footer blocks between different AccessAlly installations, eliminating the need to rebuild templates from scratch.
3. Steps to Set Up Email Templates
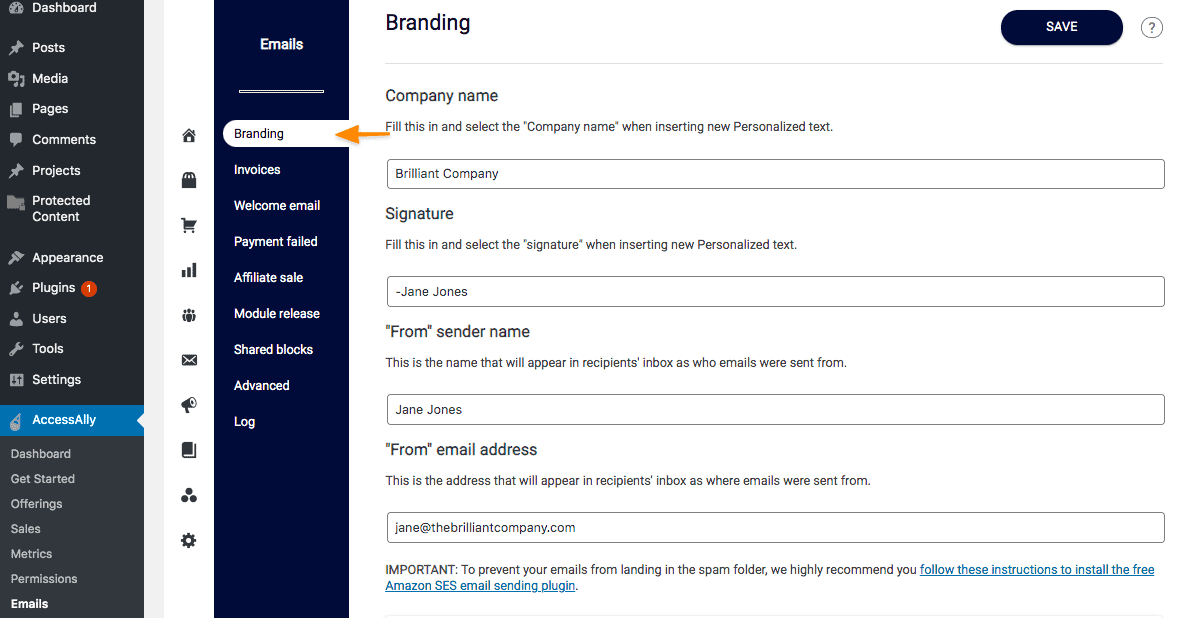
1. Configure Company Branding
Navigate: AccessAlly → Dashboard → Emails → Branding
Complete these required fields:
- Company Name – appears in email signatures and headers
- From Name – the sender name recipients see
- From Email Address – the sender email address
- Email Signature – appears at the bottom of emails
2. Set Up Shared Header Block
In the Branding section:
- Click to open the Shared Header Block
- Replace the placeholder logo with your company logo
- Use the + button to add other elements or adjust the layout
- Customize colors, fonts, and spacing to match your brand
- Click Save when complete
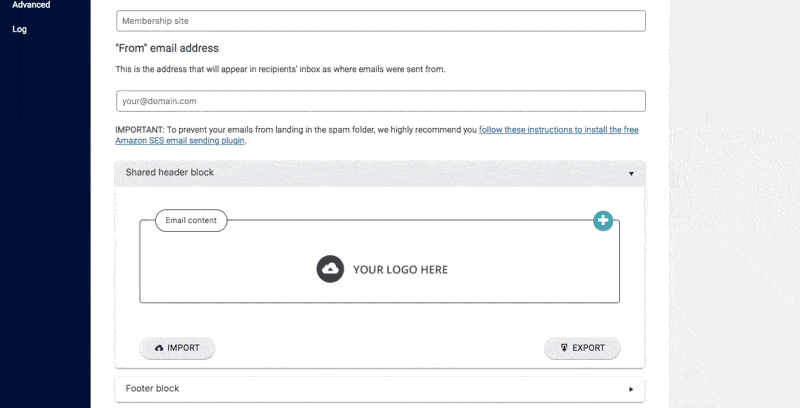
💡 Tip: Upload your logo at the recommended dimensions for best display across email clients.
3. Set Up Shared Footer Block
In the Branding section:
- Click to open the Shared Footer Block
- Edit the default text (copyright, contact information)
- Add compliance information or unsubscribe links as needed
- Use the + button to add elements or modify the design
- Click Save when complete
3. Template Management Options
AccessAlly provides several tools for managing your email templates:
Delete
Remove unused email templates or shared blocks to keep your dashboard organized.
Copy
Duplicate an existing email to use as the foundation for a new template, saving setup time.
Import/Export
Transfer complete emails or header/footer shared blocks between different AccessAlly sites for consistency across multiple sites.

4. Best Practices
Use Shared Blocks Strategically
Create shared blocks for elements that appear across multiple emails. When your logo or contact information changes, you only need to update the shared block instead of every individual email.
Maintain Footer Consistency
Keep contact information and copyright notices uniform across all emails by using a shared footer block.
