In this tutorial, you’ll see how to migrate from the Zippy Courses plugin to AccessAlly.
When you’re migrating from Zippy Courses to AccessAlly, it’s important to use our free conversion tool. This is because Zippy Courses creates content as custom posts inside WordPress. Once Zippy Courses is deactivated, the content on those custom posts becomes inaccessible.
ARTICLE CONTENT:
How The Zippy Courses Conversion Tool Works
Our conversion tool changes the custom posts created by the Zippy Courses plugin to regular, standard WordPress pages or posts.
The conversion tool can also replicate the Zippy Courses structure as an AccessAlly Offering – so you can easily manage, edit, and view your courses in your new AccessAlly-powered site.
How to Download and Use the Conversion Tool
Download the Zippy Courses conversion tool plugin here:
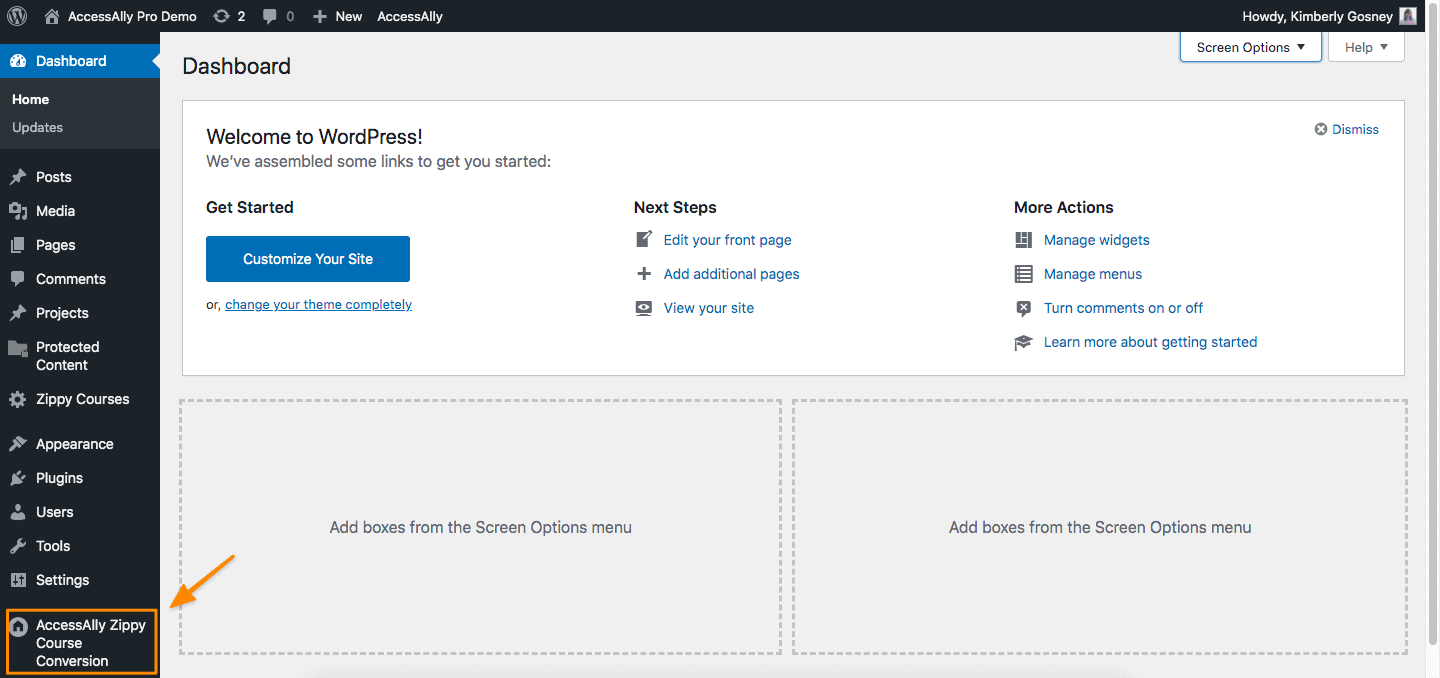
Step 1: Using the AccessAlly Zippy Course Conversion Tool
You can find this on the left sidebar of your WordPress website dashboard.
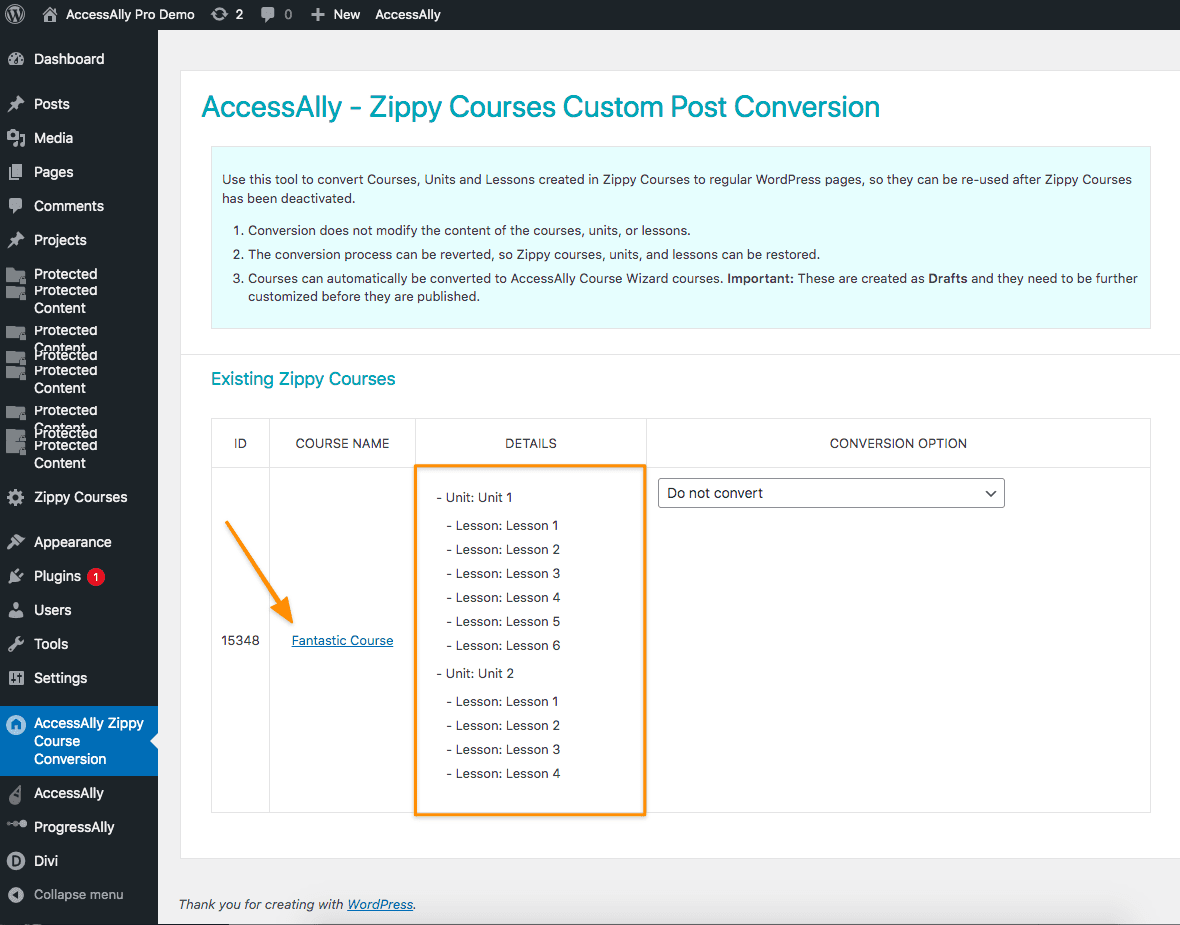
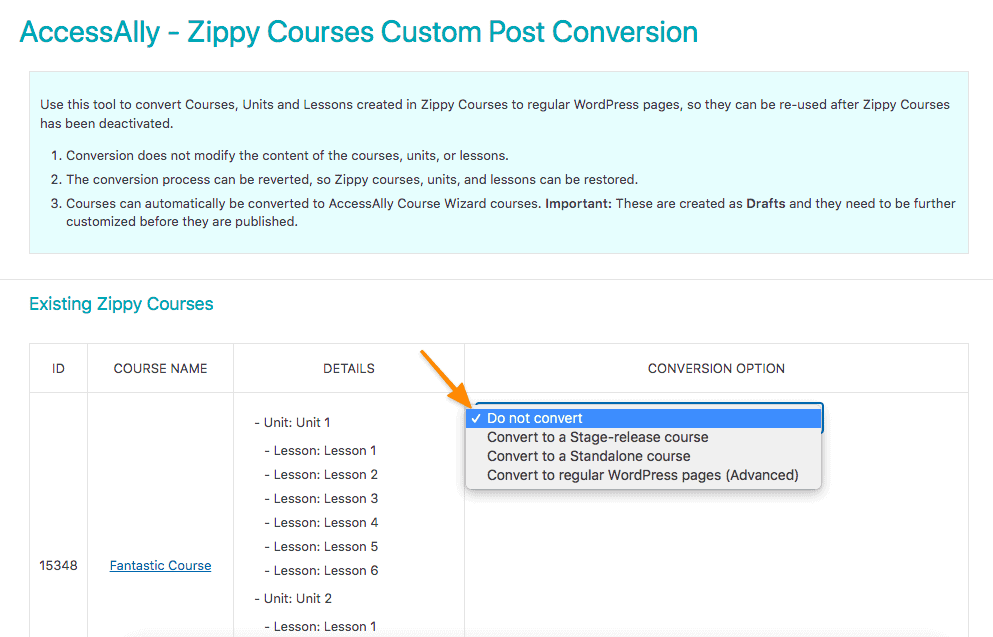
Step 2: Decide Which Courses You’d Like to Convert
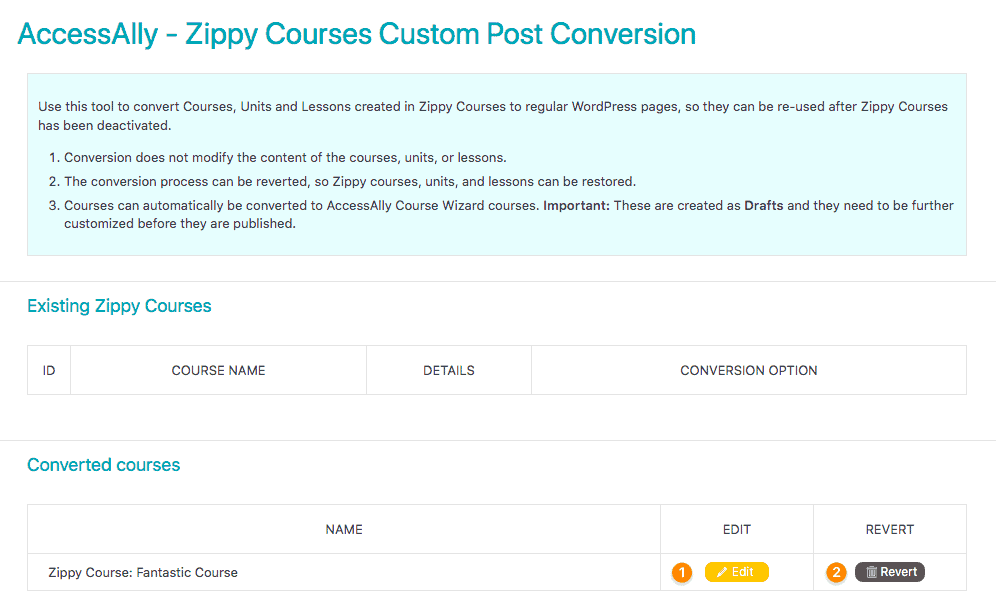
When you open up the Zippy Courses Conversion tool, you can see a list of all the courses you’ve created with Zippy Courses, along with the content associated with it.
Step 3: Choose the Type of Course You’ll Convert to in AccessAlly
Under “Conversion Option”, you can choose how you’d like to convert each Zippy Course, using the following options:
- Standalone Course – this course type is instantly released.
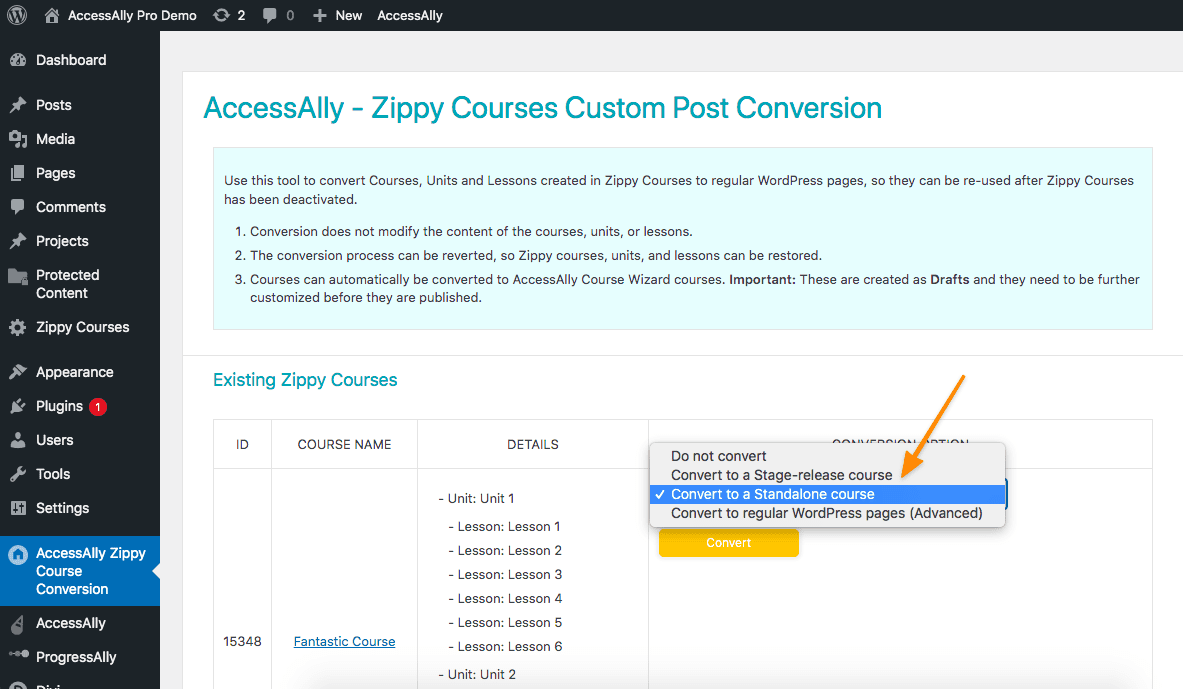
- Stage-Release Course – this course type has dripped content (released over time.)
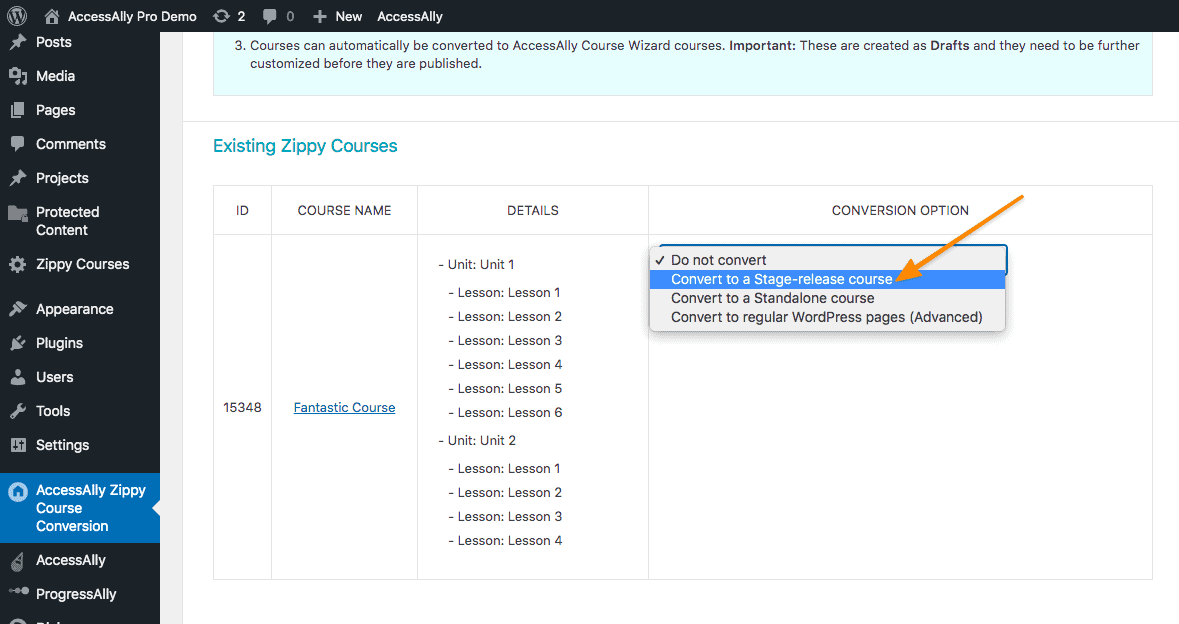
- Convert to Regular WordPress Pages (Advanced)

- Do not convert – with this option your course will not be converted to AccessAlly.
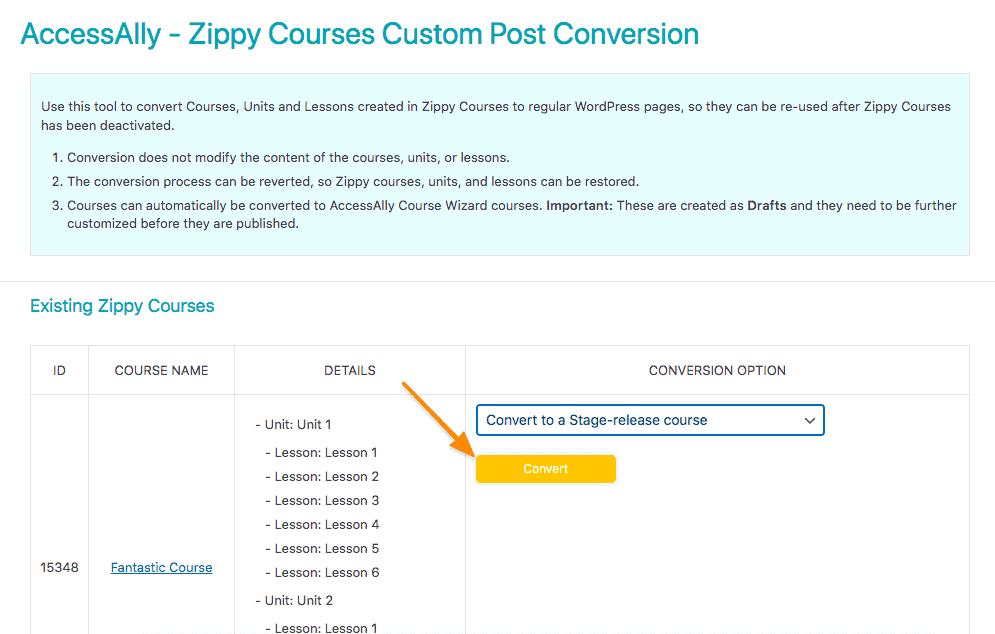
Step 4: Convert and Edit the Course
Once you select the corresponding conversion option from the dropdown click the Convert button to convert your course.
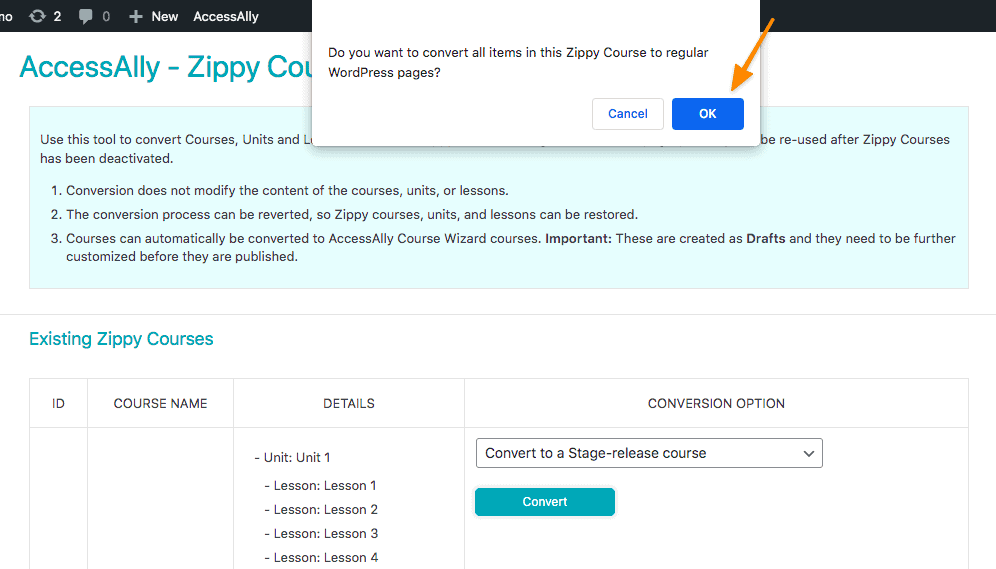
A confirmation message will appear. Confirm that you’d like to convert the Zippy Course to AccessAlly.
Once the course has been converted you will see a success message.
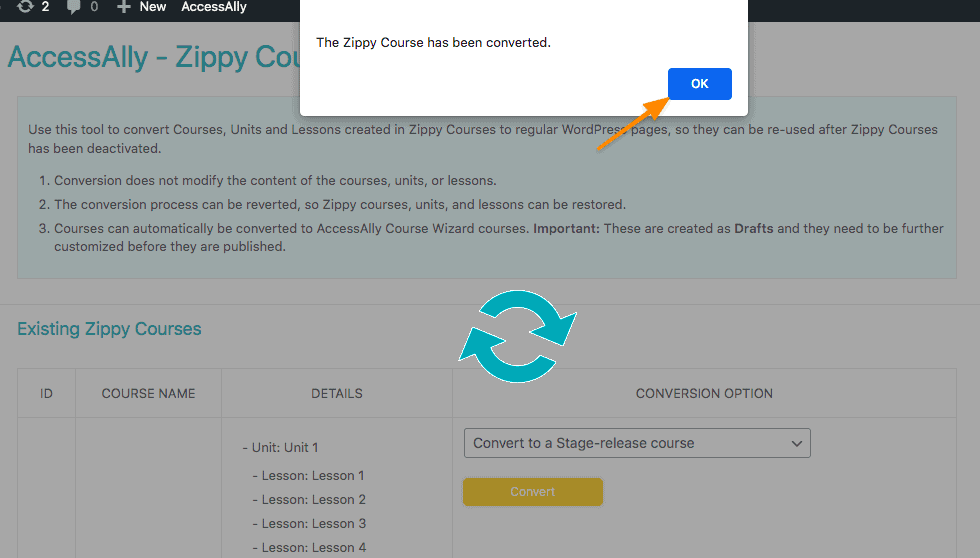
Now that your course has been successfully converted it will appear in the Converted courses section where you can:
- Edit the course in AccessAlly
- Revert the course back to the Zippy Courses format
Step 5: Edit the Course with AccessAlly
Your course has now been converted from a course in Zippy Courses to an offering in the AccessAlly Offerings Wizard! We recommend reviewing the Offerings Guide to see how Offerings work in AccessAlly.
Review the AccessAlly Offerings Guide
Quick Tip: If your course has both units and lessons, clicking the unit pages will reveal the lesson pages.

Once your Zippy Courses Migration is Complete… Make Sure to Import Members
The Zippy Courses Migration tool helps you convert your Zippy Courses content into an offering in AccessAlly, but it doesn’t handle the importing/converting of your course participants.
To handle that you’ll want to follow our Member Migration tutorial here.
