You can allow clients to manage subscription payments with the click of a button (or via integrated CRM system) using AccessAlly subscription action custom operations.
The following options are available with this feature:
- Cancel – cancels payment plan and removes client access to offering content access (at end of current billing period)
- Revoke – immediately cancels payment plan and removes client access to offering content
- Pause – pauses payments client retains access to offering content
- Add payment credits (skip future payments) – allows for “x” number of payments to be skipped client retains access to offering content
ARTICLE CONTENT:
Create Subscription Action Custom Operations
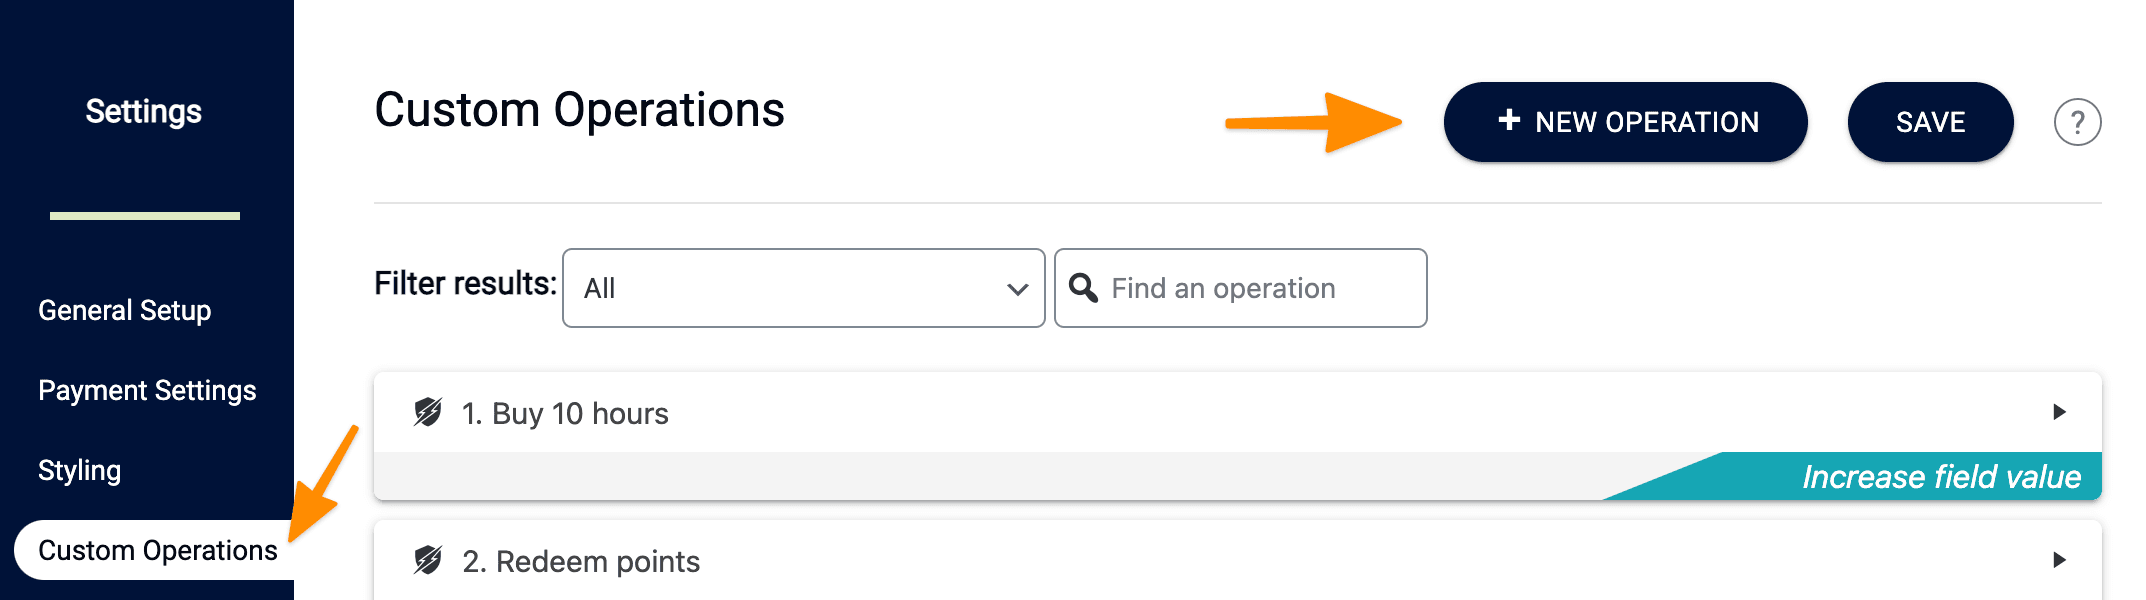
Go to AccessAlly > Settings > Custom Operation > + NEW OPERATION
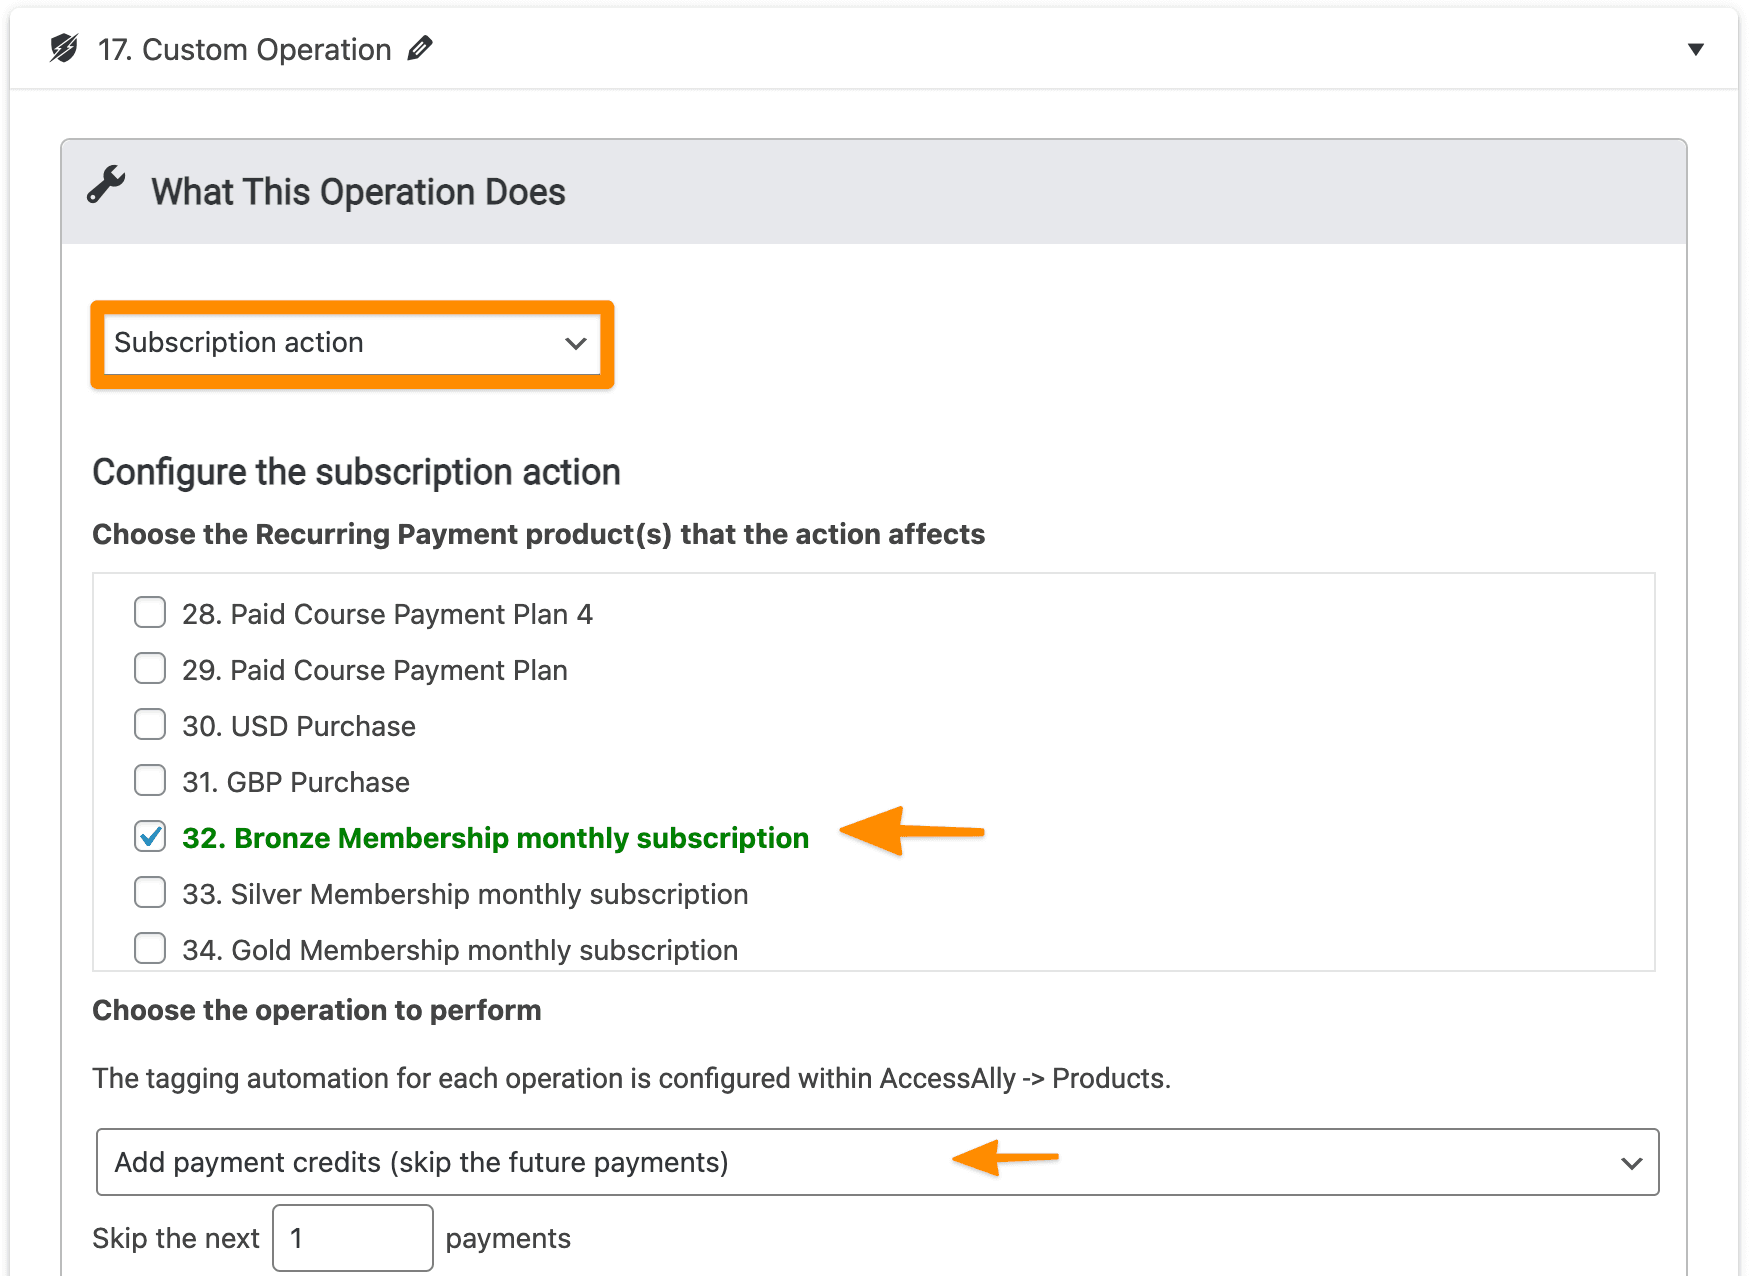
You can name the operation, then select the Subscription action option under “Choose what this operation will do”.
Configure Subscription Actions
In the Configure the subscription action section select all offerings that this button will work with. Then choose an operation to perform from the dropdown.
- Cancel: A client’s future recurring payments are no longer charged. Client has access to offering content until the end of the billing cycle.
- Revoke: A client’s recurring payments are no longer charged, money paid may need to be refunded manually, client is no longer able to access offering content.
- Pause: A client’s future recurring payments are no longer charged and the client continues to have access to offering content.
- Add payment credits (skip the future payments): Mark a designated number of recurring payments to be skipped while allowing client access to offering content. Once all skip payments have occurred the billing cycle will continue. (Stripe only not available for PayPal.)
These options all correspond to Subscription Management options available in the Sales area.
Run Subscription Actions
There are two options for how your subscription actions run.
Option #1: Client clicks button from inside your site
Button Text
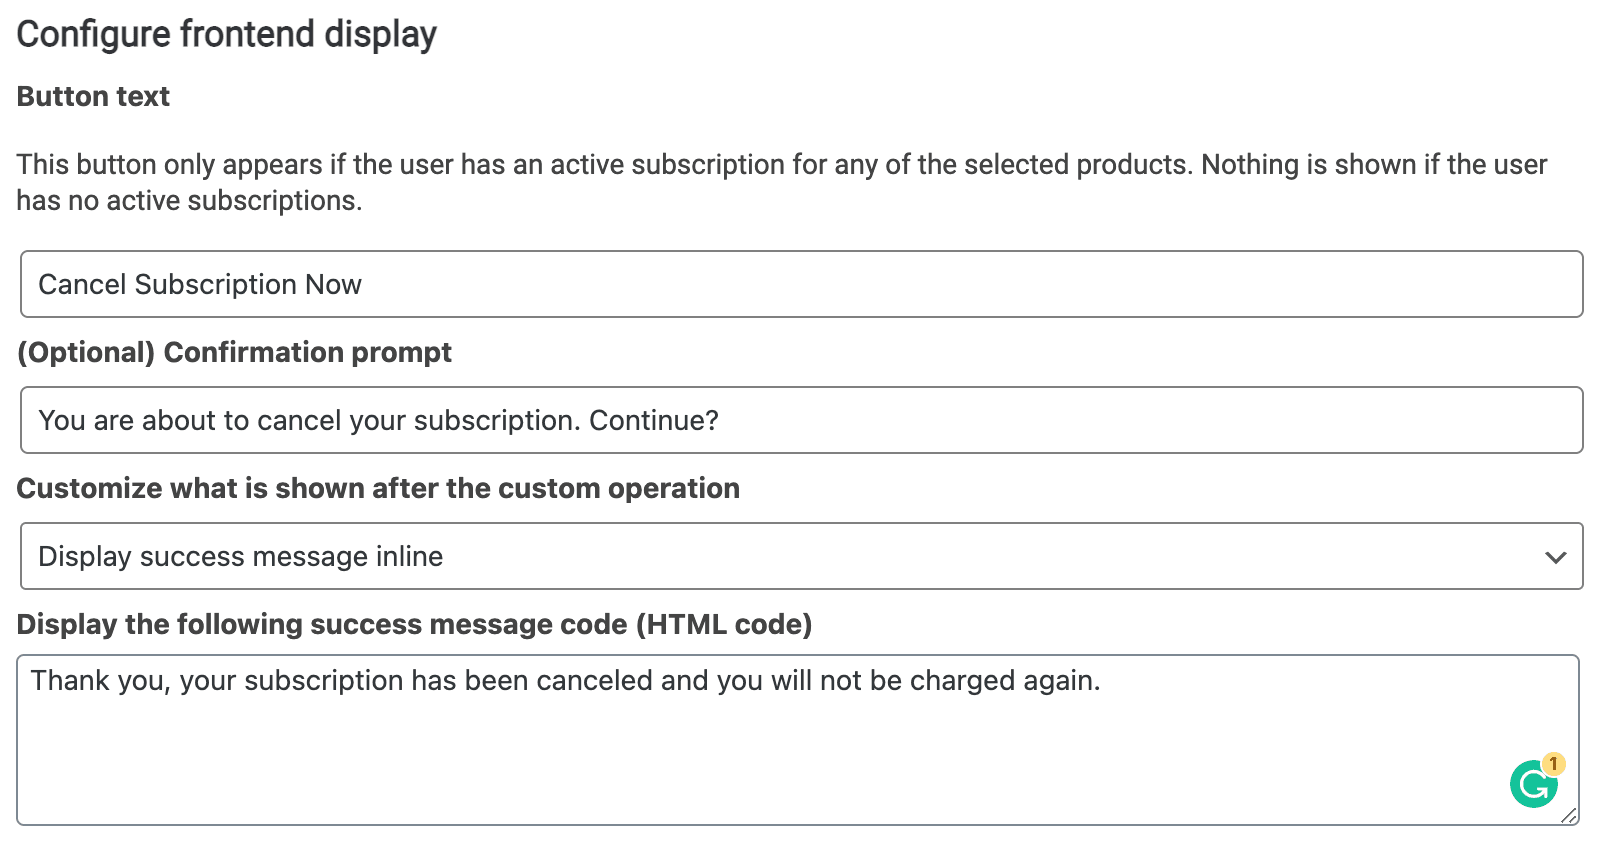
Button Display
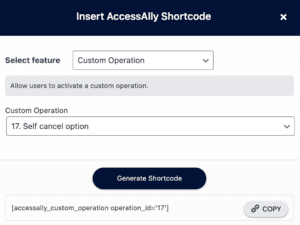
Use the AccessAlly shortcode generator to get the code for your custom operation.
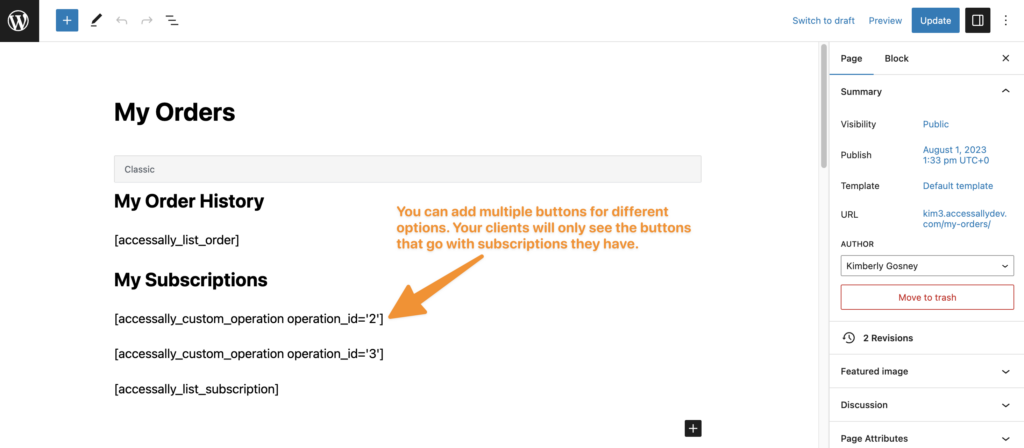
Add Code
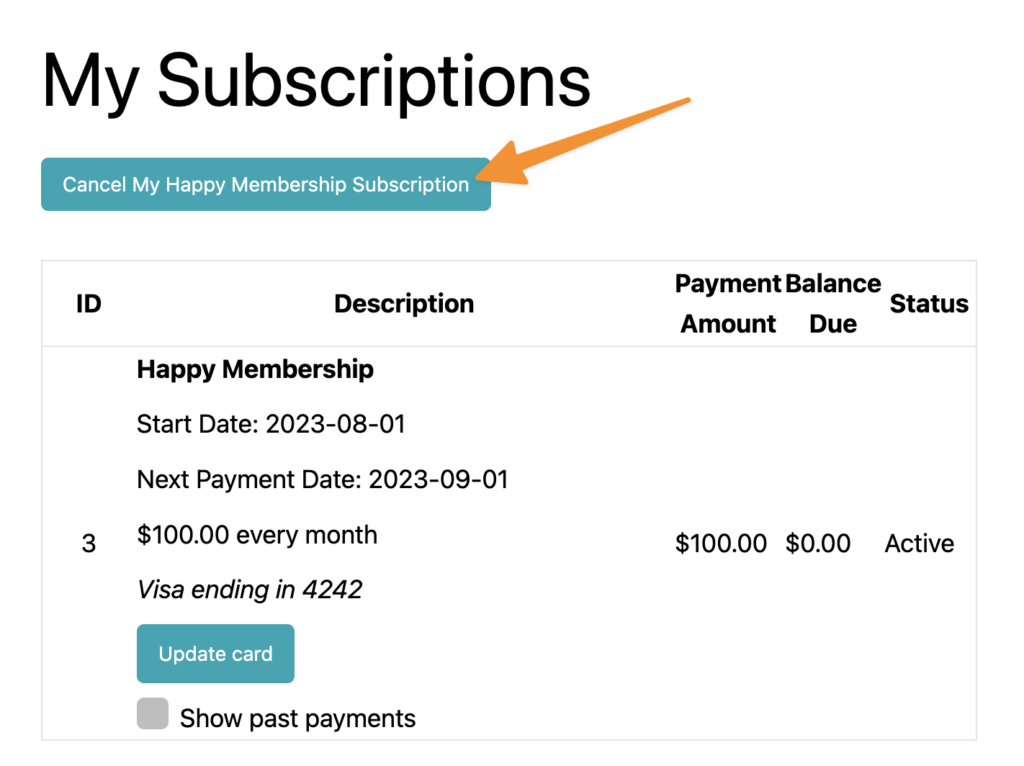
Now it’s time to add the shortcode to your My Orders page to display the button.
Option #2: Webhooks run subscription action from your CRM
If you would prefer to use your CRM to run your subscription actions you can use the webhook setting. This option uses a webhook to pass the data from your CRM back to your AccessAlly site.
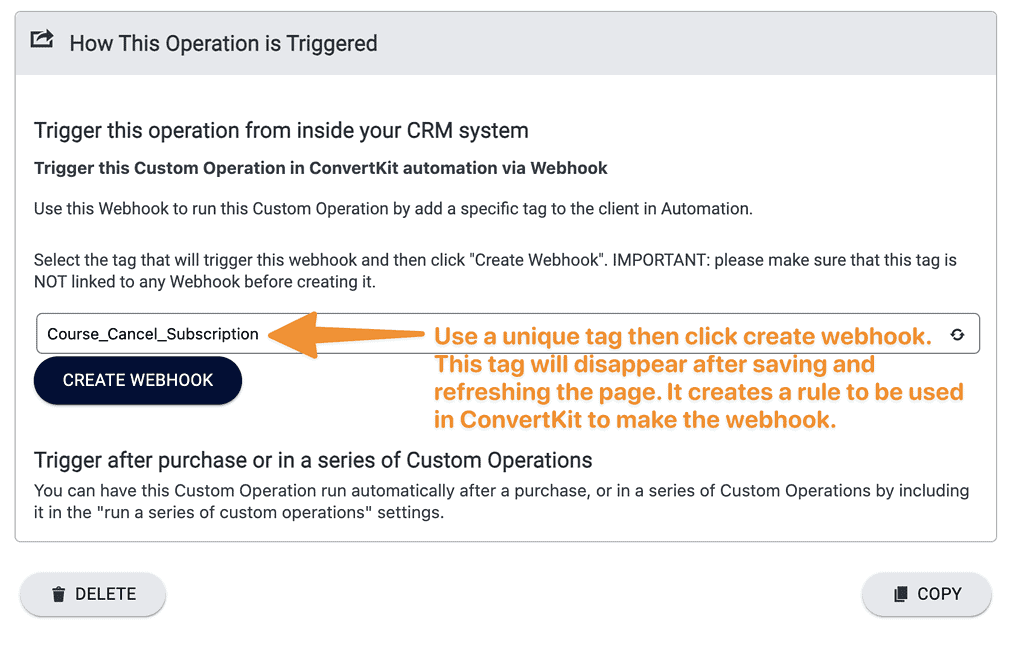
Example: Subscription action webhook creation in Kit.
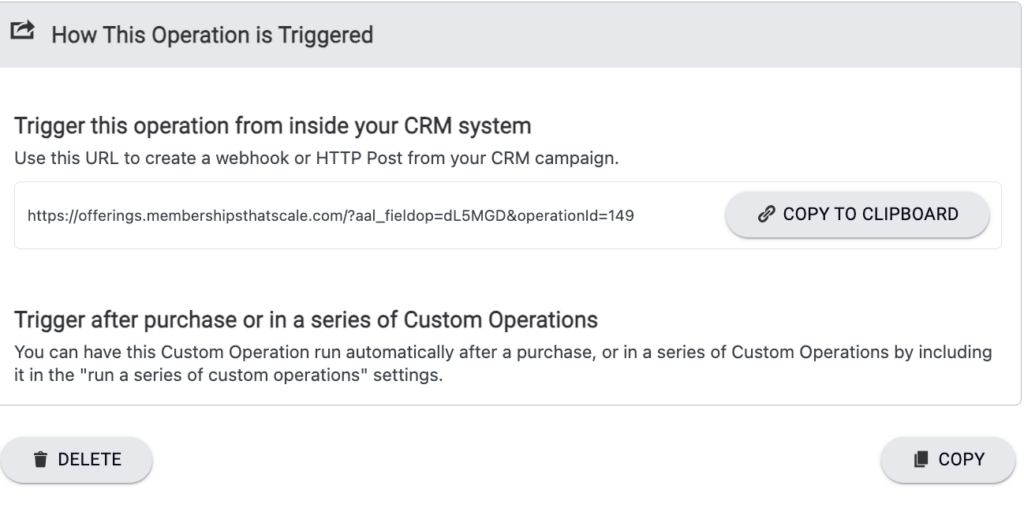
Example: Webhook inside a subscription action all CRMs (except Kit)
How to Use the Subscription Management Features for Your Business
Cancel (removes access at the end of the period)
Use cancel subscription custom operation to allow your members to cancel their subscriptions right inside your membership site.
This operation can help reduce the number of customer service inquiries your team handles and manually processes for cancellation requests.
Use AccessAlly Pro to win back your cancellations requests with a win-back campaign. Find out how to set this up here.
Revoke (immediately removes access)
This option is most often used when a client requests a refund and will immediately remove access to offering content and stop recurring payments from being processed – but it doesn’t refund payments!
See how to refund payments here.
Pause (does not remove access but stops future payments)
The pause subscription custom operation should be used to prevent ALL future payments. This operation will not remove access to your membership, but no additional payments will be taken.
This operation could be used to allow members to maintain access to the programs and training they have already completed with their membership, but no future trainings or materials when they want to cancel their account.
Or it can be used to allow members to pause their subscription without making a payment and then resuming later.
Add payment credits (skip the future payments)
This custom operation can be used to give a credit to someone’s payments, while still allowing members to retain access to the programs and trainings they signed up for.
Payments will not accumulate or process during this time. After the specified period of time, payments will resume at the original subscription rate.
This option is great for members who may not have had the opportunity to take advantage of the content they have been paying for. By adding a specified number of credits you can skip upcoming payments for the amount of time you decide is appropriate, and resume when they have had the chance to catch up with the materials.
