There are many reasons you might be looking to switch website hosts: slow load times, bad neighbors on your existing server, poor customer support, or other technical limitations that you encounter.
ARTICLE CONTENT:
Should you change your site hosting?
This workshop with Scott, Technical Support Engineer at AccessAlly, will help you spot what to look for.
Here’s what you need to know to make sure your transition from one web host to another goes smoothly! This advice applies to all AccessAlly sites, and can prevent errors like double payments for your customers or faulty access permissions.
When planning a webhost migration, make sure that you set aside enough time to do the migration and that you’re not planning to do it during a busy time (like a launch)… since your site will not be able to take new payments and you don’t want to impact people’s access for a long time.
Enable maintenance mode when migrating to a new host
We highly recommend enabling maintenance mode BEFORE the migration to your new hosting provider, especially if you are taking (recurring) payments:
1. Enabling Maintenance Mode will stop AccessAlly from processing payments.
2. During the migration process, you will temporarily have 2 copies of the same site, one on your old host, and one on the new one.
3. You only want to process payment on the new site. By enabling Maintenance Mode BEFORE the migration ensures that the site on the old host will NOT process payment.
4. Once you are satisfied with the migration, you can disable Maintenance Mode on the new site.
Detailed Migration Process
This process assumes that you’re keeping the same domain name and URL when switching website hosts. If you’re switching to a new domain name or URL, then you’ll find instructions for what to do at the end of these steps.
Step 1: Enable Maintenance Mode to Pause New and Recurring Orders in AccessAlly
If you’re using AccessAlly’s order forms and payment system, you’ll want to make sure that you don’t double-charge your customers. If you have your current site running and you make a copy of it on your new webhost, it means there will be two versions of AccessAlly that could charge recurring payments.
This also applies when using a staging site, and you can read more about staging sites here.
Go to: AccessAlly > Settings > General Setup > Migration Tools
1. Update To Avoid Duplicate Subscription Charges on Staging or Testing sites settings
- Check the Only process subscription and recurring payments on the specified site box.
- Enter the site URL for your AccessAlly site. For example: https://youraccess.mydomain.com.Note: This will handle the time in-between when you’re transferring hosts. Once you start pointing to the new server, it will begin making payments there instead of the old site.
2. Update Turn On Maintenance Mode – Pause New and Recurring Orders settings
- Check the box to enable.
To make sure that no payments will be charged and no new clients try to purchase during your site migration, make sure to enable this maintenance mode box.
This will make sure that you don’t double charge any payments, so it’s really important!
![]()
Step 2: Make a Backup of Your Site
It’s always a good idea to make a backup of your website just in case things go awry, or in case you need to revert back at some point. (This file is a “just in case” item, and won’t be used during the migration.)
You have a few options when it comes to making a backup copy of your entire site (including theme files, plugins, users, content, and database).
The one you choose will depend on what your current host offers, since taking advantage of the backups they might create for you will be the easiest. Here are some common backup solutions:
- Use the UpdraftPlus plugin (any host)
- Use the paid BackupBuddy plugin (any host) (affiliate link)
- Manually backing up your files via FTP and PHPmyAdmin (for developers)
- Use Bluehost’s BackupPro
- Use Siteground’s backup tool
- Use GoDaddy’s backup tool
- Use Hostgator’s backups
- Use InMotion’s backup tool
Keep these files safe. Again, it’s really just for you in case anything happens during the migration and you need to revert.
Step 3: Do The Migration
Now we’re going to make a copy of the site on your new web host.
We highly recommend WPEngine, it’s the host we use, we’re proud affiliates, and it’s a great reliable company! They also have a great process to help migrate your site for you.
If you’re migrating to WPEngine, use their Hassle-Free Migration plugin and install it on your AccessAlly site. This will do the migration for you and bring over all the content, themes, members, and settings from your previous host.
Another solid host that has a Migration Guru plugin to help make the move easier is Kinsta (also an affiliate link).
If you’re migrating to a different host, they might have another process to get your content migrated over – get in touch with their support if you run into any issues copying the site over.
Step 4: Pre-Transition Checkpoint: Make Sure Everything Transferred Properly
Now that you’ve copied the WordPress site over to your new webhost, we’re going to check a few things to make sure the migration worked before we switch domains to point to the new host.
At this point, your domain should still be pointing to your old host and your new site will have a funky URL like “https://sitename.wpengine.com”.
Navigate to this new version of your site:
- Make sure you can login as an admin (same username and password as before)
- Click around the pages and make sure that themes and pages look right
- Make sure that the “Maintenance Mode” checkbox is still enabled
Next, add your domain to WPEngine’s (or your new host’s) domain settings in preparation to update the DNS settings.
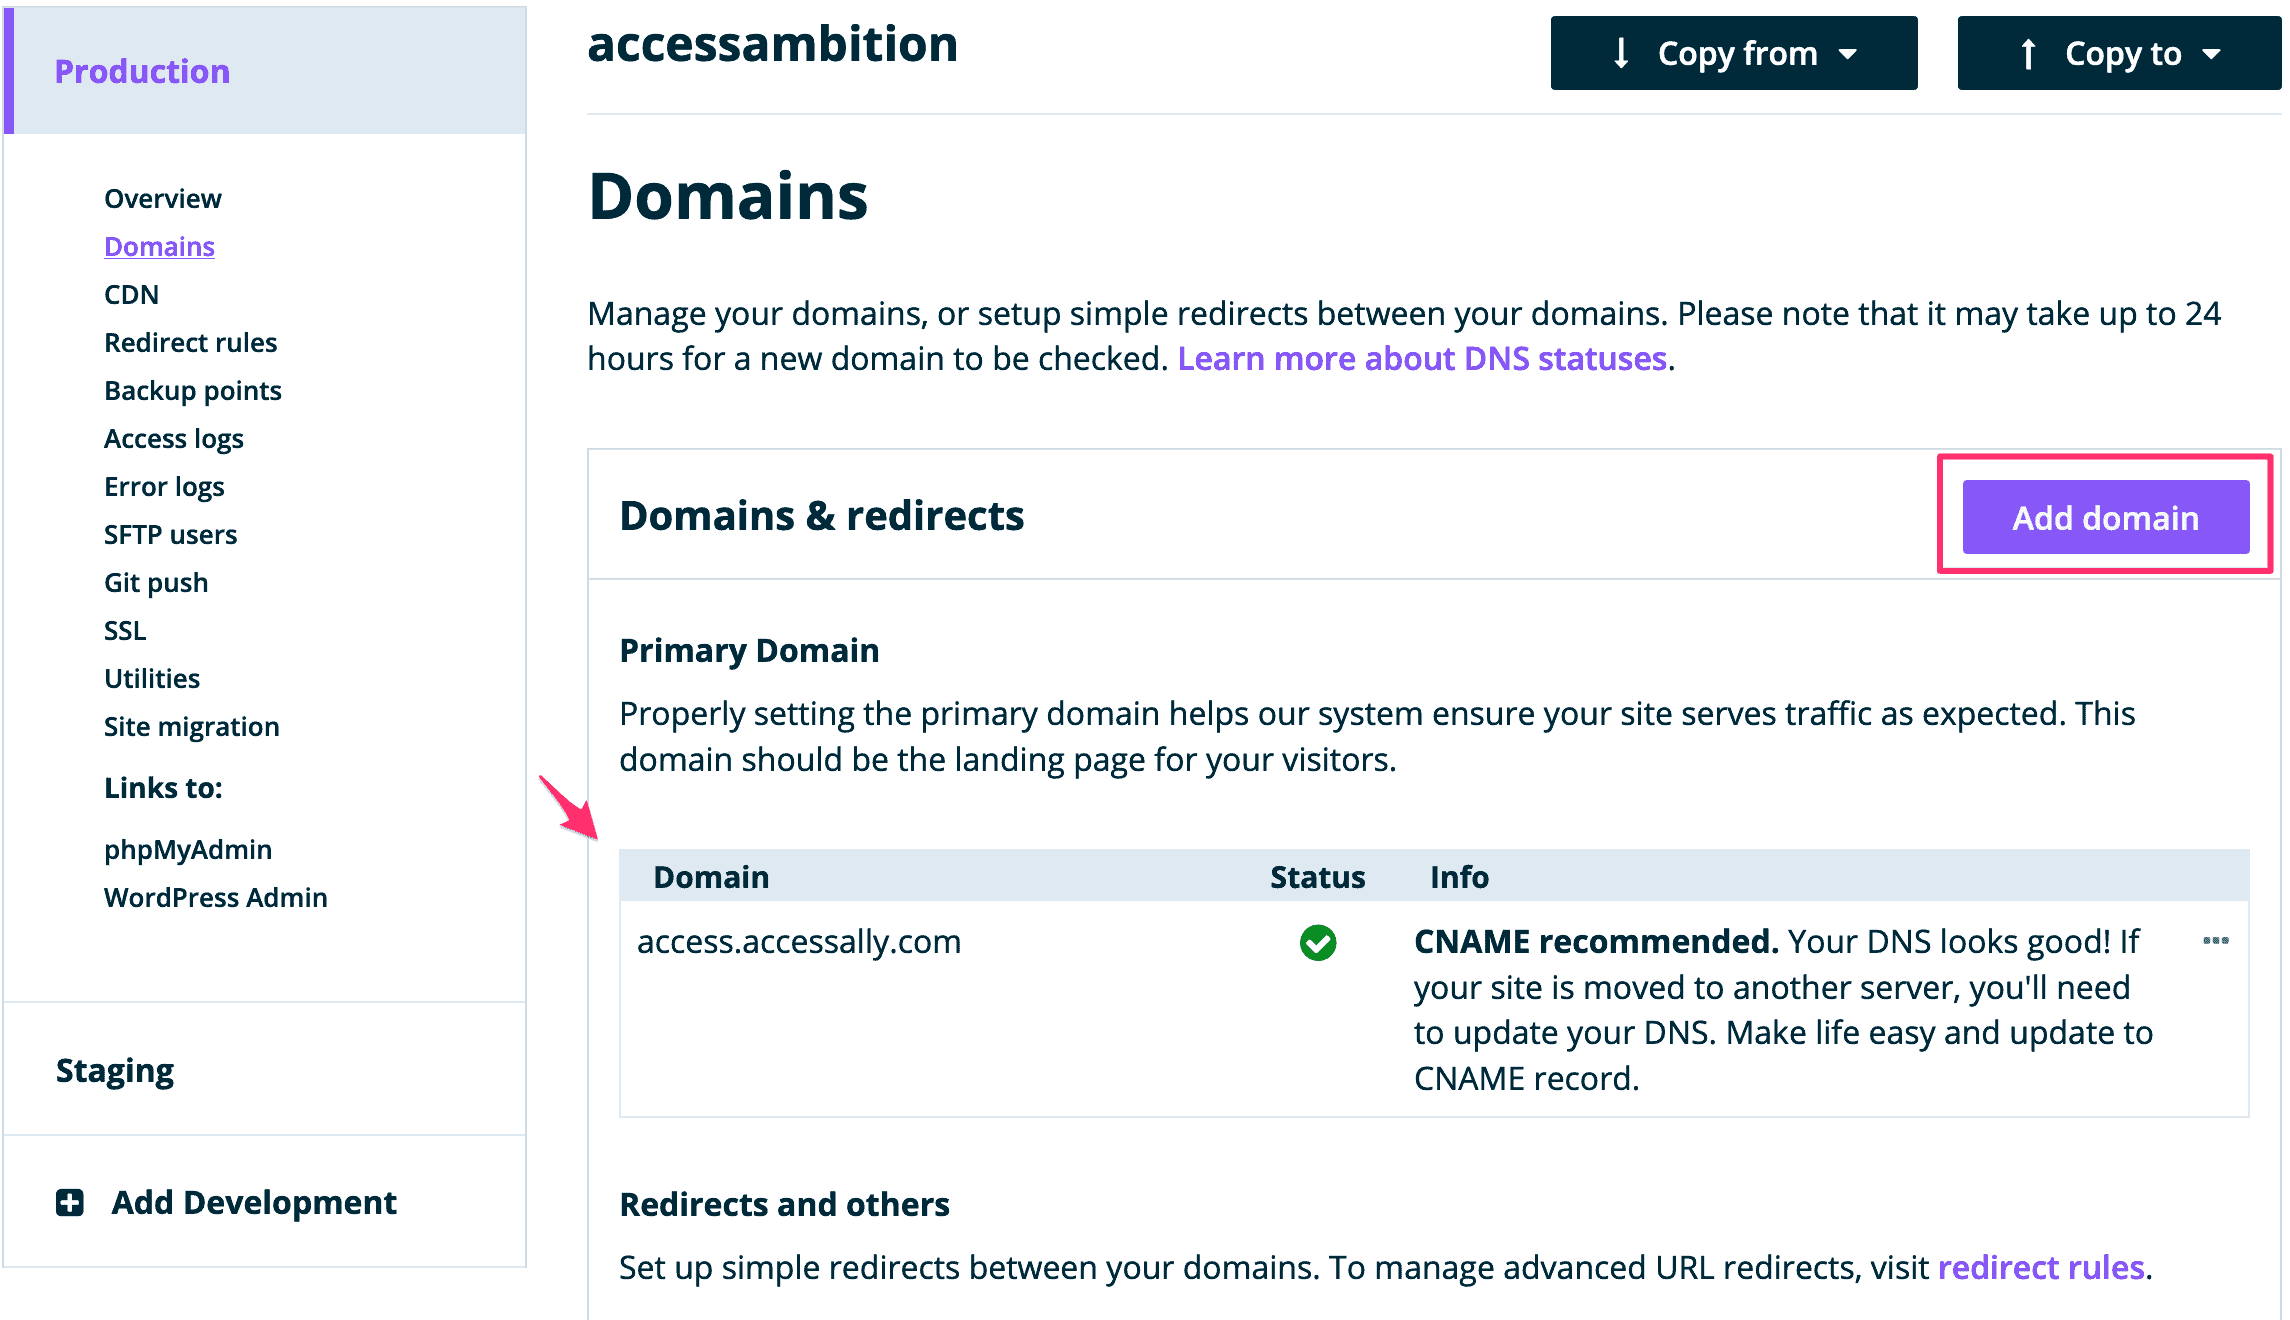
Step 5: Update DNS To Have Your Domain Point to the New Host
Login to your domain registrar and update the DNS settings to point to your new host.
Follow the instructions specific to changing your DNS settings in your Domain Registrar since each domain registrar has a different process.
It can take up to 24 hours for the changes to propagate all over the world.
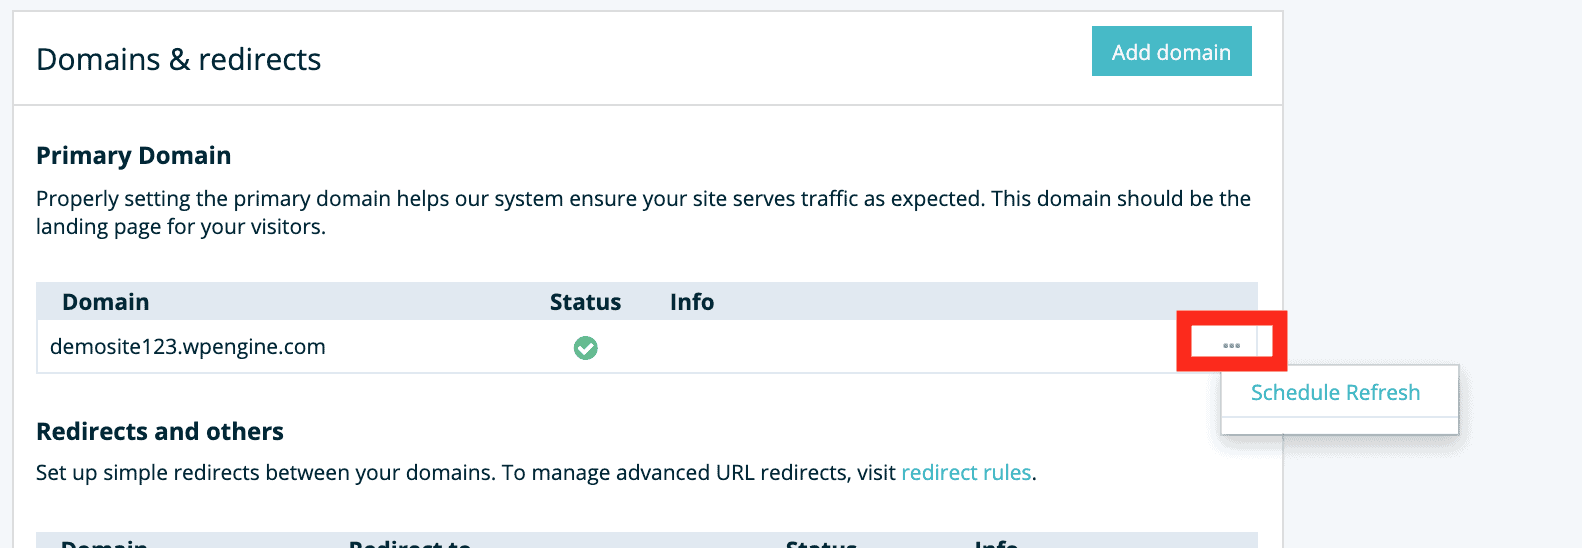
For WPEngine, you can check that you’ve set it up right or ask them to refresh to make sure it’s updating like this:
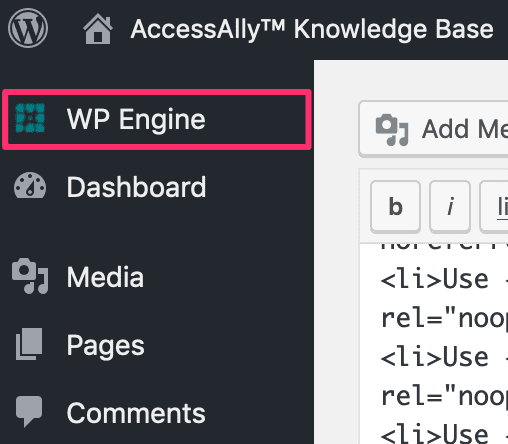
Now when you go to your domain or subdomain, you’ll know that you’re on the migrated site when you see the “WPEngine” section in the left hand sidebar of your WordPress back end like this:
At this point, your migration is complete – but please follow the next few steps to make sure your site gets back into fully operational mode.
Step 6: Turn Off Maintenance Mode on the New Site
Now that you’ve made sure everything is working on the new site, you should immediately turn off the “Maintenance Mode” that prevents orders and subscriptions from being charged.
Go to: AccessAlly > Settings > General Setup > Migration Tools
Keep the URL for your AccessAlly site in the first box, but turn off the checkbox for Maintenance Mode.
![]()
Now you’ll be able to take payments and recurring payments will continue to be charged on schedule.
Step 7: Delete Old Site or Disable AccessAlly
Now you’ll want to go back to your old hosting provider and do one of these:
- Delete your old WordPress installation
- Cancel your hosting and have them delete your files
- Disable AccessAlly entirely
The reason you want to do this is that you don’t want your AccessAlly site to continue to run payments accidentally. It shouldn’t happen while Maintenance Mode is still enabled on this old site, but just to be safe it’s best not to have another copy of the site running.
Step 8: Test CRM Webhooks
Finally, you’ll want to make sure that your email marketing platform can successfully send webhooks to your new host.
You can test this by adding a new test user to your CRM, and adding them to a campaign with a webhook that runs immediately.
Go to: AccessAlly > Settings > Developer Tools > Detailed Log
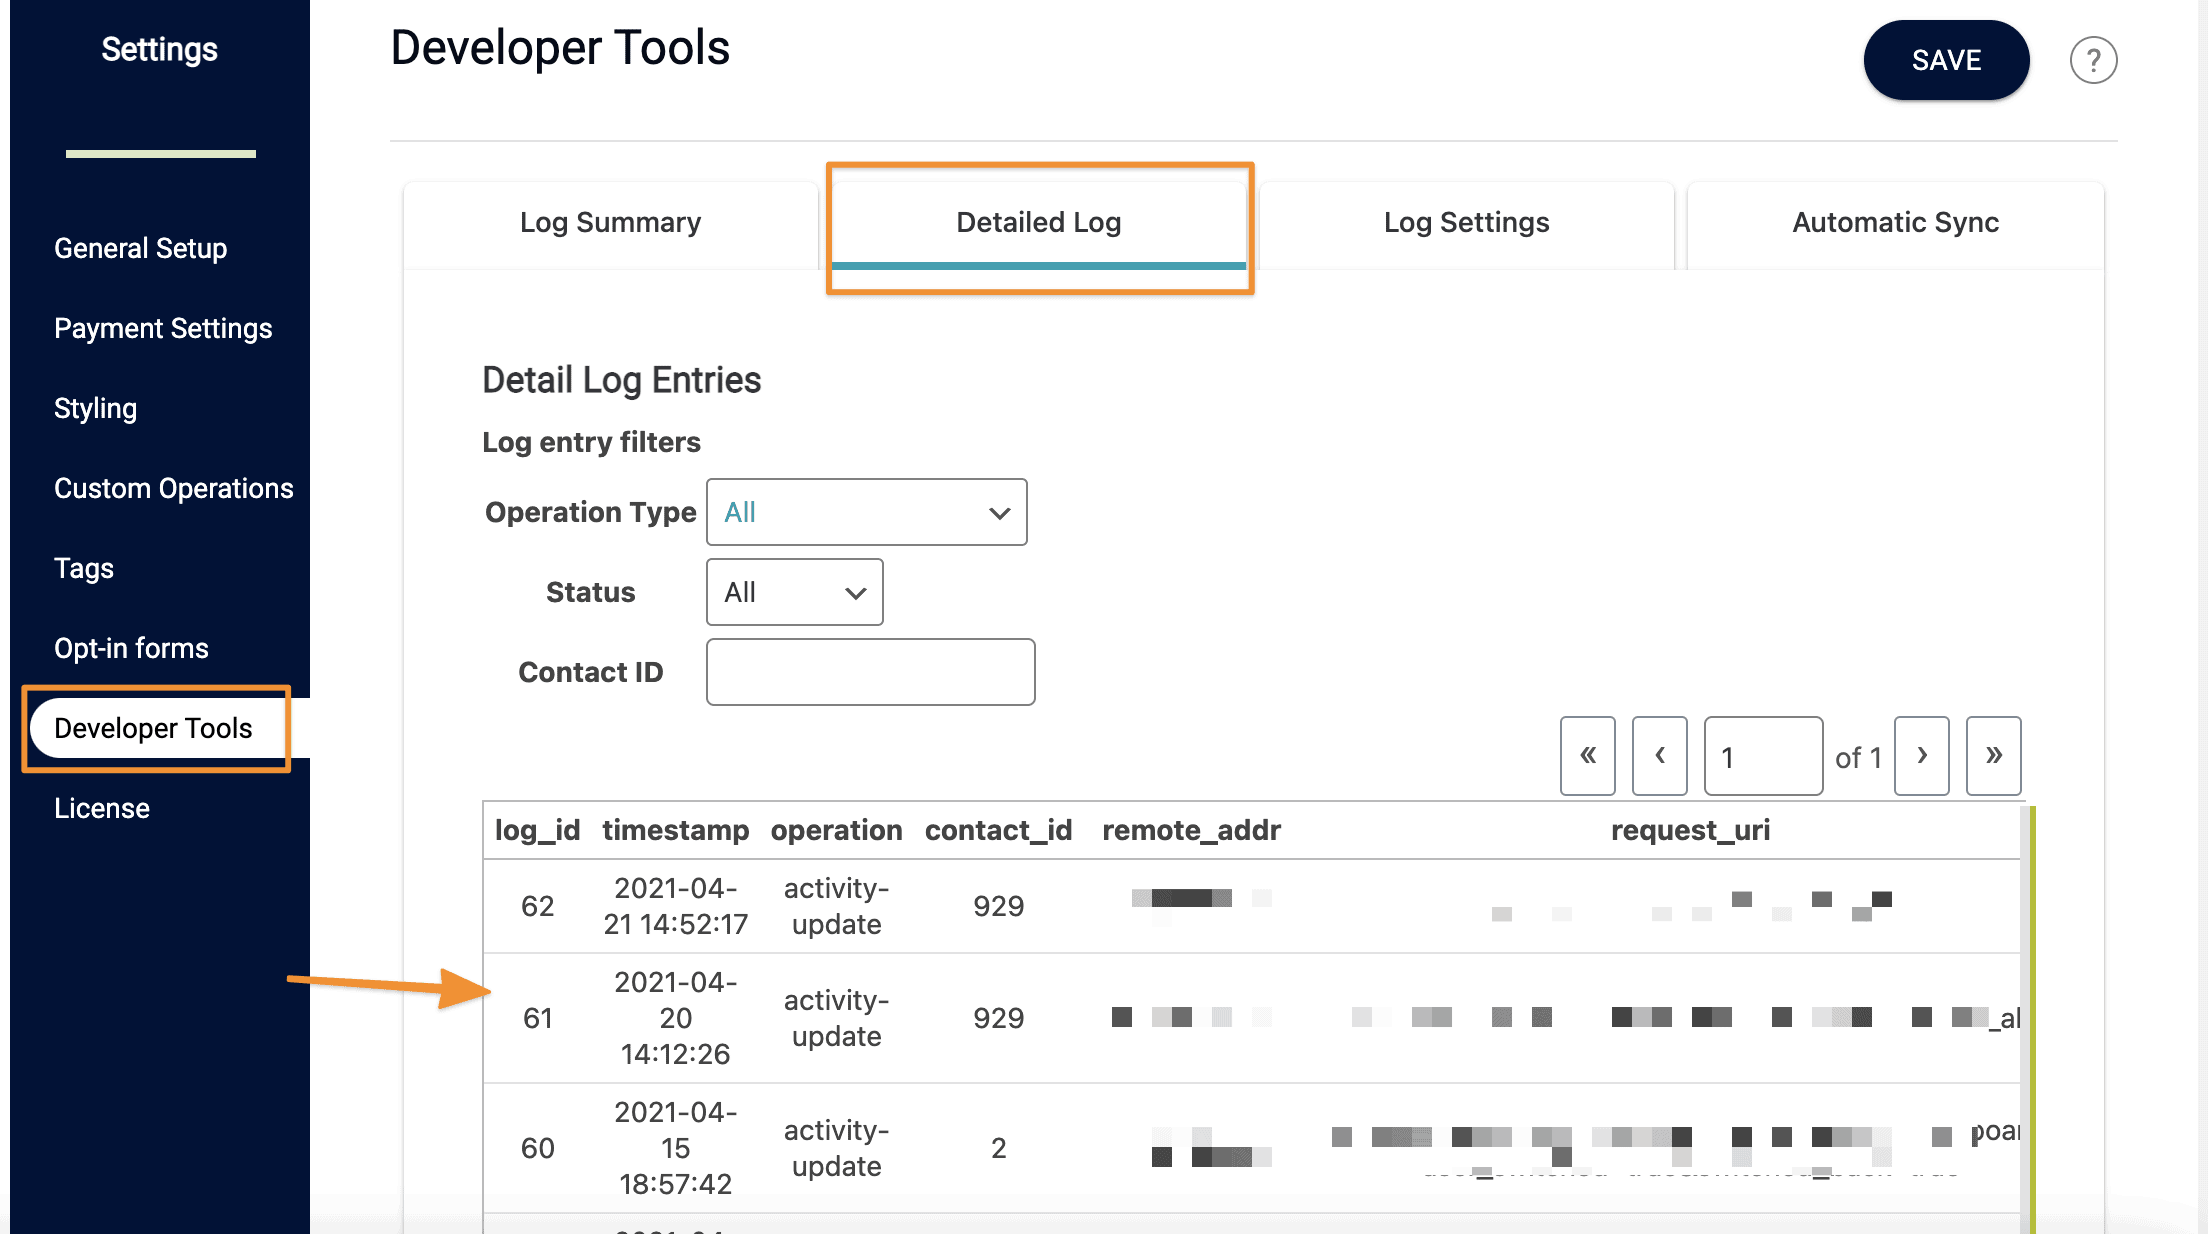
You should see your webhook here. If you don’t see anything here, then you can read this troubleshooting guide or get in touch with our support so we can help get things working.
Switching Domain Names or Site URL
If you’re planning on changing your site’s domain name (say from https://members.yoursite.com to https://members.newsite.com)… here are a few things to keep in mind.
The process is largely the same as when you’re migrating website hosts, with a few added steps to make sure that everything is forwarding properly. (If you plan to switch hosts and domain names at the same time, you’ll essentially be repeating the “migration” process twice to make sure that both content, and domain are ported over properly.)
Here are the places you’ll want to double-check your work when switching domains:
- Make sure that your domain registrar is pointing to your website host for the new domain
- Your WordPress site’s URL in your WordPress Dashboard’s General Settings, to point to the new domain.
- Update the AccessAlly developer settings to reflect the new URL
Go to: AccessAlly > Settings > General Setup > Migration Tools - Set up a redirect from your old domain to your new domain, so if anyone goes to the old site it sends them to the new one.
- Update all of your CRM automation webhooks with the new URL, so that your site keeps syncing properly from your email marketing platform
