It’s time to put all the pieces together and add your member directory. Here you can customize the appearance of search results, add your filters from Step 2, and create a beautiful member directory page.
ARTICLE CONTENT:
Directory Member Display Templates
Go to the directory in the backend settings (AccessAlly > Directories), select the Directory, and click on the Member Display tab.
This tab controls how you design your directory. Using the Customize Member Profile using templates option is the most flexible and is a great starting option.
In the Member profile page section you can add the link to your Member Profile page if you would like users to be taken to the profile page when they click on a directory listing.
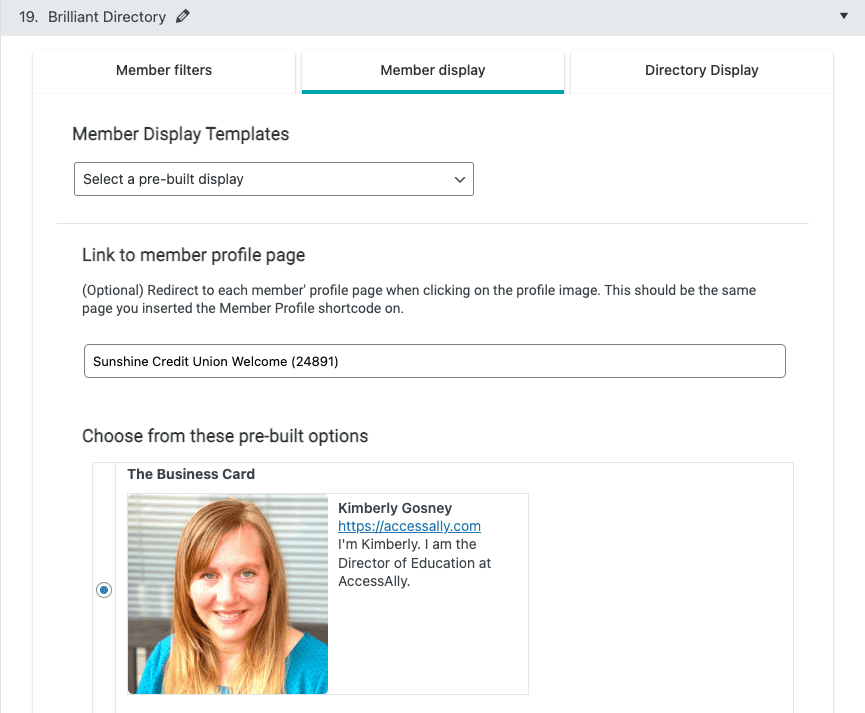
This template style is very easy to set up. You choose from three pre-built display options and hit save.
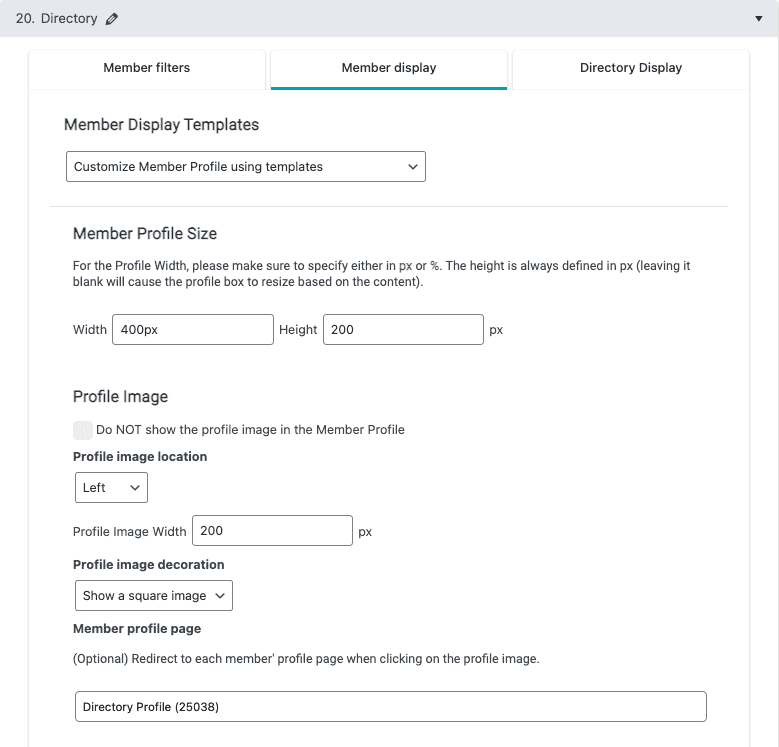
This option allows for adding more robust options to your directory display while not having to custom code.
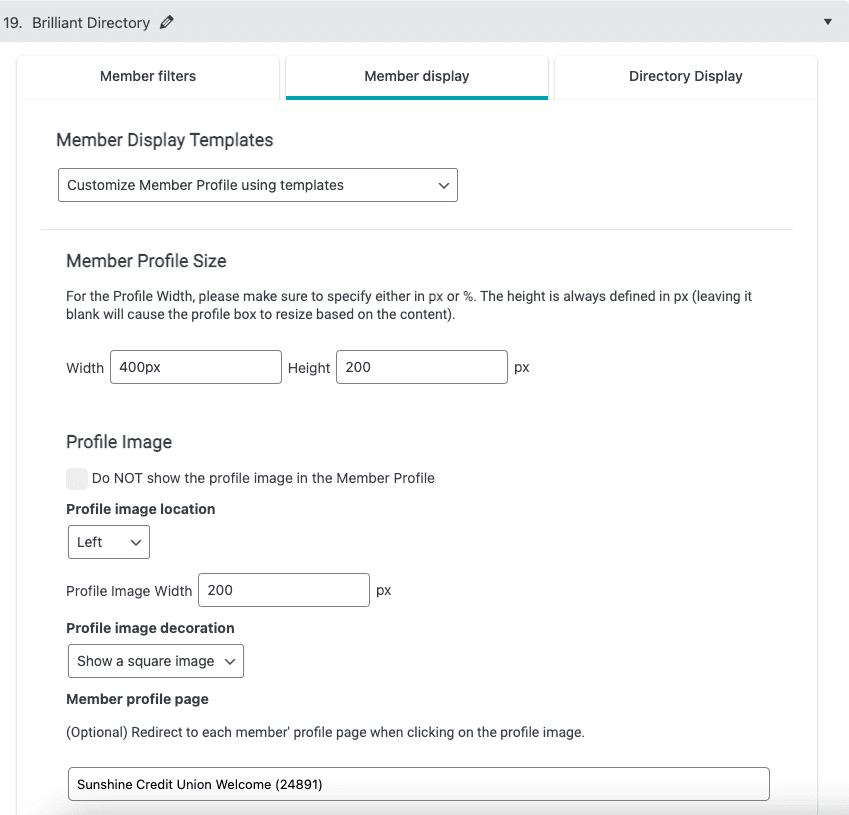
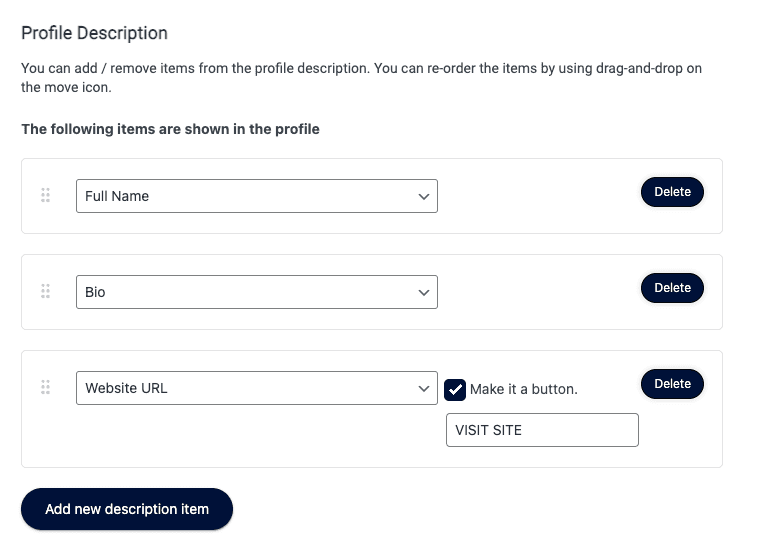
You can choose the exact items that you want to appear on the directory in the Profile Description section.
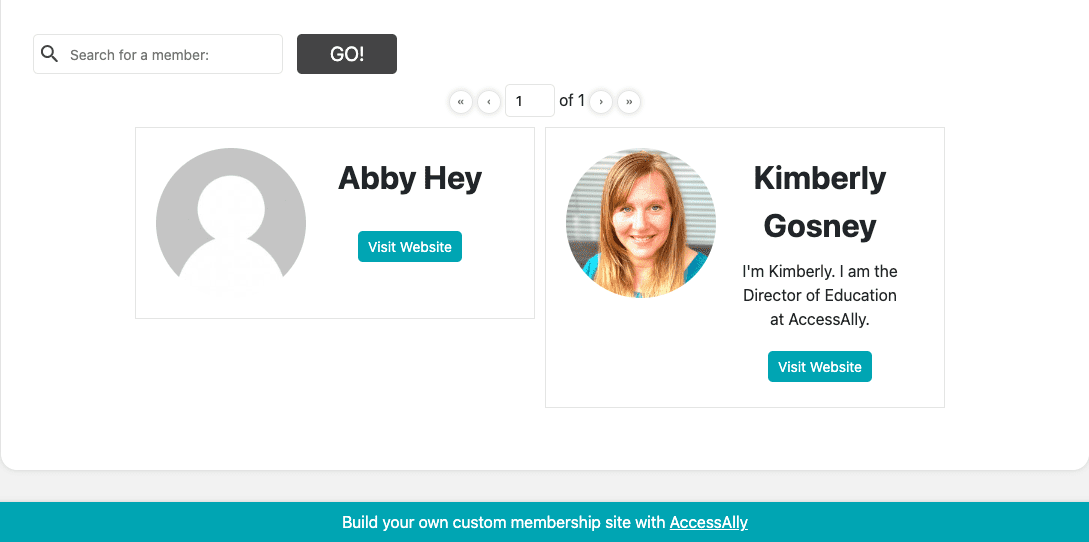
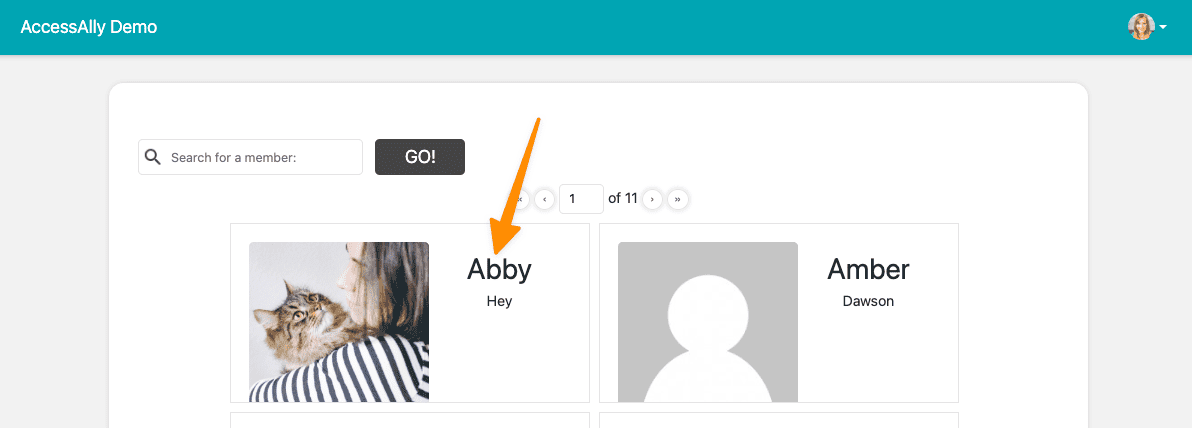
What this directory template style looks like. Remember you get to choose the options that you would like added to the directory.
A quick tip. If you enable the Website URL with the “Make it a button” option and you do not see the button (as shown in the image below) go to AccessAlly > Settings > Styling and click the SAVE button on the top right to refresh your settings.
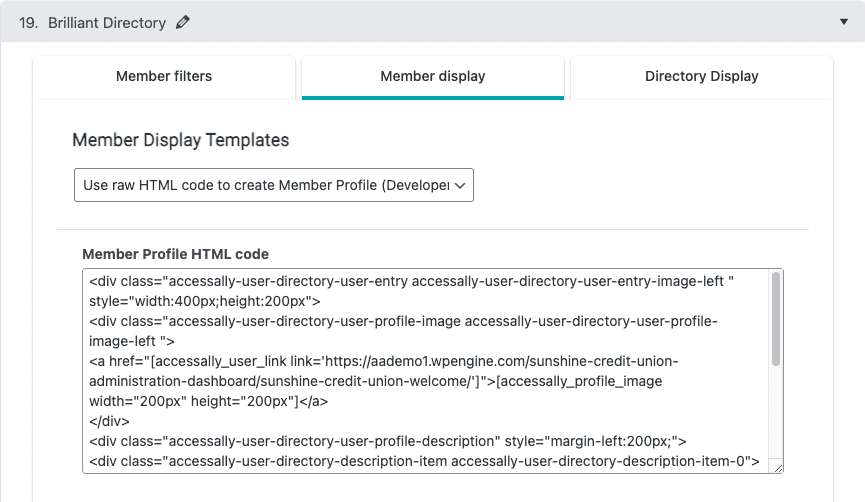
With this option you can create the entire directory display using custom HTML. This option is advanced and not recommended for beginner or intermediate level WordPress users.
Add the Directory to Your Site
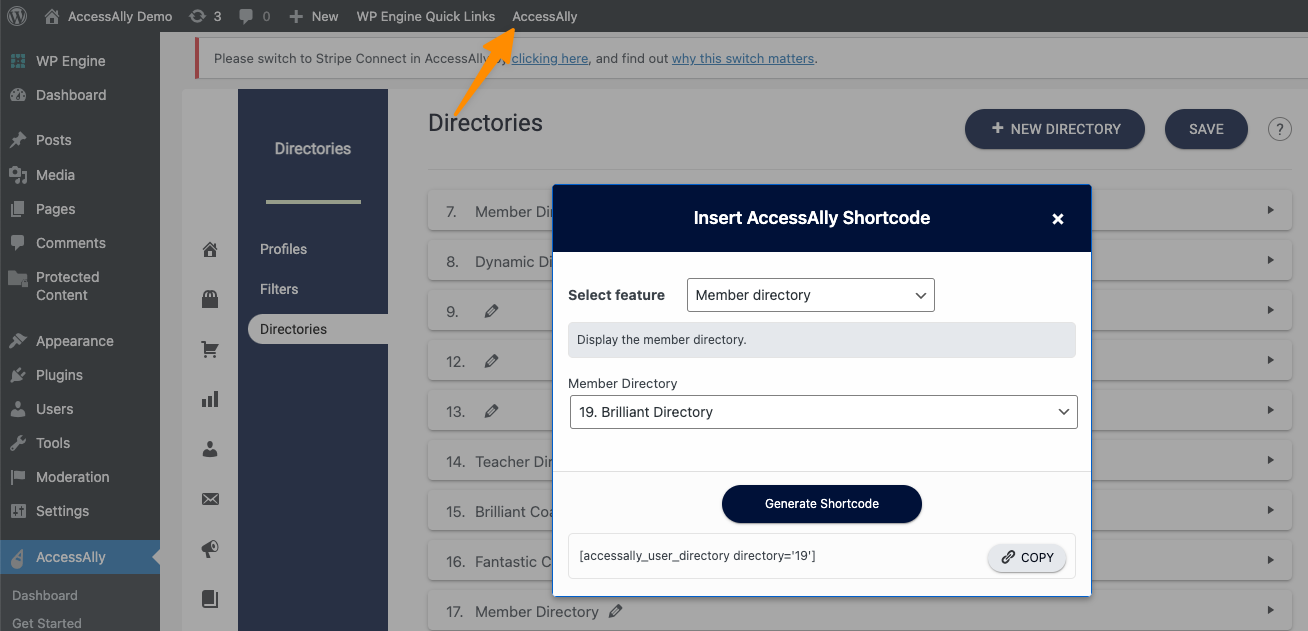
Create a new offering (or add a new page to an existing offering) to hold your directory. You can use the AccessAlly Shortcode Generator to create the shortcode for your directory like this.
Quick Tip: If you do not see the AccessAlly option in the top menu bar as shown in the image below visit the /wp-admin/ page on your site.
Now you can open your WordPress page and add the shortcode like this:

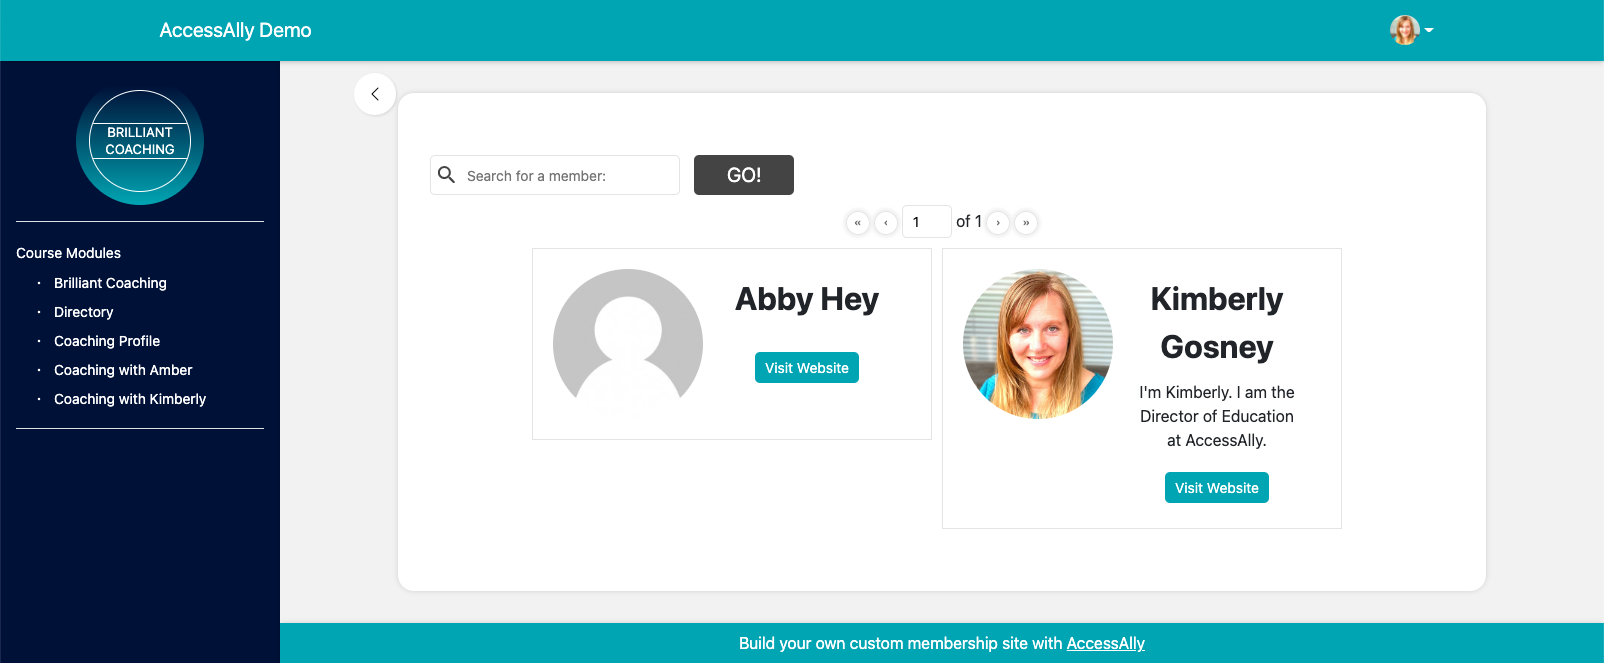
View the WordPress page to see your new directory.
Frequently Asked Questions
Direct links to a user profile will time out in 24 hours or less. This allows for users that have been removed from a directory to no longer be viewable. However, it is possible to create permanent user profile links.
In the Member Directory, add the User Profile link with the following shortcode (via custom code element)
[accessally_user_link link="https://link.to/user/profile/" method="nice"]
On the Member Profile page, add the profile with the following shortcode:
[accessally_user_profile profile_id="1" request="nice"]
The key argument is “nice”, which creates permanent links. And… this argument must be added to both the member directory and the member profile page to ensure the links work when clicked on.
Stay tuned. We are planning an upcoming beginner friendly CSS workshop. If you would like to learn how to code visit this article.
Elements in the directory can be styled using CSS a great example of this would be styling an individual item listed in a directory. You could use the code below to change the size of the font in the first directory item.
*A quick tip: Review the article linked above in the example below the directory page in use shows this as item 1, but this will vary from site to site. Inspecting the item using the article above is the best way to know the correct number to use for your directory.
.accessally-user-directory-description-item-1 {
font-size: 32px;
}
Before CSS

After CSS
Next Steps
Now that you’ve completed your Member Directory, here are some more ways you can use your new directory.
