With AccessAlly Pro, you can create admin-initiated notes that are specific to each user. This is an advanced feature, so make sure to follow the tutorial below to learn how to set it up:
ARTICLE CONTENT:
What is an Admin-Initiated Note
An admin-initiated note is a note that a user can see, that is started by an administrator. Users will not see this note until it has been created for that specific user.
Creating the Note
This section will walk you through creating your admin-initiated note.
Step 1: Create the Note
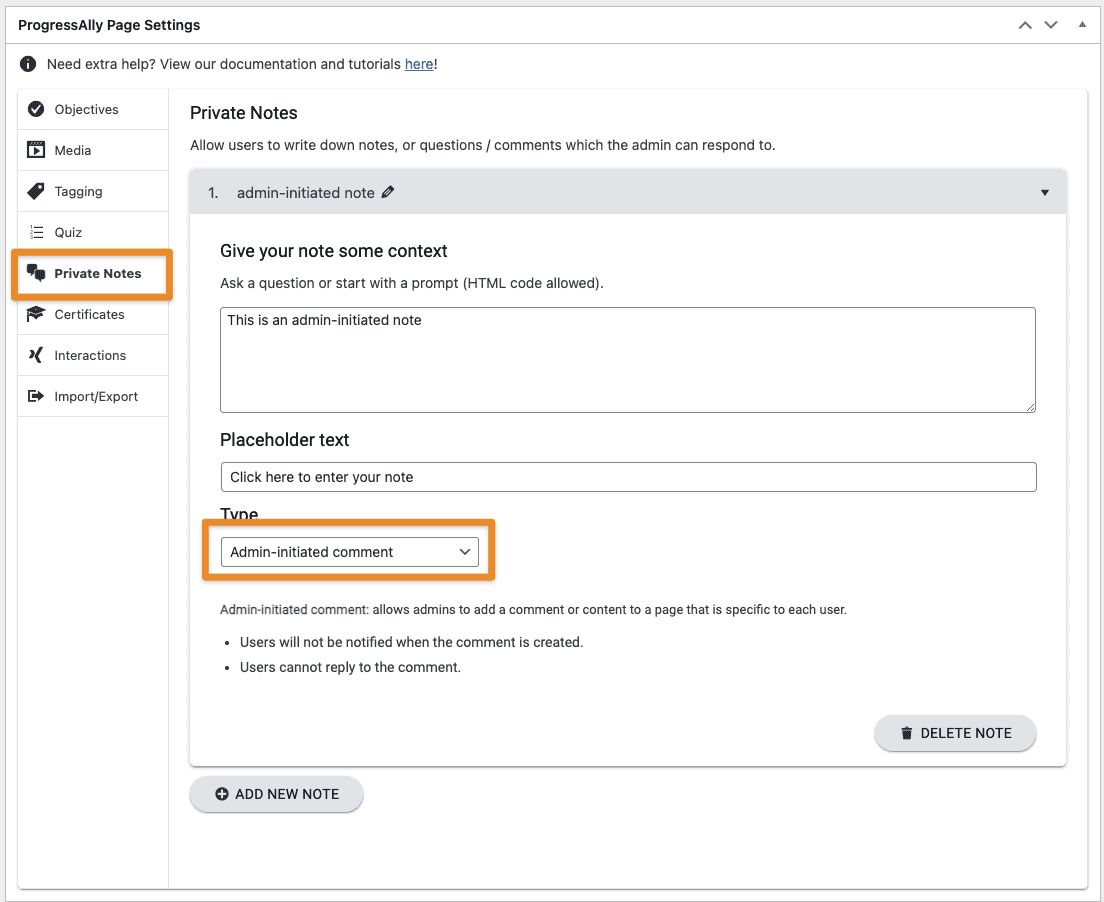
Go to the page you want the note to appear on. Scroll down to the ProgressAlly Page Settings and click on Private Notes, click on the ADD NEW NOTE button, and then name your note and select ‘Admin-initiated comment’ for the type. Give your note some context and placeholder text.
Step 2: Add the note to the page
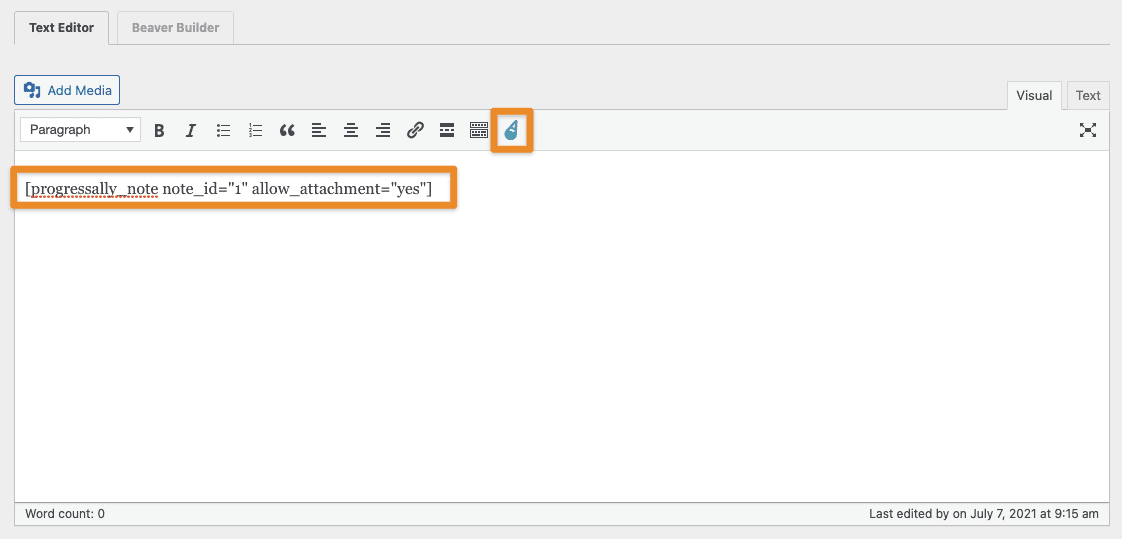
Scroll up to the content editing area in WordPress. Click on the AccessAlly shortcode adder button and select Private Note, then select your newly created note, and click on insert shortcode. Then publish the page.
Initiating the note
This section will walk you through initiating the note so the specific user can see it.
Step 1: Initiate a Private Note
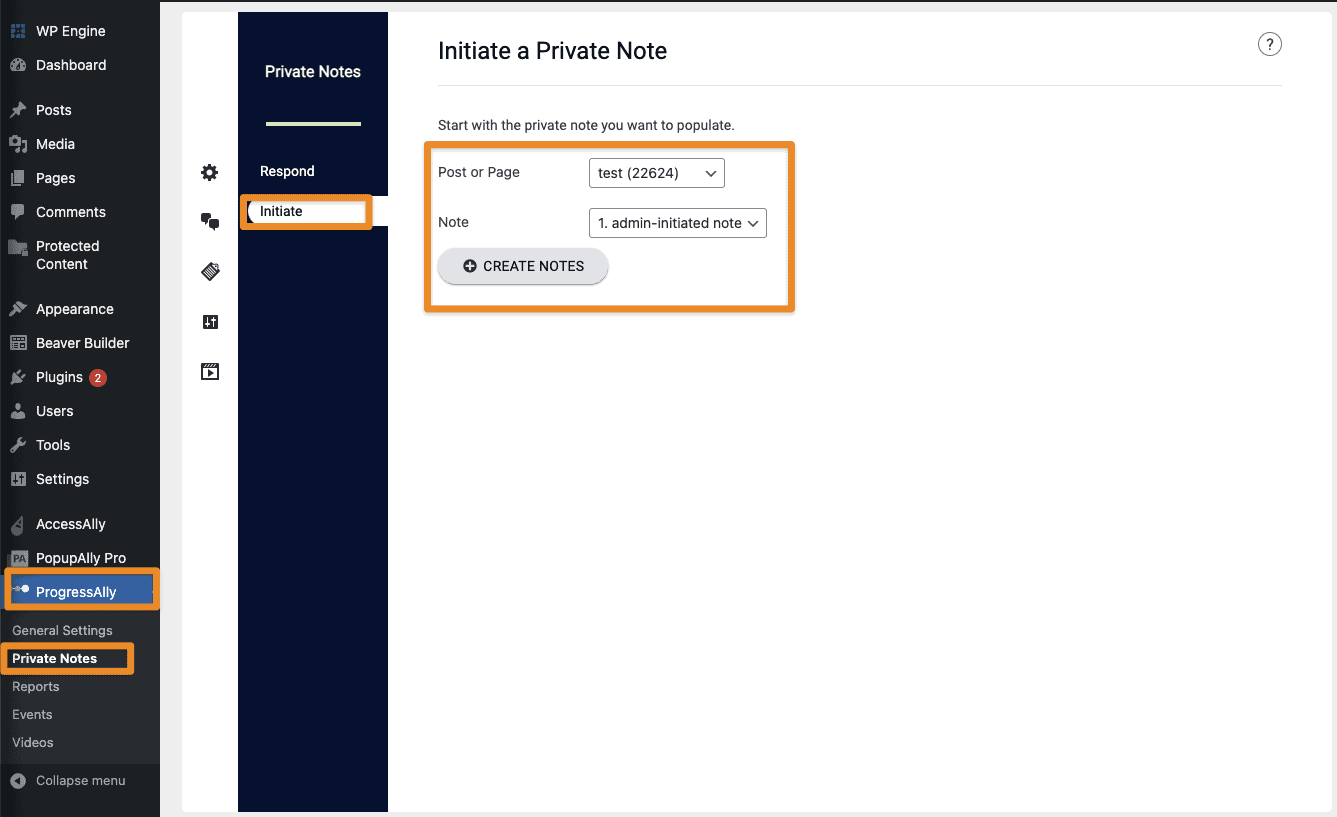
Go to ProgressAlly → Private Notes, click on the Initiate tab, and select the Page with the note, then select the note and click on Create Notes.
Step 2: Creating the user specific note
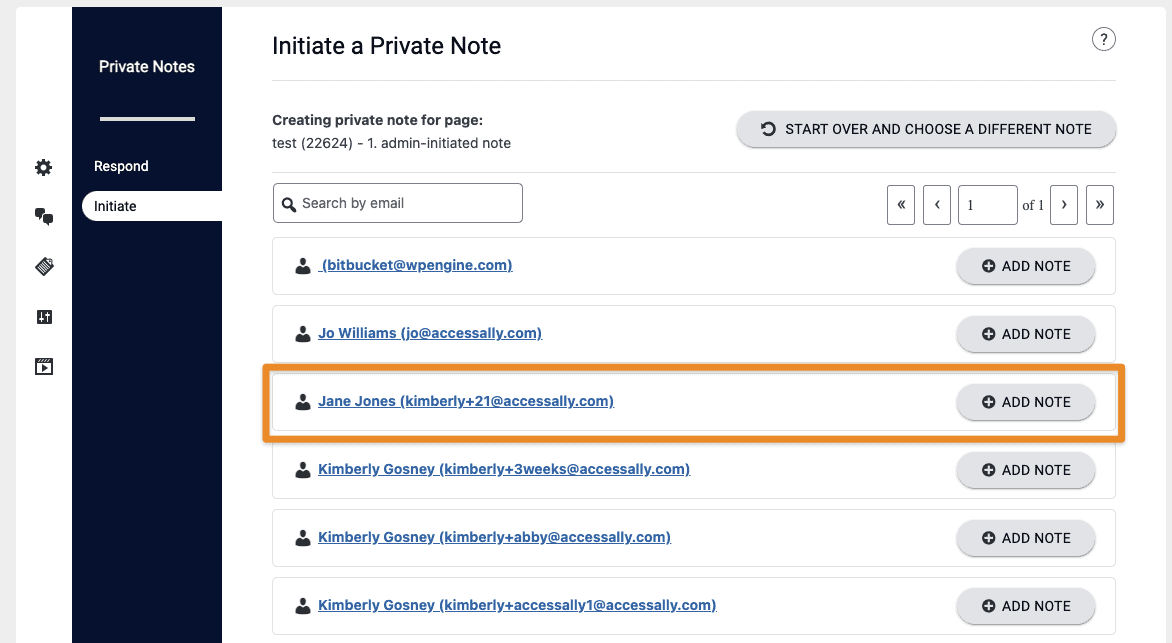
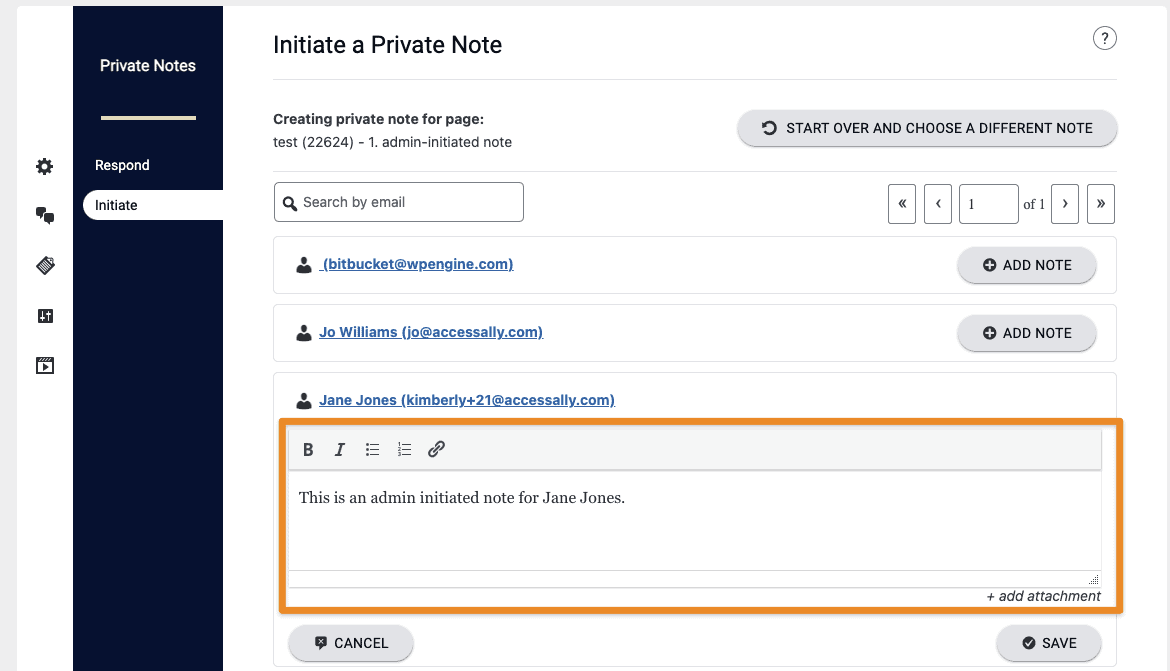
On this page you will need to click the Add Note button next to the user you want to see the note. In this example we will use Jane Jones.
Step 3: Add your note
Add the text for your note and click on the Save button.
What the user will see
The user will now be able to see the admin initiated note when they visit that page.

