With the “Personality Test” quiz, you can design a questionnaire that guides people to the right level or set of content based on how they answered. You can use this to reduce “content overwhelm” and help your students get the most out of your membership and courses.
ARTICLE CONTENT:
Watch the Workshop
In the video below you can see how using a Personality Quiz ties into creating a personalized experience.

Create a Personality Quiz
Step 1: Create Your Results
You first need to create the possible results for your personality quiz. You can do this by going to the page you want the personality test on, scrolling down to the ProgressAlly Page Settings area and clicking on Quiz. You then check the box to Activate Quiz & Create Your Questions. Select the quiz type of Personality Test. Then create your Outcomes under the Personality Test Outcomes section.
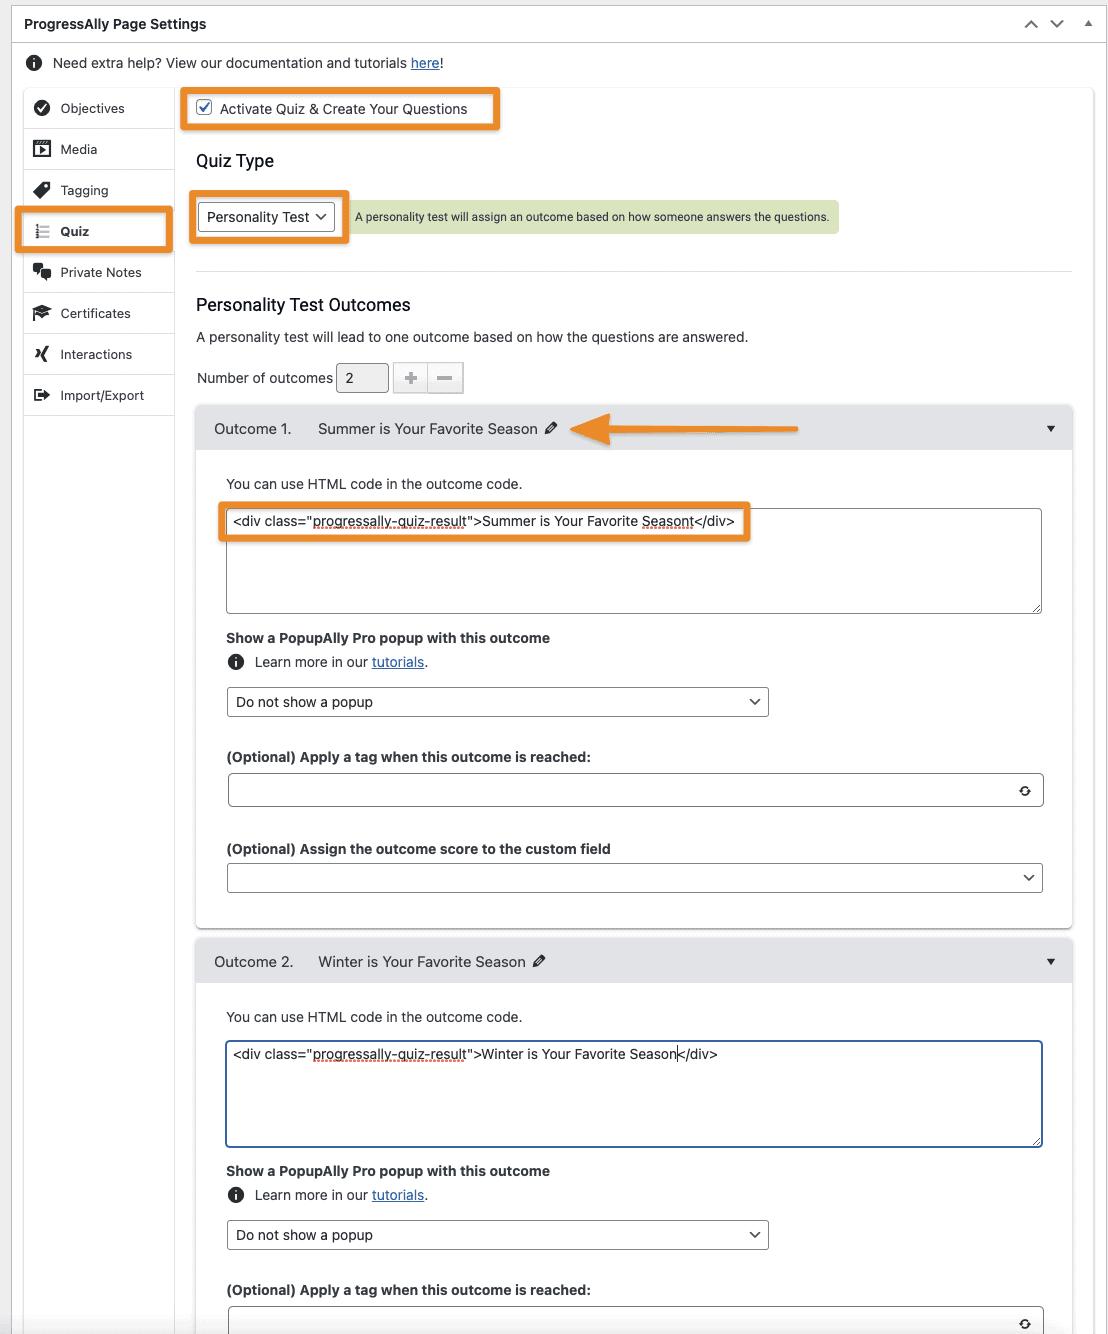
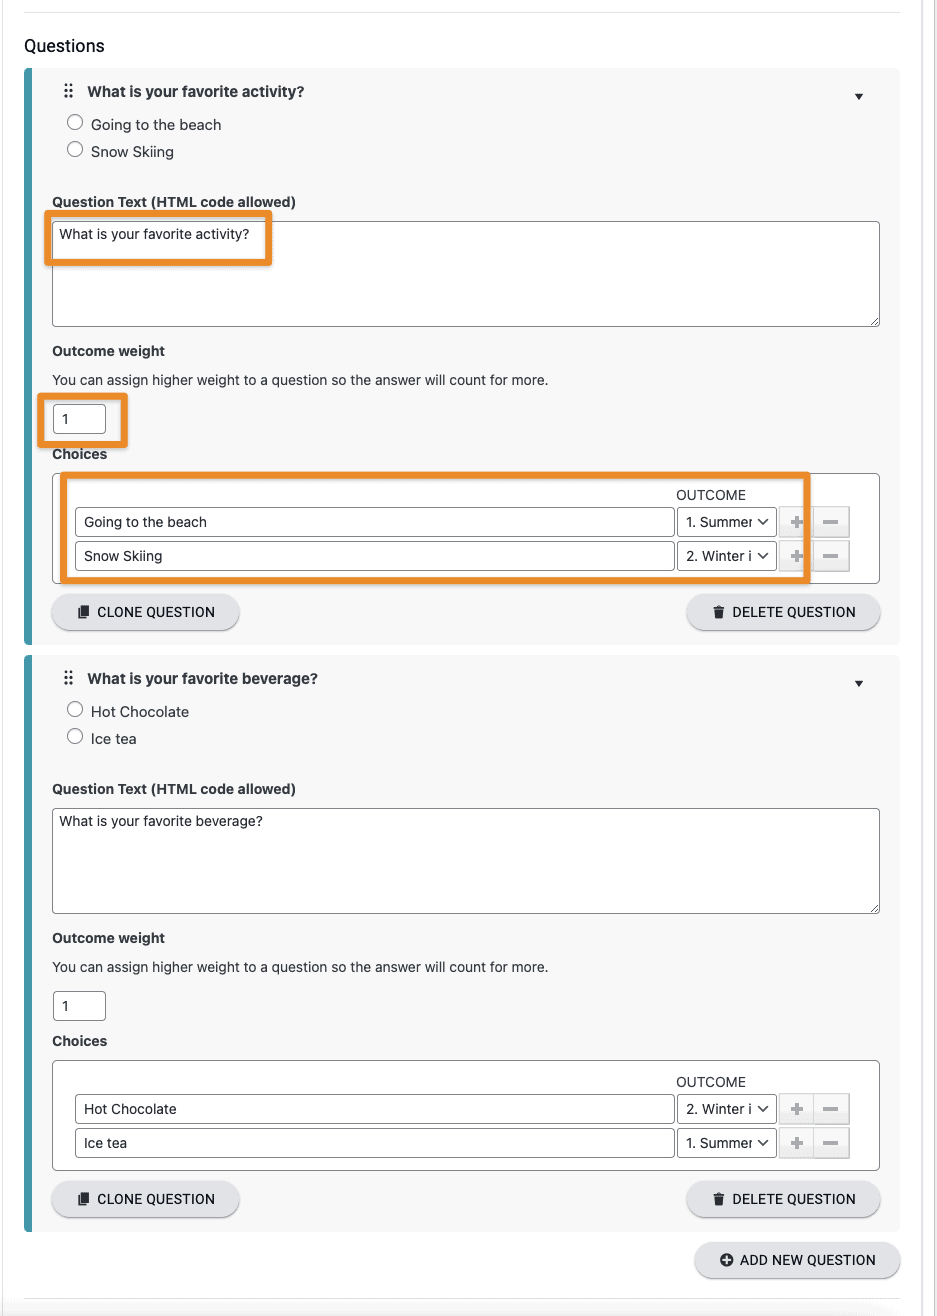
Step 2: Create Your Questions
You will now create your questions and assign each answer to an outcome, and assign the weight of each question. The weight is how many points that particular question gives towards an outcome. This allows you to have specific questions that are worth more than others.
Step 3: Add your quiz to the page
Using the shortcode adder at the top of the page add your quiz to the page and the publish.

When a user takes the quiz their answers will determine which outcome is shown based on what was selected when creating the quiz.

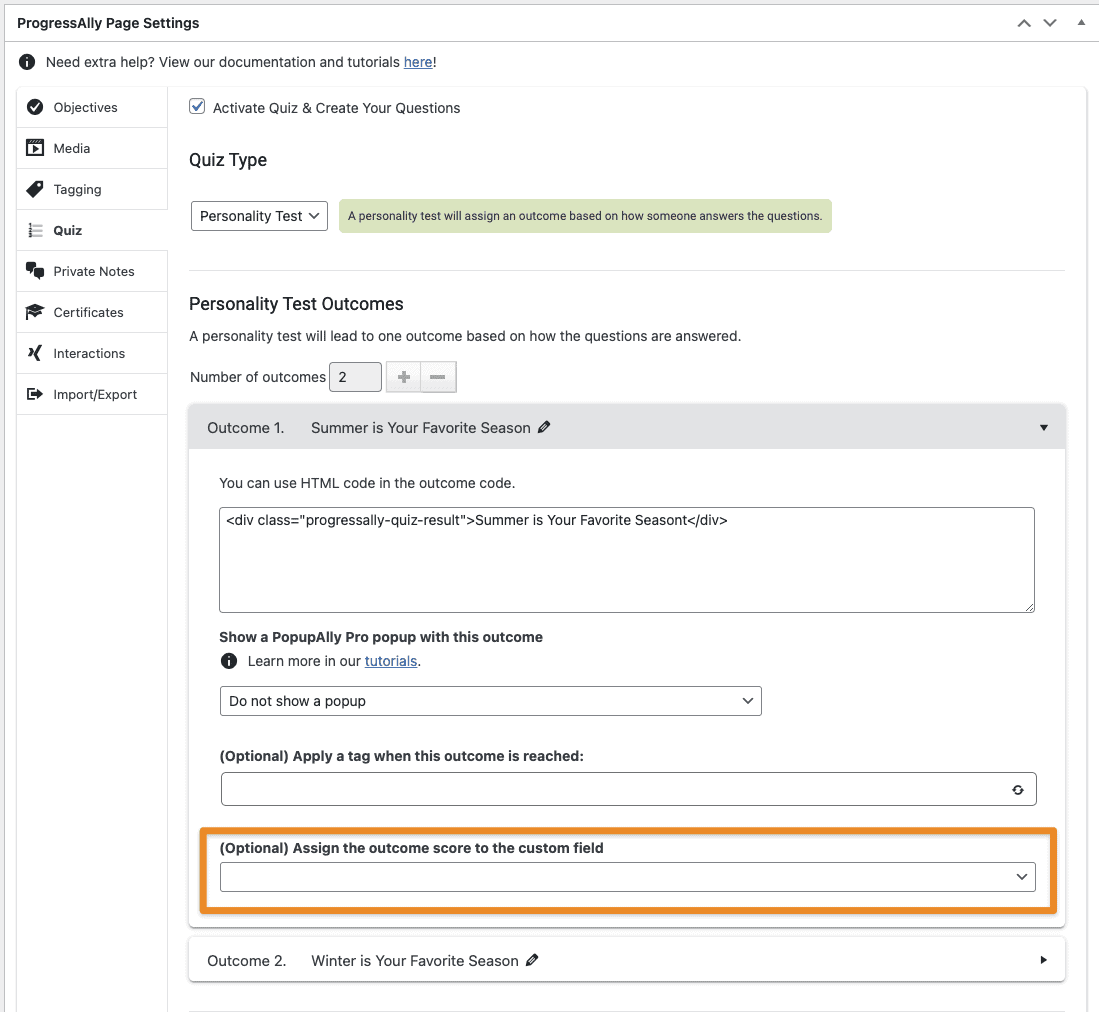
Save Personality Quiz Results To A Custom Field
If you wish, you can save the results to a custom field.
Step 1: Create Custom Field(s)
First, you’ll want to create a custom field. You have two options for this portion of the setup:
- Create a single custom field. All of the personality quiz results will store here. This may be a good option if you are choosing to email out quiz results and would like to use a single merge field to display results. This custom field needs to be a text field.
- Create a unique custom field for each personality quiz result, so if you have four possible outcomes, you will create four custom fields. All custom fields need to be text fields. This may be a good option for more complex setups and segmentation requirements.
Step 2: Assign the custom fields to each personality quiz outcome
Now, make sure to go through each one of your possible outcomes and assign the necessary custom field.
Step 3: Save Changes
Before exiting the page, make sure to save (or publish) the page.
Step 4: Test Setup
Finally, take the personality quiz. If you used option 1 (a single custom field), you only need to take the quiz once, then check the custom field inside to make sure you see the result.
If you used option 2, you will need to take the quiz multiple times to achieve each different outcome. Then, check inside your custom field as each result is applied.
Tag Personality Quiz Results From an AccessAlly Opt-in Form or Order Form
If you would like to apply a tag based on each personality quiz result, see how below.
Step 1: Create tags in AccessAlly
For each personality result you’ll create one new tag.
Go to AccessAlly > Settings > Tags and create new tags.

Step 2: Add tag to Opt-in Form or Order Form.
If you are using a free opt-in form add the personality test tag to the form (not to the page with the quiz) the participant may not be a member of your site yet and this ensures the quiz goes with a WordPress user!
You’ll create one opt-in form for each result and place the correct tag on that form.
Add tag to AccessAlly Opt-in Form
Go to AccessAlly > Settings > Opt-in Forms and select your forms.

Add tag to AccessAlly Order Form
If there is a payment to receive the personalized quiz results you can add your personality type tag to the order form. You’ll create one order form for each personality type.
Remember it’s important to tag the order form as the quiz taker may not be an existing member of your AccessAlly site.
Go to AccessAlly > Sales > Order Forms and select the order forms then apply the personality tag as shown in the image below.

Step 3: Save Changes
Save your changes on each opt-in form or order form.
Step 4: Test Setup
Finally, take the personality quiz. If you used option 1 (free opt-in form), complete the form, then go to AccessAlly > Members > search by email and review to see if the personality tag has been added.
If you used option 2 (paid order form), complete the order form purchase, then go to AccessAlly > Members > search by email and review to see if the personality tag has been added.
Article FAQs
The questions below are about styling a quiz. We recommend making changes via CSS for your quiz questions. If you’re not familiar with CSS, watch this video. Code examples are provided as a guide, but your results may vary depending on your WordPress Theme and/or page builder.
Add custom CSS by going to ProgressAlly → General Settings → Styling → Custom CSS and adding the code to the bottom below any existing code you see.
We recommend placing all ProgressAlly Custom CSS here to ensure the code is not overwritten by your WordPress theme when it gets updated.
Q: How can I align the radio buttons to my quiz choices?
A: You can adjust the alignment of the radio buttons using the example code below.
.progressally-quiz-choice-input {

position: absolute;

margin-top: 6px;

}
Example before code.

Example after code.

Q: How do I change the answer text?
A: We recommend inspecting the elements to determine what pieces you’d like to change as there are many options available.
Here’s an example of finding the CSS selector and then adding more margin between the radio button and your quiz answer choices.

Example code shown below.
label.progressally-quiz-choice-label {

margin-left: 40px;

}

