ARTICLE CONTENT:
1. Countdown Timer Custom Operation
Go to: AccessAlly → Settings → Custom Operations → Click “+ NEW OPERATION”
- Name your operation by clicking the pencil icon.
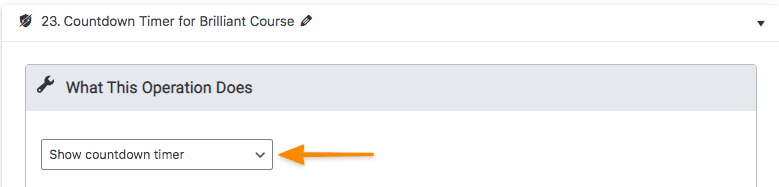
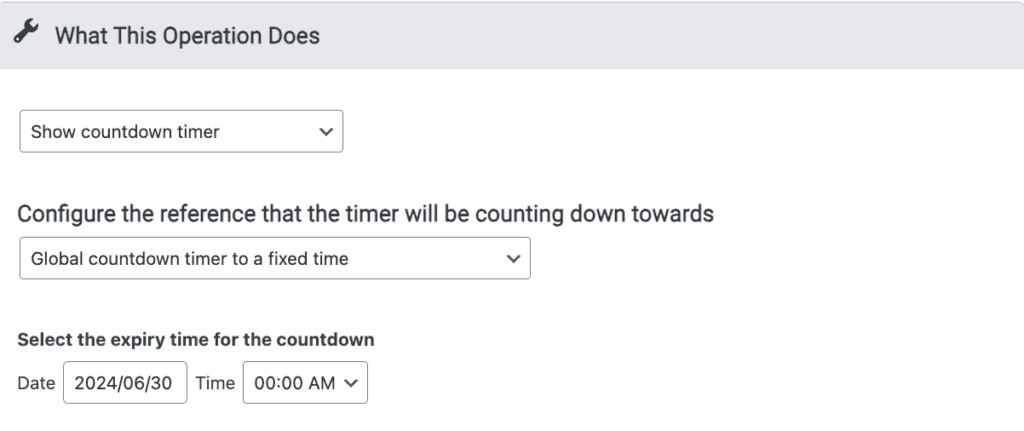
- Select “Show countdown timer”
2. Select Timer Settings
There are three options to select from:
- Contact-specific countdown timer – logged in visitors only, set desired number of hours
- Global countdown to a fixed time – all page visitors, starts countdown timer upon page visit
- Countdown timer when a coupon expires – all visitors to the page with a CRM activated promo code or from the Generate CRM activated coupon (custom operation)
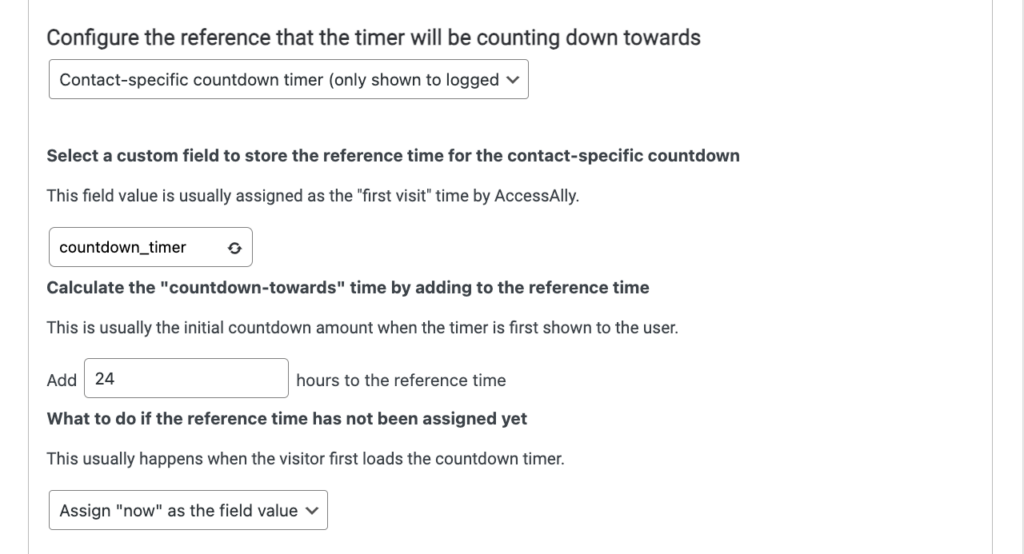
Option 1: Contact-specific countdown timer
The countdown reference determines when or how the countdown timer starts.
- select a custom field to store reference time
- set hours until the countdown timer expires (you can also add .5 for half-hour)
- set options like “assign now” when a contact visits the page for the first time.
If you need to create a custom field, see this article, the custom field type is below.
- Keap/Infusionsoft: Date/Time custom field
- Ontraport: Date custom field
- ActiveCampaign: Date or Text custom field
- Kit: custom field
- Drip: custom field
- AccessAlly Managed: text custom field
Option 2: Global Countdown Timer
This countdown timer shows to anyone that visits a page, no login required! With this timer, you determine the exact date and time the countdown expires.
Option 3: Countdown timer when a coupon expires
This countdown timer counts down based on a unique coupon code and is used with:
- CRM activated promo codes (emailed from your CRM)
- Generate CRM Activated Coupon custom operations (coupons generated in your site!)

Select the promo dropdown
Use this option if the promo coupon is generated in your CRM automations.

Select the run a custom operation first
Use this option if the promo coupon is generated in your AccessAlly site.

3. Configure the Countdown Timer Display
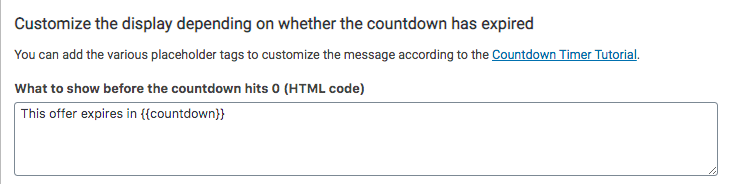
You can use the following codes inside your countdown timer display, along with any text you would like.
Before countdown expires options:
- {{countdown}} used to show the timer – you can customize the wording before and after if you’d like.
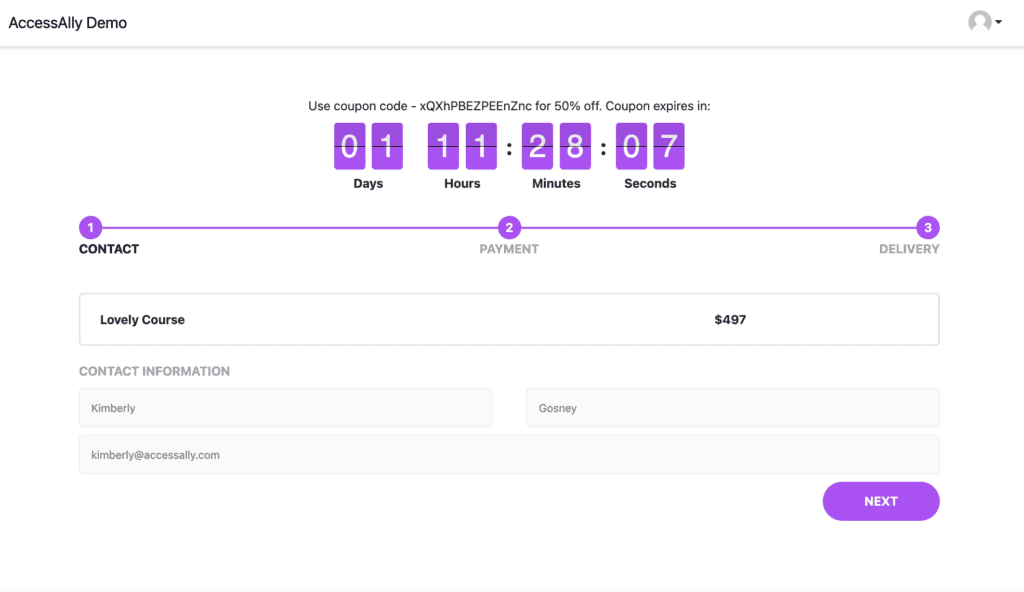
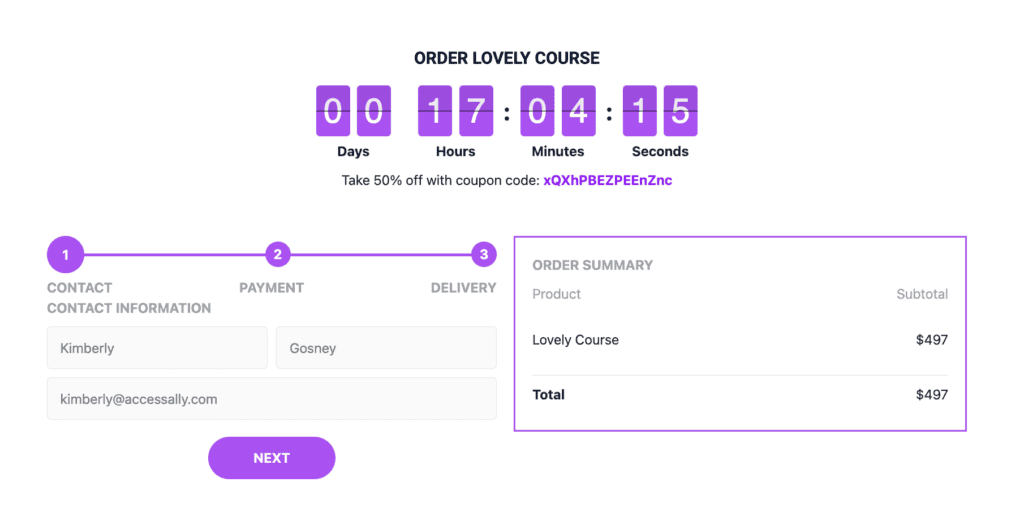
- {{coupon}} used to display unique coupon code when using “Countdown timer when a coupon expires”
Countdown timer example.
Countdown timer when a coupon expires example.

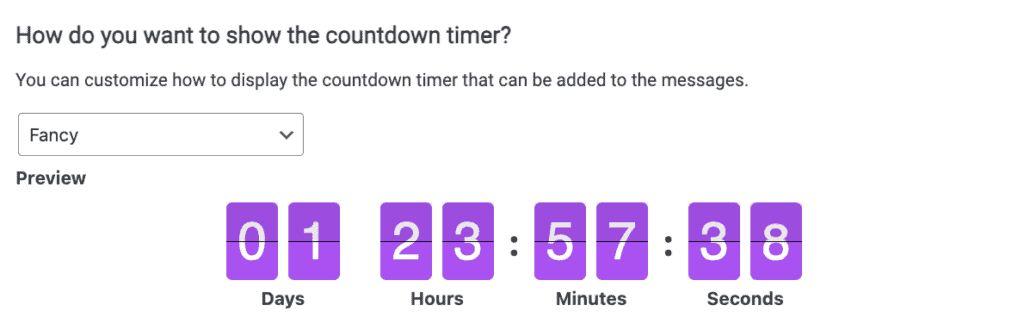
Select the design style for your countdown timer from the dropdown.
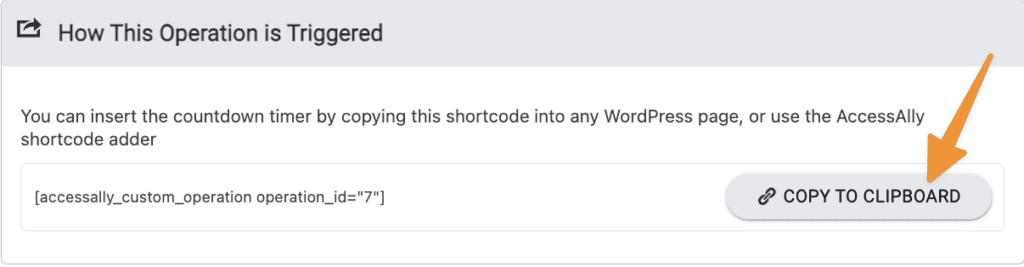
4. Copy To Clipboard
Use the button to copy the shortcode.
5. Save
Scroll to the top of your custom operations tab, click the “SAVE” button.
6. Add Countdown Timer
On the page you would like to display your countdown timer paste your shortcode.
Countdown timer when a coupon expires example.