AccessAlly’s Setup Wizard provides an easy-to-follow, step-by-step process to activate your plugin license, integrate with your CRM, and start taking payments with Stripe and/or PayPal.
ARTICLE CONTENT:
Why Use the Setup Wizard
Running the Setup Wizard from start to finish ensures that the fundamental setup & integrations of your site work properly. This can alleviate a large portion of common setup errors that could otherwise occur if you are not fully trained in the software and try to do the setup manually.
Note that the Setup Wizard can be accessed at any time. Plus each of the individual settings can be found in various tabs inside AccessAlly’s Settings.
Please make sure you’ve installed the AccessAlly .zip file, first!
How to Use the Setup Wizard
Before running the AccessAlly Setup Wizard, please make sure you have reviewed the AccessAlly Onboarding steps which cover important information about:
- Setting up WordPress hosting
- Creating a subdomain
- Securing your website with an SSL certificate
- Choosing your WordPress theme and page builder
- Selecting a Video Hosting provider
- Taking payments via Stripe and/or PayPal
- Review your CRM options
If you didn’t receive a welcome email or can not access the steps above? Just contact us and we’ll get you sorted right away!
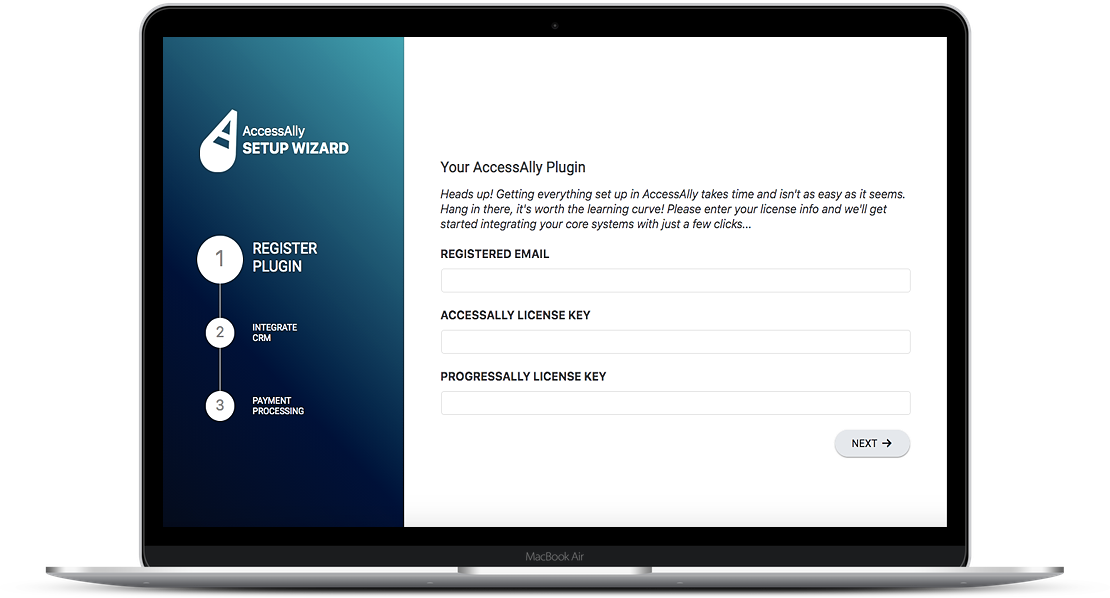
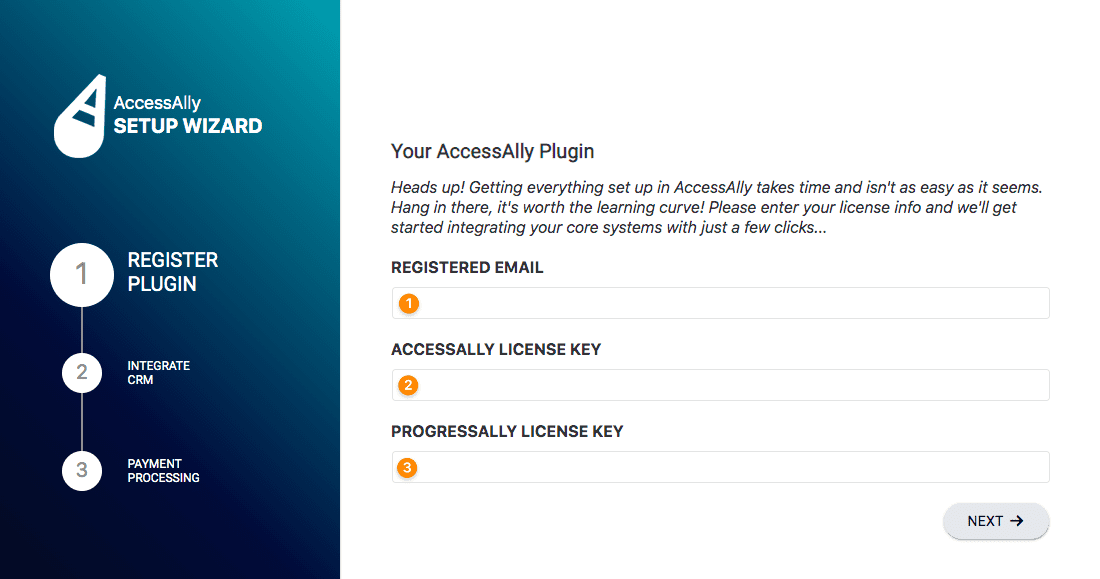
Your license keys can be found here. If you can not access this page contact us.
- Add your registered email. This is the email address you used when you purchased AccessAlly.
- Your AccessAlly license key goes here.
- Optional: If you’re an AccessAlly Pro user you’ll add the license key for ProgressAlly here.
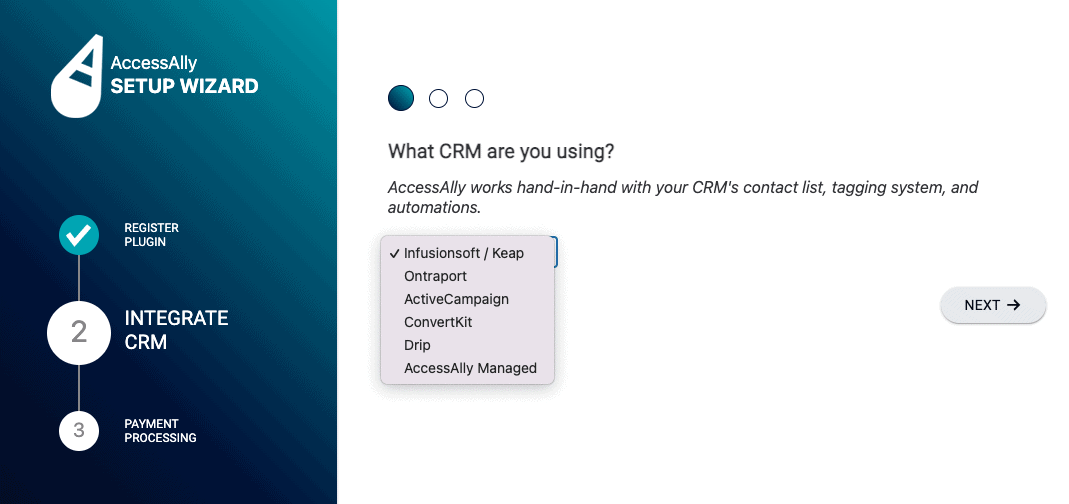
Choose the CRM system you would like to integrate with from the dropdown. The steps will vary based on the CRM system you are using. Follow the prompts for your CRM and click the NEXT button to continue.
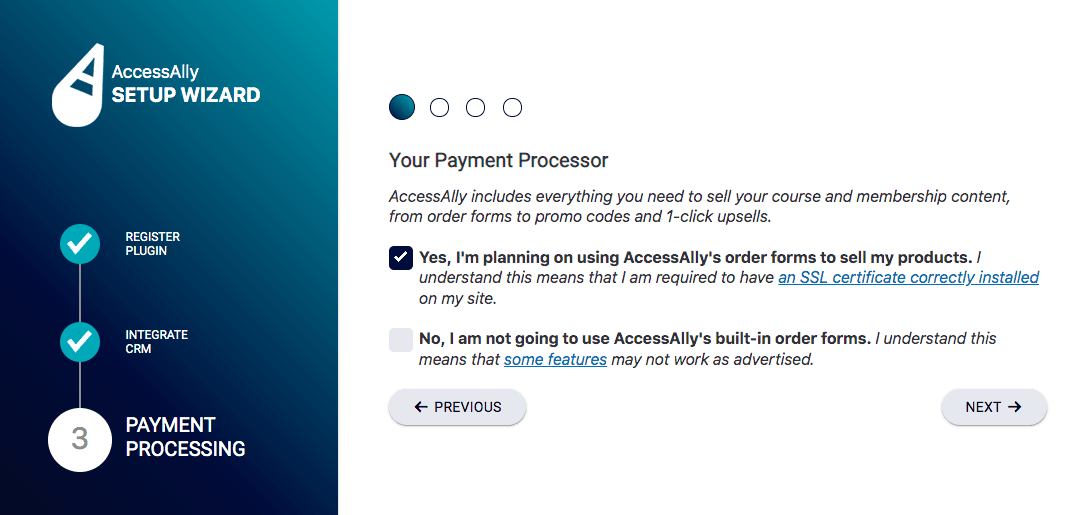
Now it’s time to choose your Payment Processor.
- Select YES if you would like to process payments using Stripe and/or PayPal with AccessAlly order forms (highly recommended).
- Select NO if you would like to use a 3rd party tool to process payments (note some features may not work as advertised!)
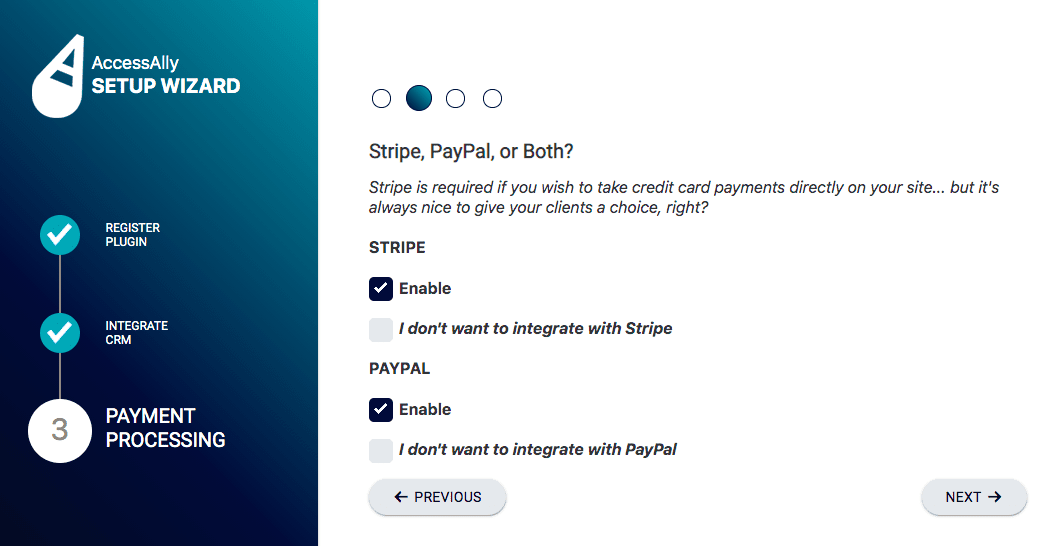
Additional Options: If you selected YES in the previous step you will be taken to Stripe, PayPal, or Both? to select which options you would like to use to process payments.
- You can use test keys for Stripe if you’d like to test the payment process before launching your site. Remember to switch testing keys to LIVE keys (via Settings > Payments) before launching your site.
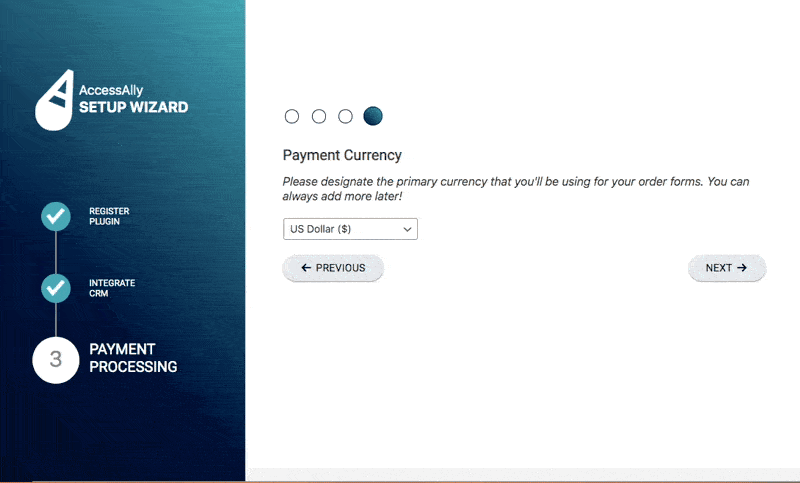
Now it’s time to select your default Payment Currency. You can process payments in more than one currency, but this option sets your preferred site currency.
Congratulations, you have successfully installed AccessAlly!
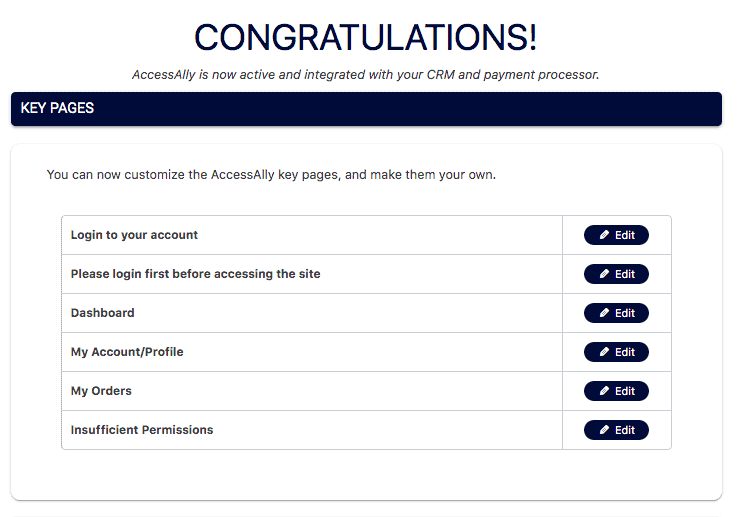
After completing the steps under Get Started in the AccessAlly Onboarding Wizard Key Pages will be created for your site. You can hit Edit by each Key Page to see it in action.
List of Key Pages Created by AccessAlly
Key pages are powerful pages that help your users move through the site. These pages are pre-populated with shortcodes used by AccessAlly, but you can apply additional styling to them to match your brand.
To preview your key pages visit AccessAlly > Get Started click the Edit button by each page to view the default settings.
- Login to your account – this page is where your users log in. All AccessAlly sites have ONE login page.
- Please login first before accessing the site – this page is shown when an existing user (not logged in) makes a new purchase on your site. This page is shown for security reasons and displays a message letting the user know to log in with their existing password (for verification purposes.)
- Dashboard – shows offerings on your site
- My Account/Profile – allows a user to change their password (optional) and email address this also changes the information in your CRM
- My Orders – shows a user’s orders and subscription payments
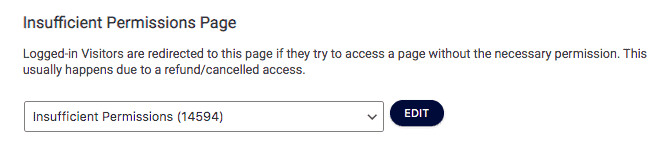
- Insufficient Permissions – shown when a sales page redirect has not been set and a user is visiting a page they are not tagged with access to see.
Key Page Redirects
Key page redirects are automatically created when you set your site up with the AccessAlly Setup Wizard. These are existing pages on your site. If you need to review these visit AccessAlly > Settings > General Setup > Key Pages.
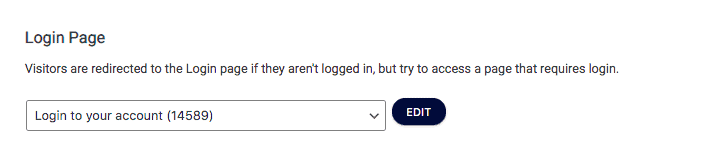
The Login Page
The login page should be set to the Login to your account page.
The Existing Member Login Page
%22%20transform%3D%22translate(1.4%201.4)%20scale(2.73828)%22%20fill-opacity%3D%22.5%22%3E%3Cellipse%20fill%3D%22%23fff%22%20cx%3D%22225%22%20cy%3D%2247%22%20rx%3D%2245%22%20ry%3D%2268%22%2F%3E%3Cellipse%20fill%3D%22%23d8d8d8%22%20cx%3D%22102%22%20rx%3D%2284%22%20ry%3D%2284%22%2F%3E%3Cellipse%20fill%3D%22%23fff%22%20rx%3D%221%22%20ry%3D%221%22%20transform%3D%22matrix(42.4094%20-33.13386%2028.66027%2036.68347%20231.9%2029.2)%22%2F%3E%3Cpath%20fill%3D%22%23fff%22%20d%3D%22M-7.9%2062.9l7.3-37.3L27.9%2031l-7.3%2037.3z%22%2F%3E%3C%2Fg%3E%3C%2Fsvg%3E)
Page after logging in

This page should be set to the Dashboard page

Insufficient Permissions Page
Logout Page
FAQs
It is highly recommended to install AccessAlly on a subdomain see why here.
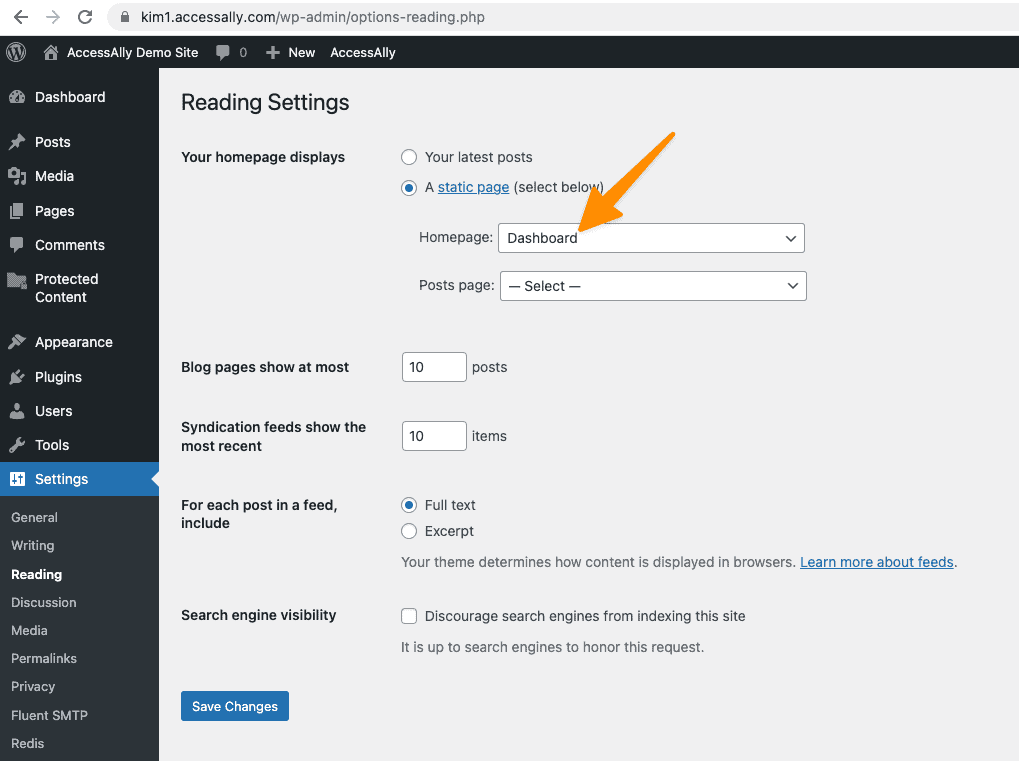
When installing AccessAlly the dashboard page is created and set to be the home page of your site. If you installed AccessAlly on a site that is open to the public “your main site” go to Settings > Reading > select your original home page (most often named “Home”) and save your changes.
This will remove the AccessAlly dashboard page from being used as the home page of your site.